Cloud Service 中WebRole就相当与我们的WebSite,而WorkRole相当与我们在服务器上写了个Windows Service,站在高可用的角度上来讲,Cloud Service要优于WebSite,拿个例子来说,我们上传个数据,数据需要入库,通常website需要提交数据,等待响应,这个时候如果并发量大,系统响应时间会很长.如果使用Cloud Service就不存在这个问题,WebRole只负责把数据提交上来,而对数据的处理入库则可以提交给WorkRole来处理,中间可以使用Service Bus中消息队列机制进行信息的传递.个人感觉非常好的一个东东.
不说那么多废话了,我们实际动手来完成一个WebRole和WorkRole具体的一个Demo.
首先,创建我们Cloud Service项目.
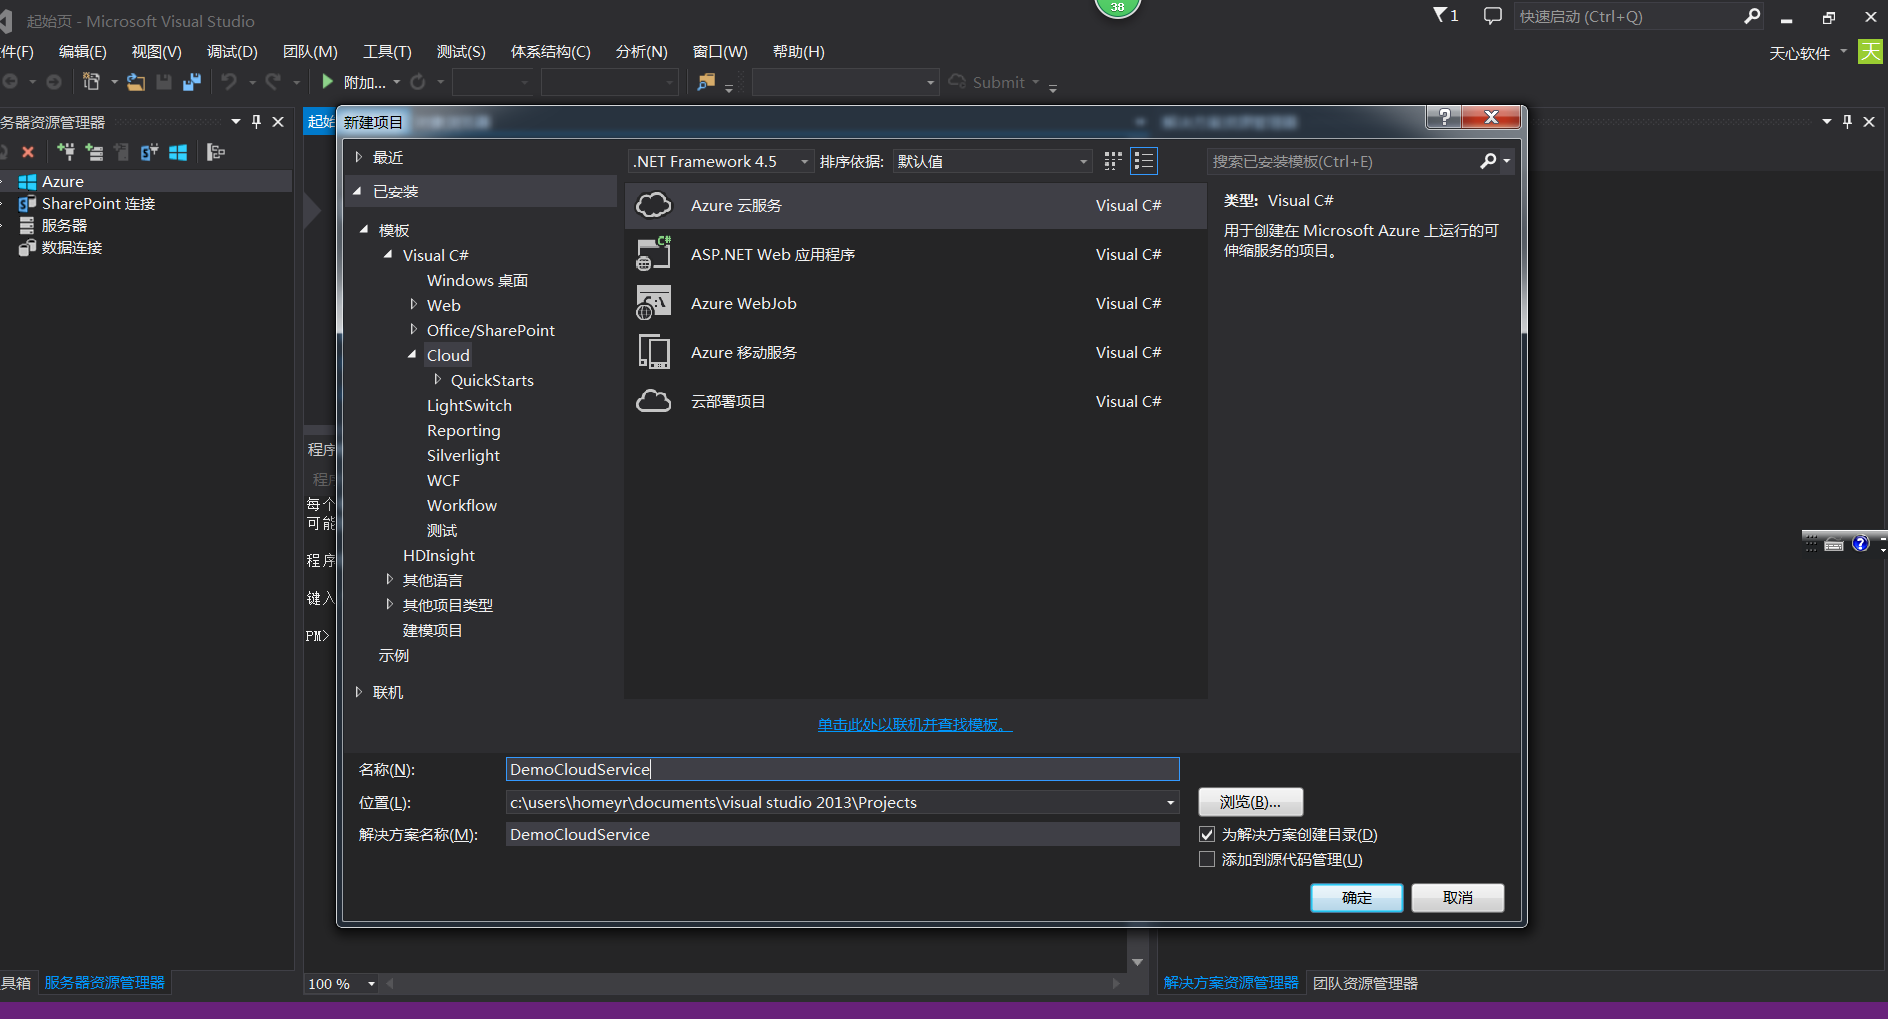
然后选择添加,WebRole Asp.net Web角色 和 WorkRole 辅助角色与服务总线队列

点击编辑已添加的WebRole1和WorkerRoleWithSBQueue1修改对应的名字.

然后确定,选择Web Forms,空的解决模板.如果大家这里身份验证存在问题,请参考我的第二节内容.

点击确定按钮,生成我们的解决方案.
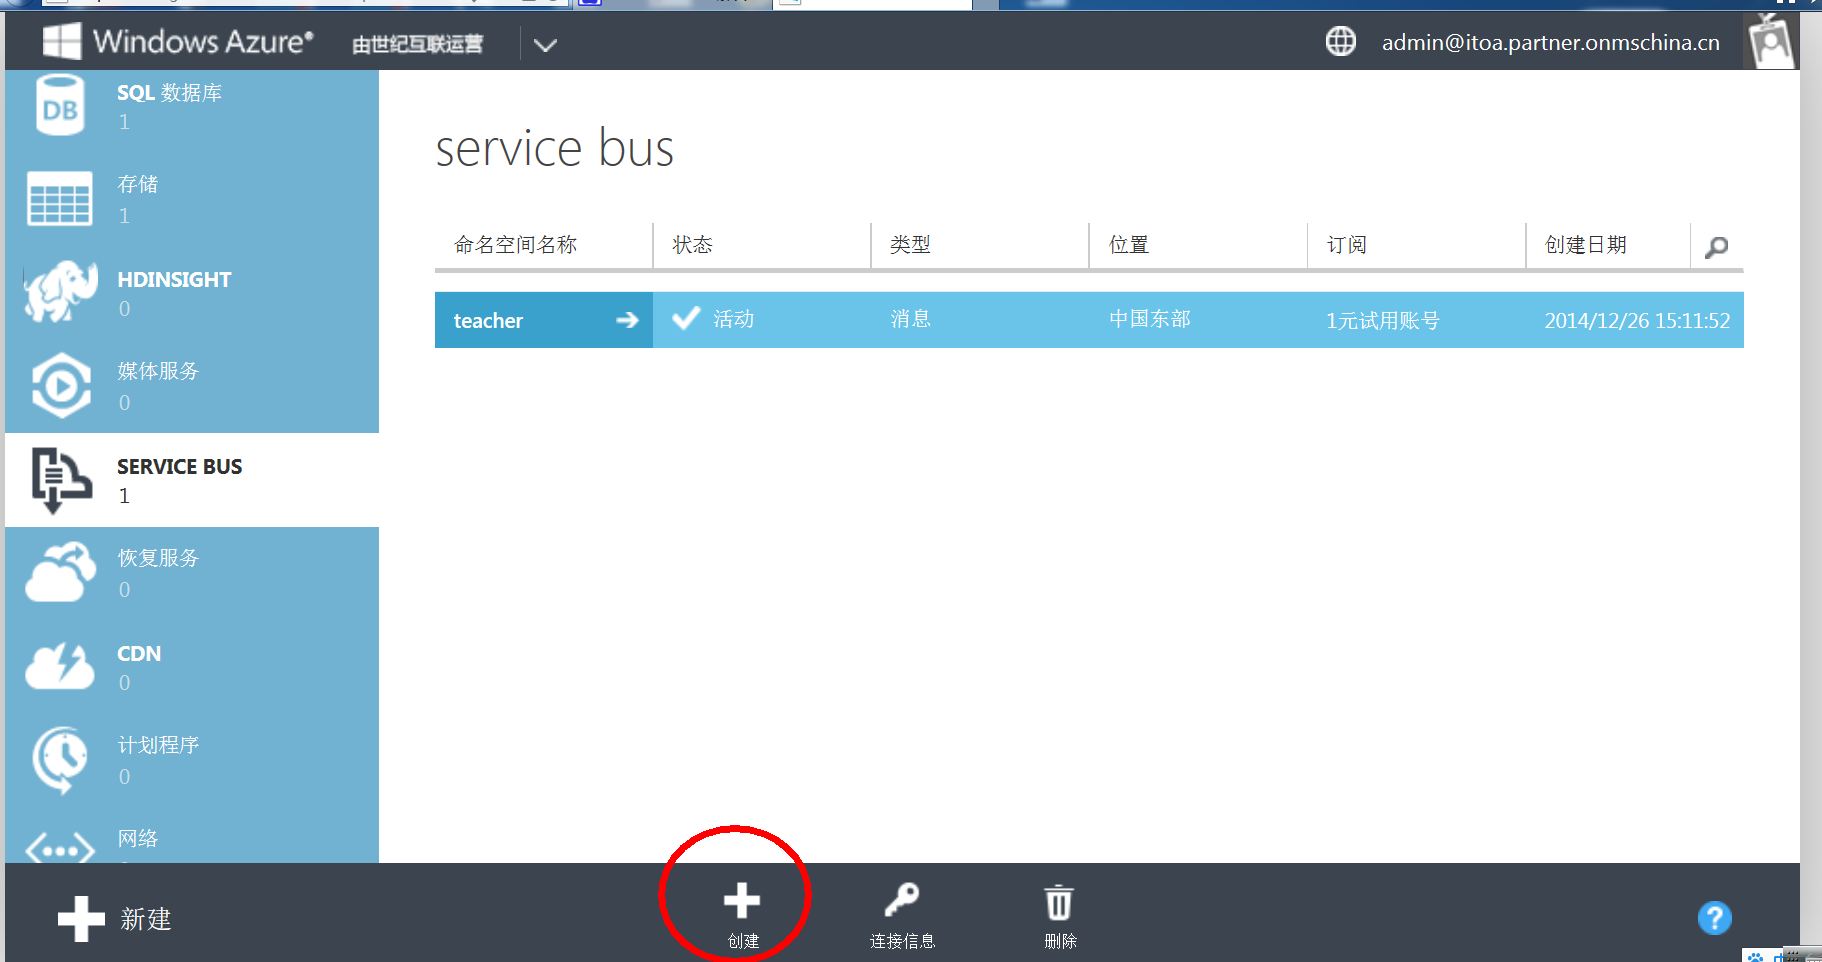
下来我们登陆我们的WindowsAzure门户中,点击Service Bus菜单创建我们的消息服务.

选择我们创建的Service Bus查看它的连接信息.

然后我们复制他的连接字符串

下来我们打开,我们CloudService的配置文件,将连接Service Bus的连接字符串放入进去.

下来我们在这个配置文件中,修改WebRole中的内容,因为WebRole他需要访问Service Bus那么我们在这里定义它的节点.
下来我们对具体的配置文件进行修改,也是将WorkRole中的ServiceBus配置,拷贝到WebRole中.

下来再我们刚才Windows Azure门户当中复制的连接字符串,也放入对应的配置里.

下来,使用同样的方法配制我们第三个配置文件:

这里我们Cloud Service中相关Service Bus就配置完成.
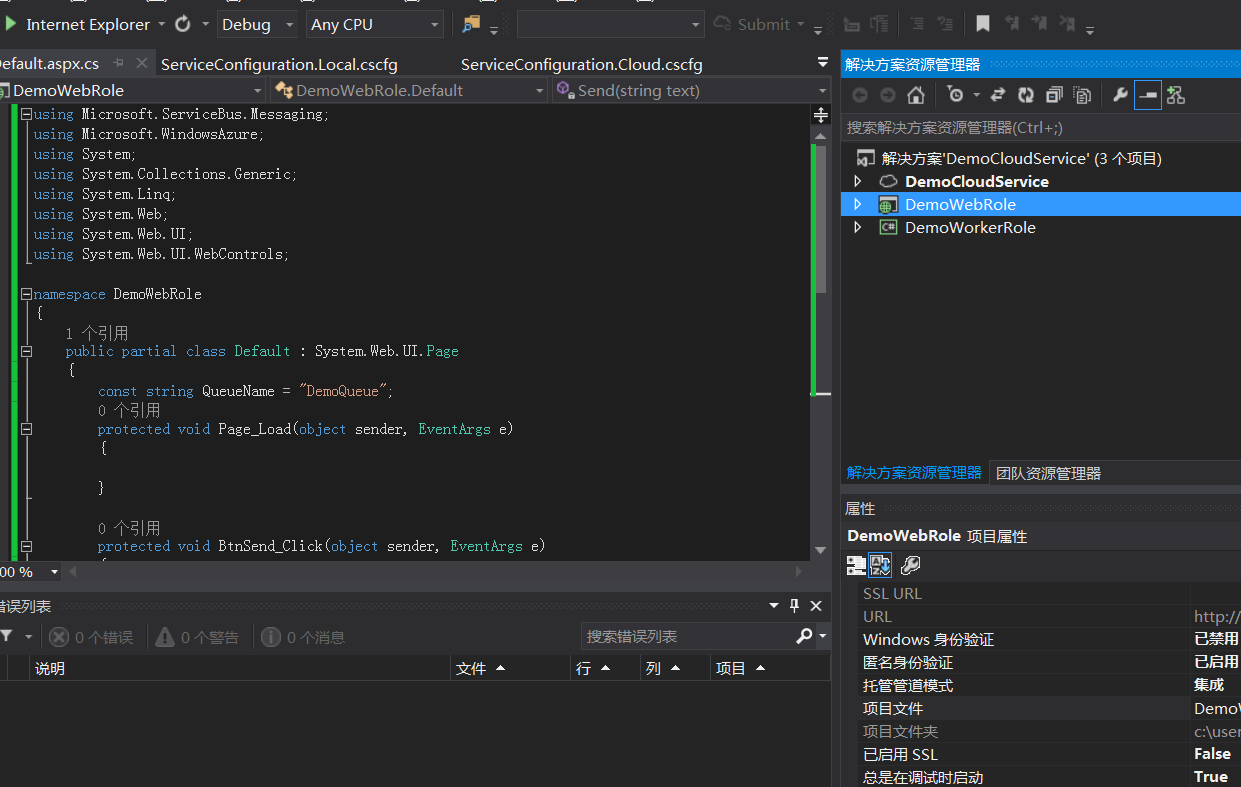
然后我们在WebRole中,右键添加一个Default页面:

完成下列代码
Default.aspx
<%@ Page Language="C#" AutoEventWireup="true" CodeBehind="Default.aspx.cs" Inherits="DemoWebRole.Default" %>
<!DOCTYPE html>
<html xmlns="http://www.w3.org/1999/xhtml">
<head runat="server">
<meta http-equiv="Content-Type" content="text/html; charset=utf-8"/>
<title></title>
</head>
<body>
<form id="form1" runat="server">
<div>
<asp:TextBox ID="txbInput" runat="server"></asp:TextBox>
<asp:Button ID="BtnSend" runat="server" Text="发送消息" OnClick="BtnSend_Click" />
<p />
<asp:Label ID="Label1" runat="server" Text=""></asp:Label>
</div>
</form>
</body>
</html>
Default.aspx.cs
using Microsoft.ServiceBus.Messaging;
using Microsoft.WindowsAzure;
using System;
using System.Collections.Generic;
using System.Linq;
using System.Web;
using System.Web.UI;
using System.Web.UI.WebControls;
namespace DemoWebRole
{
public partial class Default : System.Web.UI.Page
{
const string QueueName = "DemoQueue";
protected void Page_Load(object sender, EventArgs e)
{
}
protected void BtnSend_Click(object sender, EventArgs e)
{
string strinput = txbInput.Text.ToString();
Send(strinput);
txbInput.Text = string.Empty;
}
private void Send(string text)
{
string connectionString = CloudConfigurationManager.GetSetting("Microsoft.ServiceBus.ConnectionString");
MessagingFactory factory = MessagingFactory.CreateFromConnectionString(connectionString);
// Initialize the connection to Service Bus Queue
MessageSender sender = factory.CreateMessageSender(QueueName);
BrokeredMessage message1 = new BrokeredMessage(text);
sender.Send(message1);
}
}
}
这个时候他会提示,和Service Bus相关的组件,没有被引用

这个组件在那里呢,我们可以查看WorkRole中的引用找到它.

下来将地址路径进行拷贝,然后再WebRole中引用进去.这个时候就没有问题了.
下来我们修改WorkRole的代码,让WebRole传递过来的内容,输出出来:
WorkerRole.cs
using System;
using System.Collections.Generic;
using System.Diagnostics;
using System.Linq;
using System.Net;
using System.Threading;
using Microsoft.ServiceBus;
using Microsoft.ServiceBus.Messaging;
using Microsoft.WindowsAzure;
using Microsoft.WindowsAzure.ServiceRuntime;
namespace TeacherWorkerRole
{
public class WorkerRole : RoleEntryPoint
{
// 队列的名称
const string QueueName = "TeacherQueue";
// QueueClient 是线程安全的。建议你进行缓存,
// 而不是针对每一个请求重新创建它
QueueClient Client;
ManualResetEvent CompletedEvent = new ManualResetEvent(false);
public override void Run()
{
Trace.WriteLine("正在开始处理消息");
// 启动消息泵,并且将为每个已收到的消息调用回调,在客户端上调用关闭将停止该泵。
Client.OnMessage((receivedMessage) =>
{
try
{
// 处理消息
Trace.WriteLine("正在处理 Service Bus 消息: " + receivedMessage.SequenceNumber.ToString() + receivedMessage.GetBody<string>());
}
catch
{
// 在此处处理任何处理特定异常的消息
}
});
CompletedEvent.WaitOne();
}
public override bool OnStart()
{
// 设置最大并发连接数
ServicePointManager.DefaultConnectionLimit = 12;
// 如果队列不存在,则创建队列
string connectionString = CloudConfigurationManager.GetSetting("Microsoft.ServiceBus.ConnectionString");
var namespaceManager = NamespaceManager.CreateFromConnectionString(connectionString);
if (!namespaceManager.QueueExists(QueueName))
{
namespaceManager.CreateQueue(QueueName);
}
// 初始化与 Service Bus 队列的连接
Client = QueueClient.CreateFromConnectionString(connectionString, QueueName);
return base.OnStart();
}
public override void OnStop()
{
// 关闭与 Service Bus 队列的连接
Client.Close();
CompletedEvent.Set();
base.OnStop();
}
}
}
好的,代码编写完成,我们进行调试.这时候你可以在配制文件中修改你的实例数,比如我可以设置我的WebRole设置为2个实例,WorkRole2个实例.
两种设置方式,1种是在配制文件直接配制,另一种是直接在Cloud Service中选择对应的WebRole和WorkRole右键属性中配制,然后他自动在配制文件中生成.


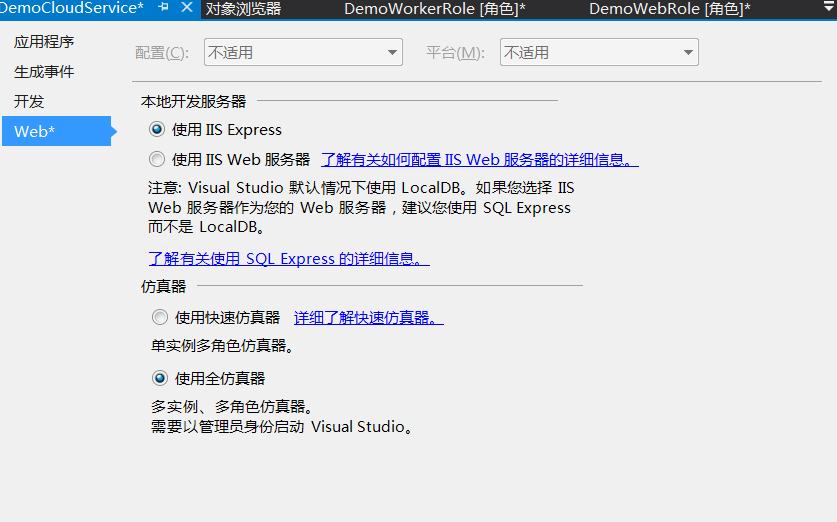
下来我们在去设置Demo Cloud Service使用全仿真器,默认仿真器只能使用单实例.
然后我们运行Demo Cloud Service进行全仿真测试


打开仿真界面.我们可以进行测试

点击发送消息,可以看到其中的一个WorkRole已经获取到我发送的消息了

嘿嘿,很有成就感吧!.