启动类和核心注解
@SpringBootApplication

    Spring Boot应用通常都有一个名为*Application的程序入口类,该入口类需要使用Spring Boot的核心注解@SpringBootApplication标注为应用的启动类。

    Spring Boot的核心注解@SpringBootApplication是一个组合注解,主要组合了@SpringBootConfiguration、@EnableAutoConfiguration和@ComponentScan注解。
@SpringBootConfiguration注解

    @SpringBootConfiguration是Spring Boot应用的配置注解,该注解也是一个组合注解,源代码可以从spring-boot-2.1.4.RELEASE.jar依赖包中查看org/springframework/boot/ SpringBootConfiguration.java。在Spring Boot应用中推荐使用@SpringBootConfiguration注解替代@Configuration注解。
@EnableAutoConfiguration注解

@EnableAutoConfiguration注解可以让Spring Boot根据当前应用项目所依赖的jar自动配置项目的相关配置。例如,在Spring Boot项目的pom.xml文件中添加了spring-boot-starter-web依赖,Spring Boot项目会自动添加Tomcat和Spring MVC的依赖,同时对Tomcat和Spring MVC进行自动配置。打开pom.xml文件,选择Dependency Hierarchy页面查看spring-boot-starter-web的自动配置
@ComponentScan注解

    该注解的功能是让Spring Boot自动扫描@SpringBootApplication所在类的同级包以及它的子包中的配置,所以建议将@SpringBootApplication注解的入口类放置在项目包下(Group Id+Artifact Id组合的包名),这样可以保证Spring Boot自动扫描项目所有包中的配置。
关闭某个特定的自动配置

    如果开发者不需要Spring Boot的某一项自动配置,该如何实现呢?通过查看@SpringBootApplication的源代码可知,应该使用@SpringBootApplication注解的exclude参数关闭特定的自动配置,以关闭neo4j自动配置为例,代码如下:
@SpringBootApplication(exclude={Neo4jDataAutoConfiguration.class})
定制Banner

    首先,打开网站http://patorjk.com/software/taag,输入自定义字符串,单击网页下方的“Select & Copy”按钮,如图4.4所示。然后,将自定义banner字符串图案复制到src/main/resources目录下的banner.txt文件中。
关闭banner

    开发者如果需要关闭banner,可以在src/main/resources目录下的application.properties文件中添加如下配置:
spring.main.banner-mode = off
Spring Boot的全局配置文件

    1.设置端口号
    使用全局配置文件主要用于修改项目的默认配置,如修改内嵌的Tomcat的默认端口。例如,在Spring Boot项目ch4_1的src/main/resources目录下找到名为application.properties的全局配置文件,添加如下配置内容:server.port=8888

    2.设置Web应用的上下文路径
    如果开发者想设置一个Web应用程序的上下文路径,可以在application.properties文件中配置如下内容:
    server.servlet.context-path=/XXX
    这时应该通过“http://localhost:8080/XXX/testStarters”访问如下控制器类中的请求处理方法:
@RequestMapping("/testStarters")
public String index() {
}
Spring Boot的Starters

    Spring Boot提供了很多简化企业级开发的“开箱即用”的Starters。Spring Boot项目只要使用了所需要的Starters,Spring Boot就可以自动关联项目开发所需要的相关依赖。例如,我们在ch4_1的pom.xml文件中,添加如下依赖配置:
<dependency>
    <groupId>org.springframework.boot</groupId>
    <artifactId>spring-boot-starter-web</artifactId>
</dependency>
    Spring Boot将自动关联Web开发的相关依赖,如tomcat、spring-webmvc等,进而对Web开发的支持,并将相关技术的配置实现自动配置。

    通过访问“https://docs.spring.io/spring-boot/docs/2.1.4.RELEASE/reference/htmlsingle/#
using-boot-starter”官网,可以查看Spring Boot官方提供的Starters
Environment

    Environment是一个通用的读取应用程序运行时的环境变量的类,可以通过key-value方式读取application.properties、命令行输入参数、系统属性、操作系统环境变量等。
添加配置文件内容

在src/main/resources目录下,找到全局配置文件application.properties,并添加如下内容:
    test.msg=read config
创建控制器类EnvReaderConfigController
在控制器类EnvReaderConfigController中,使用@Autowired注解依赖注入Environment类的对象
@RestController
public class EnvReaderConfigController{
@Autowired
private Environment env;
@RequestMapping("/testEnv")
public String testEnv() {
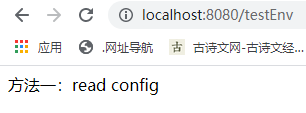
return "方法一:" + env.getProperty("test.msg") ;
//test.msg为配置文件application.properties中的key
}
}
测试应用

启动Spring Boot应用后,默认访问地址为:http://localhost:8080/,将项目路径直接设为根路径,这是Spring Boot的默认设置。因此,我们可以通过http://localhost:8080/testEnv测试应用(testEnv与控制器类ReaderConfigController中的@RequestMapping("/testEnv")对应)
<project xmlns="http://maven.apache.org/POM/4.0.0"
    xmlns:xsi="http://www.w3.org/2001/XMLSchema-instance"
    xsi:schemaLocation="http://maven.apache.org/POM/4.0.0 http://maven.apache.org/maven-v4_0_0.xsd">
    <modelVersion>4.0.0</modelVersion>

    <parent>
        <groupId>org.springframework.boot</groupId>
        <artifactId>spring-boot-starter-parent</artifactId>
        <version>2.1.4.RELEASE</version>
        <relativePath /> <!-- lookup parent from repository -->
    </parent>

    <groupId>com.bb</groupId>
    <artifactId>SpringBootConfg</artifactId>
    <packaging>war</packaging>
    <version>0.0.1-SNAPSHOT</version>
    <name>SpringBootConfg Maven Webapp</name>

    <properties>
        <java.version>11</java.version>
    </properties>

    <url>http://maven.apache.org</url>

    <dependencies>

        <dependency>
            <groupId>org.springframework.boot</groupId>
            <artifactId>spring-boot-starter-web</artifactId>
        </dependency>

        <dependency>
            <groupId>org.springframework.boot</groupId>
            <artifactId>spring-boot-starter-test</artifactId>
            <scope>test</scope>
        </dependency>

        <dependency>
            <groupId>org.springframework.boot</groupId>
            <artifactId>spring-boot-configuration-processor</artifactId>
            <optional>true</optional>
        </dependency>

    </dependencies>
    <build>
        <finalName>SpringBootConfg</finalName>

        <plugins>
            <plugin>
                <groupId>org.springframework.boot</groupId>
                <artifactId>spring-boot-maven-plugin</artifactId>
            </plugin>
        </plugins>

    </build>
</project>
package com.ch.ch4_1.controller;

import org.springframework.beans.factory.annotation.Autowired;
import org.springframework.core.env.Environment;
import org.springframework.web.bind.annotation.RequestMapping;
import org.springframework.web.bind.annotation.RestController;

@RestController
public class EnvReaderConfigController {
    @Autowired
    private Environment env;

    @RequestMapping("/testEnv")
    public String testEnv() {
        return "方法一:" + env.getProperty("test.msg");
    }
}
package com.ch.ch4_1;

import org.springframework.boot.SpringApplication;
import org.springframework.boot.autoconfigure.SpringBootApplication;

@SpringBootApplication
public class Ch41Application {
    public static void main(String[] args) {
        SpringApplication.run(Ch41Application.class, args);
    }
}