1 目的
Spark Streaming整合Flume。参考官方整合文档(http://spark.apache.org/docs/2.2.0/streaming-flume-integration.html
补充一下:关于后台开启flume:这条命名中-Dflume.root.logger=INFO,console是表示简单的把日志信息输出到控制台,这种flume 普通方式启动会有自己自动停掉的问题,这可能是linux的进程机制把他停掉的原因,
flume-ng agent --name simple-agent --conf $FLUME_HOME/conf --conf-file $FLUME_HOME/conf -Dflume.root.logger=INFO,console
如何在后台启动:定向输出日志?
nohup flume-ng agent --name simple-agent --conf $FLUME_HOME/conf --conf-file $FLUME_HOME/conf -Dflume.root.logger=INFO,console &
这样会在后台启动,且日志会输出到flume 根目录下的,nohup.out这个文件中
当然也可以自定义log的输出方式,需要你配置lo4g文件了,后台启动及其日志设定,可以参考这篇博文:
2 整合方式一:基于推
2.1 基本要求
- flume和spark一个work节点要在同一台机器上,flume会在本机器上通过配置的端口推送数据
- streaming应用必须先启动,receive必须要先监听推送数据的端口后,flume才能推送数据
- 添加如下依赖
 groupId = org.apache.spark
 artifactId = spark-streaming-flume_2.11
 version = 2.2.0
2.2 配置Flume
我们知道flume 的使用就是如何配置它的配置文件,使用本地的netcat source来模拟数据,本次配置如下:
# Name the components on this agent
a1.sources = r1
a1.sinks = k1
a1.channels = c1

# Describe/configure the source
a1.sources.r1.type = netcat
a1.sources.r1.bind = hadoop
a1.sources.r1.port = 5900

# Describe the sink
a1.sinks.k1.type = avro
a1.sinks.k1.hostname = hadoop
a1.sinks.k1.port = 5901
#a1.sinks.k1.type = logger

# Use a channel which buffers events in memory
a1.channels.c1.type = memory
#a1.channels.c1.capacity = 1000
#a1.channels.c1.transactionCapacity = 100

# Bind the source and sink to the channel
a1.sources.r1.channels = c1
a1.sinks.k1.channel = c1
2.3 在服务器上运行
思路如下:
- 用maven打包工程
- 使用saprk-submit提交
- 开启flume
- 发送模拟数据
- 验证
验证代码如下:功能简单的做一个单词统计:


 1 package flume_streaming
 2
 3 import org.apache.spark.SparkConf
 4 import org.apache.spark.streaming.flume.FlumeUtils
 5 import org.apache.spark.streaming.{Durations, StreamingContext}
 6
 7 /**
 8  * @Author: SmallWild
 9  * @Date: 2019/11/2 9:42
10  * @Desc: 基于flumePushWordCount
11  */
12 object flumePushWordCount {
13   def main(args: Array[String]): Unit = {
14     if (args.length != 2) {
15       System.err.println("错误参数,用法:flumePushWordCount <hostname> <port>")
16       System.exit(1)
17     }
18     //传入参数
19     val Array(hostname, port) = args
20     //一定不能使用local[1]
21     val sparkConf = new SparkConf() //.setMaster("local[2]").setAppName("kafkaDirectWordCount")
22     val ssc = new StreamingContext(sparkConf, Durations.seconds(5))
23     //设置日志级别
24     ssc.sparkContext.setLogLevel("WARN")
25     //TODO 简单的进行单词统计
26     val flumeStream = FlumeUtils.createStream(ssc, hostname, port.toInt)
27     flumeStream.map(x => new String(x.event.getBody.array()).trim)
28       .flatMap(_.split(" ")).map((_, 1)).reduceByKey(_ + _).print()
29     ssc.start()
30     ssc.awaitTermination()
31   }
32 }
验证具体步骤如下:
 1  1)打包工程
 2  mvn clean package -DskipTest
 3  2)spark-submit提交(这里使用local模式)
 4  ./spark-submit --class flume_streaming.flumePushWordCount /
 5  --master local[2] /
 6  --packages org.apache.spark:spark-streaming-flume_2.11:2.2.0 /
 7  /smallwild/app/SparkStreaming-1.0.jar hadoop 5901
 8  3)开启flume
 9  flume-ng agent --name simple-agent --conf $FLUME_HOME/conf --conf-file $FLUME_HOME/conf -Dflume.root.logger=INFO,console
10  4)发送模式数据
11  这里使用本地5900端口发送数据
12  telnet hadoop 5900
13  5)验证
14  查看streaming应用程序是否能出现对应的单词计数字样
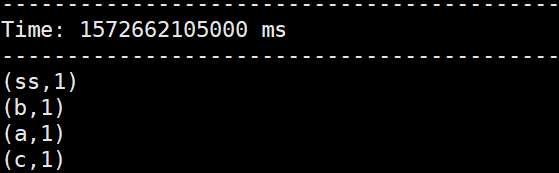
验证结果:能正确统计从端口发送过来的某一批次的单词的数量
3 整合方式二:基于拉(常用)
这种方式和上面基本一致
3.1 注意事项
- 先启动flume
- 使用自定义的sink,streaming主动去拉取数据,数据会先存放在缓冲区
- 事务保障机制,副本机制和数据被接收(Transactions succeed only after data is received and replicated by Spark Streaming.)
- 高容错保证
- 添加如下依赖
 groupId = org.apache.spark
 artifactId = spark-streaming-flume-sink_2.11
 version = 2.2.0

 groupId = org.scala-lang
 artifactId = scala-library
 version = 2.11.8

 groupId = org.apache.commons
 artifactId = commons-lang3
 version = 3.5
3.2 配置Flume
和前面差别在配置sink,需要使用自定义的sink
 1 # Name the components on this agent
 2 a1.sources = r1
 3 a1.sinks = k1
 4 a1.channels = c1
 5
 6 # Describe/configure the source
 7 a1.sources.r1.type = netcat
 8 a1.sources.r1.bind = hadoop
 9 a1.sources.r1.port = 5900
10
11 # Describe the sink
12 a1.sinks.k1.type = org.apache.spark.streaming.flume.sink.SparkSink
13 a1.sinks.k1.hostname = hadoop
14 a1.sinks.k1.port = 5901
15 #a1.sinks.k1.type = logger
16
17 # Use a channel which buffers events in memory
18 a1.channels.c1.type = memory
19 #a1.channels.c1.capacity = 1000
20 #a1.channels.c1.transactionCapacity = 100
21
22 # Bind the source and sink to the channel
23 a1.sources.r1.channels = c1
24 a1.sinks.k1.channel = c1
3.3 在服务上运行
业务逻辑大致和前面一样,这里使用下面的类
 import org.apache.spark.streaming.flume._

 val flumeStream = FlumeUtils.createPollingStream(streamingContext, [sink machine hostname], [sink port])
3.4 提交验证
思路如下:
- 用maven打包工程
- 开启flume
- 使用saprk-submit提交
- 发送模拟数据
- 验证
和前面基本一致
4 总结
整理两种整合flume的实践。