angular 渲染层
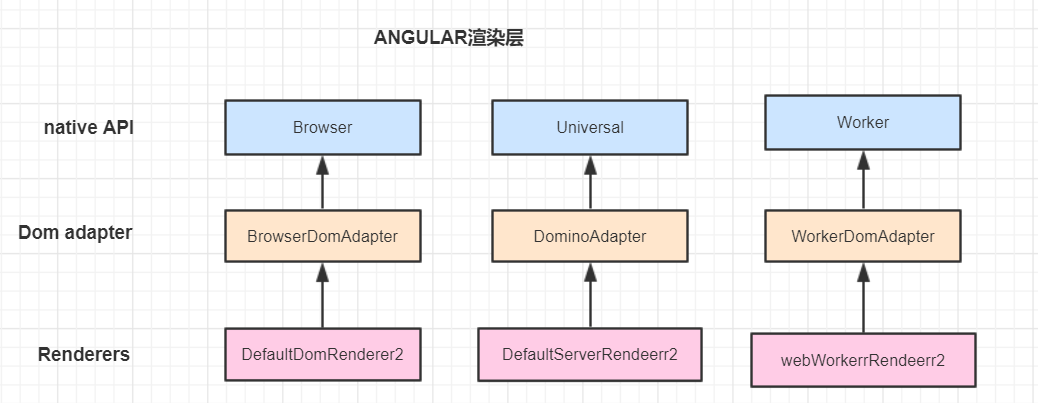
angular一个跨平台的框架不仅仅针对的浏览器这一个平台
ElementRef 与 TemplateRef
简单的理解:
ElemnetRef : 例如一个<span>元素的引用;
TemplateRef: 例如template模板的引用;
再angular中,官方的说法是: 不推荐使用ElementRef来改变元素的样式属性值或者操作DOM元素,原因是,angular是一个跨平台的框架,如果直接使用ElementRef对DOM直接进行操作,那么在其他平台情况下会出事。那么真的的正规操作DOM是使用什么呢? 官方推荐: 仅使用render2来改变DOM元素的样式,仅使用viewContentRef来改变DOM的结构,不推荐使用render2来改变DOM结构,为什么呢?
不推荐使用Render2来改变DOM结构的原因
首先了解一下angular中如何将组件转为视图

view 与 HTML 元素的关系

使用render2操作DOM结构,只是将DOM的标签移除,但是在视图中的标签view并没有被真的移除,这就是为什么改变DOM结构不推荐使用render2的原因
实战
1. 使用TemplateRef关联元素 结合render2改变元素的样式
首先了解一下render2几个常用API

box.component.html
<div>div 1</div>
<div #targetDiv>targerDiv</div>
box.component.ts
export class BoxComponent implements OnInit, AfterViewInit {
    @ViewChild('targetDiv') targetDiv: ElementRef;

    constructor(private _elementRef: ElementRef,
              private _render: Renderer2) { }

    ngOnInit() {
    }

    ngAfterViewInit(): void {
        this._render.setStyle(this.targetDiv.nativeElement, 'background', 'pink');

        console.log(this._elementRef.nativeElement);
        console.log(this.targetDiv);
    }
}
效果图

2. 使用ViewContentRef创建元素
总体思路:viewContentRef引用<ng-container>标签,<ng-container>是angular里的一种映射,在没有真的内容出现的时候,<ng-container>只是一个隐式的占位符,最后动态生成的元素会被填充到这个占位符中,由viewContentRef的实例使用自带的API来创建元素,元素应该是一开始就写好的,但是其DOM结果没有被渲染出来,在angular中<ng-template>中的内容会被忽略,我们需要做的是创建<ng-tempate>的引用,然后给到viewContentRef的实例<ng-tempate>中的元素自然会被显示出来。
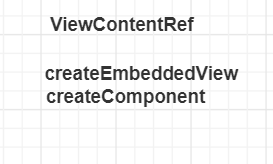
首先了解一下ViewContentRef的常用API
ViewContentRefComponent.html
<!--<ng-template><span #span>i am span to removed</span></ng-template>-->
<ng-template><a>i am a to removed</a></ng-template>
<ng-container #vc></ng-container>
<button (click)="remove()">remove</button>
<button (click)="create()">create</button>
ViewContentRefComponent.ts
export class ViewContentRefComponent implements OnInit, AfterViewInit {
    // @ViewChildren('span') spanElemnet;
    // @ViewChildren('a') aElement;
    @ViewChild(TemplateRef) template;
    @ViewChild('vc', {read: ViewContainerRef}) vc;
    constructor() { }

    ngOnInit() {
        // console.log(this.spanElemnet);
        console.log(this.template);
        console.log(this.vc);
    }

    ngAfterViewInit(): void {
        this.vc.createEmbeddedView(this.template);
        // console.log(this.spanElemnet.length);
    }

    remove = () => {
        this.vc.remove();
    }

    create = () => {
        this.vc.createEmbeddedView(this.template);
    }
}
2. 使用viewContentRef创建组件
总体思路: 创建一个组件;然后再要创建组件的另外一个组建中引用ViewContainerRef,将工厂解析器解析之后的组件(被创建的组件)ViewContainerRef的创建组件函数中即可
alerComponent.html
<p>name: {{name}}</p>
<p>age: {{age}}</p>
alerComponent.ts
export class AlertComponent implements OnInit {
    @Input() name = '';
    @Input() age = 0;
    constructor() { }

    ngOnInit() {
    }

}
createAlert.html
<ng-template #contatiner></ng-template>
<button (click)="create()">create alter component</button>
<button (click)="remove()">remove component</button>
createAlert.componts.ts
export class CreateAlertComponent implements OnInit {
    @ViewChild('contatiner', {read: ViewContainerRef}) contatiner;
    alertComponent: ComponentRef<any>;
    constructor(private componentFactoryResolver: ComponentFactoryResolver) { }

    ngOnInit() {
    }

    create = (): void => {
        this.contatiner.clear();
        this.alertComponent = this.contatiner.createComponent(this.componentFactoryResolver.resolveComponentFactory(AlertComponent));
        this.alertComponent.instance.name = 'lili';
        this.alertComponent.instance.age = 12;
    }

    remove = (): void => {
        // 被创建的组件进行自我销毁
        this.alertComponent.destroy();
    }

}
最终效果,可以拉取代码跑一下。