20165230 《Java程序设计》实验三 敏捷开发与XP实践 实验报告
一、实验报告封面
课程:Java程序设计 班级:1652班 姓名:田坤烨 学号:20165230 成绩:
指导教师:娄嘉鹏 实验日期:2018年4月16日
实验时间:13:45 - 3:25
实验序号:实验三 实验名称:敏捷开发与XP实践
实验内容:
- XP基础
- XP核心实践
- 相关工具
实验要求:
- 没有Linux基础的同学建议先学习《Linux基础入门(新版)》《Vim编辑器》 课程;
- 完成实验、撰写实验报告,注意实验报告重点是运行结果,遇到的问题(工具查找,安装,使用,程序的编辑,调试,运行等)、解决办法(空洞的方法如“查网络”、“问同学”、“看书”等一律得0分)以及分析(从中可以得到什么启示,有什么收获,教训等);
- 实验报告中统计自己的PSP(Personal Software Process)时间;
- 严禁抄袭。
二、实验内容及步骤
(一)编码标准
- 编程标准使代码更容易阅读和理解,甚至可以保证其中的错误更少。编程标准包含:具有说明性的名字、清晰的表达式、直截了当的控制流、可读的代码和注释,以及在追求这些内容时一致地使用某些规则和惯用法的重要性。
- 没有缩进的代码
public class CodeStandard {
public static void main(String [] args){
StringBuffer buffer = new StringBuffer();
buffer.append('S');
buffer.append("tringBuffer");
System.out.println(buffer.charAt(1));
System.out.println(buffer.capacity());
System.out.println(buffer.indexOf("tring"));
System.out.println("buffer = " + buffer.toString());
if(buffer.capacity()<20)
buffer.append("1234567");
for(int i=0; i<buffer.length();i++)
System.out.println(buffer.charAt(i));
}
}
-
在IDEA中规范缩进
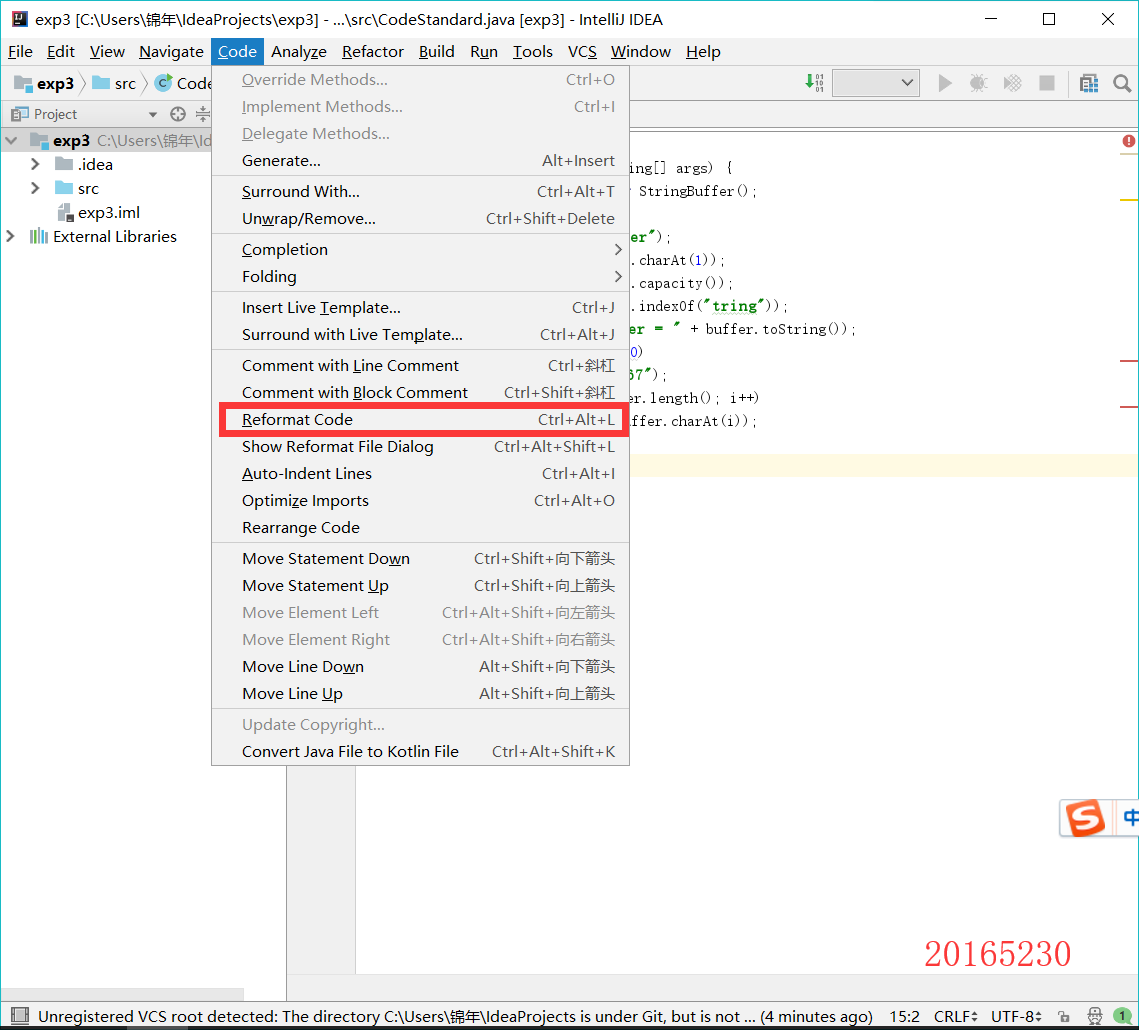
-
规范后的代码

-
研究code菜单
Move Line/statement Down/Up:将某行、表达式向下、向上移动一行generate可以自动创建类里面任何字段的 getter 与 setter 方法Reformat Code:格式化代码suround with:代码块环绕comment with line/block comment:把选中它区域变成注释show reformat file dialog:按照格式自动对齐Optimize imports:去除不必要的importsInsert Live Template:插入一些记不起来的 Live Template 缩写
- 个人觉得最好用的是
generate功能,在编程时用到generate可以省去编写简单方法的功夫,提高效率。如getter and setter
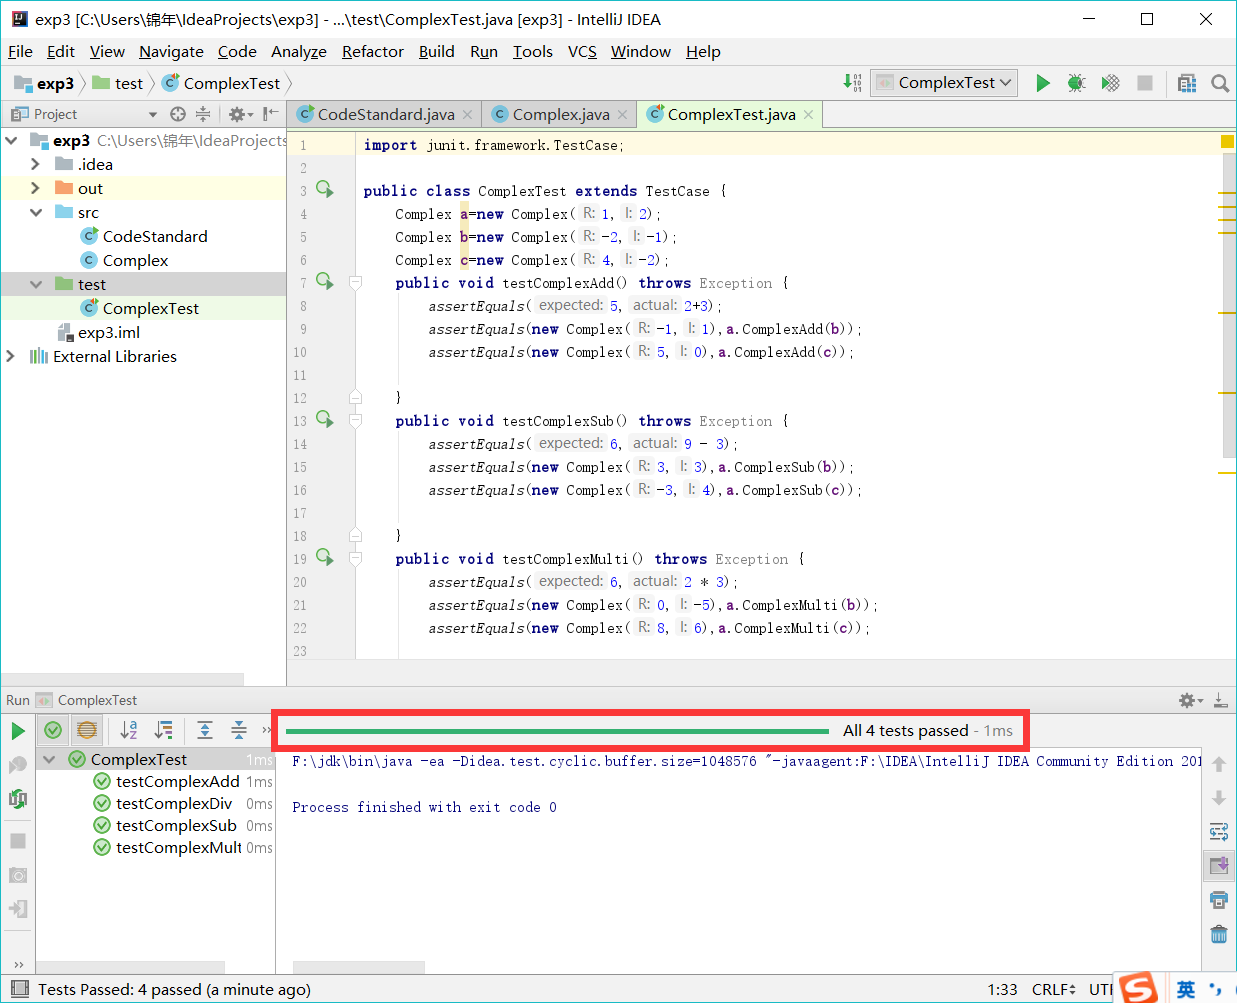
(二)下载搭档实验二的Complex代码,加入不少于三个JUnit单元测试用例
- 代码如下:
import junit.framework.TestCase;

public class ComplexTest extends TestCase {
    Complex a=new Complex(1,2);
    Complex b=new Complex(-2,-1);
    Complex c=new Complex(4,-2);
    public void testComplexAdd() throws Exception {
        assertEquals(5,2+3);
        assertEquals(new Complex(-1,1),a.ComplexAdd(b));
        assertEquals(new Complex(5,0),a.ComplexAdd(c));

    }
    public void testComplexSub() throws Exception {
        assertEquals(6,9 - 3);
        assertEquals(new Complex(3,3),a.ComplexSub(b));
        assertEquals(new Complex(-3,4),a.ComplexSub(c));

    }
    public void testComplexMulti() throws Exception {
        assertEquals(6,2 * 3);
        assertEquals(new Complex(0,-5),a.ComplexMulti(b));
        assertEquals(new Complex(8,6),a.ComplexMulti(c));

    }
    public void testComplexDiv() throws Exception {
        assertEquals(2,6 / 3);
        assertEquals(new Complex(0,0.5),a.ComplexDiv(c));
        assertEquals(new Complex(-0.3,-0.4),b.ComplexDiv(c));

    }

}
- 运行截图
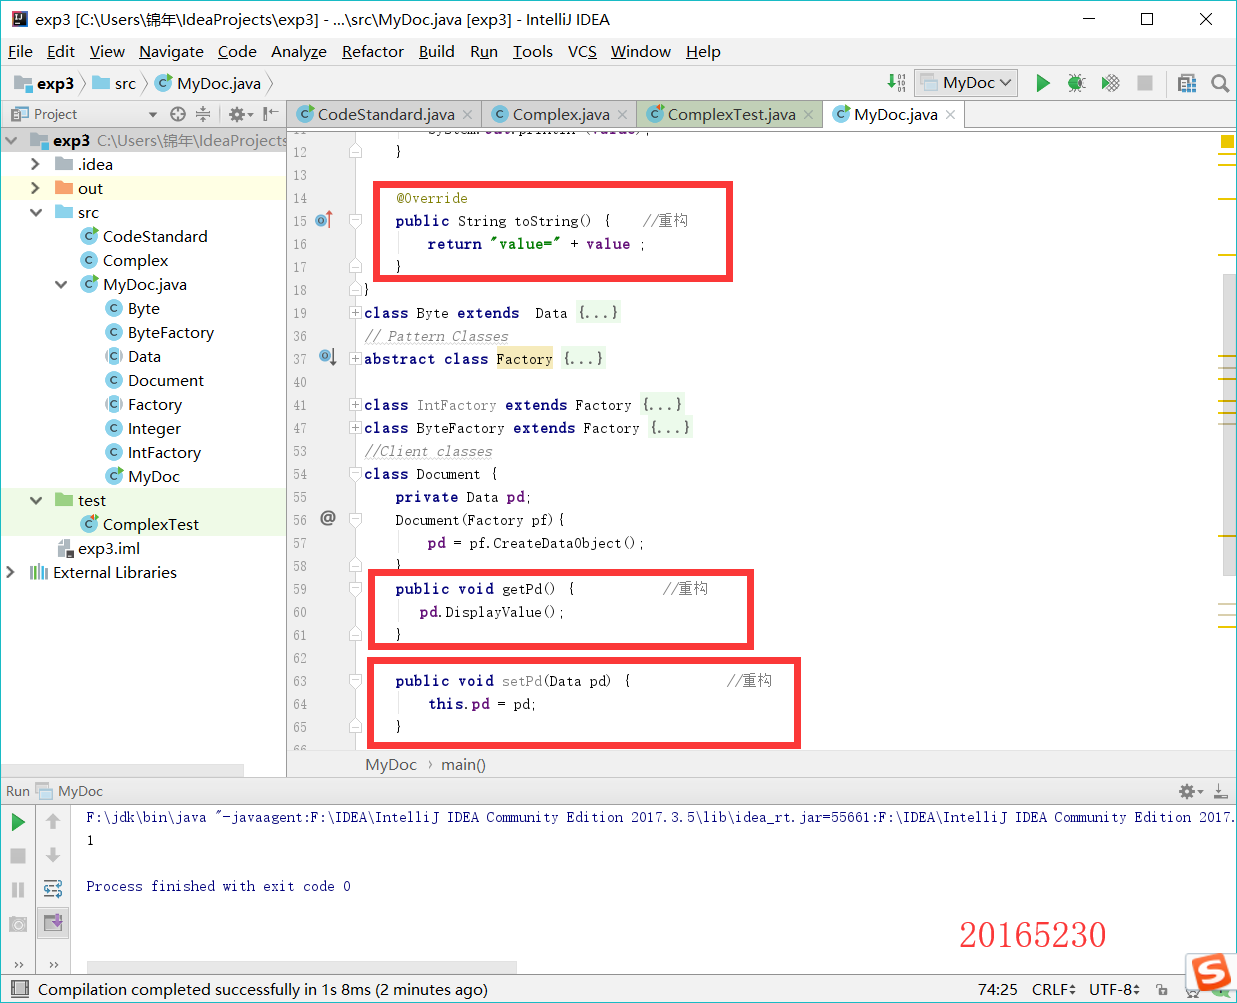
(三)重构搭档代码
重构(Refactor),就是在不改变软件外部行为的基础上,改变软件内部的结构,使其更加易于阅读、易于维护和易于变更 。
- 重构后代码
abstract class Data {
    abstract public void DisplayValue();
}
class Integer extends  Data {
    int value;
    Integer() {
        value=100;
    }
    @Override
    public void DisplayValue(){
        System.out.println (value);
    }

    @Override
    public String toString() {    //重构
        return "value=" + value ;
    }
}
class Byte extends  Data {

    byte value;
    Byte() {
        value=1;
    }
    @Override
    public void DisplayValue(){
        System.out.println (value);
    }

    @Override
    public String toString() {      //重构
        return "value=" + value ;
    }

}
// Pattern Classes
abstract class Factory {
    abstract public Data CreateDataObject();
}

class IntFactory extends Factory {
    @Override
    public Data CreateDataObject(){
        return new Integer();
    }
}
class ByteFactory extends Factory {
    @Override
    public Data CreateDataObject(){
        return new Byte();
    }
}
//Client classes
class Document {
    private Data pd;
    Document(Factory pf){
        pd = pf.CreateDataObject();
    }
    public void getPd() {           //重构
        pd.DisplayValue();
    }

    public void setPd(Data pd) {            //重构
        this.pd = pd;
    }


}
//Test class
public class MyDoc {
    static Document d;
    public static void main(String[] args) {
        d = new Document(new ByteFactory());
        d.getPd();  //重构
    }
}
- 运行截图
(四)以结对的方式完成Java密码学相关内容的学习,结合重构、git、代码标准等
- RSA
import java.security.*;
import java.security.spec.*;
import javax.crypto.*;
import javax.crypto.spec.*;
import javax.crypto.interfaces.*;
import java.security.interfaces.*;
import java.math.*;
import java.io.*;
public class Enc_RSA{
    public static void main(String args[]) throws Exception{
        String s="Hello World!";
        // 获取公钥及参数e,n
        FileInputStream f= getFileInputStream();
        ObjectInputStream b= getObjectInputStream(f);
        RSAPublicKey  pbk=(RSAPublicKey)b.readObject( );
        BigInteger e= getPublicExponent(pbk);
        BigInteger n= getModulus(pbk);
        getPrintln("e= " + e);
        getPrintln("n= "+n);
        // 明文 m
        byte ptext[]=s.getBytes("UTF8");
        BigInteger m= getBigInteger(ptext);
        // 计算密文c,打印
        BigInteger c=m.modPow(e,n);
        getPrintln("c= "+c);
        // 保存密文
        String cs=c.toString( );
        BufferedWriter out=
                new BufferedWriter(new OutputStreamWriter(
                        new FileOutputStream("Enc_RSA.dat")));
        out.write(cs,0,cs.length( ));
        out.close( );

    }

    private static BigInteger getBigInteger(byte[] ptext) {
        return new BigInteger(ptext);
    }

    private static void getPrintln(String x) {
        System.out.println(x);
    }

    private static BigInteger getModulus(RSAPublicKey pbk) {
        return pbk.getModulus();
    }

    private static BigInteger getPublicExponent(RSAPublicKey pbk) {
        return pbk.getPublicExponent();
    }

    private static ObjectInputStream getObjectInputStream(FileInputStream f) throws IOException {
        return new ObjectInputStream(f);
    }

    private static FileInputStream getFileInputStream() throws FileNotFoundException {
        return new FileInputStream("Skey_RSA_pub.dat");
    }
}
三、实验遇到的问题
- 问题1:在创建的新的项目里,Junit测试失败,显示
Class not found - 问题1解决方案:通过查询博客,找到了解决方法,步骤如下:
- 按ctrl+shift+alt+s,找到modules>path如下选择:
- 选project,根据自己的需要设置output文件夹:
- 问题2:如何将学习搭档加入到自己的项目中?
- 问题2解决方案:
- 先新建共同的项目,点开项目
- 找到
管理的选项,点击添加项目成员 - 将搭档作为开发者添加

四、PSP时间
| 步骤 | 耗时 | 百分比 |
|---|
   |需求分析           |   30min           | 12%            |
       |  设计         | 40min            |     15%   |
| 代码实现          |   90min          | 34%             |
|测试          |   45min          | 17%            |
  |分析总结          |   60min          |23%            |
六、代码链接
https://gitee.com/tiankunye/tky-lxs-program/tree/master/src