去年七月份因为学校项目需要开始接触图像处理,但那时候只是到网上找车牌识别代码,然后加入到自己的项目中,不太清楚细节原理。
现在自己重新一步步实现车牌识别。
车牌识别流程:

高斯模糊:
车牌识别中利用高斯模糊将图片平滑化,去除干扰的噪声对后续图像处理的影响。
高斯模糊(GaussianBlur()),也叫高斯平滑。


src:输入图片,可以使是任意通道数,该函数对通道是独立处理的,但是深度只能是CV_8U, CV_16U, CV_16S, CV_32F or CV_64F.
sigmaX:高斯内核在X方向的标准方差。
sigmaY:高斯内核在Y方向的标准方差。如果sigmaY为0,他将和sigmaX的值相同,如果他们都为0,那么他们由ksize.width和ksize.height计算得出。
borderType:用于判断图像边界的模式。


1 Mat Gaussian(Mat &img) {
2     Mat out;
3     GaussianBlur(img, out, Size(3, 3),
4         0, 0, BORDER_DEFAULT);
5     return out;
6
7 }
原图:(来自百度)


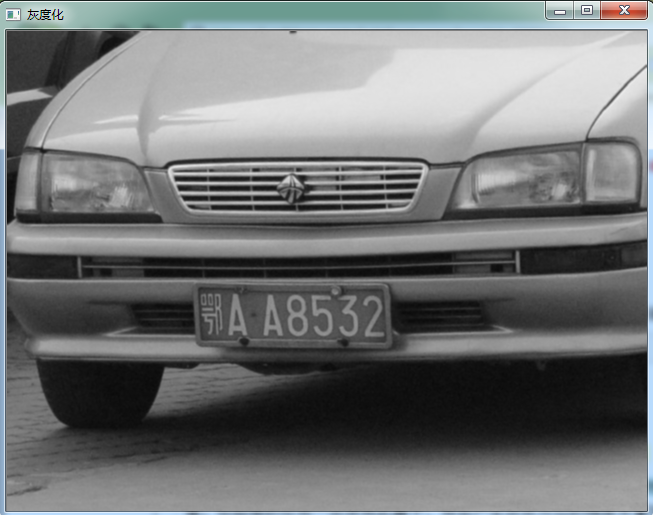
灰度化:
在车牌识别中我们需要将图像转化为灰度图像,这样有利于后续步骤的开展,如Soble算子只能作用于灰度图像。
灰度化,在RGB模型中,如果R=G=B时,则彩色表示一种灰度颜色,其中R=G=B的值叫灰度值,因此,灰度图像每个像素只需一个字节存放灰度值(又称强度值、亮度值),灰度范围为0-255。
Opencv中函数
void cvtColor(InputArray src, OutputArray dst, int code, int dstCn=0 )
参数详解:
src:输入图像:8位无符号的16位无符号(cv_16uc…)或单精度浮点。
dst:的大小和深度src.
code:输出图像颜色空间转换的代码。
dstCn:目标图像中的信道数;如果参数为0,则从SRC和代码自动导出信道的数目。
1 Mat Grayscale(Mat &img) {
2     Mat out;
3     cvtColor(img, out, CV_RGB2GRAY);
4
5     return out;
6 }
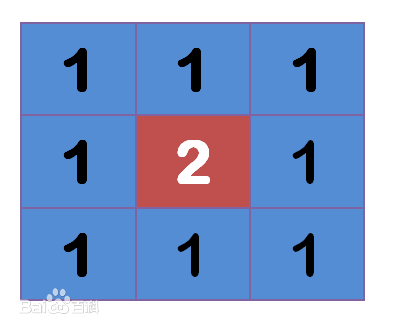
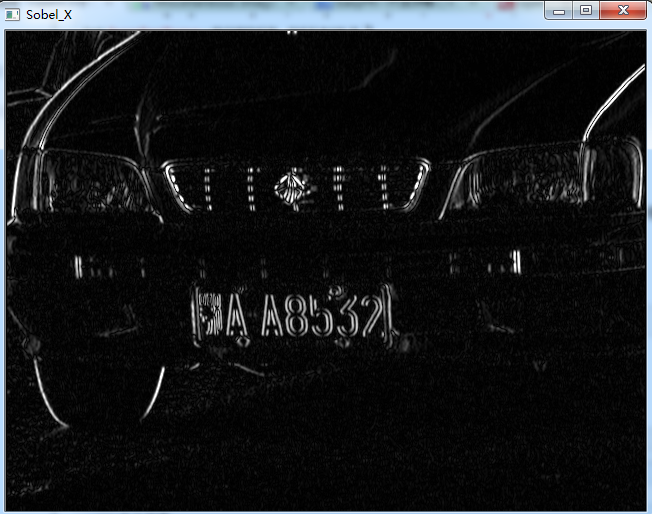
Sobel算子(X方向):
车牌定位的核心算法,水平方向上的边缘检测,检测出车牌区域。
主要用于获得数字图像的一阶梯度,常见的应用和物理意义是边缘检测。在技术上,它是一个离散的一阶差分算子,用来计算图像亮度函数的一阶梯度之近似值。在图像的任何一点使用此算子,将会产生该点对应的梯度矢量或是其法矢量。


参数:
src: 源图像。
dst:相同大小和相同数量的通道的目标图像。
ddepth:目标图像的深度。
xorder:阶导数的X.
yorder:阶导数的Y.
ksize:扩展Sobel算子–大小。它必须是1, 3, 5,或者7。
scale:计算衍生值的可选刻度因子。默认情况下,不应用缩放。看到getderivkernels()详情。
delta :可选的delta值,在将它们存储在DST之前添加到结果中。
bordertype:像素外推方法。
convertScaleAbs()——先缩放元素再取绝对值,最后转换格式为8bit型。
 1 Mat Sobel(Mat &img) {
 2     Mat out;
 3     Mat grad_x, grad_y;
 4     Mat abs_grad_x, abs_grad_y;
 5
 6     //X方向
 7     //Sobel(img, grad_x, CV_16S, 1, 0, 3, 1, 1, BORDER_DEFAULT);
 8     //convertScaleAbs(grad_x, abs_grad_x);
 9     Sobel(img, img, CV_16S, 1, 0, 3, 1, 1, BORDER_DEFAULT);
10     convertScaleAbs(img, out);
11
12     //Y方向
13     //Sobel(img, grad_y, CV_16S, 0, 1, 3, 1, 1, BORDER_DEFAULT);
14     //convertScaleAbs(grad_y, abs_grad_y);
15     //convertScaleAbs(img, out);
16
17     //合并
18     //addWeighted(abs_grad_x, 0.5, abs_grad_y, 0.5, 0, out);
19
20     return out;
21 }
二值化:
进一步对图像进行处理,强化目标区域,弱化背景。
图像的二值化,就是将图像上的像素点的灰度值设置为0或255,也就是将整个图像呈现出明显的只有黑和白的视觉效果。
OpenCV中函数
double threshold(InputArray src, OutputArray dst, double thresh, double maxVal, int thresholdType)
参数:
src:源阵列(单通道,32位浮点8位)。
dst:相同大小和类型的目标数组。
thresh:门限阈值。
Maxval:最大值使用的thresh_binary和thresh_binary_inv阈值类型。
thresholdtype:阈值型,如下。
THRESH_BINARY 当前点值大于阈值时,取Maxval,也就是第四个参数,下面再不说明,否则设置为0
THRESH_BINARY_INV 当前点值大于阈值时,设置为0,否则设置为Maxval
THRESH_TRUNC 当前点值大于阈值时,设置为阈值,否则不改变
THRESH_TOZERO 当前点值大于阈值时,不改变,否则设置为0
THRESH_TOZERO_INV 当前点值大于阈值时,设置为0,否则不改变
1 Mat TwoValued(Mat &img) {
2     Mat out;
3     threshold(img, out, 0, 255, CV_THRESH_OTSU + CV_THRESH_BINARY);
4     //threshold(img, out, 100, 255, CV_THRESH_BINARY);
5
6     return out;
7 }

闭操作:
闭操作可以将目标区域连成一个整体,便于后续轮廓的提取。
闭操作可使轮廓线更光滑,但与开操作相反的是,闭操作通常消弥狭窄的间断和长细的鸿沟,消除小的空洞,并填补轮廓线中的断裂。

参数:
src:源图像。
dst:相同大小和类型的目标图像。
element:内核类型 用getStructuringElement函数得到。
OP:
可以是以下形式之一的形态学操作的类型:
morph_open -开启操作
morph_close -闭合操作
morph_gradient -形态学梯度
morph_tophat“顶帽”
morph_blackhat -“黑帽”
iterations:侵蚀和膨胀的次数被应用。
bordertype–像素外推方法。
bordervalue–边界值在一个恒定的边界情况。默认值有特殊含义。
关注前4个参数即可,后面用默认参数。
1 Mat Close(Mat &img) {
2     Mat out;
3     //Mat element(5, 5, CV_8U, cv::Scalar(1));
4     Mat element = getStructuringElement(MORPH_RECT, Size(17, 5));
5     morphologyEx(img, out, cv::MORPH_CLOSE, element);
6
7     return out;
8 }

取轮廓:
将前面处理的车牌目标区域提取出来。
相关函数:
查找轮廓:
void findContours(InputOutputArray image, OutputArrayOfArrays contours, OutputArray hierarchy, int mode, int method, Point offset=Point())
image: 输入的 8-比特、单通道图像. 非零元素被当成 1, 0 象素值保留为 0 - 从而图像被看成二值的。为了从灰度图像中得到这样的二值图像,可以使用 cvThreshold, cvAdaptiveThreshold 或 cvCanny. 本函数改变输入图像内容。
storage :得到的轮廓的存储容器
first_contour :输出参数:包含第一个输出轮廓的指针
header_size :如果 method=CV_CHAIN_CODE,则序列头的大小 >=sizeof(CvChain),否则 >=sizeof(CvContour) .
mode :
提取模式.
CV_RETR_EXTERNAL - 只提取最外层的轮廓
CV_RETR_LIST - 提取所有轮廓,并且放置在 list 中
CV_RETR_CCOMP - 提取所有轮廓,并且将其组织为两层的 hierarchy: 顶层为连通域的外围边界,次层为洞的内层边界。
CV_RETR_TREE - 提取所有轮廓,并且重构嵌套轮廓的全部 hierarchy
method :
逼近方法 (对所有节点, 不包括使用内部逼近的 CV_RETR_RUNS).
CV_CHAIN_CODE - Freeman 链码的输出轮廓. 其它方法输出多边形(定点序列).
CV_CHAIN_APPROX_NONE - 将所有点由链码形式翻译(转化)为点序列形式
CV_CHAIN_APPROX_SIMPLE - 压缩水平、垂直和对角分割,即函数只保留末端的象素点;
CV_CHAIN_APPROX_TC89_L1,
CV_CHAIN_APPROX_TC89_KCOS - 应用 Teh-Chin 链逼近算法. CV_LINK_RUNS - 通过连接为 1 的水平碎片使用完全不同的轮廓提取算法。仅有 CV_RETR_LIST 提取模式可以在本方法中应用.
offset :
每一个轮廓点的偏移量. 当轮廓是从图像 ROI 中提取出来的时候,使用偏移量有用,因为可以从整个图像上下文来对轮廓做分析.
函数 cvFindContours 从二值图像中提取轮廓,并且返回提取轮廓的数目。指针 first_contour 的内容由函数填写。它包含第一个最外层轮廓的指针,如果指针为 NULL,则没有检测到轮廓(比如图像是全黑的)。其它轮廓可以从 first_contour 利用 h_next 和 v_next 链接访问到。 在 cvDrawContours 的样例显示如何使用轮廓来进行连通域的检测。轮廓也可以用来做形状分析和对象识别 - 见CVPR2001 教程中的 squares 样例。该教程可以在 SourceForge 网站上找到。
绘制轮廓:
void drawContours(InputOutputArray image, InputArrayOfArrays contours, int contourIdx, const Scalar& color, intthickness=1, int lineType=8, InputArray hierarchy=noArray(), int maxLevel=INT_MAX, Point offset=Point() )

相关参数参考——http://www.opencv.org.cn/opencvdoc/2.3.2/html/modules/imgproc/doc/structural_analysis_and_shape_descriptors.html?highlight=drawcontours#cv.DrawContours
漫水填充算法:
int floodFill(InputOutputArray image, Point seed, Scalar newVal, Rect* rect=0, Scalar loDiff=Scalar(), ScalarupDiff=Scalar(), int flags=4 )


相关参数参考——http://www.opencv.org.cn/opencvdoc/2.3.2/html/modules/imgproc/doc/miscellaneous_transformations.html?highlight=floodfill#cv.FloodFill
尺寸判断函数
 1 bool verifySizes(RotatedRect mr)
 2 {
 3     float error = 0.3;
 4     //Spain car plate size: 52x11 aspect 4,7272
 5     //China car plate size: 440mm*140mm,aspect 3.142857
 6     float aspect = 3.142857;
 7     //Set a min and max area. All other patchs are discarded
 8     int min= 1*aspect*1; // minimum area
 9     int max= 2000*aspect*2000; // maximum area
10     //int min = 44 * 14 * m_verifyMin; // minimum area
11     //int max = 44 * 14 * m_verifyMax; // maximum area
12                                      //Get only patchs that match to a respect ratio.
13     float rmin = aspect - aspect*error;
14     float rmax = aspect + aspect*error;
15
16     int area = mr.size.height * mr.size.width;
17     float r = (float)mr.size.width / (float)mr.size.height;
18     if (r < 1)
19     {
20         r = (float)mr.size.height / (float)mr.size.width;
21     }
22
23     if ((area < min || area > max) || (r < rmin || r > rmax))
24     {
25         return false;
26     }
27     else
28     {
29         return true;
30     }
31 }
均衡直方图:
 1 Mat histeq(Mat in)
 2 {
 3     Mat out(in.size(), in.type());
 4     if (in.channels() == 3) {
 5         Mat hsv;
 6         vector<Mat> hsvSplit;
 7         cvtColor(in, hsv, CV_BGR2HSV);
 8         split(hsv, hsvSplit);
 9         equalizeHist(hsvSplit[2], hsvSplit[2]);
10         merge(hsvSplit, hsv);
11         cvtColor(hsv, out, CV_HSV2BGR);
12     }
13     else if (in.channels() == 1) {
14         equalizeHist(in, out);
15     }
16
17     return out;
18
19 }
整体代码:
  1 void Contour(Mat &img, Mat &out) {
  2     RNG rng(12345);
  3
  4     vector< Mat > contours(1000);
  5     vector<Vec4i> hierarchy(1000);
  6     findContours(img, contours, hierarchy, CV_RETR_TREE, CV_CHAIN_APPROX_SIMPLE, Point(0, 0));
  7
  8
  9     vector< Mat >::iterator itc = contours.begin();
 10     vector<RotatedRect> rects;
 11     int t = 0;
 12     while (itc != contours.end()) {
 13         //Create bounding rect of object
 14         RotatedRect mr = minAreaRect(Mat(*itc));
 15         //large the rect for more
 16         if (!verifySizes(mr)) {
 17             itc = contours.erase(itc);
 18         }
 19         else {
 20             ++itc;
 21             rects.push_back(mr);
 22         }
 23    }
 24
 25     cv::Mat result;
 26     img.copyTo(result);
 27     for (int i = 0; i< contours.size(); i++)
 28     {
 29         drawContours(result, contours, i, Scalar(0, 0, 255), 2, 8, vector<Vec4i>(), 0, Point());
 30         //drawContours(result, contours, i, Scalar(255), 2);
 31     }
 32
 33     //imshow("MASK11", result);
 34
 35     for (int i = 0; i < rects.size(); i++) {
 36         circle(result, rects[i].center, 3, Scalar(0, 255, 0), -1);
 37
 38         float minSize = (rects[i].size.width < rects[i].size.height) ? rects[i].size.width : rects[i].size.height;
 39         //minSize = minSize - minSize*0.5;
 40
 41         srand(time(NULL));
 42         Mat mask;
 43         mask.create(out.rows + 2, out.cols + 2, CV_8UC1);
 44         mask = Scalar::all(0);
 45         int loDiff = 30;
 46         int upDiff = 30;
 47         int connectivity = 4;
 48         int newMaskVal = 255;
 49         int NumSeeds = 10;
 50         Rect ccomp;
 51         int flags = connectivity + (newMaskVal << 8) + CV_FLOODFILL_FIXED_RANGE + CV_FLOODFILL_MASK_ONLY;
 52
 53         for (int j = 0; j < NumSeeds; j++) {
 54             Point seed;
 55             seed.x = rects[i].center.x + rand() % (int)minSize - (minSize / 2);
 56             seed.y = rects[i].center.y + rand() % (int)minSize - (minSize / 2);
 57             circle(result, seed, 1, Scalar(0, 255, 255), -1);
 58             int area = floodFill(out, mask, seed, Scalar(255, 0, 0), &ccomp, Scalar(loDiff, loDiff, loDiff), Scalar(upDiff, upDiff, upDiff), flags);
 59         }
 60
 61         //imshow("MASK", mask);
 62
 63         vector<Point> pointsInterest;
 64         Mat_<uchar>::iterator itMask = mask.begin<uchar>();
 65         Mat_<uchar>::iterator end = mask.end<uchar>();
 66         for (; itMask != end; ++itMask)
 67             if (*itMask == 255)
 68                 pointsInterest.push_back(itMask.pos());
 69
 70         RotatedRect minRect = minAreaRect(pointsInterest);
 71
 72         if (verifySizes(minRect)) {
 73             // rotated rectangle drawing
 74             Point2f rect_points[4]; minRect.points(rect_points);
 75             for (int j = 0; j < 4; j++)
 76                 line(result, rect_points[j], rect_points[(j + 1) % 4], Scalar(0, 0, 255), 1, 8);
 77
 78             //Get rotation matrix
 79             float r = (float)minRect.size.width / (float)minRect.size.height;
 80             float angle = minRect.angle;
 81             if (r < 1)
 82                 angle = 90 + angle;
 83             Mat rotmat = getRotationMatrix2D(minRect.center, angle, 1);
 84
 85             //Create and rotate image
 86             Mat img_rotated;
 87             warpAffine(out, img_rotated, rotmat, out.size(), CV_INTER_CUBIC);//实现旋转
 88
 89             //Crop image
 90             Size rect_size = minRect.size;
 91             if (r < 1)
 92                 swap(rect_size.width, rect_size.height);
 93             Mat img_crop;
 94             getRectSubPix(img_rotated, rect_size, minRect.center, img_crop);
 95
 96             Mat resultResized;
 97             resultResized.create(33, 144, CV_8UC3);
 98             resize(img_crop, resultResized, resultResized.size(), 0, 0, INTER_CUBIC);;
 99
100             ////Equalize croped image
101             Mat grayResult;
102             cvtColor(resultResized, grayResult, CV_BGR2GRAY);// CV_RGB2GRAY
103             blur(grayResult, grayResult, Size(3, 3));
104             grayResult = histeq(grayResult);
105
106             if (1) {
107                 stringstream ss(stringstream::in | stringstream::out);
108                 ss << "haha" << "_" << i << ".jpg";
109                 imwrite(ss.str(), grayResult);
110             }
111
112         }
113     }
114 }
主函数:
 1 int main() {
 2     Mat img;
 3     Mat out;
 4     //Mat result;
 5
 6     //载入图片
 7     img = imread("test1.jpg");//, CV_LOAD_IMAGE_GRAYSCALE);
 8     img.copyTo(out);
 9     //imshow ("原始图", img);
10
11     img = Gaussian(img);
12     //imshow ("高斯模糊", img);
13
14     img = Grayscale(img);
15     //imshow("灰度化", img);
16
17     img = Sobel(img);
18     //imshow("Sobel_X", img);
19
20     img = TwoValued(img);
21     //imshow("二值化", img);
22
23     img = Close(img);
24     //imshow("闭操作", img);
25
26     //
27     Contour(img, out);
28
29     waitKey(0);
30     cvDestroyAllWindows();
31 }


车牌定位部分完整代码:
  1 /*------------------------------ - 程序介绍------------------------------*/
  2 //版本:VS2017 + Opencv2.4.9
  3 //描述:OpenCV学习之路——车牌识别之车牌定位
  4 /*-----------------------------------------------------------------------*/
  5
  6
  7 #include "opencv.hpp"
  8 #include "opencv2/highgui/highgui.hpp"
  9 #include "opencv2/imgproc/imgproc.hpp"
 10 #include "opencv2corecore.hpp"
 11 #include "vector"
 12 #include "iostream"
 13 #include "time.h"
 14
 15 using namespace cv;
 16 using namespace std;
 17
 18 Mat histeq(Mat in)
 19 {
 20     Mat out(in.size(), in.type());
 21     if (in.channels() == 3) {
 22         Mat hsv;
 23         vector<Mat> hsvSplit;
 24         cvtColor(in, hsv, CV_BGR2HSV);
 25         split(hsv, hsvSplit);
 26         equalizeHist(hsvSplit[2], hsvSplit[2]);
 27         merge(hsvSplit, hsv);
 28         cvtColor(hsv, out, CV_HSV2BGR);
 29     }
 30     else if (in.channels() == 1) {
 31         equalizeHist(in, out);
 32     }
 33
 34     return out;
 35
 36 }
 37
 38 //! 对minAreaRect获得的最小外接矩形,用纵横比进行判断
 39 bool verifySizes(RotatedRect mr)
 40 {
 41     float error = 0.3;
 42     //Spain car plate size: 52x11 aspect 4,7272
 43     //China car plate size: 440mm*140mm,aspect 3.142857
 44     float aspect = 3.142857;
 45     //Set a min and max area. All other patchs are discarded
 46     int min= 1*aspect*1; // minimum area
 47     int max= 2000*aspect*2000; // maximum area
 48     //int min = 44 * 14 * m_verifyMin; // minimum area
 49     //int max = 44 * 14 * m_verifyMax; // maximum area
 50                                      //Get only patchs that match to a respect ratio.
 51     float rmin = aspect - aspect*error;
 52     float rmax = aspect + aspect*error;
 53
 54     int area = mr.size.height * mr.size.width;
 55     float r = (float)mr.size.width / (float)mr.size.height;
 56     if (r < 1)
 57     {
 58         r = (float)mr.size.height / (float)mr.size.width;
 59     }
 60
 61     if ((area < min || area > max) || (r < rmin || r > rmax))
 62     {
 63         return false;
 64     }
 65     else
 66     {
 67         return true;
 68     }
 69 }
 70
 71 Mat Gaussian(Mat &img) {
 72     Mat out;
 73     GaussianBlur(img, out, Size(3, 3),
 74         0, 0, BORDER_DEFAULT);
 75     return out;
 76
 77 }
 78
 79 Mat Grayscale(Mat &img) {
 80     Mat out;
 81     cvtColor(img, out, CV_RGB2GRAY);
 82
 83     return out;
 84 }
 85
 86 Mat Sobel(Mat &img) {
 87     Mat out;
 88     Mat grad_x, grad_y;
 89     Mat abs_grad_x, abs_grad_y;
 90
 91     //X方向
 92     //Sobel(img, grad_x, CV_16S, 1, 0, 3, 1, 1, BORDER_DEFAULT);
 93     //convertScaleAbs(grad_x, abs_grad_x);
 94     Sobel(img, img, CV_16S, 1, 0, 3, 1, 1, BORDER_DEFAULT);
 95     convertScaleAbs(img, out);
 96
 97     //Y方向
 98     //Sobel(img, grad_y, CV_16S, 0, 1, 3, 1, 1, BORDER_DEFAULT);
 99     //convertScaleAbs(grad_y, abs_grad_y);
100     //convertScaleAbs(img, out);
101
102     //合并
103     //addWeighted(abs_grad_x, 0.5, abs_grad_y, 0.5, 0, out);
104
105     return out;
106 }
107
108 Mat TwoValued(Mat &img) {
109     Mat out;
110     threshold(img, out, 0, 255, CV_THRESH_OTSU + CV_THRESH_BINARY);
111     //threshold(img, out, 100, 255, CV_THRESH_BINARY);
112
113     return out;
114 }
115
116 Mat Close(Mat &img) {
117     Mat out;
118     //Mat element(5, 5, CV_8U, cv::Scalar(1));
119     Mat element = getStructuringElement(MORPH_RECT, Size(17, 5));
120     morphologyEx(img, out, cv::MORPH_CLOSE, element);
121
122     return out;
123 }
124
125
126 void Contour(Mat &img, Mat &out) {
127     RNG rng(12345);
128
129     vector< Mat > contours(1000);
130     vector<Vec4i> hierarchy(1000);
131     findContours(img, contours, hierarchy, CV_RETR_TREE, CV_CHAIN_APPROX_SIMPLE, Point(0, 0));
132
133
134     vector< Mat >::iterator itc = contours.begin();
135     vector<RotatedRect> rects;
136     int t = 0;
137     while (itc != contours.end()) {
138         //Create bounding rect of object
139         RotatedRect mr = minAreaRect(Mat(*itc));
140         //large the rect for more
141         if (!verifySizes(mr)) {
142             itc = contours.erase(itc);
143         }
144         else {
145             ++itc;
146             rects.push_back(mr);
147         }
148    }
149
150     cv::Mat result;
151     img.copyTo(result);
152     for (int i = 0; i< contours.size(); i++)
153     {
154         drawContours(result, contours, i, Scalar(0, 0, 255), 2, 8, vector<Vec4i>(), 0, Point());
155         //drawContours(result, contours, i, Scalar(255), 2);
156     }
157     //imshow("画轮廓", out);
158
159     for (int i = 0; i < rects.size(); i++) {
160         circle(result, rects[i].center, 3, Scalar(0, 255, 0), -1);
161
162         float minSize = (rects[i].size.width < rects[i].size.height) ? rects[i].size.width : rects[i].size.height;
163         //minSize = minSize - minSize*0.5;
164
165         srand(time(NULL));
166         Mat mask;
167         mask.create(out.rows + 2, out.cols + 2, CV_8UC1);
168         mask = Scalar::all(0);
169         int loDiff = 30;
170         int upDiff = 30;
171         int connectivity = 4;
172         int newMaskVal = 255;
173         int NumSeeds = 10;
174         Rect ccomp;
175         int flags = connectivity + (newMaskVal << 8) + CV_FLOODFILL_FIXED_RANGE + CV_FLOODFILL_MASK_ONLY;
176
177         for (int j = 0; j < NumSeeds; j++) {
178             Point seed;
179             seed.x = rects[i].center.x + rand() % (int)minSize - (minSize / 2);
180             seed.y = rects[i].center.y + rand() % (int)minSize - (minSize / 2);
181             circle(result, seed, 1, Scalar(0, 255, 255), -1);
182             int area = floodFill(out, mask, seed, Scalar(255, 0, 0), &ccomp, Scalar(loDiff, loDiff, loDiff), Scalar(upDiff, upDiff, upDiff), flags);
183         }
184         imshow("漫水填充", mask);
185
186         vector<Point> pointsInterest;
187         Mat_<uchar>::iterator itMask = mask.begin<uchar>();
188         Mat_<uchar>::iterator end = mask.end<uchar>();
189         for (; itMask != end; ++itMask)
190             if (*itMask == 255)
191                 pointsInterest.push_back(itMask.pos());
192
193         RotatedRect minRect = minAreaRect(pointsInterest);
194
195         if (verifySizes(minRect)) {
196             // rotated rectangle drawing
197             Point2f rect_points[4]; minRect.points(rect_points);
198             for (int j = 0; j < 4; j++)
199                 line(result, rect_points[j], rect_points[(j + 1) % 4], Scalar(0, 0, 255), 1, 8);
200
201             //Get rotation matrix
202             float r = (float)minRect.size.width / (float)minRect.size.height;
203             float angle = minRect.angle;
204             if (r < 1)
205                 angle = 90 + angle;
206             Mat rotmat = getRotationMatrix2D(minRect.center, angle, 1);
207
208             //Create and rotate image
209             Mat img_rotated;
210             warpAffine(out, img_rotated, rotmat, out.size(), CV_INTER_CUBIC);//实现旋转
211
212             //Crop image
213             Size rect_size = minRect.size;
214             if (r < 1)
215                 swap(rect_size.width, rect_size.height);
216             Mat img_crop;
217             getRectSubPix(img_rotated, rect_size, minRect.center, img_crop);
218
219             Mat resultResized;
220             resultResized.create(33, 144, CV_8UC3);
221             resize(img_crop, resultResized, resultResized.size(), 0, 0, INTER_CUBIC);;
222
223             ////Equalize croped image
224             Mat grayResult;
225             cvtColor(resultResized, grayResult, CV_BGR2GRAY);// CV_RGB2GRAY
226             blur(grayResult, grayResult, Size(3, 3));
227             grayResult = histeq(grayResult);
228
229             if (1) {
230                 stringstream ss(stringstream::in | stringstream::out);
231                 ss << "haha" << "_" << i << ".jpg";
232                 imwrite(ss.str(), grayResult);
233             }
234
235         }
236     }
237 }
238
239
240 int main() {
241     Mat img;
242     Mat out;
243     //Mat result;
244
245     //载入图片
246     img = imread("test1.jpg");//, CV_LOAD_IMAGE_GRAYSCALE);
247     img.copyTo(out);
248     //imshow ("原始图", img);
249     img = Gaussian(img);
250     imshow ("高斯模糊", img);
251
252     img = Grayscale(img);
253     imshow("灰度化", img);
254
255     img = Sobel(img);
256     imshow("Sobel_X", img);
257
258     img = TwoValued(img);
259     imshow("二值化", img);
260
261     img = Close(img);
262     imshow("闭操作", img);
263
264     Contour(img, out);
265
266     waitKey(0);
267     cvDestroyAllWindows();
268 }
总结:
车牌定位部分到此告一段落,但这方面的研究还要继续。
本算法仅适用于特定的图片,对于另一些场合的图片需要重新进行参数测试以判断准确率。需要对算法进一步完善,实现复杂背景下车牌的识别。
同时想要得到更准确的车牌区域,需要进行SVM训练。
注:
注解部分来自百度百科和http://www.opencv.org.cn
学习自——http://www.cnblogs.com/subconscious/p/3979988.html