jdbc.driverClass=com.mysql.jdbc.Driver
jdbc.url=jdbc:mysql:///testspring
jdbc.username=root
jdbc.password=root
参考 http://www.imooc.com/video/9330
这里使用xml配置来声明事务
准备好jar包

在数据库中创建数据:
#创建数据表account
CREATE TABLE `account` (
`id` int(11) NOT NULL AUTO_INCREMENT,
`name` varchar(20) NOT NULL,
`money` double DEFAULT NULL,
PRIMARY KEY (`id`)
) ENGINE=InnoDB AUTO_INCREMENT=4 DEFAULT CHARSET=utf8;
INSERT INTO `account` VALUES ('1', 'aaa', '1000');
INSERT INTO `account` VALUES ('2', 'bbb', '1000');
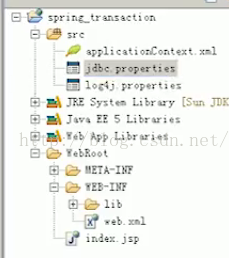
INSERT INTO `account` VALUES ('3', 'ccc', '1000');创建,applicationContext.xml,jdbc.properties,log4j.properties 等会儿再配置
创建一个转账业务接口和实现类,再对应的dao层的接口和实现类:
package com.guoke;
/**
 *转账业务接口
 */
public interface AccountService {
<span style="white-space:pre">	</span>public void transfer(String out, String in, double money);
}
package com.guoke.spring.demo1;
import com.guoke.AccountDao;
import com.guoke.AccountService;

/**
 *转账业务的实现类
 */
public class AccountServiceImpl implements AccountService {

	private AccountDao accountDao;

	public void setAccountDao(AccountDao accountDao) {
		this.accountDao = accountDao;
		System.out.println("初始化accountDao"+accountDao);
	}

	@Override
	public void transfer(String out, String in, double money) {
		accountDao.outMoney(out, money);
		accountDao.inMoney(in, money);
	}

}
package com.guoke;


/**
 *dao层接口
 */
public interface AccountDao {
<span style="white-space:pre">	</span>public void inMoney(String in,Double money);
<span style="white-space:pre">	</span>public void outMoney(String out,Double money);
}
package com.guoke.spring.demo1;


import org.springframework.jdbc.core.support.JdbcDaoSupport;


import com.guoke.AccountDao;


/**
 *dao层的实现类
 */
public class AccountDaoImpl extends JdbcDaoSupport implements AccountDao{


<span style="white-space:pre">	</span>@Override
<span style="white-space:pre">	</span>public void inMoney(String in, Double money) {
<span style="white-space:pre">		</span>String sql="update account set money=money+? where name=?";
<span style="white-space:pre">		</span>this.getJdbcTemplate().update(sql,money,in);
<span style="white-space:pre">	</span>}


<span style="white-space:pre">	</span>@Override
<span style="white-space:pre">	</span>public void outMoney(String out, Double money) {
<span style="white-space:pre">		</span>String sql="update account set money=money-? where name=?";
<span style="white-space:pre">		</span>this.getJdbcTemplate().update(sql, money,out);
<span style="white-space:pre">		</span>
<span style="white-space:pre">	</span>}


}
然后配置文件:
applicationContext.xml :
<?xml version="1.0" encoding="UTF-8"?>
<beans xmlns="http://www.springframework.org/schema/beans"
<span style="white-space:pre">	</span>xmlns:xsi="http://www.w3.org/2001/XMLSchema-instance" xmlns:context="http://www.springframework.org/schema/context"
<span style="white-space:pre">	</span>xmlns:aop="http://www.springframework.org/schema/aop" xmlns:tx="http://www.springframework.org/schema/tx"
<span style="white-space:pre">	</span>xsi:schemaLocation="http://www.springframework.org/schema/beans
 http://www.springframework.org/schema/beans/spring-beans-4.0.xsd
 http://www.springframework.org/schema/context
   http://www.springframework.org/schema/context/spring-context-4.0.xsd
 http://www.springframework.org/schema/aop
 http://www.springframework.org/schema/aop/spring-aop-4.0.xsd
 http://www.springframework.org/schema/tx
 http://www.springframework.org/schema/tx/spring-tx.xsd">
<span style="white-space:pre">	</span><!-- 引入外部的属性文件 -->
<span style="white-space:pre">	</span><context:property-placeholder location="classpath:jdbc.properties"/>
<span style="white-space:pre">	</span><!-- 引入c3p0连接池 -->
<span style="white-space:pre">	</span><bean id="dataSource" class="com.mchange.v2.c3p0.ComboPooledDataSource">
<span style="white-space:pre">		</span><property name="driverClass" value="${jdbc.driverClass}" />
<span style="white-space:pre">		</span><property name="jdbcUrl" value="${jdbc.url}" />
<span style="white-space:pre">		</span><property name="user" value="${jdbc.username}" />
<span style="white-space:pre">		</span><property name="password" value="${jdbc.password}" />
<span style="white-space:pre">	</span></bean>
<span style="white-space:pre">	</span><!-- 引入dao层类 -->
<span style="white-space:pre">	</span><bean id="accountDao" class="com.guoke.spring.demo1.AccountDaoImpl">
<span style="white-space:pre">		</span><property name="dataSource" ref="dataSource" />
<span style="white-space:pre">	</span></bean>
<span style="white-space:pre">	</span><!-- 引入业务层类 -->
<span style="white-space:pre">	</span><bean id="accountService" class="com.guoke.spring.demo1.AccountServiceImpl">
<span style="white-space:pre">		</span><property name="accountDao" ref="accountDao" />
<span style="white-space:pre">	</span></bean>


</beans>
jdbc.driverClass=com.mysql.jdbc.Driver
jdbc.url=jdbc:mysql:///testspring
jdbc.username=root
jdbc.password=root
注意:这里的testspring是自己建的数据库的名字
log4j.properties :
log4j.rootLogger=DEBUG, stdout

log4j.appender.stdout=org.apache.log4j.ConsoleAppender
log4j.appender.stdout.layout=org.apache.log4j.PatternLayout
log4j.logger.org.apache=INFO
最后再创建一个转账的测试类
package com.guoke.demo1;

import javax.annotation.Resource;

import org.junit.Test;
import org.junit.runner.RunWith;
import org.springframework.test.context.ContextConfiguration;
import org.springframework.test.context.junit4.SpringJUnit4ClassRunner;
import com.guoke.AccountService;

@RunWith(SpringJUnit4ClassRunner.class)
@ContextConfiguration("classpath:applicationContext.xml")
public class SpringDemo1 {
	@Resource(name="accountService")
	private AccountService accountService;

	@Test
	public void demo1(){
		accountService.transfer("aaa","bbb", 200d);
	}
}
测试后, 得到的效果:
现在是正常情况。。
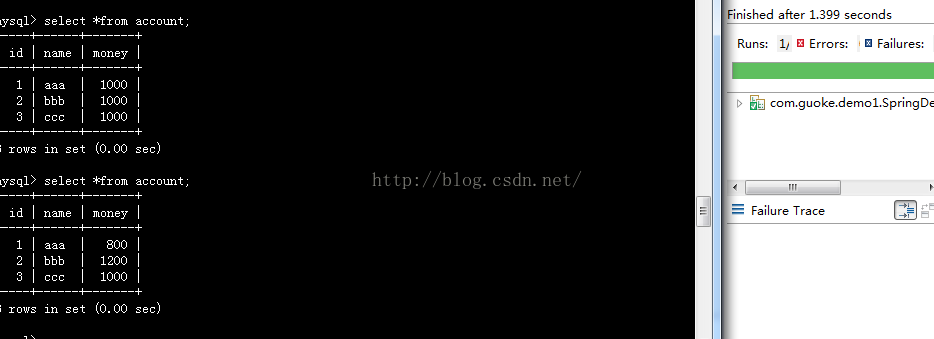
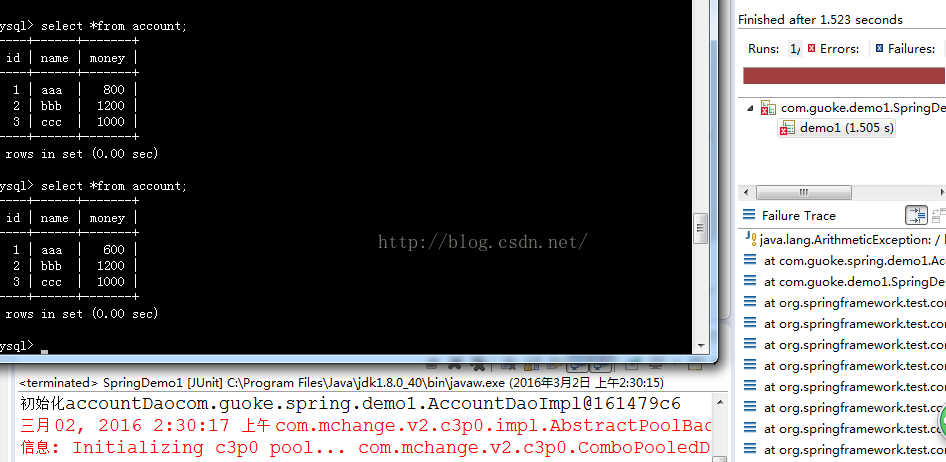
由于这里没有开启事务,如果在转账过程中出错,那么就不一定有上面的效果。
先手动添加一个异常:
	public void transfer(String out, String in, double money) {
		accountDao.outMoney(out, money);
		int i=1/0;//运行时抛出异常
		accountDao.inMoney(in, money);
	}
为了管理事务有编程式事务管理,声明式事务管理。
编程式的事务管理,set注入方式,哪个类需要进行事物控制,就需要在对应的BEAN中注入事物管理模板
1.在AccountService中使用TransactionTemplate (事务管理的模板)
2.TransactionTemplate依赖DateSourceTransaction (这是管理数据库的)
3.DataSourcceTransactionManager依赖DataSource构造
PlatFormTransactionManager是管理事务的接口
编程式事务管理:
<?xml version="1.0" encoding="UTF-8"?>
<beans xmlns="http://www.springframework.org/schema/beans"
<span style="white-space:pre">	</span>xmlns:xsi="http://www.w3.org/2001/XMLSchema-instance" xmlns:context="http://www.springframework.org/schema/context"
<span style="white-space:pre">	</span>xmlns:aop="http://www.springframework.org/schema/aop" xmlns:tx="http://www.springframework.org/schema/tx"
<span style="white-space:pre">	</span>xsi:schemaLocation="http://www.springframework.org/schema/beans
 http://www.springframework.org/schema/beans/spring-beans-4.0.xsd
 http://www.springframework.org/schema/context
   http://www.springframework.org/schema/context/spring-context-4.0.xsd
 http://www.springframework.org/schema/aop
 http://www.springframework.org/schema/aop/spring-aop-4.0.xsd
 http://www.springframework.org/schema/tx
 http://www.springframework.org/schema/tx/spring-tx.xsd">
<span style="white-space:pre">	</span><!-- 引入外部的属性文件 -->
<span style="white-space:pre">	</span><context:property-placeholder location="classpath:jdbc.properties"/>
<span style="white-space:pre">	</span><!-- 引入c3p0连接池 -->
<span style="white-space:pre">	</span><bean id="dataSource" class="com.mchange.v2.c3p0.ComboPooledDataSource">
<span style="white-space:pre">		</span><property name="driverClass" value="${jdbc.driverClass}" />
<span style="white-space:pre">		</span><property name="jdbcUrl" value="${jdbc.url}" />
<span style="white-space:pre">		</span><property name="user" value="${jdbc.username}" />
<span style="white-space:pre">		</span><property name="password" value="${jdbc.password}" />
<span style="white-space:pre">	</span></bean>
<span style="white-space:pre">	</span><!-- 引入dao层类 -->
<span style="white-space:pre">	</span><bean id="accountDao" class="com.guoke.spring.demo1.AccountDaoImpl">
<span style="white-space:pre">		</span><property name="dataSource" ref="dataSource" />
<span style="white-space:pre">	</span></bean>
<span style="white-space:pre">	</span><!--配置事务管理器 -->
<span style="white-space:pre">	</span><bean id="transactionManager" class="org.springframework.jdbc.datasource.DataSourceTransactionManager">
<span style="white-space:pre">		</span><property name="dataSource" ref="dataSource"/>
<span style="white-space:pre">	</span></bean>
<span style="white-space:pre">	</span><!-- 配置事务管理的模板,为简化事务管理的代码而提供的类 -->
<span style="white-space:pre">	</span><bean id="transactionTemplate" class="org.springframework.transaction.support.TransactionTemplate">
<span style="white-space:pre">		</span><property name="transactionManager" ref="transactionManager"/>
<span style="white-space:pre">	</span></bean>
<span style="white-space:pre">	</span><!-- 引入业务层类 -->
<span style="white-space:pre">	</span><bean id="accountService" class="com.guoke.spring.demo1.AccountServiceImpl">
<span style="white-space:pre">		</span><property name="accountDao" ref="accountDao" />
<span style="white-space:pre">		</span><property name="transactionTemplate" ref="transactionTemplate"/>
<span style="white-space:pre">	</span></bean>


</beans>
package com.guoke.spring.demo1;
import org.springframework.transaction.TransactionStatus;
import org.springframework.transaction.support.TransactionCallbackWithoutResult;
import org.springframework.transaction.support.TransactionTemplate;
import com.guoke.AccountDao;
import com.guoke.AccountService;
/**
 *转账业务的实现类
 */
public class AccountServiceImpl implements AccountService {
<span style="white-space:pre">	</span>//注入事务管理的模板
<span style="white-space:pre">	</span>private TransactionTemplate transactionTemplate;
<span style="white-space:pre">	</span>private AccountDao accountDao;
<span style="white-space:pre">	</span>
<span style="white-space:pre">	</span>public void setTransactionTemplate(TransactionTemplate transactionTemplate) {
<span style="white-space:pre">		</span>this.transactionTemplate = transactionTemplate;
<span style="white-space:pre">	</span>}


<span style="white-space:pre">	</span>public void setAccountDao(AccountDao accountDao) {
<span style="white-space:pre">		</span>this.accountDao = accountDao;
<span style="white-space:pre">		</span>System.out.println("初始化accountDao"+accountDao);
<span style="white-space:pre">	</span>}
<span style="white-space:pre">	</span>
<span style="white-space:pre">	</span>@Override
<span style="white-space:pre">	</span>public void transfer(final String out, final String in, final double money) {
<span style="white-space:pre">		</span>transactionTemplate.execute(new TransactionCallbackWithoutResult() {
<span style="white-space:pre">			</span>@Override
<span style="white-space:pre">			</span>protected void doInTransactionWithoutResult(TransactionStatus status) {
<span style="white-space:pre">				</span>accountDao.outMoney(out, money);
<span style="white-space:pre">				</span>//int i=1/0;
<span style="white-space:pre">				</span>accountDao.inMoney(in, money);
<span style="white-space:pre">			</span>}
<span style="white-space:pre">		</span>});
<span style="white-space:pre">	</span>}
}
package com.guoke.spring.demo1;

import javax.annotation.Resource;

import org.junit.Test;
import org.junit.runner.RunWith;
import org.springframework.test.context.ContextConfiguration;
import org.springframework.test.context.junit4.SpringJUnit4ClassRunner;
import com.guoke.AccountService;

@RunWith(SpringJUnit4ClassRunner.class)
@ContextConfiguration("classpath:applicationContext.xml")
public class SpringDemo1 {
	@Resource(name="accountService")
	private AccountService accountService;

	@Test
	public void demo1(){
		accountService.transfer("aaa","bbb", 200d);
	}
}
运行后, 如果有异常, 失败, 则一起失败。,不会出现钱丢失的现象。
声明式事务管理有三种,这里只写一种。

package com.guoke.spring.demo1;

import javax.annotation.Resource;

import org.junit.Test;
import org.junit.runner.RunWith;
import org.springframework.test.context.ContextConfiguration;
import org.springframework.test.context.junit4.SpringJUnit4ClassRunner;
import com.guoke.AccountService;

@RunWith(SpringJUnit4ClassRunner.class)
@ContextConfiguration("classpath:applicationContext2.xml")
public class SpringDemo1 {
	@Resource(name="accountService")
	private AccountService accountService;

	@Test
	public void demo1(){
		accountService.transfer("aaa","bbb", 200d);
	}
}
package com.guoke.spring.demo2;
import org.springframework.transaction.TransactionStatus;
import org.springframework.transaction.support.TransactionCallbackWithoutResult;
import org.springframework.transaction.support.TransactionTemplate;
import com.guoke.AccountDao;
import com.guoke.AccountService;
/**
 *转账业务的实现类
 */
public class AccountServiceImpl implements AccountService {
	private AccountDao accountDao;
	public void setAccountDao(AccountDao accountDao) {
		this.accountDao = accountDao;
		System.out.println("初始化accountDao"+accountDao);
	}
	@Override
	public void transfer(String out, String in, double money) {
				accountDao.outMoney(out, money);
				accountDao.inMoney(in, money);
	}
}
package com.guoke.spring.demo2;

import javax.annotation.Resource;

import org.junit.Test;
import org.junit.runner.RunWith;
import org.springframework.test.context.ContextConfiguration;
import org.springframework.test.context.junit4.SpringJUnit4ClassRunner;
import com.guoke.AccountService;

@RunWith(SpringJUnit4ClassRunner.class)
@ContextConfiguration("classpath:applicationContext2.xml")
public class SpringDemo2 {
	@Resource(name="accountServiceProxy")
	private AccountService accountService;

	@Test
	public void demo2(){
		accountService.transfer("aaa","bbb", 200d);
	}
}
效果跟刚才一样的。
=============================================
如果报错, 异常信息给的很全, 应该仔细读。
另外: 之前applicationContext.xml老是 property-placeholder 报错:
The matching wildcard is strict, but no declaration can be found for element 'context:property-placeholder'
写好:
http://www.springframework.org/schema/tx
http://www.springframework.org/schema/tx/spring-tx.xsd
以及导包,还是出错。
后来尝试把xsd改成4.0后,property-placeholder不报错了。