之前有写一篇文章:http://www.cnblogs.com/tfanalysis/p/3625430.html理清如何make menuconfig的问题,现在今天在无意间多注意了一下buildroot这个工具,发现编译openwrt与之有极大的联系,或许openwrt就是建立在这个工具之上的。
现特意将这个buildroot的相关文档上传上来。
仔细阅读这个文档,许多之前不明白的问题(其实之前也就是没有搞清楚来龙去脉)现在终于有些眉目了。
2.3节
当用户执行了make menuconfig(或者make xconfig,make gconfig)设置并保存之后:
Once everything is configured, the configuration tool generates a .config file that contains the description of your configura-
tion. It will be used by the Makefiles to do what’s needed.
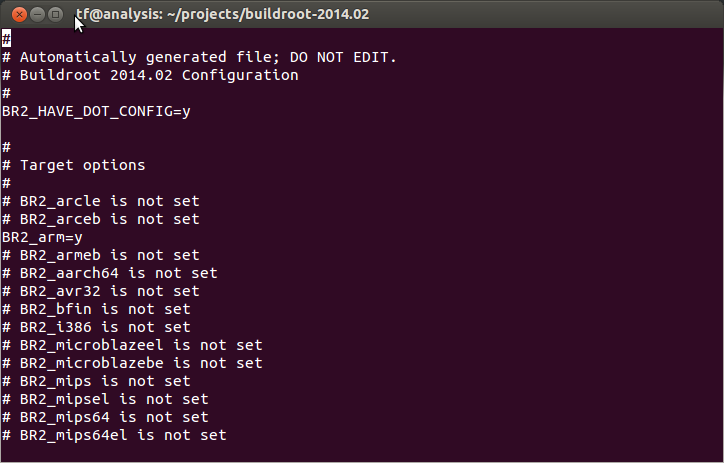
下面就是刚刚生成的.config文件!
接下来我们就是执行make命令了,make在背地里做了什么,这个文档也把它的罪行昭示天下了:
Let’s go:
$ make
You should never use make -jN with Buildroot: it does not support top-level parallel make. Instead, use the BR2_JLEVEL option to tell Buildroot to run each package compilation with make -jN.
The make command will generally perform the following steps:
• download source files (as required);
• configure, build and install the cross-compiling toolchain using the appropriate toolchain backend, or simply import an external toolchain;
• build/install selected target packages;
• build a kernel image, if selected;
• build a bootloader image, if selected;
• create a root filesystem in selected formats.
Buildroo的编译输出存放在output/.下面,里头包含有的文件夹及其用处:
- images/ 存放了kernel image, bootloader and root filesystem等images
- build/ 存放除交叉编译器之外的所有组件,每个组件自己有一个文件夹
- staging/ 包含有一套与根文件系统类似的层级文件目录,其中包括有交叉编译器和为目标系统所选的各种包文件,但是这个根目录不能直接用于目标板上:这些文件包含有大量调试开发文件,二进制文件和库,对于目标系统来说就太大了
- target/ 包含几乎与目标根文件系统一样的目录,尚缺少的是设备文件/dev(Buildroot不是运行在也不想运行在root权限下),因而这个目录也不能作为目标系统的根文件系统,你应该使用images/下的其中一个作为目标系统的根文件系统
- host/ 包含host所需要的各种安装包(为运行buildroot所需要的各组件,及交叉编译器)
- toolchain/ 里面存放的是适用不同平台的各个交叉编译器的编译目录
3.3 用户定制
3.3.1 定制生成的目标文件系统
除了使用make *config的方式之后,用户还可以通过以下几种方法来配置目标板的文件系统
- 直接修改目标文件系统然后再编译镜像。这些目标文件系统就存在于output/target/.中,你可以直接修改这些文件,然后执行make命令编译——就会重新编译目标文件系统镜像。利用这种方法你可以任何修改你的目标文件系统,但是需要注意的是,如果你重新编译了交叉工具链和其它工具,那么对out/target/的修改就会被覆盖掉。因而这个解决方案仅适用于快速测试,一旦你make clean了你得重新来过一遍对output/target/的修改。一旦你已经确认你的对目标文件系统的修改是正确了的话,那么你需要在你make clean了之后这样的修改一直保持更新(手动),不过通过下面的方法可以自动地保持住这些修改;
- 新建一个临时文件系统:新建一个目录树,当你的目标文件系统编译完成之后直接复制并覆盖之。只需要把BR2_ROOTFS_OVERLAY设置为该目录树的根目录就可以了。.git, .svn, .hg directories, .empty files and files ending with ~ are excluded. Among these first 3 methods, this one should be preferred
- 在buildroot配置项中,你可以指定一个或多个post-build scripts。在Buildroot编译了所有用户所选的包之后,在组合为根文件系统之前,这些scripts会按用户列举的顺序依次执行。用户可通过设置BR2_ROOTFS_POST_BUILD_SCRIPT的值指定这些脚本所在的具体位置及名字,这个字段可以在System configuration菜单中找到。Buildroot会将目标根文件系统的目录作为脚本的第1参数传递过去,因而这些脚本就可以增删修改该文件系统了。如果你发现某个包会生成你不需要的文件,那么,虽然这些脚本是可以删除根文件系统中的文件的(清理工作),但是你应该去修改这些包上的错误,而不是使用scripts来做这样的善后。另外,在这些scipts中你可以使用下面这些变量:
- BR2_CONFIG: the path to the Buildroot .config file
- HOST_DIR, STAGING_DIR, TARGET_DIR: see Section 7.2.4.2
- BUILD_DIR: the directory where packages are extracted and built
- BINARIES_DIR: the place where all binary files (aka images) are stored
- BASE_DIR: the base output directory
- 新建自己的目标skeleton(骨架):你可以参考system/skeleton来做一个适用于自己项目的目录,设置好BR2_ROOTFS_SKELETON_CUSTOM 和BR2_ROOTFS_SKELETON_CUSTOM_PATH(这些字段可以在System configuration菜单中找到)之后就可以了。编译过程中,在所有包安装之后这些骨架内容就会直接拷贝到output/target中了。由于这会造成系统中带有两份skeleton内容,不容易将来对Buildroot的维护与升级,所以这是不推荐的做法。最好的方法还是使用post-build scirpts这个。
Note also that you can use the post-image scripts if you want to perform some specific actions after all filesystem images have been created (for example to automatically extract your root filesystem tarball in a location exported by your NFS server, or to create a special firmware image that bundles your root filesystem and kernel image, or any other custom action), you can specify a space-separated list of scripts in the BR2_ROOTFS_POST_IMAGE_SCRIPT configuration option. This option can be found in the System configuration menu as well.
Each of those scripts will be called with the path to the images output directory as first argument, and will be executed with the main Buildroot source directory as the current directory. Those scripts will be executed as the user that executes Buildroot, which should normally not be the root user. Therefore, any action requiring root permissions in one of these post-image scripts will require special handling (usage of fakeroot or sudo), which is left to the script developer.
Just like for the post-build scripts mentioned above, you also have access to the following environment variables from your post-image scripts: BR2_CONFIG, BUILD_DIR, HOST_DIR, STAGING_DIR, TARGET_DIR, BINARIES_DIR and BASE_DIR.
Additionally, each of the BR2_ROOTFS_POST_BUILD_SCRIPT and BR2_ROOTFS_POST_IMAGE_SCRIPT scripts will be passed the arguments specified in BR2_ROOTFS_POST_SCRIPT_ARGS (if that is not empty). All the scripts will be passed the exact same set of arguments, it is not possible to pass different sets of arguments to each script.
3.3.2 定制busybox
Busybox is very configurable, and you may want to customize it. You can follow these simple steps to do so. This method isn’t optimal, but it’s simple, and it works:
• Do an initial compilation of Buildroot, with busybox, without trying to customize it.
• Invoke make busybox-menuconfig. The nice configuration tool appears, and you can customize everything.
• Run the compilation of Buildroot again.
Otherwise, you can simply change the package/busybox/busybox-<version>.config file, if you know the options you want to change, without using the configuration tool.
If you want to use an existing config file for busybox, then see Section 3.5.5.
3.3.3 定制uClibc
Just like BusyBox Section 3.3.2, uClibc offers a lot of configuration options. They allow you to select various functionalities depending on your needs and limitations.
The easiest way to modify the configuration of uClibc is to follow these steps:
• Do an initial compilation of Buildroot without trying to customize uClibc.
• Invoke make uclibc-menuconfig. The nice configuration assistant, similar to the one used in the Linux kernel or Buildroot, appears. Make your configuration changes as appropriate.
• Copy the $(O)/build/uClibc-VERSION/.config file to a different place (e.g. board/MANUFACTURER/BOARDNAME/uClibc.config) and adjust the uClibc configuration file option BR2_UCLIBC_CONFIG to refer to this configuration instead of the default one.
• Run the compilation of Buildroot again.
Otherwise, you can simply change package/uclibc/uClibc-VERSION.config, without running the configuration assistant.
If you want to use an existing config file for uClibc, then see Section 3.5.5.
3.3.4 定制Linux内核
The Linux kernel configuration can be customized just like BusyBox Section 3.3.2 and uClibc Section 3.3.3 using make linux-menuconfig. Make sure you have enabled the kernel build in make menuconfig first. Once done, run make to (re)build everything.
If you want to use an existing config file for Linux, then see Section 3.5.5.
3.3.5 定制toolchain
3.3.5.2 Using the internal Buildroot toolchain backend
The internal Buildroot toolchain backend allows to generate toolchains based on uClibc, glibc and eglibc. Generation of (e)glibc-based toolchains is still experimental in Buildroot.
It allows to tune major settings, such as:
• Linux headers version;
• C library configuration (only available for uClibc, see uClibc Section 3.3.3);
• Binutils, GCC, Gdb and toolchain options.
These settings are available after selecting the Buildroot toolchain type in the menu Toolchain.
3.4 保存配置
3.4.1 保存配置基础
3.4.1.1 Buildroot配置
Buildroot提供make savedefconfig这个命令来保存自身的配置信息(仅会存放配置的信息,其余#形状的选项会直接去除)。结果会在根目录下生成一个叫做defconfig的文件,通过修改BR2_DEFCONFIG的值Buildroot会把defconfig文件写到该BR2_DEFCONFIG值指定的目录下去,抑或可以在执行make savedefconfig BR2_DEFCONFIG=<path-to-defconfig>指定存放目录。在menuconfig菜单的Build Options中可以设置。一般来说这个目录是configs/<boardname>_defconfig,重新编译时只要输入make <boardname>_defconfig就可以了。当然,如果你使用了其它BR2_DEFCONFIG目录的话,重新编译时应该使用make defconfig BR2_DEFCONFIG=<path-to-defconfig-file>
3.4.1.2 其它包配置
与Buildroot一样,busybox/linux kernel/barebox/uClibc的配置信息也应该及时被保存起来。而对于这些配置文件的读入,buildroot都有在相应的某个地方可以设置这些文件的路径。比如BR2_LINUX_KERNEL_CUSTOM_CONFIG_FILE。To save their configuration, set those configuration options to a path outside your output directory, e.g. board/<manufacturer>/<boardname>/linux.config. Then, copy the configuration files to that path.
请确保在修改BR2_LINUX_KERNEL_CUSTOM_CONFIG_FILE等配置前你已经有对应的配置文件了,否则buildroot去访问该文件又不存在时便出错。
You can create the configuration file by running make linux-menuconfig etc.
Buildroot provides a few helper targets to make the saving of configuration files easier.
- make linux-update-defconfig saves the linux configuration to the path specified by BR2_LINUX_KERNEL_CUSTOM_CONFIG_FILE. It simplifies the config file by removing default values. However, this only works with kernels starting from 2.6.33. For earlier kernels, use make linux-update-config.
- make busybox-update-config saves the busybox configuration to the path specified by BR2_PACKAGE_BUSYBOX_CONFIG.
- make uclibc-update-config saves the uClibc configuration to the path specified by BR2_UCLIBC_CONFIG.
- make barebox-update-defconfig saves the barebox configuration to the path specified by BR2_TARGET_BAREBOX_CUSTOM_CONFIG_FILE.
- For at91bootstrap3, no helper exists so you have to copy the config file manually to BR2_TARGET_AT91BOOTSTRAP3_CUSTOM_CONFIG_FILE.