第一节:SpringBoot 简介
主要是简化开发;
1. 创建独立的Spring应用程序
2. 嵌入的Tomcat,无需部署WAR文件
3. 简化Maven配置
4. 自动配置Spring
5. 提供生产就绪型功能,如指标,健康检查和外部配置
6. 绝对没有代码生成和对XML没有要求配置
第二节:STS 插件安装
注意:StS插件运行必须是JDK1.8 否则会出现安装失败的情况;
Eclipse 菜单栏 Help -> Eclipse Marketplace...Popular,下载sts(spring tool suite),安装完之后重启生效;
安装参考:http://blog.java1234.com/blog/articles/330.html
第三节:SpringBoot HelloWorld 实现
插件安装完毕,然后我们来新建一个SpringBoot项目
新建 选择 Spring->Spring Starter Project
到了 配置依赖的界面,我们这里暂时不需要用到其他的,仅选择一个Web依赖即可;
生成的项目结构:

查看自动创建的文件:
pom.xml:
<?xml version="1.0" encoding="UTF-8"?>
<project xmlns="http://maven.apache.org/POM/4.0.0" xmlns:xsi="http://www.w3.org/2001/XMLSchema-instance"
    xsi:schemaLocation="http://maven.apache.org/POM/4.0.0 http://maven.apache.org/xsd/maven-4.0.0.xsd">
    <modelVersion>4.0.0</modelVersion>

    <groupId>com.cy</groupId>
    <artifactId>HelloWorld</artifactId>
    <version>0.0.1-SNAPSHOT</version>
    <packaging>war</packaging>

    <name>HelloWorld</name>
    <description>Demo project for Spring Boot</description>

    <parent>
        <groupId>org.springframework.boot</groupId>
        <artifactId>spring-boot-starter-parent</artifactId>
        <version>2.0.0.RELEASE</version>
        <relativePath/> <!-- lookup parent from repository -->
    </parent>

    <properties>
        <project.build.sourceEncoding>UTF-8</project.build.sourceEncoding>
        <project.reporting.outputEncoding>UTF-8</project.reporting.outputEncoding>
        <java.version>1.8</java.version>
    </properties>

    <dependencies>
        <dependency>
            <groupId>org.springframework.boot</groupId>
            <artifactId>spring-boot-starter-web</artifactId>
        </dependency>

        <dependency>
            <groupId>org.springframework.boot</groupId>
            <artifactId>spring-boot-starter-tomcat</artifactId>
            <scope>provided</scope>
        </dependency>
        <dependency>
            <groupId>org.springframework.boot</groupId>
            <artifactId>spring-boot-starter-test</artifactId>
            <scope>test</scope>
        </dependency>
    </dependencies>

    <build>
        <plugins>
            <plugin>
                <groupId>org.springframework.boot</groupId>
                <artifactId>spring-boot-maven-plugin</artifactId>
            </plugin>
        </plugins>
    </build>


</project>
com.cy.HelloWorldApplication.java:--启动类;
package com.cy;

import org.springframework.boot.SpringApplication;
import org.springframework.boot.autoconfigure.SpringBootApplication;

@SpringBootApplication
public class HelloWorldApplication {

    public static void main(String[] args) {
        SpringApplication.run(HelloWorldApplication.class, args);
    }
}
HelloWorldApplication是启动类,我们右击Run As 选择 Spring Boot app
这里我们不需要Tomcat 因为SpringBoot把Tomcat集成了,默认端口8080
浏览器输入:http://localhost:8080/
出现
Whitelabel Error Page
说明项目启动成功;
写一个helloworld请求:
com.cy.controller.HelloWorldController.java:
package com.cy.controller;

import org.springframework.web.bind.annotation.RequestMapping;
import org.springframework.web.bind.annotation.RestController;

@RestController
public class HelloWorldController {

    @RequestMapping("/helloWorld")
    public String say(){
        return "spring boot你好";
    }
}
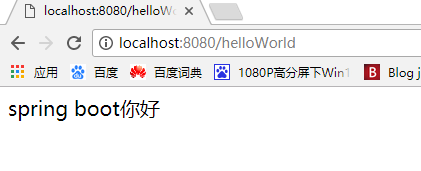
重启项目,浏览器输入http://localhost:8080/helloWorld
说明:
1.@RestController相当于之前的@Controller和@ResponseBody;
2.这里相当于返回一个json,类似于ajax请求,返回的是一个字符串;
-------