需求:在修改商品页面,添加上传商品图片功能。
SpringMVC中对多部件类型解析:
1)springmvc中配置:


1 <!-- 文件上传 -->
2     <bean id="multipartResolver" class="org.springframework.web.multipart.commons.CommonsMultipartResolver">
3         <!-- 设置上传文件的最大尺寸为5MB -->
4         <property name="maxUploadSize">
5             <value>5242880</value>
6         </property>
7     </bean>
需要加入的jar包:(上边的解析器就是使用下面的jar包进行图片上传)
commons-fileupload-1.2.2.jar;
commons-io-2.4.jar
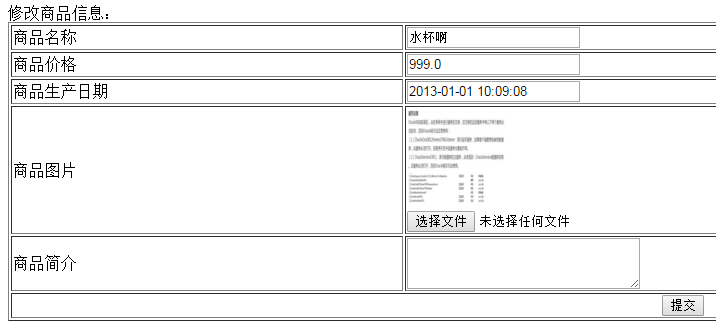
2)editItems.jsp中form的enctype要设置为“multipart/form-data”;
 1 <%@ page language="java" contentType="text/html; charset=UTF-8"
 2     pageEncoding="UTF-8"%>
 3 <%@ taglib uri="http://java.sun.com/jsp/jstl/core" prefix="c" %>
 4 <%@ taglib uri="http://java.sun.com/jsp/jstl/fmt"  prefix="fmt"%>
 5 <!DOCTYPE html PUBLIC "-//W3C//DTD HTML 4.01 Transitional//EN" "http://www.w3.org/TR/html4/loose.dtd">
 6 <html>
 7 <head>
 8 <meta http-equiv="Content-Type" content="text/html; charset=UTF-8">
 9 <title>修改商品信息</title>
10
11 </head>
12 <body>
13
14 <!-- 显示错误信息 -->
15 <c:if test="${allErrors!=null}">
16     错误信息:<br/>
17     <c:forEach items="${allErrors}" var="error">
18         ${error.defaultMessage}<br/>
19     </c:forEach>
20 </c:if>
21
22 <form id="itemForm" action="${pageContext.request.contextPath }/items/editItemsSubmit.action" method="post" enctype="multipart/form-data">
23 <input type="hidden" name="id" value="${items.id }"/>
24 修改商品信息:
25 <table width="100%" border=1>
26 <tr>
27     <td>商品名称</td>
28     <td><input type="text" name="name" value="${items.name }"/></td>
29 </tr>
30 <tr>
31     <td>商品价格</td>
32     <td><input type="text" name="price" value="${items.price }"/></td>
33 </tr>
34 <tr>
35     <td>商品生产日期</td>
36     <td><input type="text" name="createtime" value="<fmt:formatDate value="${items.createtime}" pattern="yyyy-MM-dd HH:mm:ss"/>"/></td>
37 </tr>
38 <tr>
39     <td>商品图片</td>
40     <td>
41         <c:if test="${items.pic !=null}">
42             <img src="/pic/${items.pic}" width=100 height=100/>
43             <br/>
44         </c:if>
45         <input type="file"  name="items_pic"/>
46     </td>
47 </tr>
48 <tr>
49     <td>商品简介</td>
50     <td>
51     <textarea rows="3" cols="30" name="detail">${items.detail }</textarea>
52     </td>
53 </tr>
54 <tr>
55 <td colspan="2" align="center"><input type="submit" value="提交"/>
56 </td>
57 </tr>
58 </table>
59 </form>
60 </body>
61 </html>
3)controller中代码:
这里是设置tomcat的虚拟目录的:在tomcat中图片访问路径是/pic,真实的物理地址是D:uploadimages;

对应tomcat conf/server.xml中的配置是:
<Context docBase="D:uploadimages" path="/pic" reloadable="false"/>
Contorller处理上传文件,并将文件名设置到数据库代码:
 1 //商品信息修改提交
 2     @RequestMapping("/editItemsSubmit")
 3     public String editItemsSubmit(Model model,
 4                                   HttpServletRequest request,
 5                                   Integer id,
 6                                   @Validated(value={ValidGroup1.class}) ItemsCustom itemsCustom,BindingResult bindingResult,
 7                                   MultipartFile items_pic)
 8                                  throws Exception {
 9         if(bindingResult.hasErrors()){
10              List<ObjectError> allErrors = bindingResult.getAllErrors();
11              for(ObjectError objectError : allErrors){
12                  System.out.println(objectError.getDefaultMessage());
13              }
14
15             // 将错误信息传到页面
16             model.addAttribute("allErrors", allErrors);
17
18             //可以直接使用model将提交pojo回显到页面
19             model.addAttribute("items", itemsCustom);
20
21             return "items/editItems";
22         }
23
24         String originalFilename = items_pic.getOriginalFilename();
25
26         if(items_pic!=null && originalFilename!=null && originalFilename.length()>0){
27             String pic_path = "D:\upload\images\";
28             String newFileName = UUID.randomUUID() + originalFilename.substring(originalFilename.lastIndexOf("."));
29
30             //新图片
31             File newFile = new File(pic_path + newFileName);
32
33             items_pic.transferTo(newFile);
34
35             itemsCustom.setPic(newFileName);
36         }
37
38         itemsService.updateItems(id, itemsCustom);
39         return "success";
40     }
上传图片成功:
4)修改代码将图片上传到项目路径中WebRoot/resources/images:
新建存放图片的文件夹:
我这边先是在web-inf下面放的图片;工程是发布在org.eclipse.wst.server.core mp0wtpwebapps下面;做了好几次实验,页面上就是不能展示修改后的图片;
后来把工程发布在tomcat的安装目录、资源文件放在项目根路径/WebRoot下面resources的;
    //商品信息修改提交
    //MultipartFile 接收商品图片
    @RequestMapping("/editItemsSubmit")
    public String editItemsSubmit(Model model,
                                  HttpServletRequest request,
                                  Integer id,
                                  @Validated(value={ValidGroup1.class}) ItemsCustom itemsCustom,BindingResult bindingResult,
                                  MultipartFile items_pic)
                                 throws Exception {
        if(bindingResult.hasErrors()){
             List<ObjectError> allErrors = bindingResult.getAllErrors();
             for(ObjectError objectError : allErrors){
                 System.out.println(objectError.getDefaultMessage());
             }

            // 将错误信息传到页面
            model.addAttribute("allErrors", allErrors);

            //可以直接使用model将提交pojo回显到页面
            model.addAttribute("items", itemsCustom);

            return "items/editItems";
        }

        //文件原始名称
        String originalFilename = items_pic.getOriginalFilename();

        if(items_pic!=null && originalFilename!=null && originalFilename.length()>0){

            /*
             * 1  这里上传到tomcat部署环境下面的WebRoot/resources/images/下面了
             * 因为真正项目部署后运行环境,这里就想传到这个下面;
             */
            String basePath = request.getServletContext().getRealPath("resources/images/");
            System.out.println("文件保存路径--------------------------->>" + basePath);
            //String basePath = request.getServletContext().getRealPath("WEB-INF/resources/images/");
            //E:jdbcWorkspace.metadata.pluginsorg.eclipse.wst.server.core	mp0wtpwebappsspringMVCWEB-INF
esourcesimages

            /* 2   1和2的效果是一摸一样;
            System.out.println("类名:-------------------------------" + this.getClass().getName());
            //ItemsController
            String basePath = this.getClass().getClassLoader().getResource("../../WEB-INF/resources/images/").getPath();
            System.out.println("文件保存路径--------------------------" + basePath);
            //E:jdbcWorkspace.metadata.pluginsorg.eclipse.wst.server.core	mp0wtpwebappsspringMVCWEB-INF
esourcesimages
            */

            //新的图片名称
            String newFileName = UUID.randomUUID() + originalFilename.substring(originalFilename.lastIndexOf("."));

            //新图片
            File newFile = new File(basePath + newFileName);

            //将内存中的数据写入磁盘
            items_pic.transferTo(newFile);

            itemsCustom.setPic(newFileName);
        }

        itemsService.updateItems(id, itemsCustom);
        return "success";
    }
springmvc.xml中配置了静态资源访问:
看到说这个的前提是配置了注解驱动:mvc:annotation-driven
1  <!-- 对静态资源文件的访问
2          mapping:映射
3          两个*,它表示映射resources/下所有的URL,包括子路径(即接多个/)
4          location:本地资源路径,默认是webapp根目录下的路径。
5          WEB-INF是Java的WEB应用的安全目录。所谓安全就是客户端无法访问,只有服务端可以访问的目录。
6      -->
7      <mvc:resources mapping="/resources/**" location="/resources/" />
editItems.jsp:
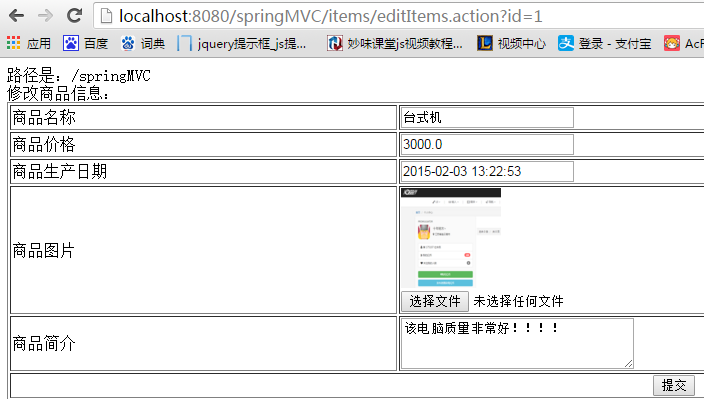
<tr>
    <td>商品图片</td>
    <td>
        <c:if test="${items.pic !=null}">
            <img src="${pageContext.request.contextPath }/resources/images/${items.pic}" width=100 height=100/>
            <br/>
        </c:if>
        <input type="file"  name="items_pic"/>
    </td>
</tr>
页面上再上传图片,能够看到:
图片保存在tomcat/webapps/springMVC/resources/images下面:
