前言
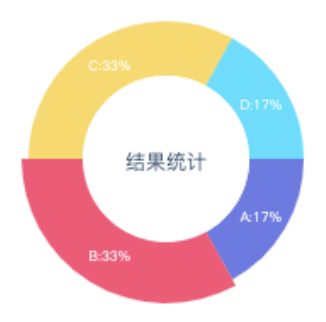
项目中需要用到一个环形图来进行数据的展示,效果如图,参考了第三方开源的小程序图表库,大都几十上百、甚者两百多k!考虑到体积的因素,且就用到一种图表,所以打算自己来写一个。看了微信小程序 canvas 相关的 API,发现旧版本和新版本不兼容,其中遇到一些坑,记录下。项目使用的是 taro 框架,所以写法和小程序原生写法有些出入,但其原理是一样的。
创建画布
首先,需要创建一个画布。由于小程序 canvas 接口版本缘故,旧版本接口停止维护,新版本接口改成 Canvas 2D 跟 HTML 的 canvas 接口看齐。 为了在电脑和手机上显示正常,需要做一些兼容处理。
<canvas style=" 200px; height: 200px;"
        id="canvas"
        canvas-id="canvas"
        :type="is2D?'2d':''"
        @touchstart="canvasTouch"></canvas>
旧版本 API 是通过 createCanvasContext 来获取 canvas 绘图上下文, 并且 canvas 标签需要设置 canvas-id 属性,而新版本 API 是通过 createSelectorQuery 获取 canvas 实例,且需要设置 id 属性。
initCanvas() {
  if (this.is2D) {
    nextTick(() => {
      createSelectorQuery()
        .select('#canvas')
        .fields({ node: true, size: true })
        .exec(res => {
          const canvas = res[0].node
          const ctx = canvas.getContext('2d')
          const dpr = getSystemInfoSync().pixelRatio
          // 根据分辨率设置画布宽高
          canvas.width = res[0].width * dpr
          canvas.height = res[0].height * dpr
          ctx.scale(dpr, dpr)

          this.canvas = canvas
          this.ctx = ctx

          if (ctx) {
            // to draw
          }
        })
    })
  } else {
    this.ctx = createCanvasContext('canvas')
    if (this.ctx) {
      // to draw
    }
  }
}
画弧线
拿到 canvas 实例后,我们就可以开始画弧线了。从图中我们可以看出,环形图其实就是由一段段弧线组成。微信小程序提供了画弧线的方法 CanvasContext.arc ,具体参数可以查看官方文档。
/**
 * 画弧线
 * sAngle:开始弧度
 * eAngle:结束弧度
 * border:弧线宽度
 * color :弧线的颜色
 */
drawArc(sAngle, eAngle, border, color) {
    // r:半径
    // centerPoint:圆心坐标
    // ctx:canvas 实例
    const { r, centerPoint, ctx, is2D } = this
    const { x, y } = centerPoint
    // 开始创建一个绘画路径
    ctx.beginPath()
    // 设置弧线宽度
    ctx.lineWidth = border
    // 设置弧线的颜色
    ctx.strokeStyle = color
    // 创建一条弧线
    ctx.arc(x, y, r, sAngle, eAngle, false)
    // 画出弧线的边框
    ctx.stroke()
    // 关闭绘画路径
    ctx.closePath()
    // 将之前在绘图上下文中的描述(路径、变形、样式)画到 canvas 中
    // canvas 2d 下不需要调用 draw 方法
    // 如果不做判断会报错
    if(!is2D) ctx.draw()
}
通过以上方法我们可以大概知道一段弧线是怎么画出来了,如果需要画多段弧,则修改弧线的弧度等参数即可。下面我们假设每段弧线的百分比为 20、30、15、45 ,计算出每段弧的开始弧度和结束弧度就能画出一个完整的环形图。
drawArcs() {
  const { ctx } = this
  // 各段弧百分比
  const ratios = [20, 30, 15, 45]
  // 各段弧颜色
  const colors = ['#6d77e6', '#fe4e75', '#fcd95c', '#3bdeff']
  // 每段弧开始弧度
  let sAngle = 0

  ratios.forEach((item, index) => {
    // 各段线的弧度
    // 2*Math.PI*弧线百分比/100
    const angle = (item * Math.PI) / 50
    // 结束弧度,需要加上上一段弧线的结束弧度
    const eAngle = sAngle + angle

    this.drawArc(sAngle, eAngle, border, colors[index])

    sAngle = eAngle
  })
}
画提示文字
drawText() {
  const { is2D, ctx } = this
  const size = 8
  const text = '要绘制的文本'
  const x = 60
  const y = 0

  // 兼容文本绘制的字体和字体颜色设置
  if (is2D) {
    ctx.font = size
    ctx.fillStyle = 'white'
  } else {
    ctx.setFontSize(size)
    ctx.setFillStyle('white')
  }

  ctx.fillText(text, x, y)
}
文字的绘画不难,难点在于获取绘画文字的坐标位置。根据设计稿可以看出,提示文字位于每段弧线的“中心”位置,因此,我们需要在绘制弧线时获取每段弧线的“中心”位置。
drawArcs(ratios) {
  // 省略...

  // 半径
  const r = 60
  const { x: _x, y: _y } = centerPoint
  const _textPoints = []

  ratios.forEach((item, index) => {
    // 省略...

    // 要绘制文本所在点的弧度
    // 需要注意的是:
    // 要加上一段弧线的结束弧度
    // 不然文字绘画不能居于弧线“中心”位置
    const _angle = sAngle + angle / 2
    // 求圆上某点
    const x = _x + r * Math.cos(_angle)
    const y = _y + r * Math.sin(_angle)

    _textPoints.push({ x, y, value: item })

    // 省略...
  })
  // 获取各弧线“中心”位置坐标
  this.textPoints = _textPoints
},
drawText() {
  const { is2D, ctx, textPoints } = this
  const size = 8

  // 兼容文本绘制的字体和字体颜色设置
  if (is2D) {
    ctx.font = size
    ctx.fillStyle = 'white'
  } else {
    ctx.setFontSize(size)
    ctx.setFillStyle('white')
  }

  textPoints.forEach((item, index) => {
    if (item.value > 0) {
      // 获取文本宽度
      const { width } = ctx.measureText(`${item.value}%`)
      const x = item.x - width / 2
      const y = item.y + tipsSize / 2
      const text = `${item.value}%`

      ctx.fillText(text, x, y)
    }
  })
}
画圆心区域
圆心区域主要是画一个圆和一行文本,没啥好说的,参考上面代码做一下修改即可。
添加点击事件
要知道点了哪个区域的弧,小程序 canvas 提供了点击画布的事件,我们可以通过计算点击的位置、距离圆心的角度来判断是否位于弧线内。
canvasTouch(e) {
  const { centerPoint, r, angles, border, activeIndex } = this
  const { x, y } = e.changedTouches[0]
  const { x: _x, y: _y } = centerPoint
  // 两点距离
  const len = Math.sqrt(Math.pow(_y - y, 2) + Math.pow(_x - x, 2))
  const borderHalf = border / 2
  // 是否在弧线内
  const isInRing = len > r - borderHalf && len < r + borderHalf
  let current = activeIndex

  if (isInRing) {
    // 获取圆心角
    let angle = Math.atan2(y - _y, x - _x)
    // 判断弧度是否为负,为负时需要转正
    angle = angle > 0 ? angle : 2 * Math.PI + angle

    angles.some((item, index) => {
      // 是否在弧度内
      if (item > angle) {
        current = index
        return true
      }
    })
  } else {
    current = -1
  }
  // 设置当前激活区域
  this.activeIndex = current
}
增加动画
动画,无非是特定时间内某个状态过渡到另外一个状态。假设我们要动画持续执行 600 毫秒,则可以计算每次执行绘画的开始和结束的时间差,并通过时间差总和来判断是否执行了足够长的时间进而终止动画。
requestAnimationFrame(callback, lastTime = 0) {
  const { canvas, is2D } = this
  const intervel = 16
  const start = new Date().getTime()

  if (is2D && canvas && canvas.requestAnimationFrame) {
    this.timer = canvas.requestAnimationFrame(() => {
      const now = new Date().getTime()
      lastTime += now - start
      callback(lastTime)
    })
  } else {
    this.timer = setTimeout(() => {
      const now = new Date().getTime()
      lastTime += now - start
      callback(lastTime)
    }, intervel)
  }
},
cancelAnimationFrame() {
  const { is2D, canvas, timer, ctx } = this
  if (is2D && canvas && canvas.cancelAnimationFrame) {
    canvas.cancelAnimationFrame(timer)
  } else {
    clearTimeout(timer)
  }
},
init() {
  const { is2D, ctx, value, duration, timer } = this
  let ratios = [20, 30, 15, 45]

  if (ctx) {
    if (timer) this.cancelAnimationFrame()

    const callback = lastTime => {
      // 清除画布内容
      ctx.clearRect(0, 0, 200, 200)

      lastTime = lastTime >= duration ? duration : lastTime

      if (lastTime === duration) {
        // 终止动画
        this.cancelAnimationFrame()
        return
      }
      // 当前时间各弧线的百分比值
      ratios = ratios.map(i => lastTime*i/duration)

      this.drawArcs(ratios)

      if (!is2D) ctx.draw()

      this.requestAnimationFrame(callback, lastTime)
    }

    this.requestAnimationFrame(callback)
  } else {
    this.initCanvas()
  }
}
小程序 canvas 旧版本接口没有 requestAnimationFrame 和 cancelAnimationFrame 方法,不过我们可以用 setTimeout 和 clearTimeout 来做兼容处理。
使用缓动函数
上面实现了动画效果,不过动得还不够“自然”,缺乏一些“节奏”感,生活中一些会动的东西基本都是有一个逐渐加速或逐渐减速的过程,不然的话会显得很生硬。有了这个需求,我们要怎么实现呢?在 CSS3 的 animation 中会有 ease、ease-in、ease-in-eout 等预设函数可用,而在 JavaScript 里我们可以使用第三方写好的缓动函数库,为了减少体积,我们就自己写吧。
/**
 * 二次方缓动函数
 * currentTime:当前动画执行的时长
 * startValue:开始值
 * changeValue:变化量,即动画执行到最后的值
 * duration:动画持续执行的时间
 */
easeInQuadratic(currentTime, startValue, changeValue, duration) {
  currentTime /= duration
  return changeValue * currentTime * currentTime + startValue
}
上面的缓动方法是基于数学的指数函数(f(x)=x^2)来写的,具体怎么演变出来后面有时间可以推导一番。
init() {
  const { is2D, ctx, value, duration, timer } = this
  let ratios = [20, 30, 15, 45]

  if (ctx) {
    if (timer) this.cancelAnimationFrame()

    const callback = lastTime => {
      // 省略...

      // 当前时间各弧线的百分比值
      ratios = value.map(i => this.easeInQuadratic(lastTime, 0, i, duration))

      this.drawArcs(ratios)

      // 省略...
    }

    this.requestAnimationFrame(callback)
  } else {
    this.initCanvas()
  }
}
总结
至此,自行手写的环形图算是大致完成了,其中有些几何数学的知识点有些遗忘了,写的时候查了公式才晓得,用别人的东西用多了脑子就不好使了,有空真的得多造些轮子才行。文中只是大概的按思路写了下代码,具体 完整代码 可在 Github 上查看,如果觉得有用就请点个 star 吧。