版本一
第一步:下载基础镜像
本实例是基于centos7镜像进行操作的,所以需要下载docker的centos7镜像
官方镜像连接:https://hub.docker.com/search?q=&type=image
[root@wallace ~] docker pull centos:centos7
第二步:创建一个测试目录,用来保存该项目所需要的所有文件信息
[root@wallace ~]# mkdir myNginx
[root@wallace ~]# cd myNginx/
[root@wallace mydocker]# touch Dockerfile
[root@wallace mydocker]# ll
总用量 0
-rw-r--r-- 1 root root 0 1月  10 17:34 Dockerfile
第三步:编写Dockerfile
FROM centos:centos7

MAINTAINER wallace@163.com
# 安装一些常用工具包
RUN yum install make wget bzip2 -y
# 加载一下阿里的镜像源,方便下载编译的包
RUN mv /etc/yum.repos.d/CentOS-Base.repo /etc/yum.repos.d/CentOS-Base.repo.bak

RUN wget -O /etc/yum.repos.d/CentOS-Base.repo https://mirrors.aliyun.com/repo/Centos-7.repo
# 安装依赖包
RUN yum install automake gcc gcc-c++ autoconf zlib-devel openssl openssl-devel pcre* pcre-devel zlib -y

# 复制包到docker容器
COPY nginx-1.8.0.tar.gz /opt/nginx/
COPY pcre-8.37.tar.bz2 /opt/pcre/

RUN tar xf /opt/pcre/pcre-8.37.tar.bz2 -C /usr/local/src/

RUN tar -xvzf /opt/nginx/nginx-1.8.0.tar.gz -C /usr/local/src/
    && useradd -M -s /sbin/nologin nginx

WORKDIR /usr/local/src/nginx-1.8.0
# 编译安装
RUN ./configure
--prefix=/usr/local/nginx
--with-http_dav_module
--with-http_stub_status_module
--with-http_addition_module
--with-http_sub_module
--with-http_flv_module
--with-http_mp4_module
--with-pcre=/usr/local/src/pcre-8.37 && make –j 3 ; make install ; cd

ENV PATH=/usr/local/nginx/sbin:$PATH

EXPOSE 80
第四步:执行创建
[root@server mydocker]# ll
总用量 4
-rw-r--r-- 1 root root 1268 1月  10 17:40 Dockerfile
[root@server mydocker]# docker build -t centos_nginx:v1 .
第五步: 创建docker容器
[root@wallace mydocker]# docker run -d -p 80:80 mynginx:v1 nginx -g "daemon off;"
7caa6019653f92db0e85f511aed29f3a56529321e08f08811658758a705f29b4
[root@wallace mydocker]# docker ps
CONTAINER ID        IMAGE               COMMAND                  CREATED             STATUS              PORTS                NAMES
7caa6019653f        mynginx:v1          "nginx -g 'daemon of…"   5 seconds ago       Up 3 seconds        0.0.0.0:80->80/tcp   vigorous_khorana
第六步: 登入网页测试
版本二: 添加CMD指令的方式
第一步: 编写文件,在之前基础上添加CMD指令
FROM centos:centos7

MAINTAINER wallace@163.com


RUN yum install make wget bzip2 -y

RUN mv /etc/yum.repos.d/CentOS-Base.repo /etc/yum.repos.d/CentOS-Base.repo.bak

RUN wget -O /etc/yum.repos.d/CentOS-Base.repo https://mirrors.aliyun.com/repo/Centos-7.repo

RUN yum install automake gcc gcc-c++ autoconf zlib-devel openssl openssl-devel pcre* pcre-devel zlib -y


COPY nginx-1.8.0.tar.gz /opt/nginx/
COPY pcre-8.37.tar.bz2 /opt/pcre/

RUN tar xf /opt/pcre/pcre-8.37.tar.bz2 -C /usr/local/src/

RUN tar -xvzf /opt/nginx/nginx-1.8.0.tar.gz -C /usr/local/src/
    && useradd -M -s /sbin/nologin nginx

WORKDIR /usr/local/src/nginx-1.8.0

RUN ./configure --prefix=/usr/local/nginx
--with-http_dav_module
--with-http_stub_status_module
--with-http_addition_module
--with-http_sub_module
--with-http_flv_module
--with-http_mp4_module
--with-pcre=/usr/local/src/pcre-8.37 && make –j 3 ; make install ; cd

ENV PATH=/usr/local/nginx/sbin:$PATH

EXPOSE 80
# 比之前多一行启动命令,注意是前台启动
CMD /bin/sh -c 'nginx -g "daemon off;"'
新增加的CMD /bin/sh -c 'nginx -g "daemon off;"' 表示
当启动一个容器时候默认运行的命令,如果在启动容器时赋予了command的话,那么定义的CMD中的命令将不会被执行,而会去执行command的命令
第二部: 构建镜像
[root@wallace mydocker]# docker build -t mynginx:v2 .
Sending build context to Docker daemon  2.394MB
Step 1/15 : FROM centos:centos7
 ---> 7e6257c9f8d8
Step 2/15 : MAINTAINER wallace@163.com
 ---> Using cache
 ---> acc7f716a143
Step 3/15 : RUN yum install make wget bzip2 -y
 ---> Using cache
 ---> e63c027f7961
Step 4/15 : RUN mv /etc/yum.repos.d/CentOS-Base.repo /etc/yum.repos.d/CentOS-Base.repo.bak
 ---> Using cache
 ---> fe16788aee95
Step 5/15 : RUN wget -O /etc/yum.repos.d/CentOS-Base.repo https://mirrors.aliyun.com/repo/Centos-7.repo
 ---> Using cache
 ---> 99892504975c
Step 6/15 : RUN yum install automake gcc gcc-c++ autoconf zlib-devel openssl openssl-devel pcre* pcre-devel zlib -y
 ---> Using cache
 ---> 55a4588aa407
Step 7/15 : COPY nginx-1.8.0.tar.gz /opt/nginx/
 ---> Using cache
 ---> e69eab8dd722
Step 8/15 : COPY pcre-8.37.tar.bz2 /opt/pcre/
 ---> Using cache
 ---> 671eb0829d88
Step 9/15 : RUN tar xf /opt/pcre/pcre-8.37.tar.bz2 -C /usr/local/src/
 ---> Using cache
 ---> 5e32435598c7
Step 10/15 : RUN tar -xvzf /opt/nginx/nginx-1.8.0.tar.gz -C /usr/local/src/     && useradd -M -s /sbin/nologin nginx
 ---> Using cache
 ---> 859c0fc26b64
Step 11/15 : WORKDIR /usr/local/src/nginx-1.8.0
 ---> Using cache
 ---> ebfbec88bba0
Step 12/15 : RUN ./configure --prefix=/usr/local/nginx --with-http_dav_module --with-http_stub_status_module --with-http_addition_module --with-http_sub_module --with-http_flv_module --with-http_mp4_module --with-pcre=/usr/local/src/pcre-8.37 && make –j 3 ; make install ; cd
 ---> Using cache
 ---> 3229dbf0ae6a
Step 13/15 : ENV PATH=/usr/local/nginx/sbin:$PATH
 ---> Using cache
 ---> 74bf35748279
Step 14/15 : EXPOSE 80
 ---> Using cache
 ---> 0572e560441e
Step 15/15 : CMD /bin/sh -c 'nginx -g "daemon off;"'
 ---> Running in 87bf69fddefa
Removing intermediate container 87bf69fddefa
 ---> 974db7c9c776
Successfully built 974db7c9c776
Successfully tagged mynginx:v2
由于在构建的过程中docker 会采用缓存机制,上面构建过程中包含很多using cache,所以这次构件非常快,如果需要重新构建,不想使用cache 需要添加 --no-cache
第三步: 启动并测试
[root@wallace mydocker]# docker run -d -p 81:80 mynginx:v2
79f40500a1e623ee8866cbdd63265fde58c1373b0e5fef914fb98cb9bc20ee83
第四步: 查看效果

版本三: 添加ENTRYPOINT
第一步: 编写Dockerfile
FROM centos:centos7

MAINTAINER wallace@163.com

RUN yum install make wget bzip2 -y

RUN mv /etc/yum.repos.d/CentOS-Base.repo /etc/yum.repos.d/CentOS-Base.repo.bak

RUN wget -O /etc/yum.repos.d/CentOS-Base.repo https://mirrors.aliyun.com/repo/Centos-7.repo

RUN yum install automake gcc gcc-c++ autoconf zlib-devel openssl openssl-devel pcre* pcre-devel zlib -y

COPY nginx-1.8.0.tar.gz /opt/nginx/

COPY pcre-8.37.tar.bz2 /opt/pcre/

RUN tar xf /opt/pcre/pcre-8.37.tar.bz2 -C /usr/local/src/

RUN tar -xvzf /opt/nginx/nginx-1.8.0.tar.gz -C /usr/local/src/
    && useradd -M -s /sbin/nologin nginx

WORKDIR /usr/local/src/nginx-1.8.0

RUN ./configure
--prefix=/usr/local/nginx
--with-http_dav_module
--with-http_stub_status_module
--with-http_addition_module
--with-http_sub_module
--with-http_flv_module
--with-http_mp4_module
--with-pcre=/usr/local/src/pcre-8.37 && make –j 3 ; make install ; cd

ENV PATH=/usr/local/nginx/sbin:$PATH

EXPOSE 80
# 使用ENTRYPOINT
ENTRYPOINT ["nginx"]

CMD ["-g", "daemon off;"]
第二步:构建镜像
[root@wallace mydocker]# docker build -t mynginx:v3 .
第三步:创建容器并测试
[root@wallace mydocker]# docker run -d -p 82:80 mynginx:v3
第四步:测试

第五步: 测试启动后自动关闭的模式 daemon off
FROM centos:centos7

MAINTAINER wallace@163.com

RUN yum install make wget bzip2 -y

RUN mv /etc/yum.repos.d/CentOS-Base.repo /etc/yum.repos.d/CentOS-Base.repo.bak

RUN wget -O /etc/yum.repos.d/CentOS-Base.repo https://mirrors.aliyun.com/repo/Centos-7.repo

RUN yum install automake gcc gcc-c++ autoconf zlib-devel openssl openssl-devel pcre* pcre-devel zlib -y

COPY nginx-1.8.0.tar.gz /opt/nginx/

COPY pcre-8.37.tar.bz2 /opt/pcre/

RUN tar xf /opt/pcre/pcre-8.37.tar.bz2 -C /usr/local/src/

RUN tar -xvzf /opt/nginx/nginx-1.8.0.tar.gz -C /usr/local/src/
    && useradd -M -s /sbin/nologin nginx

WORKDIR /usr/local/src/nginx-1.8.0

RUN ./configure
--prefix=/usr/local/nginx
--with-http_dav_module
--with-http_stub_status_module
--with-http_addition_module
--with-http_sub_module
--with-http_flv_module
--with-http_mp4_module
--with-pcre=/usr/local/src/pcre-8.37 && make –j 3 ; make install ; cd

ENV PATH=/usr/local/nginx/sbin:$PATH

EXPOSE 80
# 使用ENTRYPOINT
ENTRYPOINT ["nginx"]

CMD ["-g", "daemon on;"]
测试:
[root@wallace mydocker]# docker run -d -p 84:80 mynginx:v3
e4b88651637f2f0edf1f90150b6ad66679d182ee2400237634c5f79ce1e8308f
[root@wallace mydocker]# docker ps -a
CONTAINER ID        IMAGE               COMMAND                  CREATED             STATUS                      PORTS                NAMES
e4b88651637f        mynginx:v3          "nginx -g 'daemon on…"   16 seconds ago      Exited (0) 15 seconds ago                        modest_wilson
启动后发现自动退出了容器,就是应为我们使用的是daemon on, 如果要正常启动可以加参数:
[root@wallace mydocker]# docker run -d -p 85:80 mynginx:v3 -g "daemon off;"
455b8dd411bc4fbf4228335e979e983c5ad2c64571a83fe2538b7c310c162182
[root@wallace mydocker]# docker ps -a
CONTAINER ID        IMAGE               COMMAND                  CREATED              STATUS                          PORTS                NAMES
455b8dd411bc        mynginx:v3          "nginx -g 'daemon of…"   3 seconds ago        Up 2 seconds                    0.0.0.0:85->80/tcp   cranky_chebyshev
然后就可以正常访问了
版本四: 添加VOLUMN
第一步:编写Dockerfile添加 VOLUMN指令
FROM centos:centos7

MAINTAINER wallace@163.com

RUN yum install make wget bzip2 -y

RUN mv /etc/yum.repos.d/CentOS-Base.repo /etc/yum.repos.d/CentOS-Base.repo.bak

RUN wget -O /etc/yum.repos.d/CentOS-Base.repo https://mirrors.aliyun.com/repo/Centos-7.repo

RUN yum install automake gcc gcc-c++ autoconf zlib-devel openssl openssl-devel pcre* pcre-devel zlib -y

COPY nginx-1.8.0.tar.gz /opt/nginx/

COPY pcre-8.37.tar.bz2 /opt/pcre/

RUN tar xf /opt/pcre/pcre-8.37.tar.bz2 -C /usr/local/src/

RUN tar -xvzf /opt/nginx/nginx-1.8.0.tar.gz -C /usr/local/src/
    && useradd -M -s /sbin/nologin nginx
VOLUME ["/usr/local/nginx/html"]

WORKDIR /usr/local/src/nginx-1.8.0

RUN ./configure
--prefix=/usr/local/nginx
--with-http_dav_module
--with-http_stub_status_module
--with-http_addition_module
--with-http_sub_module
--with-http_flv_module
--with-http_mp4_module
--with-pcre=/usr/local/src/pcre-8.37 && make –j 3 ; make install ; cd

ENV PATH=/usr/local/nginx/sbin:$PATH

EXPOSE 80
# 使用ENTRYPOINT
ENTRYPOINT ["nginx"]

CMD ["-g", "daemon off;"]
第二步: 创建镜像
[root@wallace mydocker]# docker build -t mynginx:v5 .
第三步: 启动一个镜像
[root@wallace mydocker]# docker run -d -p 85:80 --name mynginx1 mynginx:v5
# 然后查看镜像信息, 如下所示
[root@wallace mydocker]# docker inspect mynginx1
 "Mounts": [
            {
                "Type": "volume",
                "Name": "c2b140d1df296d5ded06a330e424a81ff5bff02ecb864da938bbfbeb00209e49",
                "Source": "/var/lib/docker/volumes/c2b140d1df296d5ded06a330e424a81ff5bff02ecb864da938bbfbeb00209e49/_data",
                "Destination": "/usr/local/nginx/html",
                "Driver": "local",
                "Mode": "",
                "RW": true,
                "Propagation": ""
            }
        ],
第四步: 进入到宿主机的挂载目录并且查看目录内的文件:
[root@wallace ~]# cd /var/lib/docker/volumes/c2b140d1df296d5ded06a330e424a81ff5bff02ecb864da938bbfbeb00209e49/_data/
[root@wallace _data]# ls
[root@wallace _data]# echo aaa > index.html
[root@wallace _data]# ls
index.html
第五步: 进入到docker查看
[root@wallace _data]# docker exec -it mynginx1 /bin/bash
[root@0adc63e5721b nginx-1.8.0]# cd /usr/local/nginx/html/
[root@0adc63e5721b html]# ls
[root@0adc63e5721b html]# ls
index.html
第六步: 验证
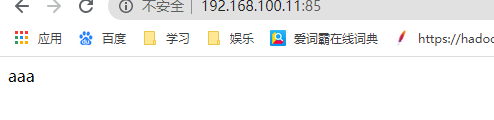
通过访问发现,在宿主机上面进行了更改,容器内部也发生了变化,这样就动态的实现网站数据动态更改。
版本五: ONBUILD的使用
Dockerfile1中base image 为A镜像,并在Dockefile1中定义ONBUILD指令,构建成新的镜像B镜像
Dockerfile2中base image 为B镜像,构建成新镜像C
当使用镜像B启动容器1不会执行OBNUILD中定义的内容,而使用C镜像启动的容器2则会执行ONBUILD定义的内容
第一步: 编写Dockerfile添加ONBUILD指令
FROM centos:centos7

MAINTAINER wallace@163.com

RUN yum install make wget bzip2 -y

RUN mv /etc/yum.repos.d/CentOS-Base.repo /etc/yum.repos.d/CentOS-Base.repo.bak

RUN wget -O /etc/yum.repos.d/CentOS-Base.repo https://mirrors.aliyun.com/repo/Centos-7.repo

RUN yum install automake gcc gcc-c++ autoconf zlib-devel openssl openssl-devel pcre* pcre-devel zlib -y

COPY nginx-1.8.0.tar.gz /opt/nginx/

COPY pcre-8.37.tar.bz2 /opt/pcre/

RUN tar xf /opt/pcre/pcre-8.37.tar.bz2 -C /usr/local/src/

RUN tar -xvzf /opt/nginx/nginx-1.8.0.tar.gz -C /usr/local/src/
    && useradd -M -s /sbin/nologin nginx

WORKDIR /usr/local/src/nginx-1.8.0
# 添加该指令
ONBUILD VOLUME ["/data"]

RUN ./configure --prefix=/usr/local/nginx
--with-http_dav_module
--with-http_stub_status_module
--with-http_addition_module
--with-http_sub_module
--with-http_flv_module
--with-http_mp4_module
--with-pcre=/usr/local/src/pcre-8.37 && make –j 3 ; make install ; cd

ENV PATH=/usr/local/nginx/sbin:$PATH

EXPOSE 80

ENTRYPOINT ["nginx"]

CMD ["-g", "daemon off;"]
第二步: 创建容器并启动测试
[root@server myNginx]# docker run -d -p 86:80 --name centos1 mycentos:v1
1f3c1672cce45e6f0f4e8d927de017fbe0a16f30858427d5cb3c2ec7f7b55d98
# 查看是否有/data目录
[root@server myNginx]# docker exec -it centos1 /bin/bash
[root@1f3c1672cce4 nginx-1.8.0]# ll /data
ls: cannot access /data: No such file or directory
第三步: 修改基础镜像,创建并验证
[root@wallace mydocker]# cat Dockerfile
# 指定基础镜像
FROM mycentos:v1

# MAINTAINER
MAINTAINER wallace@qq.com
[root@wallace mydocker]# docker build -t mycentos:v3 .
Sending build context to Docker daemon  2.394MB
Step 1/2 : FROM mycentos:v1
# Executing 1 build trigger
 ---> Using cache
 ---> 4a8295471514
Step 2/2 : MAINTAINER wallace@163.com
 ---> Using cache
 ---> 92bfba2c223d
Successfully built 92bfba2c223d
Successfully tagged mycentos:v3
[root@wallace mydocker]# docker run -d -p 88:80 --name mycentos2 mycentos:v3
3ac3b3b563f45028aeaf56a99aaa43354625555e1d117da134bebcb9e92469b5
[root@wallace mydocker]# docker exec -it mycentos2 /bin/bash
[root@3ac3b3b563f4 nginx-1.8.0]# ls /d
data/ dev/
由此可见镜像v6包含了v5所有的内容,并且增加了ONBUILD的内容
[root@server ~]