Elasticsearch 学习
jdk下载
elasticsearch
	是一个'实时分布式搜索和分析引擎',它用于全文搜索,结构化搜索,分析
搜索引擎原理就是建立反向索引
elasticsearch也是master-slave架构,也实现了数据的分片和备份
es所在主机内存做好是2G,1G用来给elasticsearch用。另外的1G用来给了lucene进程使用
一、生活中的数据
1.生活中的数据分类
1)结构化数据
行数据,以二维表的形式展示的数据,可以直接看到结构
2)非结构化数据
没有具体结构,视频,文本,音乐文件
3)半结构化数据
xml表格办公软件,HTML
2.搜索的种类
1)结构化数据搜索
结构化数据有固定结构,我们会给他'建立关系'(key value),生成'二维表查询'

结构化索引
	select * from table_name where a=b
2)非结构化数据搜索
1.顺序扫描
2.全文搜索

全文索引
	将结构化数据中的一部分信息提取出来,重新组织,使其变得有一定结构,然后对此有一定结构的数据进行搜索,从而达到搜索相对较快的目的
二、Elasticsearch介绍
1.什么Elasticsearch?
是一个高度可扩展的开源'全文搜索和分析引擎',它可实现数据的实时全文搜索搜索、支持分布式可实现高可用、提供API接口,'可以处理大规模日志数据',比如Nginx、Tomcat、系统日志等功能。
Elasticsearch是基于'lucene'开发而来的
Elasticsearch用处:1.日志收集+kibana 2.搜索引擎

#Elasticsearch不能'完全代替'数据库,因为没有用户名和密码的设置
2.ES和数据库结构对比
| mysql |
ES |
| 库(database) |
索引(index) |
| 表(table) |
类型(type) |
| 列(字段) |
项 (field) |
| 真实数据行 |
文档(doc)json格式 |
index(索引-数据库)
	索引包含一堆有相似结构的文档数据
type(类型-表)
	每个索引都可以有一个或多个type,type是index中的一个逻辑数据分类,一个type下面的document,都有相同的field(字段)
3.ES原理
1.存储数据时进行'全文检索'
2.全文检索后建立'倒排索引'

Elasticsearch数据分布式存储:
	Elasticsearch也是会对数据进行切分,同时每一个'分片'会保存多个副本
	Elasticsearch中的数据也是备份存储至多个节点中的
	Elasticsearch中,'节点是对等的',节点间会通过自己的一些规则选取集群的master,master会负责集群状态信息的改变,并同步给其他节点
	只有'建立'索引和类型需要经过master,'数据的写入'有一个简单的routing规则,可以route到集群中的任意节点,所以数据写入压力是分散在整个集群的。
4.全文检索
将一个数据的内容转化拆分
	1.分词 ('使用工具')
	2.找到关键词
	3.搜索索引
	4.匹配,命中,计算'命中率'
	5.根据命中率进行排序
5.倒排索引(反向索引)
参考网站
java 是世界上最好的语言
php 是世界上最好的语言
python 是世界上最好的语言

#docer k8s都是使用go语言写的
#网页爬取
#停顿词过滤,比如'的' '而',这些词本身没有意义,建立倒排索引的时候没必要考虑他们
#Lucene可以很方便的建立倒排索引,Elasticsearch是对Lucene的封装,提供restful的api,通过http请求就能对其进行操作
#Elasticsearch是一个分布式搜索引擎
keyword类型是不会分词的,直接根据字符串内容建立反向索引,
text类型在存入elasticsearch的时候,会先分词,然后根据分词后的内容建立反向索引
| 分词后的值(词条) |
文档1 |
文档2 |
文档3 |
| java |
命中 |
|
|
| 是 |
命中 |
命中 |
命中 |
| 世界上 |
命中 |
命中 |
命中 |
| 最好的 |
命中 |
命中 |
命中 |
| 语言 |
命中 |
命中 |
命中 |
| php |
|
命中 |
|
| python |
|
|
命中 |
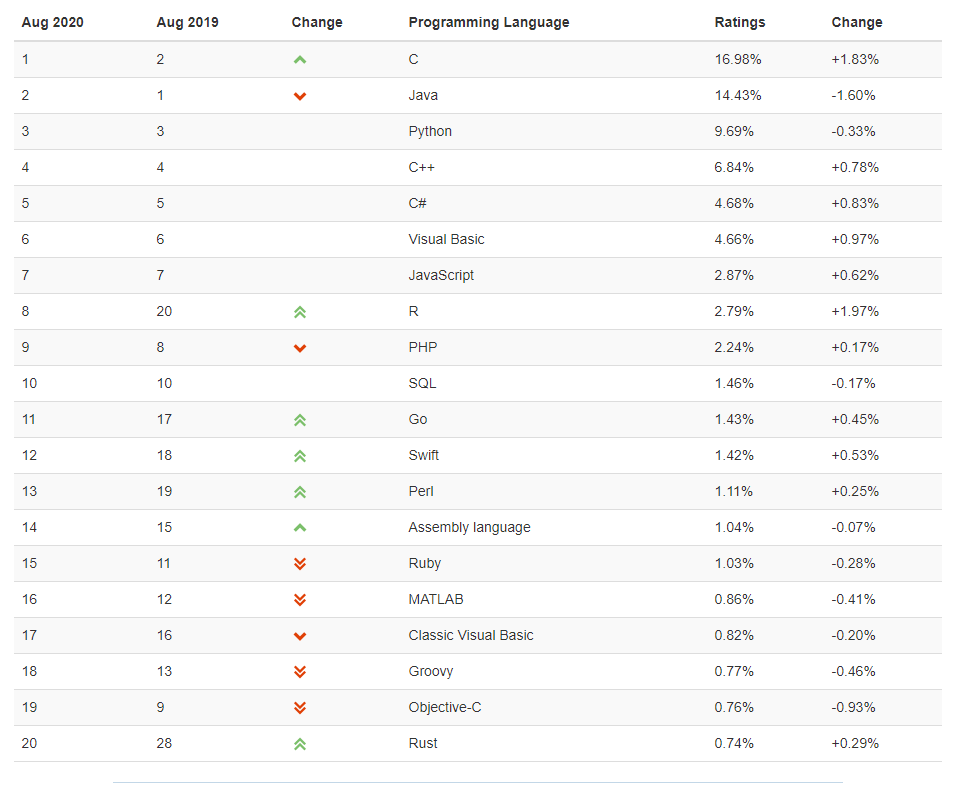
开发语言排行
6.倒排索引术语
1.词条:索引'最小的存储单位',拆分一组词之后,每一个字或者词
2.词典:词条存储的地方,一般在'内存'中

3.'倒排表':记录多个词命中的次数和顺序
4.倒排文件:存储倒排表的地方,一般在磁盘中
7.ES功能
1.分布式存储
2.全文搜索,结构化检索,数据分析
	全文搜索:select * from table;
	结构化检索:select * from table where id > 1;
	数据分析:select count(*) from table;
8.使用场景
1.大量数据存储
2.搜索数据
3.分析数据(ELK)
4.搜索高亮显示(百度)
9.ES特点
1.可以部署单点或者集群(单点既是集群)
2.高性能,百万数据毫秒级查询
3.支持分布式(容错率)
4.不需要会java
5.功能丰富
6.部署简单
三、部署ES
1.服务器时间同步
[root@db01 ~]# yum install -y ntpdate
[root@db01 ~]# ntpdate time1.aliyun.com

#注意不同的elasticsearch服务器的字符集一定要相同
2.安装java环境
#上传
[root@db01 ~]# rz jdk-8u181-linux-x64.rpm

#安装
[root@db01 ~]# rpm -ivh jdk-8u181-linux-x64.rpm
3.安装ES
1.上传或下载包
[root@db01 ~]# rz elasticsearch-6.6.0.rpm
或
[root@db01 ~]# wget https://www.elastic.co/downloads/elasticsearch

2.安装
[root@db01 ~]# rpm -ivh elasticsearch-6.6.0.rpm

3.根据提示继续操作
[root@db01 ~]# systemctl daemon-reload
[root@db01 ~]# systemctl enable elasticsearch.service
[root@db01 ~]# systemctl start elasticsearch.service

4.验证,es启动过程有点慢,看情况判断
[root@db01 ~]# netstat -lntp
tcp6       0      0 127.0.0.1:9200          :::*                    LISTEN      20040/java
tcp6       0      0 127.0.0.1:9300          :::*                    LISTEN      20040/java

[root@db01 ~]# curl 127.0.0.1:9200
{
  "name" : "FIddisT",
  "cluster_name" : "elasticsearch",		#集群的名字
  "cluster_uuid" : "m8Y9neWHRxat7V1tVijMxA",	#
  "version" : {
    "number" : "6.6.0",
    "build_flavor" : "default",
    "build_type" : "rpm",
    "build_hash" : "a9861f4",
    "build_date" : "2019-01-24T11:27:09.439740Z",
    "build_snapshot" : false,
    "lucene_version" : "7.6.0",
    "minimum_wire_compatibility_version" : "5.6.0",
    "minimum_index_compatibility_version" : "5.0.0"
  },
  "tagline" : "You Know, for Search"
}
4.ES相关配置文件
[root@db01 ~]# rpm -qc elasticsearch
/etc/elasticsearch/elasticsearch.yml				#ES主配置文件
/etc/elasticsearch/jvm.options						#jvm虚拟内存配置
/etc/elasticsearch/log4j2.properties				#日志配置
/etc/elasticsearch/role_mapping.yml					#规则配置
/etc/elasticsearch/roles.yml
/etc/elasticsearch/users
/etc/elasticsearch/users_roles
/etc/init.d/elasticsearch							#启动脚本
/etc/sysconfig/elasticsearch						#系统配置
/usr/lib/sysctl.d/elasticsearch.conf				#参数配置
/usr/lib/systemd/system/elasticsearch.service		#启动程序
5.配置ES
[root@db01 ~]# vim /etc/elasticsearch/elasticsearch.yml
#集群名称(单点配置的话不要配置)
#cluster.name: my-application
#节点名称,名字随意
node.name: node-1
#指定数据目录
path.data: /service/es/data
#指定日志目录
path.logs: /service/es/logs
#开启内存锁,c7才需要配置,c6不需要配置,配置了之后,'启动脚本'也要进行相应的配置
bootstrap.memory_lock: true
#ES监听地址
network.host: 10.0.0.51,127.0.0.1
#ES端口
http.port: 9200

#集群的地址
#discovery.zen.ping.unicast.hosts: ["host1", "host2"]
#集群投票切换(最终决定票数)
#discovery.zen.minimum_master_nodes: x

#总配置
[root@db01 ~]# grep "^[a-z]" /etc/elasticsearch/elasticsearch.yml
#cluster.name: my-application
node.name: node-1
path.data: /service/es/data
path.logs: /service/es/logs
bootstrap.memory_lock: true
network.host: 10.0.0.51,127.0.0.1
http.port: 9200
#discovery.zen.ping.unicast.hosts: ["host1", "host2"]
#discovery.zen.minimum_master_nodes: x
6.根据配置文件创建目录
#创建数据目录和日志目录
[root@db01 ~]# mkdir /service/es/{data,logs} -p

#授权
[root@db01 ~]# chown -R elasticsearch.elasticsearch /service/es/
7.重启ES
#重启ES
[root@db01 ~]# systemctl restart elasticsearch.service

#启动失败,查看日志
[2020-08-10T10:38:56,170][ERROR][o.e.b.Bootstrap          ] [node-1] node validation exception
[1] bootstrap checks failed
[1]: memory locking requested for elasticsearch process but memory is not locked
#说明内存未锁定

#配置启动文件中内存锁
[root@db01 ~]# vim /usr/lib/systemd/system/elasticsearch.service
[Service]
... ...
LimitMEMLOCK=infinity

#再次启动ES
[root@db01 ~]# systemctl daemon-reload
[root@db01 ~]# systemctl start elasticsearch.service
8.验证
#浏览器访问	http://10.0.0.51:9200/
{
  #节点名称
  "name" : "node-1",
  #集群名称
  "cluster_name" : "elasticsearch",
  #集群的uuid
  "cluster_uuid" : "KCRhZiS2QWSADsuDwwKC9g",
  #版本信息
  "version" : {
    "number" : "6.6.0",
    "build_flavor" : "default",
    "build_type" : "rpm",
    "build_hash" : "a9861f4",
    "build_date" : "2019-01-24T11:27:09.439740Z",
    "build_snapshot" : false,
    "lucene_version" : "7.6.0",
    "minimum_wire_compatibility_version" : "5.6.0",
    "minimum_index_compatibility_version" : "5.0.0"
  },
  "tagline" : "You Know, for Search"
}
四、跟ES进行交互
1.curl命令的方式
1)特点
1.使用不方便,容易出错,命令复杂
2.不需要要安装任何服务,只需要curl命令

#ES不能完全代替数据库原因
1.ES的库不可修改,表修改属性困难,容易出错,_index _user字段'不能修改'
2.ES没有用户验证和权限控制

es是非关系型数据库
es数据的存储不收字段的限制
curl命令可以去跟开发要
2)使用方式
#创建索引(库),?pretty以列格式显示
[root@db01 ~]# curl -XPUT '10.0.0.51:9200/student?pretty'
{
  "acknowledged" : true,
  "shards_acknowledged" : true,
  "index" : "student"
}

#添加数据(key value)
[root@db01 ~]# curl -XPUT '10.0.0.51:9200/student/user/1?pretty' -H 'Content-Type: application/json' -d '{"name": "lhd","sex":"man","age":"18","about":"good good study","interests":["chinese","english"]}'
{
  "_index" : "student",
  "_type" : "user",
  "_id" : "1",
  "_version" : 1,
  "result" : "created",
  "_shards" : {
    "total" : 2,
    "successful" : 1,
    "failed" : 0
  },
  "_seq_no" : 0,
  "_primary_term" : 1
}

#查看数据,索引 类型 以列显示
[root@db01 ~]# curl -GET '10.0.0.51:9200/student/user/1?pretty'
{
  "_index" : "student",
  "_type" : "user",
  "_id" : "1",
  "_version" : 1,
  "_seq_no" : 0,
  "_primary_term" : 1,
  "found" : true,
  "_source" : {
    "name" : "lhd",
    "sex" : "man",
    "age" : "18",
    "about" : "good good study",
    "interests" : [
      "chinese",
      "english"
    ]
  }
}
2.使用head插件的方式
插件是为了完成不同的功能,官方提供了一些插件但大部分是收费的,另外也有一些开发爱好者提供的插件,可以实现对elasticsearch集群的状态监控与管理配置等功能,我们现在要安装的是Elasticsearch的'head插件',此插件提供elasticsearch的web界面功能。

安装Elasticsearch的head插件时,'要安装npm',npm的全称是Node Package Manager,是随同NodeJS一起安装的包管理和分发工具,它很方便让JavaScript开发者下载、安装、上传以及管理已经安装的包。

在Elasticsearch 5.x版本以后不再支持直接安装head插件,而是需要通过启动一个服务方式。
Github地址:https://github.com/mobz/elasticsearch-head
1)特点
1.查看数据简单,操作简单
2.需要安装nodejs环境,安装费时
2)安装插件方式一:
#安装npm(只需要在一个节点安装即可,如果前端还有nginx做反向代理可以每个节点都装)
[root@elkstack01 ~]# yum install -y npm
#进入下载head插件代码目录
[root@elkstack01 src]# cd /usr/local/
#从GitHub上克隆代码到本地
[root@elkstack01 local]# git clone git://github.com/mobz/elasticsearch-head.git
#克隆完成后,进入elasticsearch插件目录
[root@elkstack01 local]# cd elasticsearch-head/
#清除缓存
[root@elkstack01 elasticsearch-head]# npm cache clean -f
#使用npm安装n模块(不同的项目js脚本所需的node版本可能不同,所以就需要node版本管理工具)
[root@elkstack01 elasticsearch-head]# npm install -g n
#安装最新版本n模块
[root@elkstack01 elasticsearch-head]# n stable
#生成grunt
[root@elkstack01 elasticsearch-head]# npm install grunt -save
#确认生成grunt文件
[root@elkstack01 elasticsearch-head]# ll node_modules/grunt
#执行安装grunt
[root@elkstack01 elasticsearch-head]# npm install
#后台启动head插件(切记,必须在插件目录下执行启动命令)
[root@elkstack01 elasticsearch-head]# npm run start &
#验证端口是否启动成功
[root@elkstack01 elasticsearch-head]# netstat -lntup
tcp        0      0 0.0.0.0:9100                0.0.0.0:*                   LISTEN      11293/grunt
#启动成功后,修改elasticsearch配置文件
[root@elkstack01 elasticsearch-head]# vim /etc/elasticsearch/elasticsearch.yml
#添加如下两行,开启跨域访问支持(添加在配置文件最后即可)
http.cors.enabled: true
http.cors.allow-origin: "*"
#重启elasticsearch
[root@elkstack01 elasticsearch-head]# /etc/init.d/elasticsearch restart
3)安装插件方式二:
1.在'电脑上'解压es-head-0.1.4_0.crx.zip,解压到一个目录
2.谷歌浏览器,右上角,三个点或者三个杠
3.更多工具--扩展程序
4.右上角打开开发者模式
5.加载已解压的扩展程序,选择解压问价你的目录
6.右上角有个放大镜或者拼图,点击进去
3.使用kibana
作业:
1.恢复快照,三台机器,2G内存
2.搭建ES
3.尝试搭建集群