思路
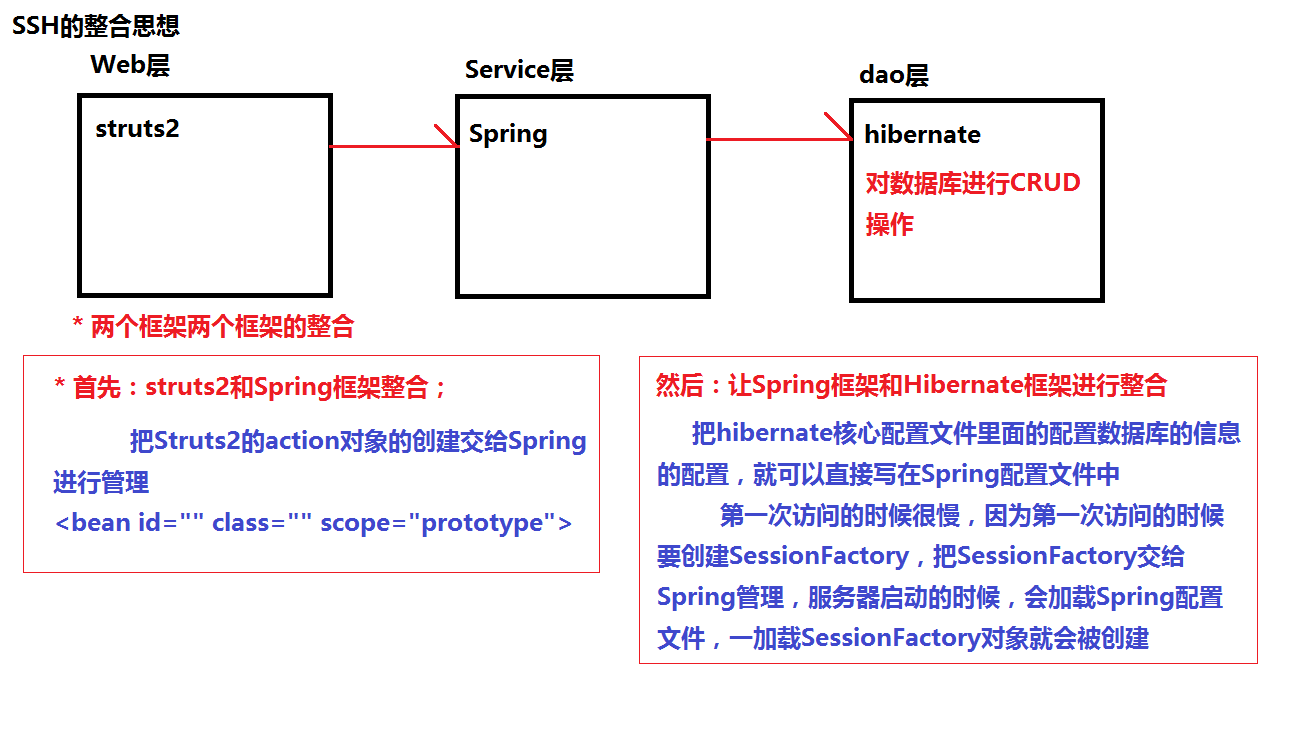
一.整合Struts2和Spring框架
1.创建Web项目2.
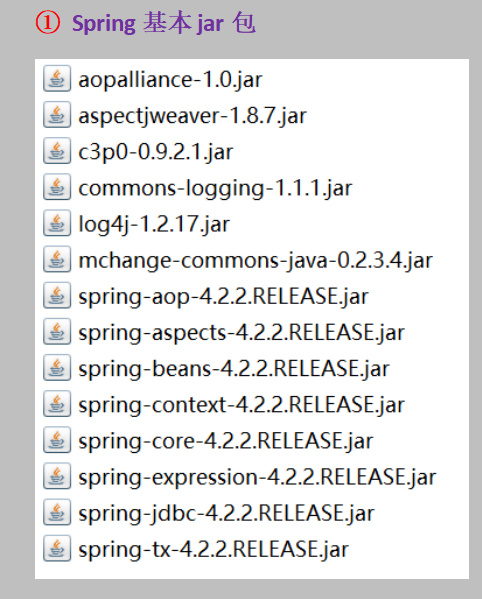
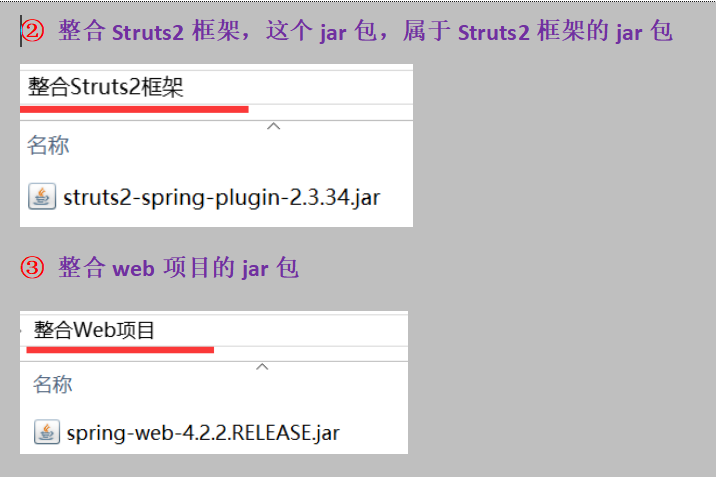
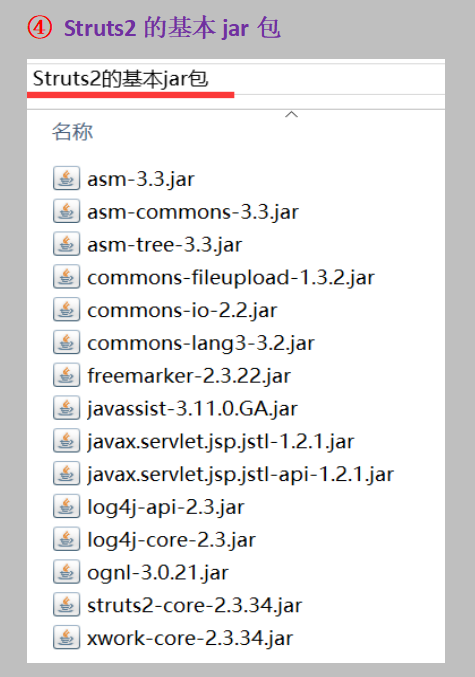
2.导入jar包

4.配置web.xml
<?xml version="1.0" encoding="UTF-8"?>
<web-app xmlns="http://xmlns.jcp.org/xml/ns/javaee"
         xmlns:xsi="http://www.w3.org/2001/XMLSchema-instance"
         xsi:schemaLocation="http://xmlns.jcp.org/xml/ns/javaee http://xmlns.jcp.org/xml/ns/javaee/web-app_4_0.xsd"
         version="4.0">
    <!--配置拦截器-->
    <filter>
        <filter-name>struts2</filter-name>
        <filter-class>org.apache.struts2.dispatcher.ng.filter.StrutsPrepareAndExecuteFilter</filter-class>
    </filter>
    <filter-mapping>
        <filter-name>struts2</filter-name>
        <url-pattern>/*</url-pattern>
    </filter-mapping>
    <!--配置监听器-->
    <context-param>
        <param-name>contextConfigLocation</param-name>
        <param-value>classpath:applicationContext.xml</param-value>
    </context-param>
    <listener>
        <listener-class>org.springframework.web.context.ContextLoaderListener</listener-class>
    </listener>
</web-app>
5.创建Spring核心配置文件:applicationContext.xml
<?xml version="1.0" encoding="UTF-8"?> <beans xmlns="http://www.springframework.org/schema/beans" xmlns:xsi="http://www.w3.org/2001/XMLSchema-instance" xmlns:context="http://www.springframework.org/schema/context" xmlns:aop="http://www.springframework.org/schema/aop" xmlns:tx="http://www.springframework.org/schema/tx" xsi:schemaLocation=" http://www.springframework.org/schema/beans http://www.springframework.org/schema/beans/spring-beans.xsd http://www.springframework.org/schema/context http://www.springframework.org/schema/context/spring-context-4.3.xsd http://www.springframework.org/schema/aop http://www.springframework.org/schema/aop/spring-aop-4.2.xsd http://www.springframework.org/schema/tx http://www.springframework.org/schema/tx/spring-tx-4.2.xsd"> <!--开启注解扫描--> <context:component-scan base-package="dao,action,entity,service"/> <!--开启AOP--> <aop:aspectj-autoproxy></aop:aspectj-autoproxy> <!--<aop:config>--> <!--<aop:pointcut id="userput" expression="execution(* dao.UserDao.add(..))"/>--> <!--<aop:aspect ref="textDao">--> <!--<aop:around method="text" pointcut-ref="userput"></aop:around>--> <!--</aop:aspect>--> <!--</aop:config>--> <!-- Ioc入门 --> <bean id="dataSource" class="com.mchange.v2.c3p0.DriverManagerDataSource"> <property name="driverClass" value="com.mysql.jdbc.Driver"/> <property name="jdbcUrl" value="jdbc:mysql://127.0.0.1:3306/user"/> <property name="user" value="root"/> <property name="password" value="971128"/> </bean> <!--<bean id="jdbcTemplate" class="org.springframework.jdbc.core.JdbcTemplate">--> <!--<property name="dataSource" ref="dataSource"/>--> <!--</bean>--> <!--注入sessionFactory对象--> <bean id="sessionFactory" class="org.springframework.orm.hibernate5.LocalSessionFactoryBean"> <property name="dataSource" ref="dataSource"/> <property name="configLocations" value="classpath:hibernate.cfg.xml" /> </bean> <!--注入hibernateTemplate对象--> <bean id="hibernateTemplate" class="org.springframework.orm.hibernate5.HibernateTemplate"> <property name="sessionFactory" ref="sessionFactory"/> </bean> <!--将hibernateTemplate注入到BaseDao--> <bean id="baseDao" class="tool.BaseDao"> <property name="hibernateTemplate" ref="hibernateTemplate"/> </bean> <!-- 配置事务管理器 --> <bean id="transactionManager" class="org.springframework.orm.hibernate5.HibernateTransactionManager"> <property name="sessionFactory" ref="sessionFactory"/> </bean> <!--开启事务注解--> <tx:annotation-driven transaction-manager="transactionManager"/> <import resource="classpath:user.xml"/> <!-- 使用静态工厂来创建对象 --> <!--<bean id="bean2" class="com.atwyl.beans.Bean2Factory" factory-method="getBean2"></bean>--> <!----> <!--<!– 使用实例工厂来创建工厂对象 –>--> <!--<bean id="bean3Factory" class="com.atwyl.beans.Bean3Factory"></bean>--> <!--<bean id="bean3" factory-bean="bean3Factory" factory-method="getBean3" ></bean>--> </beans>
8.修改web.xml文件,配置Spring的监听器

9.修改struts.xml文件
<?xml version="1.0" encoding="UTF-8" ?>
        <!DOCTYPE struts PUBLIC
                "-//Apache Software Foundation//DTD Struts Configuration 2.3//EN"
                "http://struts.apache.org/dtds/struts-2.3.dtd">
<struts>

<constant name="struts.i18n.encoding" value="UTF-8" ></constant>
    <include file="entity/user.xml"/>
     <!--引入其他struts配置文件-->
    <!--<include file="=jsons.xml"></include>-->
    <!--<include file="register.xml"></include>-->
</struts>
Spring框架整合Hibernate框架


5.创建映射文件:User.hbm.xml
<?xml version="1.0" encoding="UTF-8"?>
<!DOCTYPE hibernate-mapping PUBLIC
    "-//Hibernate/Hibernate Mapping DTD 3.0//EN"
    "http://www.hibernate.org/dtd/hibernate-mapping-3.0.dtd">
<hibernate-mapping>
<!-- 1.配置类和表的对应 class标签
           name属性:实体类的全名称
           table属性:数据库表名称
                 (表还没有创建,我们让hibernate帮我们自动生成) -->
    <class name="cn.at.wyl.entity.User"   table="t_user">
        <id name="uid" column="uid">
    <!--
    设置增长的策略(主键生成的方式) :::::  native:表的uid是主键自增
    -->
            <generator class="native"></generator>
        </id>
        <!-- 配置其他的属性和表的对应
           name:实体类属性的名称,要和实体类里面的名称保持一致
            column:表的字段的名称
           name和column可以一样也可以不一样,为了方便记忆,我们保持一致
         -->
        <property name="username" column="username"></property>
        <property name="address" column="address"></property>
    </class>
</hibernate-mapping>
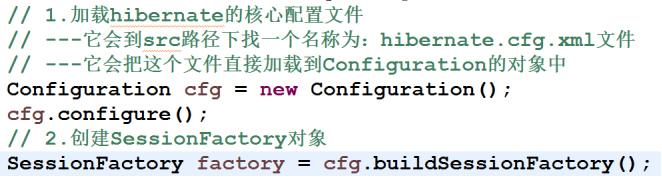
6.创建Hibernate核心配置文件:hibernate.cfg.xml,此时我们已经把Hibernate集成进来。
<hibernate-configuration>
    <session-factory>
        <!-- 1、配置hibernate的信息,可选的 -->
        <property name="hibernate.show_sql">true</property>
        <!-- 底层SQL语句进行格式化 -->
        <property name="hibernate.format_sql">true</property>
        <!-- 希望hibernate帮我们自动创建表 update:如果表已有,它就更新表,如果没有表,则创建表 -->
        <property name="hibernate.hbm2ddl.auto">update</property>
        <!-- 表示数据库的方言 在MySQL中-->
        <property name="hibernate.dialect">org.hibernate.dialect.MySQL5Dialect</property>
        <!-- 2、把映射文件放到核心配置文件中:必须的 -->
        <mapping resource="cn/at/wyl/entity/User.hbm.xml" />
    </session-factory>
</hibernate-configuration>
8.我们已经把hibernate核心配置文件里的数据库配置删除,在Spring里面已经配置了节点:<dataSource> 节点,把hibernate中的配置去掉:下图是去掉部分:

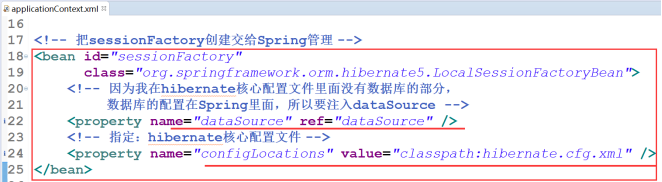
9.把hibernate的sessionFactory交给Spring配置
- ① 服务器启动的时候,加载Spring配置文件,在配置文件中对象创建
- ② 把sessionFactory对象创建在Spring配置
- ③ 因为创建sessionFactory代码不是new出来的,而是多行代码实现的
- ④ Spring里面针对上面的情况,封装类,配置类对象可以创建sessionFactory
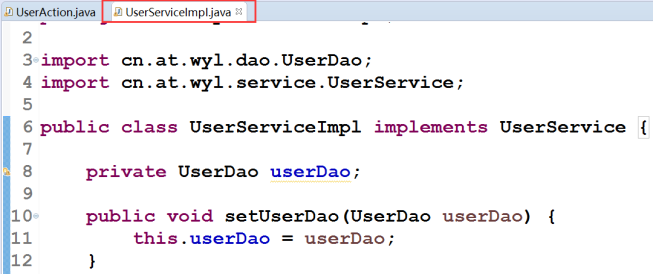
10.新建dao层和service层

11.在Action里面注入Service,在Service里面 注入dao,并生成他们的set方法

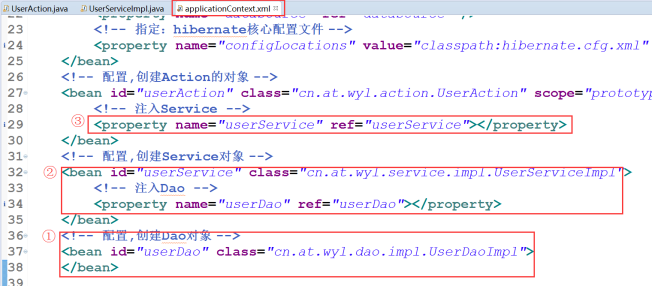
12. 修改配置文件,配置dao,在Service里面注入dao的对象,配置Service,在Action里面注入Service的对象。
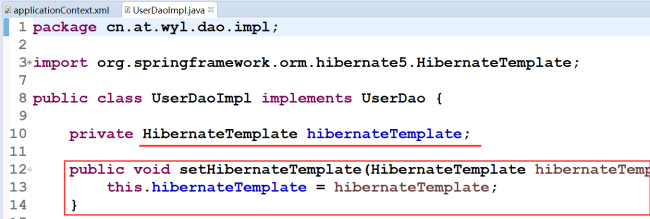
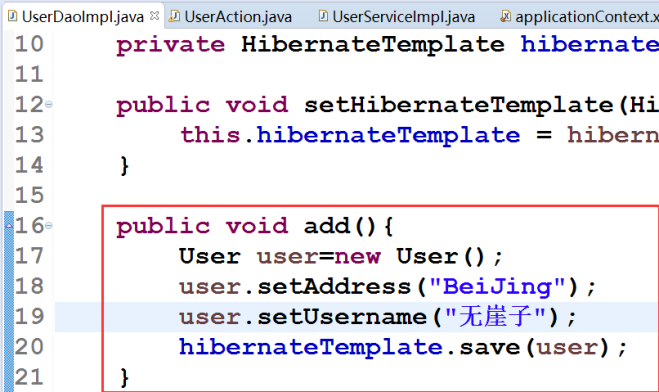
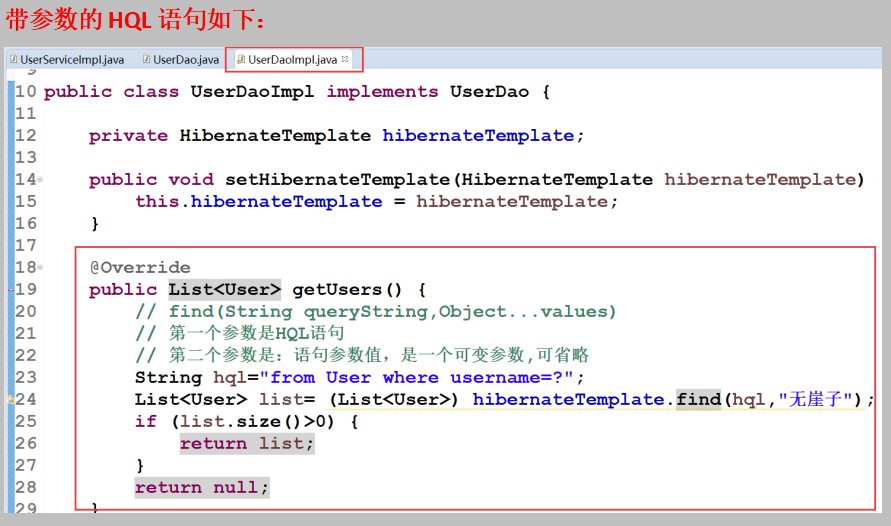
13. 在dao中使用hibernateTemplate

HibernateTemplate常用的方法
-① Serializable save(Object entity)
-② void update(Object entity)
-③ void delete (Object entity)
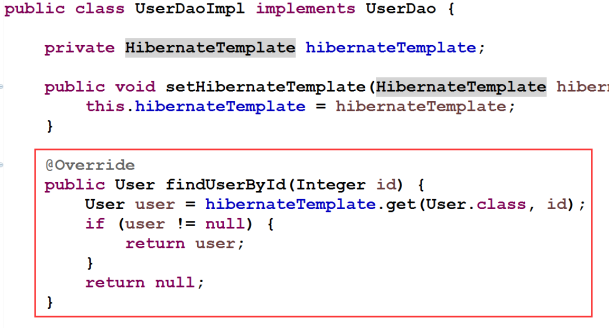
-④ <T> T get(Class(T) entityClass,Serializable id)
-⑤ <T> T load(Class(T) entityClass,Serializable id)
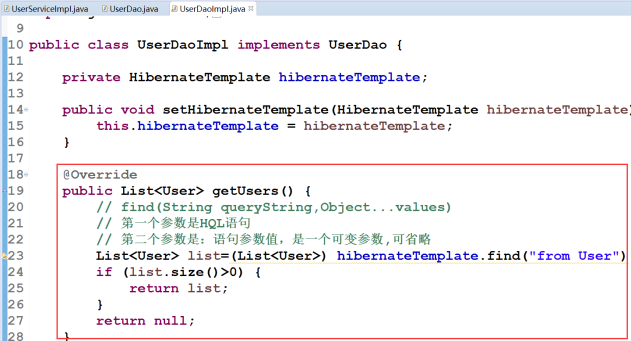
-⑥ List find(String queryString,Object…values)
-在dao里面得到hibernateTemplate的对象
配置applicationContext.xml

测试
- ② 在service层调用dao层方法

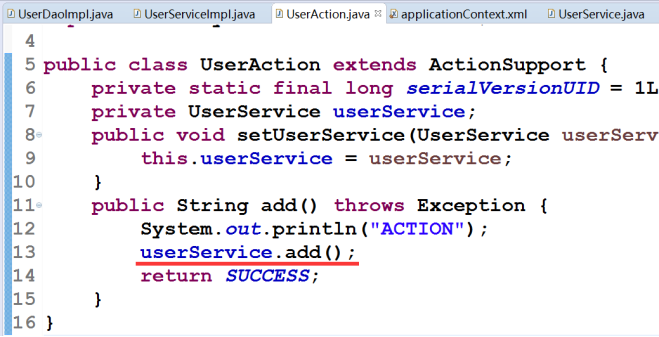
- ③ 在action里面调用Service
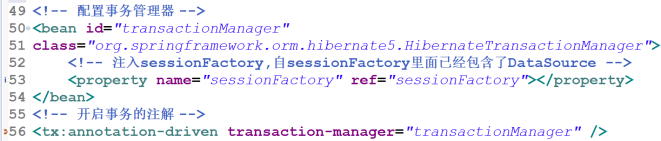
- 第一步:配置事务管理器,第二步:开启事务的注解

- 在service里面加上注解

HibernateTemplate介绍
1.HibernateTemplate对hibernate框架进行封装
- 直接调用HibernateTemplate里面的方法实现功能
2.HibernateTemplate常用方法
-① Serializable save(Object entity) 添加操作
-② void update(Object entity) 修改操作
-③ void delete (Object entity) 删除操作
-④ <T> T get(Class(T) entityClass,Serializable id) 根据id查询操作
-⑤ <T> T load(Class(T) entityClass,Serializable id) 根据id查询操作(延迟加载)
-⑥ List find(String queryString,Object…values) 查询操作的方法
-⑦ 分页查询语句如下:
hibernateTemplate.findByCriteria(criteria,firstResult, maxResults)
SSH框架整合过程
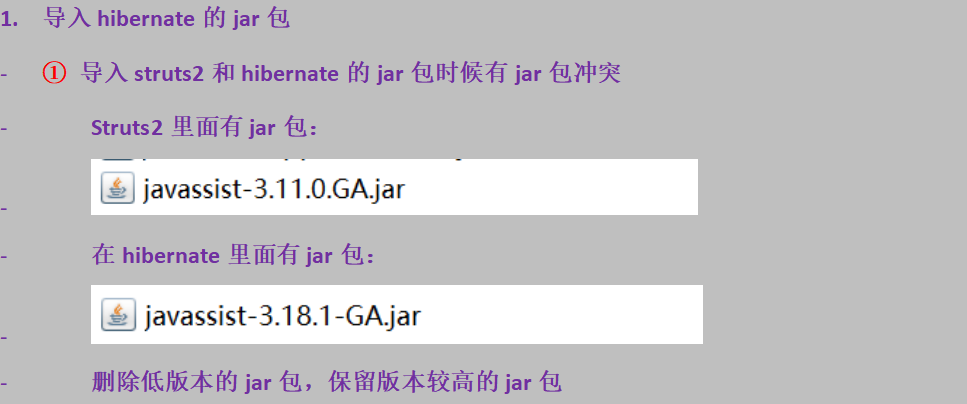
1、 第一步:导入jar包
2、 第二步:
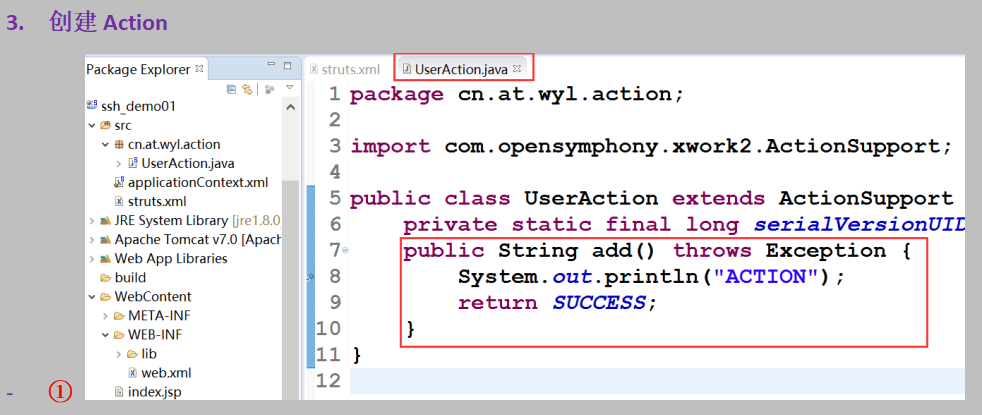
- ① 创建action,创建struts.xml配置文件,配置action
- ② 配置struts2过滤器
3、 第三步:搭建hibernate环境
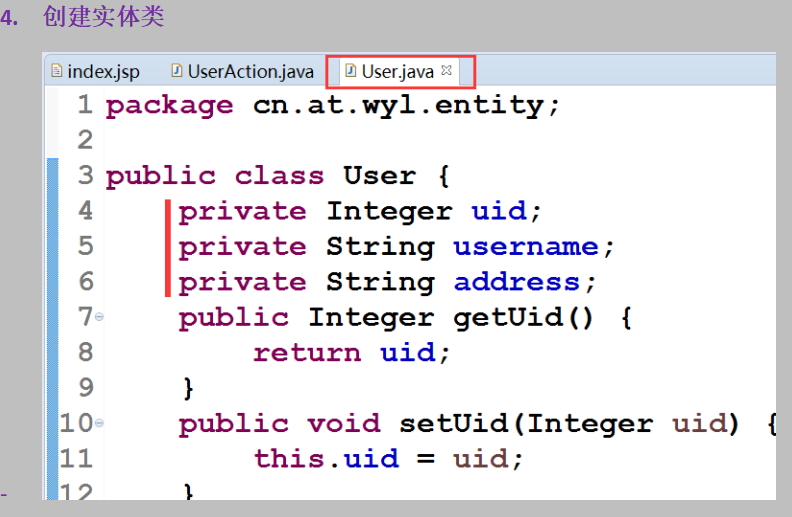
- ① 创建实体类
- ② 创建并配置数据库表的映射文件
- ③ 创建hibernate核心配置文件hibernate.cfg.xml
- 引入映射文件
4、 第四步:搭建Spring环境
- ① 创建Spring核心配置文件
- ② 让Spring配置文件在服务器启动时候加载
配置监听器
- 指定Spring配置文件的位置
5、 Struts2和Spring整合
- ① 把action在Spring配置(action是多实例的)
- ② 在struts.xml中action标签class属性里面写bean的id值
6、 Spring和hibernate整合
- ① 把hibernate核心配置文件中数据库配置,在Spring里面配置
- ② 把hibernate的sessionFactory在Spring里面配置
7、 在dao里面使用HibernateTemplate
- ① 在dao注入hibernateTemplate对象
- ② 在hibernateTemplate里面注入sessionFactory
8、 配置事务
其他整合方式
Spring整合hibernate时候,可以不写hibernate核心配置文件
- ① 把hibernate核心配置文件中,基本信息配置和映射引入都放入Spring的核心配置文件中。有了如下代码,我们在Spring配置文件引入hibernate.cfg.xml的代码可以删除,hibernate核心配置文件也可以删除。

Spring分模块开发
- 在Spring的核心配置文件中,配置的有Action对象的创建和Service对象的注入 , 还有Service对象的创建和dao对象的注入,有dao对象的创建和hibernateTemplate对象的创建等。当我们的类很多,有很多的Action,有很多的Action,我们的核心配置文件就会很大。内容很多,造成混乱,不利于维护。
- 把Spring核心配置文件中的一部分配置,放到一个单独的配置文件中,具体把那一部分拿出去,没有严格的要求,我们现在就把关于Action的部分拿出去 , 然后引入 , 在Spring配置引入其他配置文件即可:
- 把下面这一部分单独放入user.xml中:
<?xml version="1.0" encoding="UTF-8"?>
<beans xmlns="http://www.springframework.org/schema/beans"
    xmlns:xsi="http://www.w3.org/2001/XMLSchema-instance" xmlns:aop="http://www.springframework.org/schema/aop"
    xmlns:context="http://www.springframework.org/schema/context" xmlns:tx="http://www.springframework.org/schema/tx"
    xsi:schemaLocation="http://www.springframework.org/schema/beans http://www.springframework.org/schema/beans/spring-beans-4.2.xsd
        http://www.springframework.org/schema/aop http://www.springframework.org/schema/aop/spring-aop-4.2.xsd
        http://www.springframework.org/schema/context http://www.springframework.org/schema/context/spring-context-4.2.xsd
        http://www.springframework.org/schema/tx http://www.springframework.org/schema/tx/spring-tx-4.2.xsd">
    <!-- 配置C3P0数据源 -->
    <bean id="dataSource" class="com.mchange.v2.c3p0.ComboPooledDataSource">
        <property name="driverClass" value="com.mysql.jdbc.Driver" />
        <property name="jdbcUrl" value="jdbc:mysql:///ssh_demo01" />
        <property name="user" value="root" />
        <property name="password" value="root" />
    </bean>

    <!-- 把sessionFactory创建交给Spring管理 -->
    <bean id="sessionFactory"
          class="org.springframework.orm.hibernate5.LocalSessionFactoryBean">
        <!-- 因为我在hibernate核心配置文件里面没有数据库的部分,
                  数据库的配置在Spring里面,所以要注入dataSource -->
        <property name="dataSource" ref="dataSource" />
        <!-- 指定:hibernate核心配置文件 -->
        <property name="configLocations" value="classpath:hibernate.cfg.xml" />