1. 动静分离实战
1.1.1 nginx+tomcat 动静分离
| 主机 | 用途 |
|---|---|
| 10.0.0.63 | tomcat服务器 |
| 10.0.0.64 | nginx服务器 |
1.1.2 安装 java+tomcat环境[10.0.0.63]
1.tomcat配置:
mkdir /server/tools
cd /server/tools
wget https://downloads.apache.org/tomcat/tomcat-9/v9.0.34/bin/apache-tomcat-9.0.34.tar.gz
tar xf apache-tomcat-9.0.34.tar.gz -C /application/
ln -s /application/apache-tomcat-9.0.34 /application/tomcat

2. java环境配置:
   rpm -ivh https://www.chenleilei.net/soft/jdk-8u121-linux-x64.rpm  [可能要等很久,可以先下载再安装]

[root@master tools]# rpm -ivh https://www.chenleilei.net/soft/jdk-8u121-linux-x64.rpm
Retrieving https://www.chenleilei.net/soft/jdk-8u121-linux-x64.rpm
Preparing...                          ################################# [100%]
Updating / installing...
   1:jdk1.8.0_121-2000:1.8.0_121-fcs  ################################# [100%]
Unpacking JAR files...
	tools.jar...
	plugin.jar...
	javaws.jar...
	deploy.jar...
	rt.jar...
	jsse.jar...
	charsets.jar...
	localedata.jar...

3. 启动tomcat:
/application/tomcat/bin/startup.sh

#查看进程
[root@master tomcat]# ps -ef|grep java
root       4005      1 56 19:20 pts/0    00:00:02 /usr/bin/java -Djava.util.logging.config.file=/application/tomcat/conf/logging.properties -Djava.util.logging.manager=org.apache.juli.ClassLoaderLogManager -Djdk.tls.ephemeralDHKeySize=2048 -Djava.protocol.handler.pkgs=org.apache.catalina.webresources -Dorg.apache.catalina.security.SecurityListener.UMASK=0027 -Dignore.endorsed.dirs= -classpath /application/tomcat/bin/bootstrap.jar:/application/tomcat/bin/tomcat-juli.jar -Dcatalina.base=/application/tomcat -Dcatalina.home=/application/tomcat -Djava.io.tmpdir=/application/tomcat/temp org.apache.catalina.startup.Bootstrap start
root       4036   1390  0 19:20 pts/0    00:00:00 grep --color=auto java
1.1.3 安装nginx环境[10.0.0.64]
useradd  www -u 1200 -M -s /sbin/nologin
mkdir -p /var/log/nginx
yum install -y cmake pcre pcre-devel openssl openssl-devel gd-devel
    zlib-devel gcc gcc-c++ net-tools iproute telnet wget curl &&
    yum clean all &&
    rm -rf /var/cache/yum/*
mkdir -p /server/tools
cd /server/tools
wget https://www.chenleilei.net/soft/nginx-1.16.1.tar.gz
tar xf nginx-1.16.1.tar.gz
cd nginx-1.16.1
./configure --prefix=/usr/local/nginx --with-http_image_filter_module --user=www --group=www
    --with-http_ssl_module --with-http_v2_module --with-http_stub_status_module
    --pid-path=/var/run/nginx/nginx.pid
make -j 4 && make install &&
    rm -rf /usr/local/nginx/html/*  &&
    echo "nginx daemo hello" >/usr/local/nginx/html/index.html  &&
echo "export PATH=$PATH:/usr/local/nginx/sbin" >>/etc/profile
chown -R www.www /var/log/nginx /usr/local/nginx
source /etc/profile
nginx -s reload
ps -ef|grep nginx
1.1.4 nfs配置[10.0.0.64]
[root@k8s-master2 webapps]# cat /etc/exports
/application/tomcat/webapps 10.0.0.0/24(rw,sync,no_root_squash)
#这里是配置任何人可读可写.

重新启动nfs服务
systemctl restart nfs.service rpcbind.service
1.1.5 tomcat服务器挂载NFS目录
本机挂载本机 没办法一样的目录挂载 所以改成了webapps1 然后挂载为网页目录 /application/tomcat/webapps
其他服务器同样的挂载方式
[]#  mount -t nfs 10.0.0.64:/application/tomcat/webapps1 /application/tomcat/webapps
[root@master tools]# cd /application/tomcat/webapps/
[root@master webapps]# ls
docs  examples  host-manager  manager  ROOT

[root@master tools]# cd /application/tomcat/webapps1/
[root@master webapps1]# ls
docs  examples  host-manager  manager  ROOT


简单测试:
10.0.0.63:
[root@master webapps]# touch leilei
[root@master webapps]# ls
docs  examples  host-manager  leilei  manager  ROOT

10.0.0.64:
[root@k8s-master2 webapps]# ls
docs  examples  host-manager  leilei  manager  ROOT     #看到创建成功就没什么问题了,说明现在两台服务器使用的都是一个共享目录 /application/tomcat/webapps/ROOT. 这里面就有jsp页面.用于测试tomcat.动态页面.
1.1.6 nginx反向代理tomcat,配置动静分离[10.0.0.64]
[root@k8s-master2 nginx]# egrep -v "#|^$" conf/nginx.conf
worker_processes  1;
events {
    worker_connections  1024;
}
http {
    include       mime.types;
    default_type  application/octet-stream;
    sendfile        on;
    keepalive_timeout  65;
    upstream tomcat {
	server 10.0.0.63:8080;
	}
    server {
        listen       80;
        server_name  10.0.0.64;
	location ~ .*.(html|htm|gif|jpg|jpeg|bmp|png|ioc|rar|zip|txt|flv|mid|doc|ppt|pdf)$ {
		root /application/tomcat/webapps/ROOT/;
	}
	location ~ .jsp$ {
    		proxy_set_header Host $host;
    		proxy_set_header X-Real-IP $remote_addr;
    		proxy_set_header REMOTE-HOST $remote_addr;
    		proxy_set_header X-Forwarded-For $proxy_add_x_forwarded_for;
    		proxy_pass http://tomcat;
	}
        error_page   500 502 503 504  /50x.html;
        location = /50x.html {
            root   html;
        }
    }
}
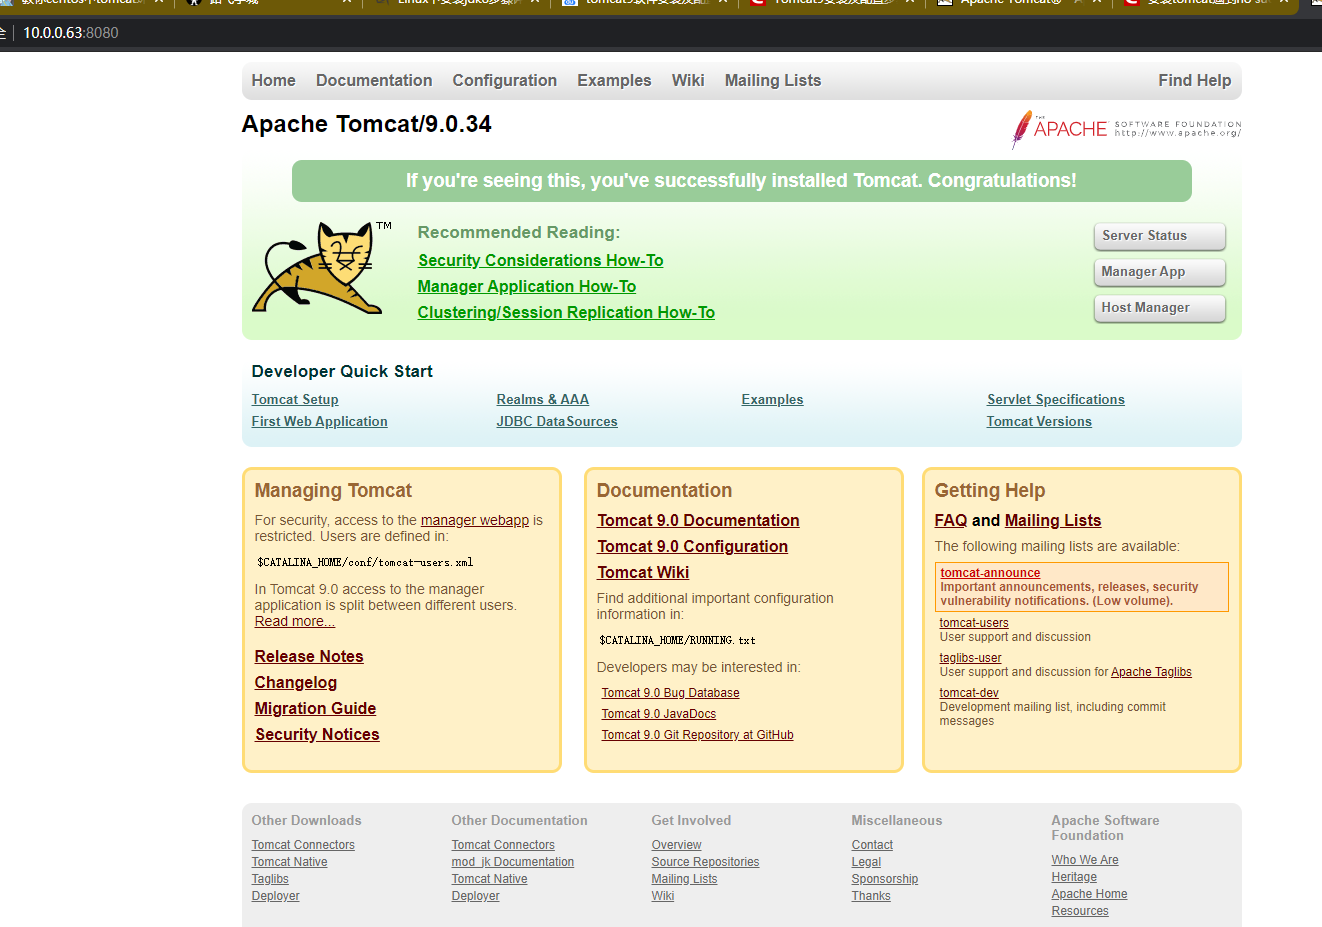
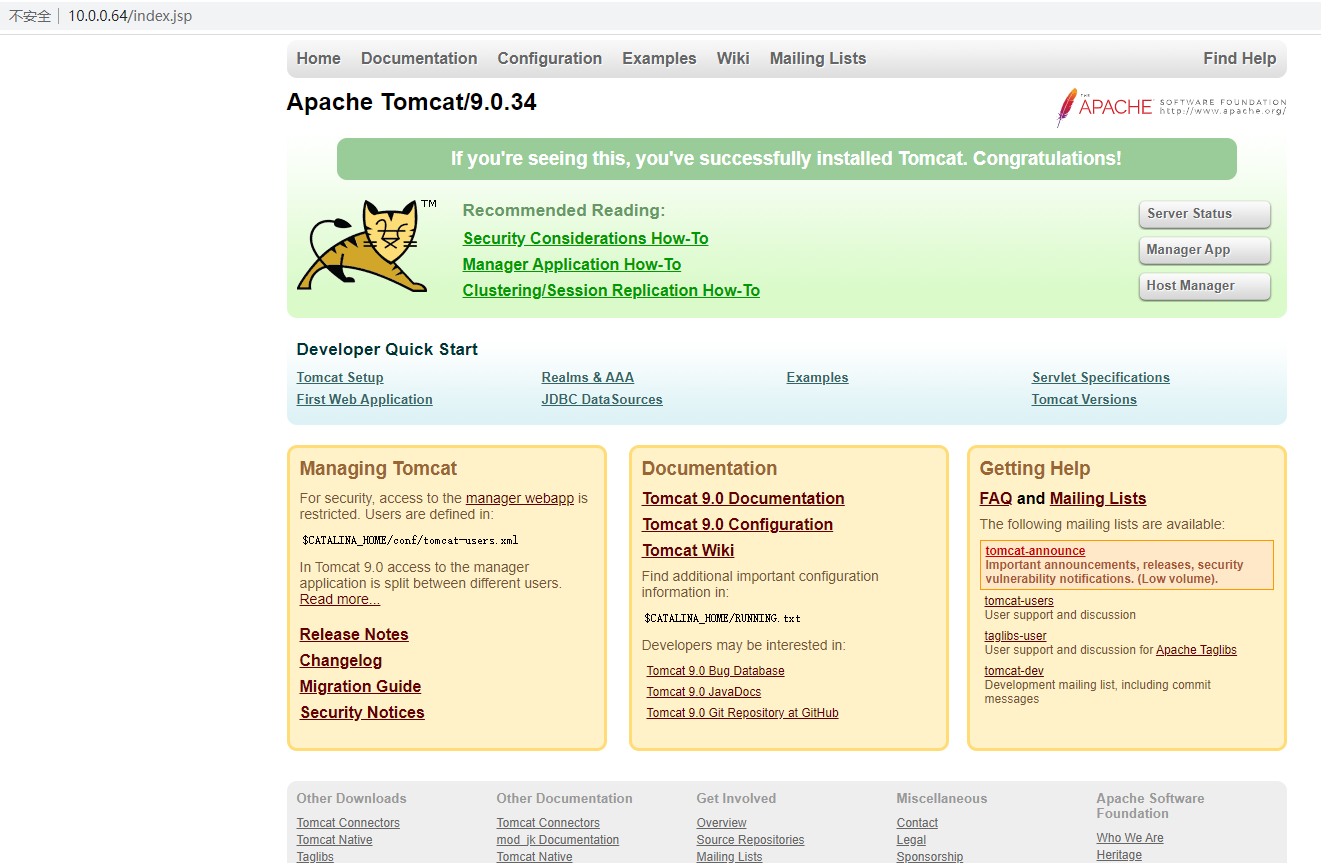
1.1.7 成功结果
1.2 nignx+php 通过TCP连接实现动静分离实验
实验环境:
| 主机 | 用途 |
|---|---|
| 10.0.0.63 | nginx服务器 |
| 10.0.0.64 | php服务器 |
通过TCP连接实现动静分离 实际上就是通过9000端口解析php文件

1. 如果php和nginx不在同一台服务器,那么就需要双方都有nginx的用户,和用户uid,以及相同目录.这样才能够请求解析成功
2. 同时 www.conf 文件中的127.0.0.1:9000 需要改为 0.0.0.0:9000 用于监听所有,或者指定php服务器的ip地址.

useradd www -u 1200 -M -s
mkdir -p /usr/local/nginx/html
chown -R www.www /usr/local/nginx/html
chmod -R 755 /usr/local/nginx/html

这里我们规划网页: /usr/local/nginx/html
在php环境中也需要创建该目录,或者直接使用NFS来处理数据一致性问题.
1.2.1 安装PHP [10.0.0.64]
yum install -y curl &&
curl -o /etc/yum.repos.d/epel.repo http://mirrors.aliyun.com/repo/epel-7.repo &&
yum clean all &&
yum remove oniguruma-devel -y &&
yum remove oniguruma -y &&
rpm -ivh https://www.chenleilei.net/soft/docker/oniguruma-6.7.0-1.el7.x86_64.rpm &&
rpm -ivh https://www.chenleilei.net/soft/docker/oniguruma-devel-6.7.0-1.el7.x86_64.rpm &&
yum install -y cmake pcre pcre-devel openssl openssl-devel gd-devel
zlib-devel gcc gcc-c++ net-tools iproute telnet wget curl
wget vim libxml2 libxml2-devel openssl openssl-devel libjpeg-turbo
libjpeg-turbo-devel libpng-devel libpng freetype-devel freetype icu
libicu-devel libicu libmcrypt libmcrypt-devel libxslt libxslt-devel  php-mysql libsqlite3x-devel &&
rm -rf /var/cache/yum/*
useradd www -u 1200 -M -s /sbin/nologin &&
mkdir -p /usr/local/nginx/html &&
chown -R www.www /usr/local/nginx/html && chmod -R 755 /usr/local/nginx/html &&
wget https://www.chenleilei.net/soft/php-7.4.3.tar.gz  &&
tar xf php-7.4.3.tar.gz &&
cd php-7.4.3 &&
./configure --prefix=/usr/local/php-7.4.3
--with-config-file-path=/usr/local/php-7.4.3/etc
--with-config-file-scan-dir=/usr/local/php-7.4.3/conf.d
--enable-fpm --with-fpm-user=www
--with-fpm-group=www
--with-mysqli=mysqlnd
--with-pdo-mysql=mysqlnd
--with-iconv-dir
--with-zlib
--enable-xml
--disable-rpath
--enable-bcmath
--enable-shmop
--enable-sysvsem
--enable-inline-optimization
--enable-mbregex
--enable-mbstring
--enable-ftp
--with-openssl
--with-mhash
--enable-pcntl
--enable-sockets
--with-xmlrpc
--enable-soap
--with-gettext
--disable-fileinfo
--enable-opcache
--enable-intl
--with-xsl &&
make -j 4 && make install &&
cp ./sapi/fpm/php-fpm.conf /usr/local/php-7.4.3/etc/  &&
cp php.ini-production /usr/local/php-7.4.3/etc/php.ini &&
cp /usr/local/php-7.4.3/etc/php-fpm.d/www.conf.default /usr/local/php-7.4.3/etc/php-fpm.d/www.conf &&
sed  -i  "s#127.0.0.1:9000#0.0.0.0:9000#g" /usr/local/php-7.4.3/etc/php-fpm.d/www.conf  &&
sed -in '99idaemonize = yes' /usr/local/php-7.4.3/etc/php-fpm.conf &&
cp /php-7.4.3/sapi/fpm/init.d.php-fpm /etc/init.d/php-fpm &&
chmod a+x /etc/init.d/php-fpm &&
rm -rf ../php-7.4.3.tar.gz &&
 /etc/init.d/php-fpm start
1.2.2 安装Nginx [10.0.0.65]
useradd  www -u 1200 -M -s /sbin/nologin
mkdir -p /var/log/nginx
yum install -y cmake pcre pcre-devel openssl openssl-devel gd-devel
    zlib-devel gcc gcc-c++ net-tools iproute telnet wget curl &&
    yum clean all &&
    rm -rf /var/cache/yum/*
mkdir -p /server/tools
cd /server/tools
wget https://www.chenleilei.net/soft/nginx-1.16.1.tar.gz
tar xf nginx-1.16.1.tar.gz
cd nginx-1.16.1
./configure --prefix=/usr/local/nginx --with-http_image_filter_module --user=www --group=www
    --with-http_ssl_module --with-http_v2_module --with-http_stub_status_module
    --pid-path=/var/run/nginx/nginx.pid
make -j 4 && make install &&
    rm -rf /usr/local/nginx/html/*  &&
    echo "nginx daemo hello" >/usr/local/nginx/html/index.html  &&
echo "export PATH=$PATH:/usr/local/nginx/sbin" >>/etc/profile
chown -R www.www /var/log/nginx /usr/local/nginx
source /etc/profile
nginx -s reload
ps -ef|grep nginx
1.2.3 TCP动静分离配置要点
nginx开启php解析配置:

location ~ .php$ {
    root           html;
    fastcgi_pass   127.0.0.1:9000;
    fastcgi_index  index.php;
    fastcgi_param  SCRIPT_FILENAME  $document_root$fastcgi_script_name;
    include        fastcgi_params;
}


注意: 如果nginx php不在同一台服务器,这里需要指向php服务器地址,并且 php服务器需要有nginx的html目录.
建议做 NFS,让php服务器nginx服务器的 html目录内容保持一致,这里还有个问题就是.php服务器也需要有nginx的运行用户
且他们的UID PID相同. 因为经过远程调用还是使用的nginx去请求的,对端如果没有nginx用户,则无法请求到资源.
所以php服务器需要执行:  useradd  www -u 1200 -M -s /sbin/nologin
1.2.4 安装NFS [做数据一致性]
在php nginx任意一台配置一个nfs都可以
这里就选择在 php [10.0.0.64]服务器上配置一个nfs 吧
1. 检查是否安装
rpm -aq nfs-utils rpcbind

2. 安装nfs服务
yum install nfs-utils rpcbind -y

3. 检查rcpbind状态
systemctl status rpcbind

4. 检查nfs状态
systemctl status nfs

5. 开机启动nfs
systemctl enabled nfs

6. 配置NFS
 mkdir /usr/local/nginx/html -p
 chown -R www.www /usr/local/nginx/html

 编辑 /etc/exports 改为下面cat的内容
 [root@k8s-master2 php-7.4.3]# cat /etc/exports
 /usr/local/nginx/html 10.0.0.0/24(rw,sync,all_squash,anonuid=1200,anongid=1200)

7. 启动rpcbind,nfs
  systemctl status rpcbind
  systemctl start nfs

8. 检查是否能够获取到挂载:
  [root@k8s-master2 php-7.4.3]# showmount -e 127.0.0.1
  Export list for 127.0.0.1:
  /usr/local/nginx/html 10.0.0.0/24

9. 由于我们是在 PHP服务器 上配置的NFS,我们还需要在nginx上挂载这个NFS磁盘.
   安装相关软件: yum install nfs-utils rpcbind -y
   检查是否检测到共享的目录:
   [root@k8s-node1 html]# showmount -e 10.0.0.64
   Export list for 10.0.0.64:
   /usr/local/nginx/html 10.0.0.0/24

    挂载nfs目录到本地:
    mount -t nfs 10.0.0.64:/usr/local/nginx/html /usr/local/nginx/html
    systemctl restart nfs rpcbind

10. 检查同步
    10.0.0.64服务器 /usr/local/nginx/html 创建 chenleilei.txt
    touch /usr/local/nginx/html/chenleilei.txt

    10.0.0.65服务器检查 /usr/local/nginx/html 是否创建了 chenleilei.txt
    [root@k8s-node1 html]# ls /usr/local/nginx/html
    chenleilei.txt
    检查无误.
1.2.5 php解析配置
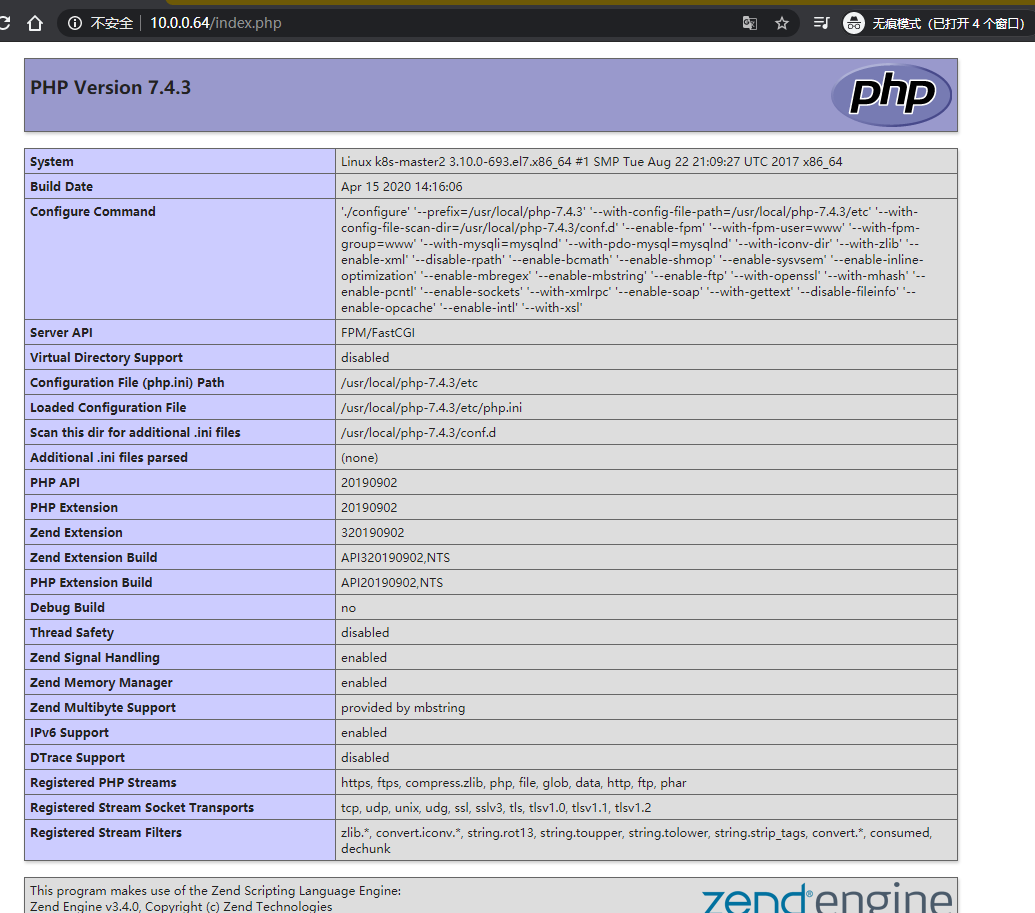
echo '<?php phpinfo(); ?>' > /usr/local/nginx/html/index.php
1.2.6 nginx配置php解析
1. 添加php的默认页:
index  index.php index.html index.htm;

2. 增加php解析:
location ~ .php$ {
    root           html;
    fastcgi_pass   10.0.0.64:9000;
    fastcgi_index  index.php;
    fastcgi_param  SCRIPT_FILENAME  $document_root$fastcgi_script_name;
    include        fastcgi_params;
}
1.2.7 成功的结果
访问 ip/index.php测试
1.3 ninx+php通过soket文件实现动静分离
通过soket实现动静分离,它没有网络开销,速度更快.
缺点: 通过socket的方式虽然可以实现更快的解析.但是,php和nginx必须在同一台服务器中.
所以这个实验都是在 10.0.0.64 服务器中配置完成.
1.3.1 安装php
1. 安装php
yum install -y curl
curl -o /etc/yum.repos.d/epel.repo http://mirrors.aliyun.com/repo/epel-7.repo
yum clean all
yum remove oniguruma-devel -y
yum remove oniguruma -y
rpm -ivh https://www.chenleilei.net/soft/docker/oniguruma-6.7.0-1.el7.x86_64.rpm
rpm -ivh https://www.chenleilei.net/soft/docker/oniguruma-devel-6.7.0-1.el7.x86_64.rpm
yum install -y cmake pcre pcre-devel openssl openssl-devel gd-devel
zlib-devel gcc gcc-c++ net-tools iproute telnet wget curl
wget vim libxml2 libxml2-devel openssl openssl-devel libjpeg-turbo
libjpeg-turbo-devel libpng-devel libpng freetype-devel freetype icu
libicu-devel libicu libmcrypt libmcrypt-devel libxslt libxslt-devel php-mysql libsqlite3x-devel &&
rm -rf /var/cache/yum/*
useradd www -u 1200 -M -s /sbin/nologin && mkdir -p /usr/local/nginx/html && chown -R www.www /usr/local/nginx/html && chmod -R 755 /usr/local/nginx/html
wget https://www.chenleilei.net/soft/php-7.4.3.tar.gz
tar xf php-7.4.3.tar.gz
WORKDIR php-7.4.3
./configure --prefix=/usr/local/php-7.4.3
--with-config-file-path=/usr/local/php-7.4.3/etc
--with-config-file-scan-dir=/usr/local/php-7.4.3/conf.d
--enable-fpm --with-fpm-user=www
--with-fpm-group=www
--with-mysqli=mysqlnd
--with-pdo-mysql=mysqlnd
--with-iconv-dir
--with-zlib
--enable-xml
--disable-rpath
--enable-bcmath
--enable-shmop
--enable-sysvsem
--enable-inline-optimization
--enable-mbregex
--enable-mbstring
--enable-ftp
--with-openssl
--with-mhash
--enable-pcntl
--enable-sockets
--with-xmlrpc
--enable-soap
--with-gettext
--disable-fileinfo
--enable-opcache
--enable-intl
--with-xsl
make -j 4 && make install
cp ./sapi/fpm/php-fpm.conf /usr/local/php-7.4.3/etc/php-fpm.conf &&
cp /php-7.4.3/php.ini-production /usr/local/php-7.4.3/etc/php.ini &&
cp /usr/local/php-7.4.3/etc/php-fpm.d/www.conf.default /usr/local/php-7.4.3/etc/php-fpm.d/www.conf &&
sed -i "s#127.0.0.1:9000#0.0.0.0:9000#g" /usr/local/php-7.4.3/etc/php-fpm.d/www.conf &&
sed -in '99idaemonize = yes' /usr/local/php-7.4.3/etc/php-fpm.conf &&
cp /php-7.4.3/sapi/fpm/init.d.php-fpm /etc/init.d/php-fpm &&
chmod a+x /etc/init.d/php-fpm
rm -rf /php-7.4.3.tar.gz
/etc/init.d/php-fpm start
2. 配置php socket : vim /usr/local/php-7.4.3/etc/php-fpm.d/www.conf 大约36行加入:
listen = /dev/shm/php-fpm.sock
listen.mode = 0660
3. 保存退出后重启php:
/etc/init.d/php-fpm restart
此时的php已经不再监听网卡了,而是通过 /dev/shm/php-fpm.sock 与nginx进行交互.
[root@k8s-master2 nginx-1.16.1]# ll /dev/shm/php-fpm.sock
srw-rw---- 1 root root 0 Apr 15 16:20 /dev/shm/php-fpm.sock
4. 让nginx的php解析也向 socket配置
location ~ .php$ {
root html;
fastcgi_pass unix:/dev/shm/php-fpm.sock; #<<<--- 这里指定socket地址
fastcgi_index index.php;
fastcgi_param SCRIPT_FILENAME /scripts$fastcgi_script_name;
include fastcgi_params;
}
5. 配置测试页面:
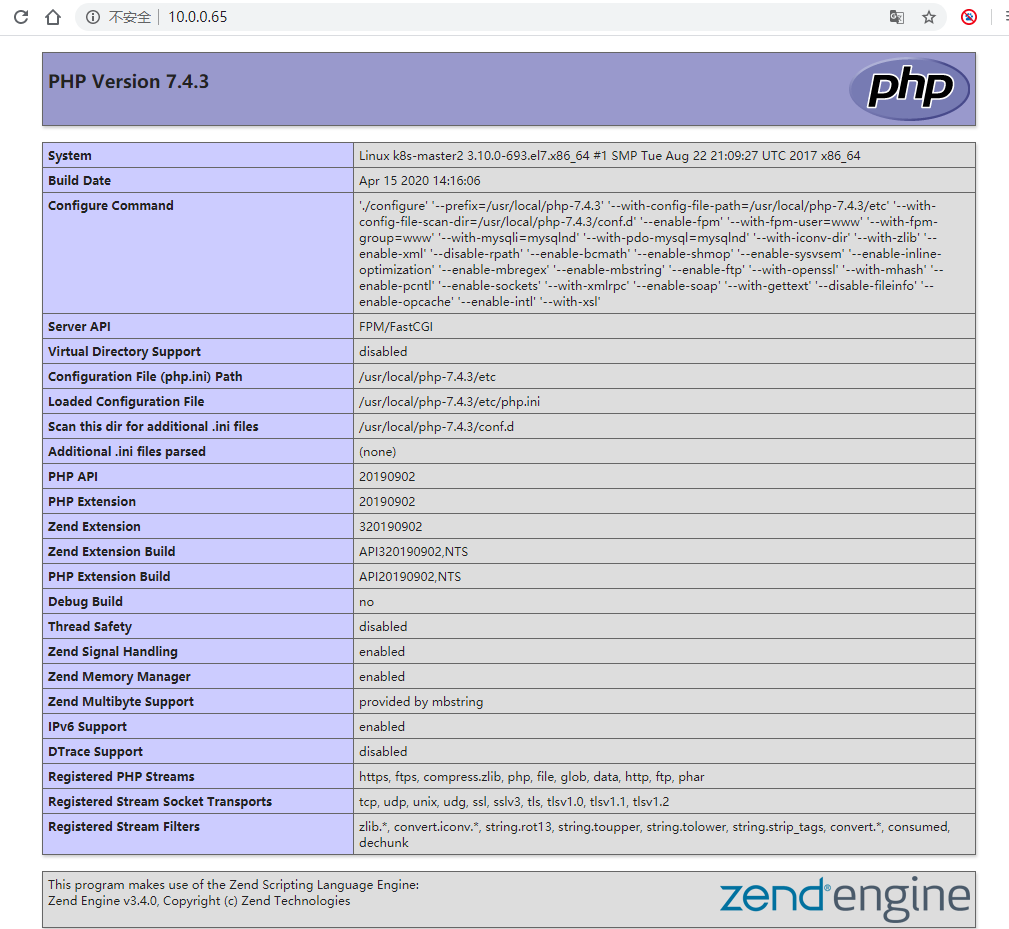
echo '<?php phpinfo(); ?>' > /usr/local/nginx/html/index.php
1.3.2. 安装nginx
useradd  www -u 1200 -M -s /sbin/nologin
mkdir -p /var/log/nginx
yum install -y cmake pcre pcre-devel openssl openssl-devel gd-devel
    zlib-devel gcc gcc-c++ net-tools iproute telnet wget curl &&
    yum clean all &&
    rm -rf /var/cache/yum/*
mkdir -p /server/tools
cd /server/tools
wget https://www.chenleilei.net/soft/nginx-1.16.1.tar.gz
tar xf nginx-1.16.1.tar.gz
cd nginx-1.16.1
./configure --prefix=/usr/local/nginx --with-http_image_filter_module --user=www --group=www
    --with-http_ssl_module --with-http_v2_module --with-http_stub_status_module
    --pid-path=/var/run/nginx/nginx.pid
make -j 4 && make install &&
    rm -rf /usr/local/nginx/html/*  &&
    echo "nginx daemo hello" >/usr/local/nginx/html/index.html  &&
echo "export PATH=$PATH:/usr/local/nginx/sbin" >>/etc/profile
chown -R www.www /var/log/nginx /usr/local/nginx
source /etc/profile
nginx -s reload
ps -ef|grep nginx
1.3.3 socket动静分离配置
1. php-fpm.conf配置文件修改:
vim /usr/local/php-7.4.3/etc/php-fpm.d/www.conf 大约36行添加或修改为如下:
 listen = /dev/shm/php-fpm.sock
 listen.mode = 0666

2.编辑 nginx.conf 配置文件添加或 "修改为" 如下行:

 location ~ .php$ {
     root           html;
     fastcgi_pass   unix:/dev/shm/php-fpm.sock;
     fastcgi_index  index.php;
     fastcgi_param  SCRIPT_FILENAME $document_root$fastcgi_script_name;
     include        fastcgi_params;
 }

3. 重启php-fpm和nginx
nginx -s reload
/etc/init.d/php-fpm restart
1.3.4 成功结果