一 DataSource 简易介绍
JDK里 javax.sql的一个接口
public interface DataSource 表示无力数据源的连接,作为DriverManager设施的替代项,
目前通过DataSource对象的getConnection() ,getConnection(String username,String password) 方法是获取连接的首选方法。
Spring 注入Datasource
一、通过XML写入bean
  <bean id="dataSource" class="org.apache.commons.dbcp.BasicDataSource" destroy-method="close">
        <property name="driverClassName" value="com.mysql.jdbc.Driver"/>
        <property name="url" value="jdbc:mysql://localhost:3306/spring"/>
        <property name="username" value="root"/>
        <property name="password" value="root"/>
    </bean>
二、在数据库实现里注入这个bean
这里利用了annotation的方式@resource获取Datasource的bean
注意
1 Datasource引入javax.sql.DataSource;
2 引入common.dbcp , common.pool , JDBC 的JAR包
package com.daoImpl;
import java.sql.SQLException;

import javax.annotation.Resource;
import javax.sql.DataSource;

import org.springframework.stereotype.Component;

import com.dao.UserDao;
import com.entity.User;
@Component
public class UserDaoImpl implements UserDao{
    DataSource dataSource ;//import javax.sql, common.dbcp  common.pool   jdbc

    public void save(User user) {
        try {
            java.sql.Connection con = dataSource.getConnection();
            con.createStatement().execute("insert into test value('1','aa')");
            con.close();
        } catch (SQLException e) {
            // TODO Auto-generated catch block
            e.printStackTrace();
        }
        System.out.println(user.getName()+"-->"+user.getRemark()+"  save --调用UserDaoImpl!");
    }

    public void update(User user) {
        System.out.println(user.getName()+"-->"+user.getRemark()+"  update --调用UserDaoImpl!");
    }

    public DataSource getDataSource() {
        return dataSource;
    }
    @Resource
    public void setDataSource(DataSource dataSource) {
        this.dataSource = dataSource;
    }
}
测试类
package com.serviceImpl.test;
import org.junit.Before;
import org.junit.Test;
import org.springframework.context.support.ClassPathXmlApplicationContext;

import com.entity.User;
import com.serviceImpl.UserServiceImpl;

public class UserServiceImplTest {
    User user;

    @Before
    public void setUp() throws Exception {
        user = new User();
        user.setName("testName");
        user.setRemark("testRemark");
    }

    @Test
    public void testAdd() {
        ClassPathXmlApplicationContext app = new ClassPathXmlApplicationContext("beans.xml");
         UserServiceImpl UserServiceImpl = (UserServiceImpl)app.getBean("userServiceImpl");
         UserServiceImpl.add(user);//调用方法
         UserServiceImpl.update(user);//调用方法
    }
}
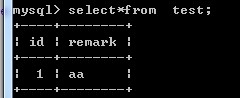
执行结果
三、DBCP的另外三个属性介绍
MaxIdle:最大的空闲连接数。如果超过数据库连接的最大空闲时间,数据库连接将被标记为不可用,然后被释放。设为0表示无限制;设置为20,表示即使没有数据库连接请求时,依然可以保持20空闲的连接,而不被清除,随时处于待命状态。
MaxActive:连接池的最大数据库连接数。设为0表示无限制;设置为20,表示同时最多有20个数据库连接。一般把maxActive设置成可能的并发量就行了。
MaxWait:数据库连接请求的最大等待时间,单位ms。如果超过此时间将得到一个异常。设为-1表示无限制。
BasicDataSource 相关的参数说明:
defaultAutoCommit:对于事务是否 autoCommit, 默认值为 true
defaultReadOnly:对于数据库是否只能读取, 默认值为 false
removeAbandoned:是否自我中断, 默认是 false
removeAbandonedTimeout:几秒后会自我中断, removeAbandoned 必须为 true
logAbandoned:是否记录中断事件, 默认为 false
四、使用占位符+property配置注入XML的bean能取得一样的效果
关键代码
<bean id="mappings"
        class="org.springframework.beans.factory.config.PropertyPlaceholderConfigurer">
        <property name="locations">
            <value>classpath:jdbc.properties</value>
        </property>
    </bean>

    <bean id="dataSource" class="org.apache.commons.dbcp.BasicDataSource" destroy-method="close">
        <property name="driverClassName" value="${jdbc.driverClassName}"/>
        <property name="url" value="${jdbc.url}"/>
        <property name="username" value="${jdbc.username}"/>
        <property name="password" value="${jdbc.password}"/>
    </bean>
jdbc.properties 配置
jdbc.driverClassName=com.mysql.jdbc.Driver
jdbc.url=jdbc:mysql://localhost:3306/spring
jdbc.username=root
jdbc.password=root
XML全景展示
<?xml version="1.0" encoding="UTF-8"?>
<beans xmlns="http://www.springframework.org/schema/beans"
    xmlns:xsi="http://www.w3.org/2001/XMLSchema-instance"
    xmlns:aop="http://www.springframework.org/schema/aop"
    xmlns:context="http://www.springframework.org/schema/context"
    xsi:schemaLocation="http://www.springframework.org/schema/beans
        http://www.springframework.org/schema/beans/spring-beans.xsd
        http://www.springframework.org/schema/context
        http://www.springframework.org/schema/context/spring-context.xsd
        http://www.springframework.org/schema/aop
        http://www.springframework.org/schema/aop/spring-aop.xsd">

    <context:annotation-config/>
    <context:component-scan base-package="com"></context:component-scan>
    <aop:config>
        <aop:aspect id="logInterceptor" ref="logInterceptor">
            <aop:pointcut expression="execution(public void com.daoImpl.UserDaoImpl.*(..))" id="myAop" />
            <aop:before pointcut-ref="myAop" method="beforMethod" /><aop:after pointcut-ref="myAop" method="afterMethod" />
            <aop:around pointcut-ref="myAop" method="around"/>
        </aop:aspect>
    </aop:config>

    <bean id="mappings"
        class="org.springframework.beans.factory.config.PropertyPlaceholderConfigurer">
        <property name="locations">
            <value>classpath:jdbc.properties</value>
        </property>
    </bean>

    <bean id="dataSource" class="org.apache.commons.dbcp.BasicDataSource" destroy-method="close">
        <property name="driverClassName" value="${jdbc.driverClassName}"/>
        <property name="url" value="${jdbc.url}"/>
        <property name="username" value="${jdbc.username}"/>
        <property name="password" value="${jdbc.password}"/>
    </bean>

<!--    <bean id="dataSource" class="org.apache.commons.dbcp.BasicDataSource" destroy-method="close">-->
<!--        <property name="driverClassName" value="com.mysql.jdbc.Driver"/>-->
<!--        <property name="url" value="jdbc:mysql://localhost:3306/spring"/>-->
<!--        <property name="username" value="root"/>-->
<!--        <property name="password" value="root"/>-->
<!--    </bean>-->

</beans>
执行结果和之前一致
总结
1 spring 通过配置XML datasource的bean
推荐用 jdbc.properties 配置,方便管理,引入PropertyPlaceholderConfigurer即可
class="org.springframework.beans.factory.config.PropertyPlaceholderConfigurer">

<property name="locations">
     <value>classpath:jdbc.properties</value>
</property>
2 把bean注入到datasource实现类的setter方法上 注意Datasource引用的是java.sql
3 引入所需要的JAR包,dbcp,pool,jdbc
4 完成