https://blog.csdn.net/ITxiaodong/article/details/105029358
文章目录
参考:
裁剪布局
Flutter中提供了一些剪裁widget,如下表格。
widget 作用
ClipRect 将 child 剪裁为给定的矩形大小
ClipRRect 将 child 剪裁为圆角矩形
ClipOval 如果 child 为正方形时剪裁之后是圆形,如果 child 为矩形时,剪裁之后为椭圆形
ClipPath 将 child 按照给定的路径进行裁剪
CustomClipper 并不是一个widget,但是使用CustomClipper可以绘制出任何我们想要的形状
ClipRect
将 child 剪裁为给定的矩形大小
查看构造函数支持哪些字段:
const ClipRect({
Key key,
this.clipper, // CustomClipper 对象,如果为空,则裁剪区域为 child 指定的大小
this.clipBehavior = Clip.hardEdge, // 裁剪的方式, 不能为 null 或者 Clip.none
Widget child // 子布局
}
)
clipBehavior可选值有:none, hardEdge, antiAlias, antiAliasWithSaveLayer
none:不裁剪
hardEdge:裁剪但不应用抗锯齿,裁剪速度比none模式慢一点,但比其他方式快。
antiAlias:裁剪而且抗锯齿,以实现更平滑的外观。裁剪速度比antiAliasWithSaveLayer快,比hardEdge慢。
antiAliasWithSaveLayer:带有抗锯齿的剪辑,并在剪辑之后立即保存saveLayer。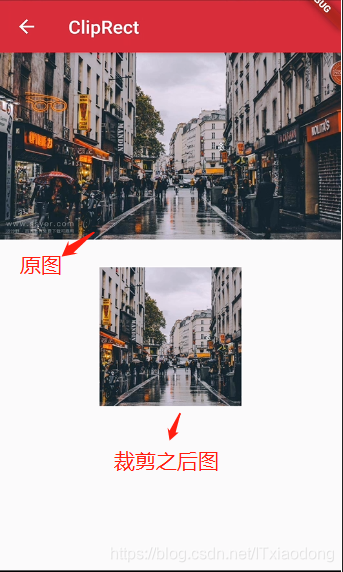
代码实现:
Column(
children: <Widget>[
Container(
child: Image.network(
'https://ssyerv1.oss-cn-hangzhou.aliyuncs.com/picture/389e31d03d36465d8acd9939784df6f0.jpg!sswm'
),
),
SizedBox(
height: 30,
),
ClipRect(
child: Container(
height: 150,
150,
child: Image.network(
'https://ssyerv1.oss-cn-hangzhou.aliyuncs.com/picture/389e31d03d36465d8acd9939784df6f0.jpg!sswm',
fit: BoxFit.cover,
),
),
)
],
)
伪代码:
Column(
children: <Widget>[
Container(
child: Image.network(
'https://ssyerv1.oss-cn-hangzhou.aliyuncs.com/picture/389e31d03d36465d8acd9939784df6f0.jpg!sswm'
),
),
SizedBox(
height: 30,
),
ClipRRect(
borderRadius: BorderRadius.circular(20),// 圆角半径
child: Container(
height: 150,
150,
child: Image.network(
'https://ssyerv1.oss-cn-hangzhou.aliyuncs.com/picture/389e31d03d36465d8acd9939784df6f0.jpg!sswm',
fit: BoxFit.cover,
),
),
),
],
)
ClipOval
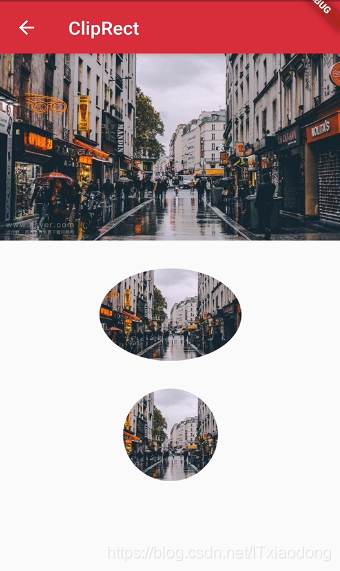
如果 child 为正方形时剪裁之后是圆形,如果 child 为矩形时,剪裁之后为椭圆形。
构造函数中的字段同ClipRect。
伪代码:
Column(
children: <Widget>[
Container(
child: Image.network(
'https://ssyerv1.oss-cn-hangzhou.aliyuncs.com/picture/389e31d03d36465d8acd9939784df6f0.jpg!sswm'
),
),
SizedBox(
height: 30,
),
ClipOval(// 宽高不一致为,裁剪后为椭圆形
child: Container(
height: 100,
150,
child: Image.network(
'https://ssyerv1.oss-cn-hangzhou.aliyuncs.com/picture/389e31d03d36465d8acd9939784df6f0.jpg!sswm',
fit: BoxFit.cover,
),
),
),
SizedBox(
height: 30,
),
ClipOval(// 宽高一致为,裁剪后为圆形
child: Container(
height: 100,
100,
child: Image.network(
'https://ssyerv1.oss-cn-hangzhou.aliyuncs.com/picture/389e31d03d36465d8acd9939784df6f0.jpg!sswm',
fit: BoxFit.cover,
),
),
),
],
)
ClipPath 及 CustomClipper
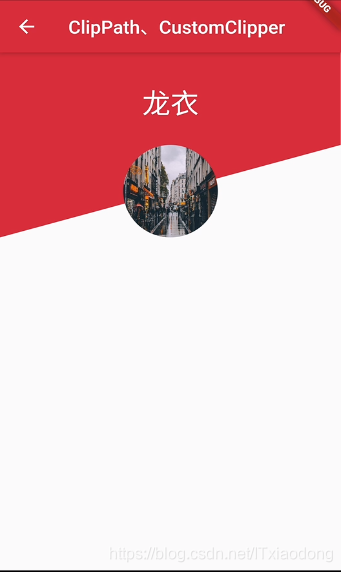
ClipPath会将 child 按照给定的路径进行裁剪,CustomClipper可以绘制出任何我们想要的形状
实现的效果:实战项目源码可在 Flutter-WanAndroid 中查看。
上方的这种效果可以通过ClipPath+CustomClipper实现。
主要思路是通过CustomClipper实现自定义的斜线效果然后将结果传递给ClipPath构造函数中的clipper字段。
我们先来看看CustomClipper这个抽象类。
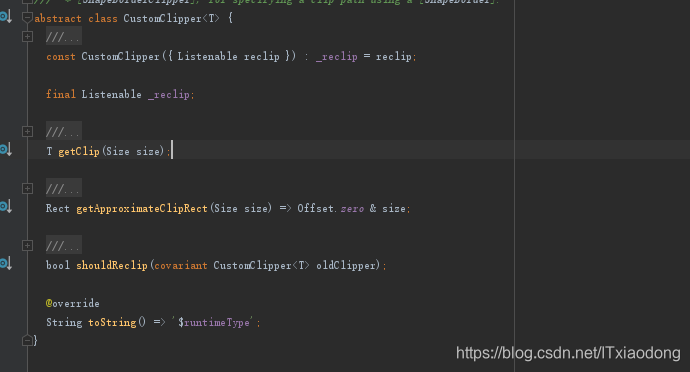
在源码中可以看到getClip方法就是获取裁剪的区域。我们可以在这个方法中绘制出斜对角效果。
伪代码实现如下:
class _CustomClipperTestPageState extends State<CustomClipperTestPage> {
@override
Widget build(BuildContext context) {
return Scaffold(
appBar: AppBar(
title: Text('ClipPath、CustomClipper'),
),
body: Column(children: <Widget>[
Stack(
children: <Widget>[
ClipPath(
clipper:
TopBarClipper(MediaQuery.of(context).size.width, 200.0),
child: Container(// 主题色填充 child
double.infinity,
height: 240.0,
color: Theme.of(context).primaryColor,
),
),
// 名字
Padding(
padding: EdgeInsets.only(top: 40.0),
child: Center(
child: Text(
'龙衣',
style: TextStyle(fontSize: 30.0, color: Colors.white),
)),
),
// 圆形头像
Container(
margin: EdgeInsets.only(top: 100.0),
child: Center(
child: Container(
100.0,
height: 100.0,
child: ClipOval(
child: Image.network(
"https://ssyerv1.oss-cn-hangzhou.aliyuncs.com/picture/389e31d03d36465d8acd9939784df6f0.jpg!sswm",
fit: BoxFit.fill,
)))),
),
],
),
]));
}
}
/// 顶部斜对角栏裁剪
class TopBarClipper extends CustomClipper<Path> {
// 宽高
double width;
double height;
/// 构造函数,接收传递过来的宽高
TopBarClipper(this.width, this.height);
/// 获取剪裁区域的接口
/// 返回斜对角的图形 path
@override
Path getClip(Size size) {
Path path = Path();
path.moveTo(0.0, 0.0);
path.lineTo(width, 0.0);
// path 斜线效果
path.lineTo(width, height / 2);
path.lineTo(0.0, height);
path.close();
return path;
}
/// 接口决定是否重新剪裁
/// 如果在应用中,剪裁区域始终不会发生变化时应该返回 false,这样就不会触发重新剪裁,避免不必要的性能开销。
@override
bool shouldReclip(CustomClipper<Path> oldClipper) {
return false;
}
}
完~
————————————————
版权声明:本文为CSDN博主「_龙衣」的原创文章,遵循 CC 4.0 BY-SA 版权协议,转载请附上原文出处链接及本声明。
原文链接:https://blog.csdn.net/ITxiaodong/article/details/105029358