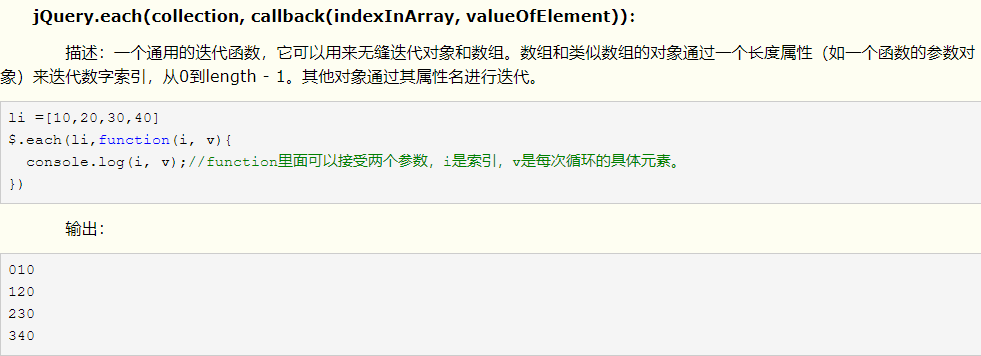
数据可视化推荐网站(都是JavaScript写的):
https://echarts.baidu.com/
https://www.joinquant.com/
我们要多用心也是可以做前端的!!!
回顾:
1.jquery介绍
2.jquery的引入方式
3.jquery选择器:找标签
基本选择器:ID,Class,标签,配合使用,组合选择器,所有元素选择器,
层级选择器:同css
基本筛选器:选择之后进行过滤
属性选择器:
表单筛选器:
4.筛选器方法(将来用的会很多):下一个元素,上一个元素,父亲元素,儿子和兄弟元素,查找,筛选
5.操作标签:
样式操作:(样式类)
位置操作:
尺寸:
文本操作:
属性操作:
文档处理:
6.转换:jq=>dom [0]
dom=>jq $("this")
7.后边的django逻辑性会有很多,需要视频查漏补缺.
今日大纲:
1.事件
2.批量操作
3.事件冒泡
4.事件委托
详细内容:
1.事件
常用事件
click(function(){...}) hover(function(){...})
blur(function(){...}) focus(function(){...}) change(function(){...}) //内容发生变化,input,select等
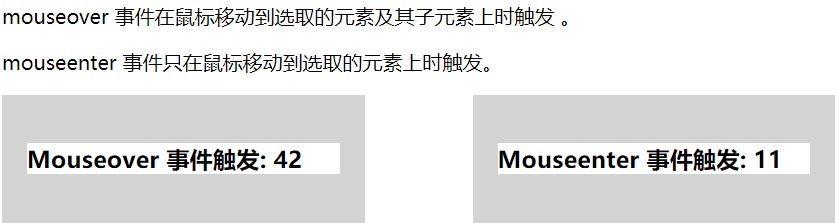
keyup(function(){...}) mouseover 和 mouseenter的区别是:mouseover事件只要你在绑定该事件的对象上移动就会一直触发,mmouseenter事件只触发一次,表示鼠标进入这个对象
第一种绑定事件的方法: click
代码:
<!DOCTYPE html>
<html lang="zh-CN">
<head>
    <meta http-equiv="content-Type" charset="UTF-8">
    <meta http-equiv="x-ua-compatible" content="IE=edge">
    <title>Title</title>
</head>
<body>
    <button id="btn1">点我啊</button>
    <!--1.button按钮-->
    <script src="jquery-3.3.1.min.js"></script>
    <!--2.引入js包-->
    <script>
        $('#btn1').click(function () {
            alert('999');
        })
    //3.弹窗
    </script>
</body>
</html>
测试结果:点击"点我啊",弹出下面的对话框

第二种绑定事件的方法(on):
<!DOCTYPE html>
<html lang="zh-CN">
<head>
    <meta http-equiv="content-Type" charset="UTF-8">
    <meta http-equiv="x-ua-compatible" content="IE=edge">
    <title>Title</title>
</head>
<body>
    <button id="btn1">点我啊</button>
    <!--1.button按钮-->
    <script src="jquery-3.3.1.min.js"></script>
    <!--2.引入js包-->
    <script>
        // $('#btn1').click(function () {
        //     alert('999');
        // })
    //3.弹窗
        $('#btn1').on('click',function () {
            alert('777');
        })
    //    第二种绑定事件的方法
    </script>
</body>
</html>
测试结果:点击"点我啊",弹出下面的对话框

hover指的是,鼠标移动上去,这个事件.
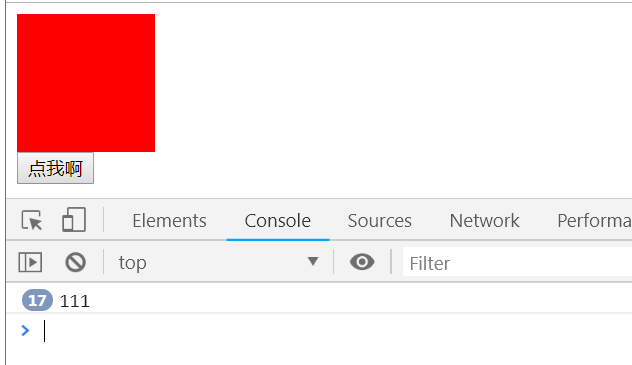
代码:测试的是hover div标签,class值为d1
<!DOCTYPE html>
<html lang="zh-CN">
<head>
    <meta http-equiv="content-Type" charset="UTF-8">
    <meta http-equiv="x-ua-compatible" content="IE=edge">
    <title>Title</title>
    <style>
        .d1{
            background-color: red;
            width: 100px;
            height: 100px;
        }
    </style>
</head>
<body>
    <div class="d1"></div>
    <button id="btn1">点我啊</button>
    <!--1.button按钮-->
    <script src="jquery-3.3.1.min.js"></script>
    <!--2.引入js包-->
    <script>
        // $('#btn1').click(function () {
        //     alert('999');
        // })
    //3.弹窗
        $('#btn1').on('click',function () {
            alert('777');
        })
    //    第二种绑定事件的方法
        $('.d1').hover(function () {
            console.log('111');
        })
    </script>
</body>
</html>
测试结果:鼠标每移动上去一次,下边就加一次
鼠标移动到div上,变为绿色,移动下来变成红色
<!DOCTYPE html>
<html lang="zh-CN">
<head>
    <meta http-equiv="content-Type" charset="UTF-8">
    <meta http-equiv="x-ua-compatible" content="IE=edge">
    <title>Title</title>
    <style>
        .d1{
            background-color: red;
            width: 100px;
            height: 100px;
        }
    </style>
</head>
<body>
    <div class="d1"></div>
    <button id="btn1">点我啊</button>
    <!--1.button按钮-->
    <script src="jquery-3.3.1.min.js"></script>
    <!--2.引入js包-->
    <script>
        // $('#btn1').click(function () {
        //     alert('999');
        // })
    //3.弹窗
        $('#btn1').on('click',function () {
            alert('777');
        })
    //    第二种绑定事件的方法
        $('.d1').hover(
            function () {
            // console.log('111');
            $(this).css('background-color','green')
        //    鼠标移动上去就改变为绿颜色
            },
            function () {
                $(this).css('background-color','red')
            //鼠标移动下来颜色颜色改变为红色
            }
        )
    </script>
</body>
</html>
focus焦点事件&blur事件:
代码案例:
<!DOCTYPE html>
<html lang="zh-CN">
<head>
    <meta http-equiv="content-Type" charset="UTF-8">
    <meta http-equiv="x-ua-compatible" content="IE=edge">
    <title>Title</title>
    <style>
        .d1{
            background-color: red;
            width: 100px;
            height: 100px;
        }
    </style>
</head>
<body>
    <div class="d1"></div>

    <input id="i1" type="text">
    <!--input获取焦点-->

    <button id="btn1">点我啊</button>
    <!--1.button按钮-->
    <script src="jquery-3.3.1.min.js"></script>
    <!--2.引入js包-->
    <script>
        // $('#btn1').click(function () {
        //     alert('999');
        // })
    //3.弹窗
        $('#btn1').on('click',function () {
            alert('777');
        });
    //    第二种绑定事件的方法
        $('.d1').hover(
            function () {
            // console.log('111');
            $(this).css('background-color','green')
        //    鼠标移动上去就改变为绿颜色
            },
            function () {
                $(this).css('background-color','red')
            //鼠标移动下来颜色颜色改变为红色
            }
        );
        $("#i1").focus(function () {
            $(this).css('background-color','red');
        //    鼠标移动到input框上去点击,变成红色
        })
        $("#i1").blur(function () {
            $(this).css('background-color','green');
        //    鼠标移动到input框下来点击,变成绿色
        })
    </script>
</body>
</html>
change事件:
html代码:选择框内发生改变,输入框的颜色发生变化
<!DOCTYPE html>
<html lang="zh-CN">
<head>
    <meta http-equiv="content-Type" charset="UTF-8">
    <meta http-equiv="x-ua-compatible" content="IE=edge">
    <title>Title</title>
    <style>
        .d1{
            background-color: red;
            width: 100px;
            height: 100px;
        }
    </style>
</head>
<body>
    <div class="d1"></div>


    <input id="i1" type="text">
    <!--input获取焦点-->

<select name="" id="s1">
    <option value="1">11</option>
    <option value="2">22</option>
    <option value="3">33</option>
</select>

    <button id="btn1">点我啊</button>
    <!--1.button按钮-->
    <script src="jquery-3.3.1.min.js"></script>
    <!--2.引入js包-->
    <script>
        // $('#btn1').click(function () {
        //     alert('999');
        // })
    //3.弹窗
        $('#btn1').on('click',function () {
            alert('777');
        });
    //    第二种绑定事件的方法
        $('.d1').hover(
            function () {
            // console.log('111');
            $(this).css('background-color','green')
        //    鼠标移动上去就改变为绿颜色
            },
            function () {
                $(this).css('background-color','red')
            //鼠标移动下来颜色颜色改变为红色
            }
        );
        $("#i1").focus(function () {
            $(this).css('background-color','red');
        //    鼠标移动到input框上去点击,变成红色
        });
        $("#i1").blur(function () {
            $(this).css('background-color','green');
        //    鼠标移动到input框下来点击,变成绿色
        });
        $("#s1").change(function () {
            $("#i1").css('background-color','blue');
        })
    </script>
</body>
</html>
keyup&keydown事件(键盘上按下来)
//e,event代表事件
<!DOCTYPE html>
<html lang="zh-CN">
<head>
    <meta http-equiv="content-Type" charset="UTF-8">
    <meta http-equiv="x-ua-compatible" content="IE=edge">
    <title>Title</title>
    <style>
        .d1{
            background-color: red;
            width: 100px;
            height: 100px;
        }
    </style>
</head>
<body>
    <div class="d1"></div>


    <input id="i1" type="text">
    <!--input获取焦点-->

<select name="" id="s1">
    <option value="1">11</option>
    <option value="2">22</option>
    <option value="3">33</option>
</select>

    <button id="btn1">点我啊</button>
    <!--1.button按钮-->
    <script src="jquery-3.3.1.min.js"></script>
    <!--2.引入js包-->
    <script>
        // $('#btn1').click(function () {
        //     alert('999');
        // })
    //3.弹窗
        $('#btn1').on('click',function () {
            alert('777');
        });
    //    第二种绑定事件的方法
        $('.d1').hover(
            function () {
            // console.log('111');
            $(this).css('background-color','green')
        //    鼠标移动上去就改变为绿颜色
            },
            function () {
                $(this).css('background-color','red')
            //鼠标移动下来颜色颜色改变为红色
            }
        );
        $("#i1").focus(function () {
            $(this).css('background-color','red');
        //    鼠标移动到input框上去点击,变成红色
        });
        $("#i1").blur(function () {
            $(this).css('background-color','green');
        //    鼠标移动到input框下来点击,变成绿色
        });
        $("#s1").change(function () {
            $("#i1").css('background-color','blue');
        });
        $(window).keydown(function (e) {
            console.log(e.keyCode);
        })
    </script>
</body>
</html>
鼠标点击在页面上,再在键盘上输入字母等,显示数字,推测应该显示的是ascii码.

#shift键表示16,时刻监控着键盘,同上边一样
这个e或者event表示鼠标按下或者抬起这个事件的本身.
在键盘上按下,或者抬起
<!DOCTYPE html>
<html lang="zh-CN">
<head>
    <meta http-equiv="content-Type" charset="UTF-8">
    <meta http-equiv="x-ua-compatible" content="IE=edge">
    <title>Title</title>
    <style>
        .d1{
            background-color: red;
            width: 100px;
            height: 100px;
        }
    </style>
</head>
<body>
    <div class="d1"></div>


    <input id="i1" type="text">
    <!--input获取焦点-->

<select name="" id="s1">
    <option value="1">11</option>
    <option value="2">22</option>
    <option value="3">33</option>
</select>

    <button id="btn1">点我啊</button>
    <!--1.button按钮-->
    <script src="jquery-3.3.1.min.js"></script>
    <!--2.引入js包-->
    <script>
        // $('#btn1').click(function () {
        //     alert('999');
        // })
    //3.弹窗
        $('#btn1').on('click',function () {
            alert('777');
        });
    //    第二种绑定事件的方法
        $('.d1').hover(
            function () {
            // console.log('111');
            $(this).css('background-color','green')
        //    鼠标移动上去就改变为绿颜色
            },
            function () {
                $(this).css('background-color','red')
            //鼠标移动下来颜色颜色改变为红色
            }
        );
        $("#i1").focus(function () {
            $(this).css('background-color','red');
        //    鼠标移动到input框上去点击,变成红色
        });
        $("#i1").blur(function () {
            $(this).css('background-color','green');
        //    鼠标移动到input框下来点击,变成绿色
        });
        $("#s1").change(function () {
            $("#i1").css('background-color','blue');
        });
        $(window).keydown(function (e) {
            // console.log(e.keyCode);
            if(e.keyCode===16){
                console.log('这是shift键')
            //    鼠标按在shift键上会显示这个
            }
        })
    </script>
</body>
</html>
mouseover表示鼠标每次从外边移动进去,则加1,
mouseenter
<!DOCTYPE html>
<html lang="zh-CN">
<head>
    <meta http-equiv="content-Type" charset="UTF-8">
    <meta http-equiv="x-ua-compatible" content="IE=edge">
    <title>Title</title>
    <style>
        .d1,#d2{
            background-color: red;
            width: 100px;
            height: 100px;
        }
    </style>
</head>
<body>
    <div class="d1"></div>


    <input id="i1" type="text">
    <!--input获取焦点-->

<select name="" id="s1">
    <option value="1">11</option>
    <option value="2">22</option>
    <option value="3">33</option>
</select>
<div id="d2"></div>

    <button id="btn1">点我啊</button>
    <!--1.button按钮-->
    <script src="jquery-3.3.1.min.js"></script>
    <!--2.引入js包-->
    <script>
        // $('#btn1').click(function () {
        //     alert('999');
        // })
    //3.弹窗
        $('#btn1').on('click',function () {
            alert('777');
        });
    //    第二种绑定事件的方法
        $('.d1').hover(
            function () {
            // console.log('111');
            $(this).css('background-color','green')
        //    鼠标移动上去就改变为绿颜色
            },
            function () {
                $(this).css('background-color','red')
            //鼠标移动下来颜色颜色改变为红色
            }
        );
        $("#i1").focus(function () {
            $(this).css('background-color','red');
        //    鼠标移动到input框上去点击,变成红色
        });
        $("#i1").blur(function () {
            $(this).css('background-color','green');
        //    鼠标移动到input框下来点击,变成绿色
        });
        $("#s1").change(function () {
            $("#i1").css('background-color','blue');
        });
        $(window).keyup(function (e) {
            // console.log(e.keyCode);
            if(e.keyCode===16){
                console.log('这是shift键')
            //    鼠标按在shift键上会显示这个
            }
        });
        $('#d2').mouseover(function () {
            console.log('xxx');
        //    应该是在框内移动,就打印,实际情况是在每次进入才打印
        });
        // $('#d2').mouseenter(function () {
        //     console.log('xxx');
        //    每次进入打印一次.
        // });
    </script>
</body>
</html>
参考菜鸟教程:(讲解有误)
注意:hover事件不可以通过on进行绑定.
事件绑定:
移除事件(不常用):
组织后续时间执行:
2.批量操作
当选中某个操作,按住shift,可以一起操作某个事件.
批量操作可以理解成,对一些事物,处理相同的操作的一个程序
3.事件冒泡:
事件冒泡可以理解为,触发了子事件,父事件也会跟着触发.
代码:
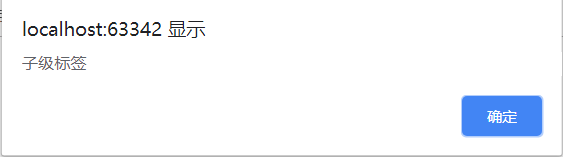
<!DOCTYPE html>
<html lang="zh-CN">
<head>
    <meta http-equiv="content-Type" charset="UTF-8">
    <meta http-equiv="x-ua-compatible" content="IE=edge">
    <title>Title</title>

    <style>
        #d2{
            height: 100px;
            width:100px;
            background-color: green;
        }
    </style>

</head>
<body>

<div id="d1">
    <div id="d2"></div>
</div>

<script src="jquery-3.3.1.min.js"></script>
<script>
    $("#d1").click(function () {
        alert('父级标签')
    });
    $("#d2").click(function () {
        alert('子级标签')
    });
</script>
</body>
</html>
点击绿框:

阻止冒泡发生的方法:两种
<!DOCTYPE html>
<html lang="zh-CN">
<head>
    <meta http-equiv="content-Type" charset="UTF-8">
    <meta http-equiv="x-ua-compatible" content="IE=edge">
    <title>Title</title>

    <style>
        #d2{
            height: 100px;
            width:100px;
            background-color: green;
        }
    </style>

</head>
<body>

<div id="d1">
    <div id="d2"></div>
</div>

<script src="jquery-3.3.1.min.js"></script>
<script>
    $("#d1").click(function () {
        alert('父级标签')
    });
    $("#d2").click(function (e) {
        alert('子级标签')
        // return false;
        e.stopPropagation()
    //下面这个方法必须加上e事件.
    });
</script>
</body>
</html>
4.事件委托:
事件委托是通过事件冒泡的原理,利用父标签去捕获子标签的事件,将未来添加进来的某些子标签自动绑定上事件.
以全选,取消,反选例子为基础来进行验证事件委托.
<!DOCTYPE html>
<html lang="en">
<head>
    <meta charset="UTF-8">
    <title>Title</title>
</head>
<body>

<button id="all">全选</button>
<button id="reverse">反选</button>
<button id="cancel">取消</button>
<table border="1">
   <thead>
    <tr>
        <th>#</th>
        <th>姓名</th>
        <th>爱好</th>
    </tr>
   </thead>
    <tbody>
    <tr>
        <td><input type="checkbox"></td>
        <td>金老板</td>
        <td>开车</td>
    </tr>
    <tr>
        <td><input type="checkbox"></td>
        <td>景女神</td>
        <td>茶道</td>
    </tr>
    <tr>
        <td><input type="checkbox"></td>
        <td>苑昊(苑局)</td>
        <td>不洗头、不翻车、不要脸</td>
    </tr>
    </tbody>
</table>

<!--<script src="jquery.js"></script>-->
<script src="jquery-3.3.1.min.js"></script>
<script>
    // 点击全选按钮 选中所有的checkbox
    // DOM绑定事件方法
    // $("#all")[0].onclick = function(){}
    // jQuery绑定事件方法
    $("#all").click(function () {
        $(":checkbox").prop('checked', true);
    });
    // 取消
    $("#cancel").on("click", function () {
         $(":checkbox").prop('checked', false);
    });
    // 反选
    $("#reverse").click(function () {
        // 1. 找到所有选中的checkbox取消选中
        // $("input:checked").prop('checked', false);
        // // 2. 找到没有选中的checkbox选中
        // $("input:not(:checked)").prop('checked', true);
        //你会发现上面这么写,不行,为什么呢?因为你做了第一步操作之后,再做第二步操作的时候,所有标签就已经全部取消选中了,所以第二步就把所有标签选中了

        // 方法1. for循环所有的checkbox,挨个判断原来选中就取消选中,原来没选中就选中
        var $checkbox = $(":checkbox");
        for (var i=0;i<$checkbox.length;i++){
            // 获取原来的选中与否的状态
            var status = $($checkbox[i]).prop('checked');
            $($checkbox[i]).prop('checked', !status);
        }
        // 方法2. 先用变量把标签原来的状态保存下来
    //     var $unchecked =  $("input:not(:checked)");
    //     var $checked = $("input:checked");
    //
    //     $unchecked.prop('checked', true);
    //     $checked.prop('checked', false);
    })

</script>
</body>
</html>
通过删除引出,委托事件:
<!DOCTYPE html>
<html lang="en">
<head>
    <meta charset="UTF-8">
    <title>Title</title>
    <style>
        .shadow{
            position: fixed;
            background-color: rgba(0,0,0,0.3);
            top:0;
            left:0;
            bottom:0;
            right:0;
            /*设置上下左右没有距离*/
            z-index: 900;
        }
        .modal{
            position: fixed;
            width: 400px;
            height: 200px;
            background-color: #ffffff;
            top:50%;
            left:50%;
            z-index: 1000;
            margin-top: -100px;
            /*往上移动*/
            margin-left: -200px;
            /*往左移动*/
        }
        .hide{
            display:none;
            /*隐藏*/
        }
    </style>
</head>
<body>

<button id="all">全选</button>
<button id="reverse">反选</button>
<button id="cancel">取消</button>
<button id="add">增加</button>
<table border="1">
   <thead>
    <tr>
        <th>#</th>
        <th>姓名</th>
        <th>爱好</th>
        <th>操作</th>
    </tr>
   </thead>
    <tbody>
    <tr>
        <td><input type="checkbox"></td>
        <td>金老板</td>
        <td>开车</td>
        <td><button class="b1">删除</button></td>
    </tr>
    <tr>
        <td><input type="checkbox"></td>
        <td>景女神</td>
        <td>茶道</td>
        <td><button class="b1">删除</button></td>
    </tr>
    <tr>
        <td><input type="checkbox"></td>
        <td>苑昊(苑局)</td>
        <td>不洗头、不翻车、不要脸</td>
        <td><button class="b1">删除</button></td>
    </tr>
    </tbody>
</table>

<div class="modal hide">
    <!--对话框开始的时候隐藏-->
    <div>
        <label for="name">姓名</label>
        <input id="name" type="text">
    </div>
    <div>
        <label for="hobby">爱好</label>
        <input id="hobby" type="text">
    </div>
    <div>
        <button class="btn2">保存</button>
    </div>
</div>

<div class="shadow hide"></div>
<!--阴影层开始的时候隐藏-->

<!--<script src="jquery.js"></script>-->
<script src="jquery-3.3.1.min.js"></script>
<script>
    // 点击全选按钮 选中所有的checkbox
    // DOM绑定事件方法
    // $("#all")[0].onclick = function(){}
    // jQuery绑定事件方法
    $("#all").click(function () {
        $(":checkbox").prop('checked', true);
    });
    // 取消
    $("#cancel").on("click", function () {
         $(":checkbox").prop('checked', false);
    });
    // 反选
    $("#reverse").click(function () {
        // 1. 找到所有选中的checkbox取消选中
        // $("input:checked").prop('checked', false);
        // // 2. 找到没有选中的checkbox选中
        // $("input:not(:checked)").prop('checked', true);
        //你会发现上面这么写,不行,为什么呢?因为你做了第一步操作之后,再做第二步操作的时候,所有标签就已经全部取消选中了,所以第二步就把所有标签选中了

        // 方法1. for循环所有的checkbox,挨个判断原来选中就取消选中,原来没选中就选中
        var $checkbox = $(":checkbox");
        for (var i=0;i<$checkbox.length;i++){
            // 获取原来的选中与否的状态
            var status = $($checkbox[i]).prop('checked');
            $($checkbox[i]).prop('checked', !status);
        }
        // 方法2. 先用变量把标签原来的状态保存下来
    //     var $unchecked =  $("input:not(:checked)");
    //     var $checked = $("input:checked");
    //
    //     $unchecked.prop('checked', true);
    //     $checked.prop('checked', false);
    })


    //点击增加,弹出模态框
    $("#add").click(function () {
        // $(".modal").removeClass('hide');
        // $(".shadow").removeClass('hide');
        //整合上边的两条
        $(".modal,.shadow").removeClass('hide');
    })

    $('.btn2').click(function () {
        //1.获取用户输入的信息
        var name=$('#name').val();
        var hobby=$('#hobby').val();

        //2.创建标签,将数据添加到标签里面,拼接字符串添加标签
        var s="<tr>" +
            "<td><input type="checkbox"></td>" +
            "<td>"+name+"</td>" +
            "<td>"+hobby+"</td>" +
            "<td><button class="b1">删除</button></td>" +
            "</tr>";
        //在上边将要添加的name和hobby添加进去
        //3.将创建好的标签,天际到表格里面去
        $('tbody').append(s)

        //添加完成之后
        //4.关闭(隐藏)对话框
        $('.modal,.shadow').addClass('hide');
    //    5.清空用户输入的内容
        $('#name').val('');
        $('#hobby').val('');
    })

    //删除按钮事件
    // $('.b1').click(function () {
    //     $(this).parent().parent().remove();
    // //    通过单击button按钮,实现删除功能
    // })

//问题:新增加的,无法绑定删除功能?应该怎么处理
//    1.将删除功能放在最后是不可行的
//    2.需要处理添加这个标签的父标签进行处理,也就是子标签委托父标签处理这个事情。

    //    注意由上边的.b1标签改写成tbody下的tr标签,
    //    给下边的tbody下的tr绑定一个click事件,click事件由button触发
    //    也就是把button事件的处理过程给了他的父亲.
    //    在这里表示把含有.b1标签的全部委托给它的父亲
    //
    //事件委托,将button的click事件委托给了祖父tbody标签,实现的效果就是点击button按钮,触发tbody的click事件,$(this表示的还是被点击的那个标签)
    //on可以做事件委托,单纯的click不可以做事件委托
    //参数:click事件名称,button委托人,tbody的后代标签
    $('tbody').on('click','button',function () {
        $(this).parent().parent().remove();
    })
</script>
</body>
</html>
5.页面加载
案例1:
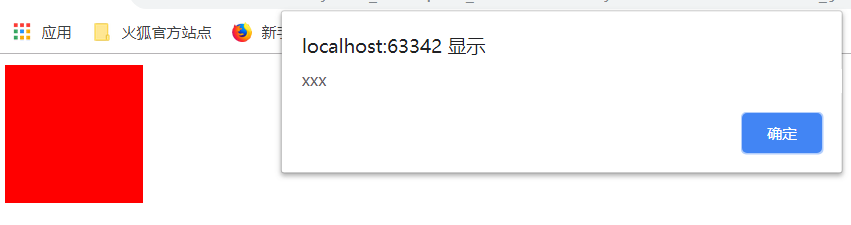
<!DOCTYPE html>
<html lang="zh-CN">
<head>
    <meta http-equiv="content-Type" charset="UTF-8">
    <meta http-equiv="x-ua-compatible" content="IE=edge">
    <title>Title</title>
    <style>
        .d1{
            background-color: red;
            width: 100px;
            height: 100px;
        }
    </style>

</head>
<body>

<div class="d1"></div>
<script src="jquery-3.3.1.min.js"></script>
<script>
        $('.d1').click(function () {
            alert('xxx');
        })
</script>
</body>
</html>
点击红色区域出现如下对话框.
通过window.onload实现最后加载.在头部放这个
案例:
<!DOCTYPE html>
<html lang="zh-CN">
<head>
    <meta http-equiv="content-Type" charset="UTF-8">
    <meta http-equiv="x-ua-compatible" content="IE=edge">
    <title>Title</title>
    <style>
        .d1{
            background-color: red;
            width: 100px;
            height: 100px;
        }
    </style>
    <script>
            window.onload=function () {
                $('.d1').click(function () {
                alert('xxx');
            })
            }
    </script>
</head>
<body>

<div class="d1"></div>
<script src="jquery-3.3.1.min.js"></script>

</body>
</html>
缺点分析:有两个js文件也就是多人操作中,js写在html和js文件中
html中代码:
<!DOCTYPE html>
<html lang="zh-CN">
<head>
    <meta http-equiv="content-Type" charset="UTF-8">
    <meta http-equiv="x-ua-compatible" content="IE=edge">
    <title>Title</title>
    <style>
        .d1{
            background-color: red;
            width: 100px;
            height: 100px;
        }
    </style>
    <script>
            window.onload=function () {
                $('.d1').click(function () {
                alert('xxx');
            })
            }
    </script>
    <script src="01test.js"></script>
</head>
<body>

<div class="d1"></div>
<script src="jquery-3.3.1.min.js"></script>

</body>
</html>
js代码:
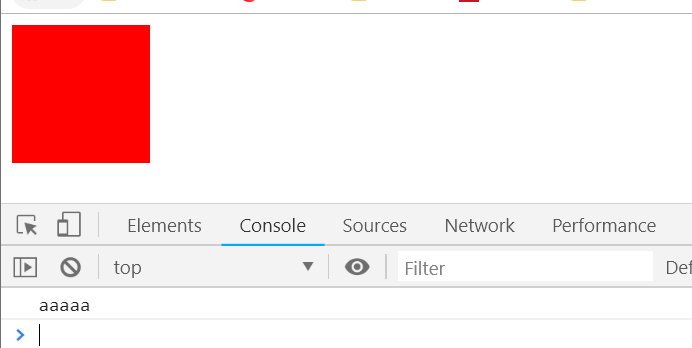
window.onload=function () {
    console.log('aaaaa');
};
此时只能在调试框中显示:aaaaa
更优化的方法:(两个都能够打印出来了)

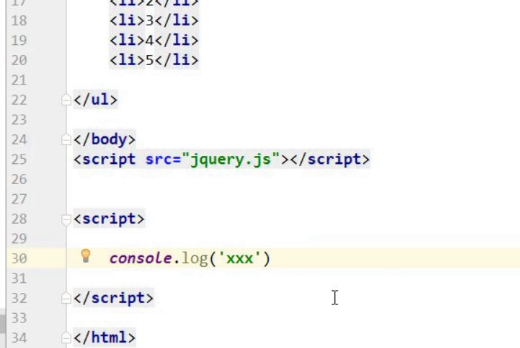
html代码:
<!DOCTYPE html>
<html lang="zh-CN">
<head>
    <meta http-equiv="content-Type" charset="UTF-8">
    <meta http-equiv="x-ua-compatible" content="IE=edge">
    <title>Title</title>
    <style>
        .d1{
            background-color: red;
            width: 100px;
            height: 100px;
        }
    </style>
    <script src="jquery-3.3.1.min.js"></script>
    <script>
            // window.onload=function () {
            //     $('.d1').click(function () {
            //     alert('xxx');
            // })
            // }

      //jquery页面加载完成之后做某些事情的操作
        $(function () {
            $('.d1').click(function () {
                alert('xxx');
            })
        })
    </script>
    <script src="01test.js"></script>
</head>
<body>

<div class="d1"></div>


</body>
</html>
js代码(01test.js):
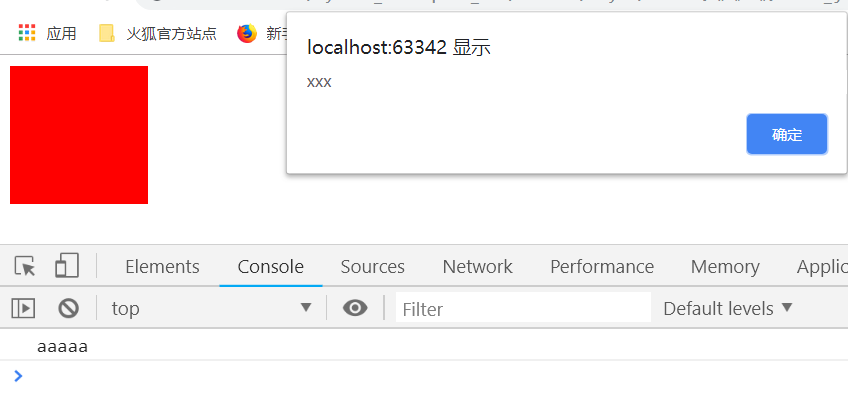
$(function () {
            console.log('aaaaa');
});
结果如下:
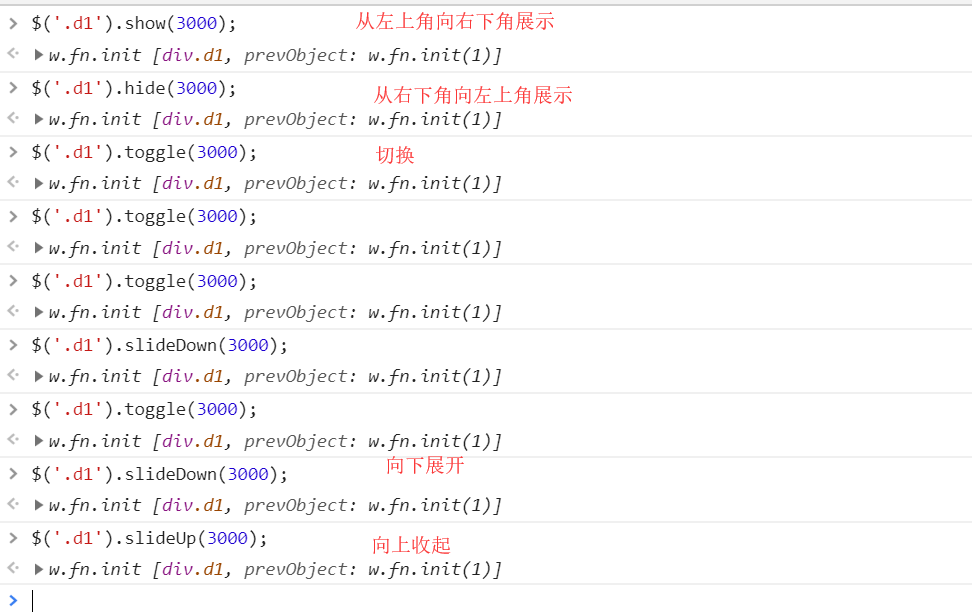
6.动画效果
代码html:
<!DOCTYPE html>
<html lang="zh-CN">
<head>
    <meta http-equiv="content-Type" charset="UTF-8">
    <meta http-equiv="x-ua-compatible" content="IE=edge">
    <title>Title</title>
    <style>
        .d1{
            background-color: red;
            width: 100px;
            height: 100px;
            display: none;
        }
    </style>
</head>
<body>

<div class="d1"></div>
</body>
<script src="jquery-3.3.1.min.js"></script>
</html>

动画效果案例html2:
<!DOCTYPE html>
<html lang="en">
<head>
    <meta charset="UTF-8">
    <title>Title</title>
    <style>
        .c1{
            background-color: red;
            /*background: url("hlw.png") no-repeat;*/
            width: 200px;
            height: 200px;
            /*position: absolute;*/  /*自己试以下position:absolute的效果*/
            display: none;
        }
        .c2{
            height: 100px;
            background-color: lawngreen;
        }

    </style>
</head>
<body>

<!--<div class="c1" hidden></div>-->  <!--不用hidden,上面写display:none也是可以的-->
<div class="c1"></div>
<div class="c2"></div>
<script src="jquery-3.3.1.min.js"></script>
<script>
    // $('.c1').hide(3000);
    $('.c1').show(3000);

</script>
</body>
</html>
点赞html案例:
<!DOCTYPE html>
<html lang="zh-CN">
<head>
  <meta charset="UTF-8">
  <meta http-equiv="x-ua-compatible" content="IE=edge">
  <meta name="viewport" content="width=device-width, initial-scale=1">
  <title>点赞动画示例</title>
  <style>
    div {
      position: relative;
      display: inline-block;
    }
    div>i {
      display: inline-block;
      color: red;
      position: absolute;
      right: -16px;
      top: -5px;
      opacity: 1;
    }
  </style>
</head>
<body>

<div id="d1">点赞</div>
<script src="jquery-3.2.1.min.js"></script>
<script>
  $("#d1").on("click", function () {
    var newI = document.createElement("i");
    newI.innerText = "+1";
    $(this).append(newI);
    $(this).children("i").animate({
      opacity: 0  //1秒之后透明度变为0,注意写法,animate({属性:值},毫秒数)
    }, 1000)
  })
</script>
</body>
</html>
推荐:iconfonts,阿里图标库
7.其他
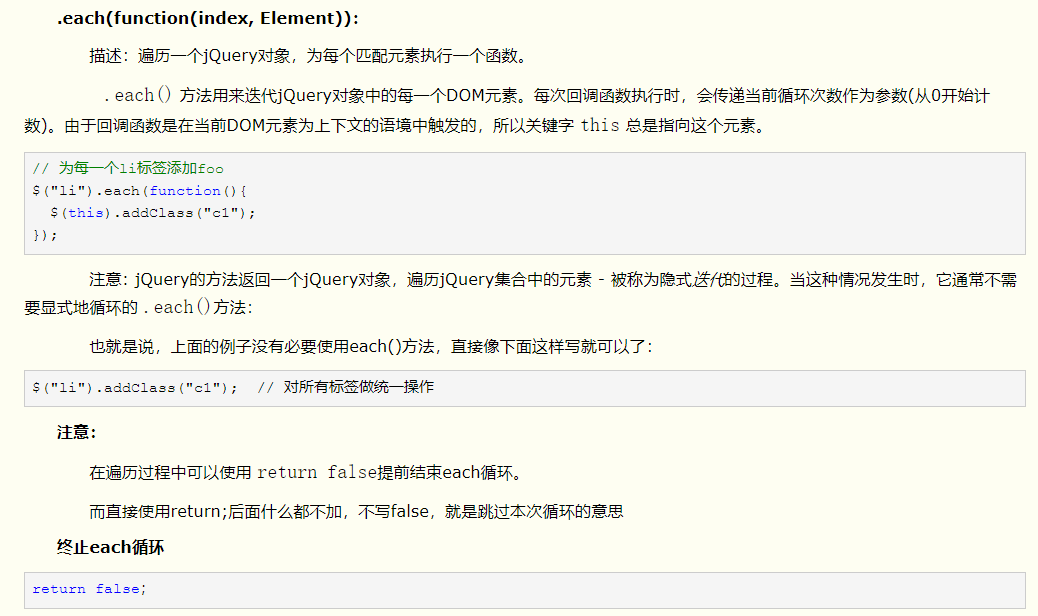
测试:

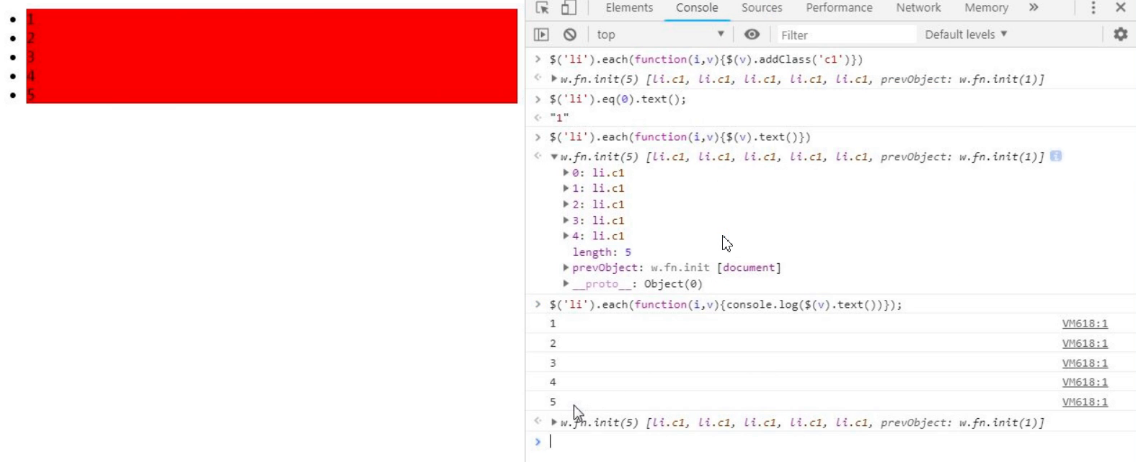
each还可以测试循环所有标签.
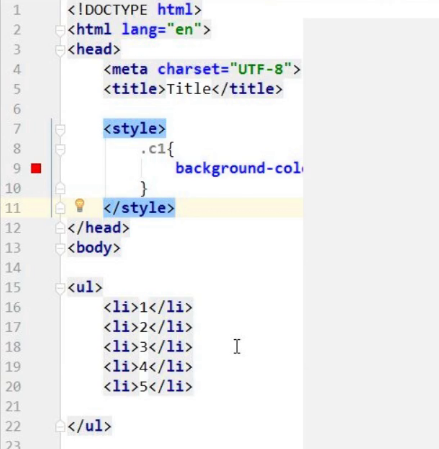
html测试代码:
<!DOCTYPE html>
<html lang="zh-CN">
<head>
    <meta http-equiv="content-Type" charset="UTF-8">
    <meta http-equiv="x-ua-compatible" content="IE=edge">
    <title>Title</title>

</head>
<body>
<ul>
    <li>1</li>
    <li>2</li>
    <li>3</li>
    <li>4</li>
    <li>5</li>
</ul>
<script src="jquery-3.3.1.min.js"></script>
</body>
</html>
测试结果:
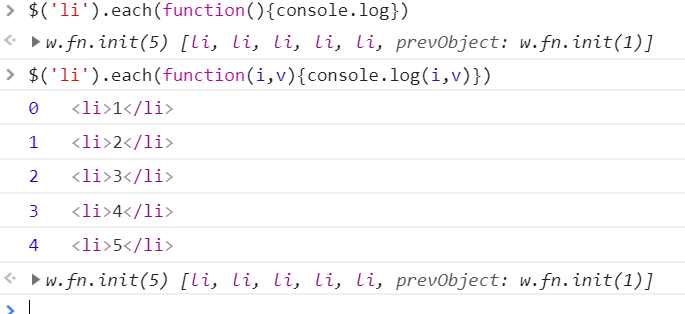
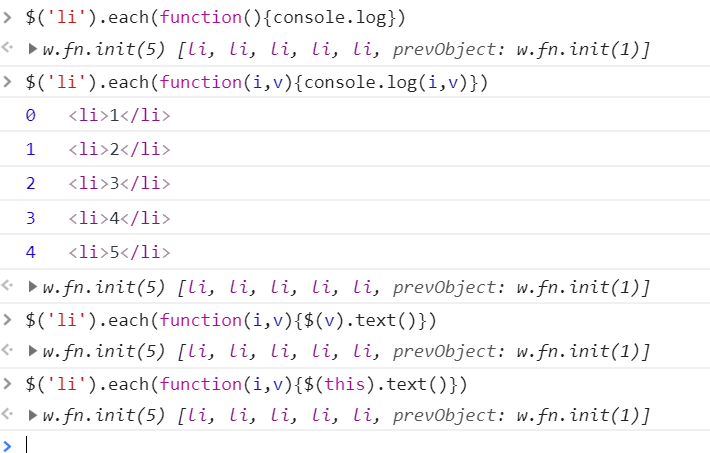
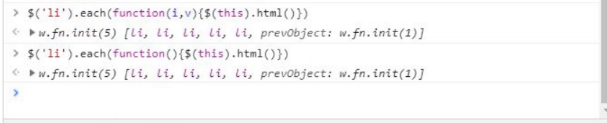
代码截图
8.

标签内部也可以存储数据


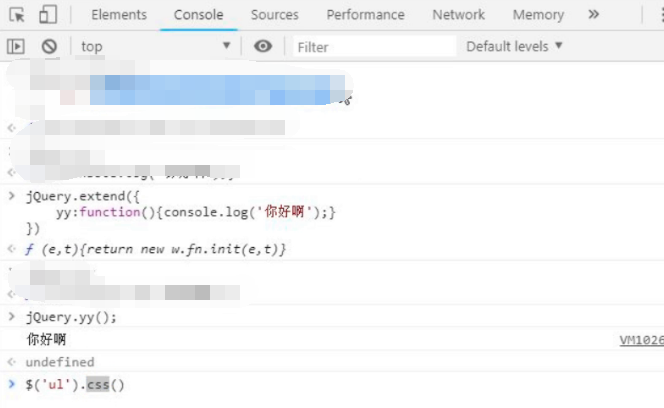
9.自定义插件
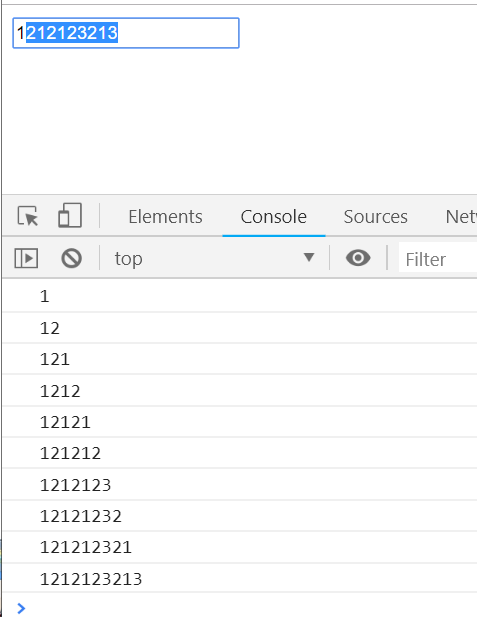
10.input事件
代码:
<!DOCTYPE html>
<html lang="zh-CN">
<head>
    <meta http-equiv="content-Type" charset="UTF-8">
    <meta http-equiv="x-ua-compatible" content="IE=edge">
    <title>Title</title>
</head>
<body>
<input id="name" type="text">
<script src="jquery-3.3.1.min.js"></script>
<script>
    $('#name').on('input',function(){
        console.log($(this).val());
    })
</script>
</body>
</html>