1. 下载rpm包
# wget https://repo.zabbix.com/zabbix/4.4/rhel/7/x86_64/zabbix-agent-4.4.4-1.el7.x86_64.rpm
2. 安装
# rpm -ivh zabbix-agent-4.4.4-1.el7.x86_64.rpm
3. 修改配置文件
# vim /etc/zabbix/zabbix_agentd.conf

Server=192.168.80.131    #修改为服务器ip(被动)
ServerActive=192.168.80.131    #修改为服务器ip(主动)
Hostname=192.168.80.132   #修改为客户机ip
4. 启动agent
# systemctl start zabbix-agent
# systemctl enable zabbix-agent
5. 开放端口
# firewall-cmd --zone=public --add-port=10050/tcp
# firewall-cmd --zone=public --add-port=10050/tcp --permanent
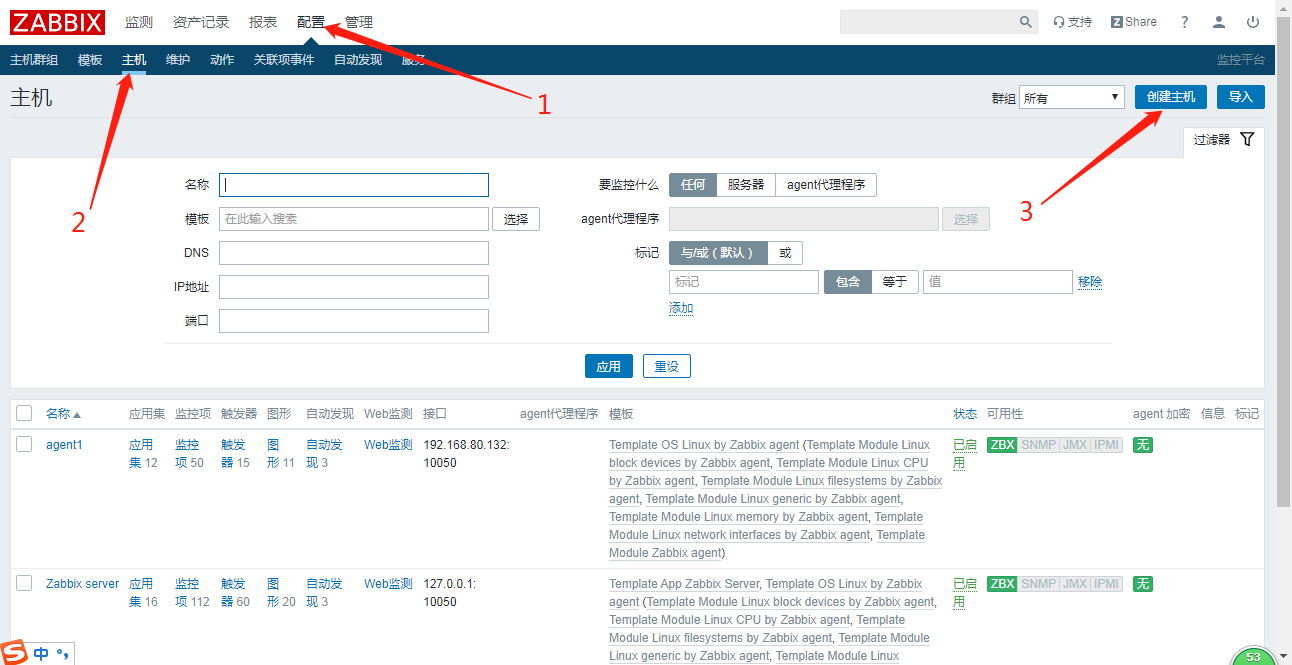
6. 添加主机
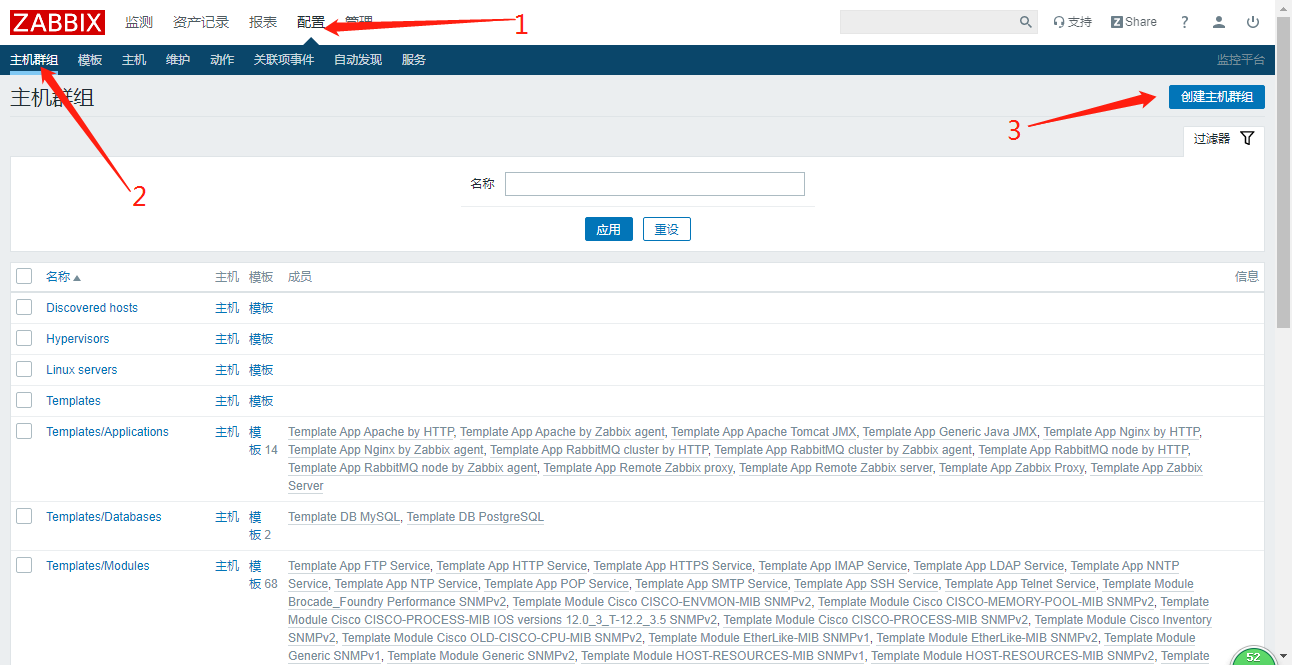
先添加主机组
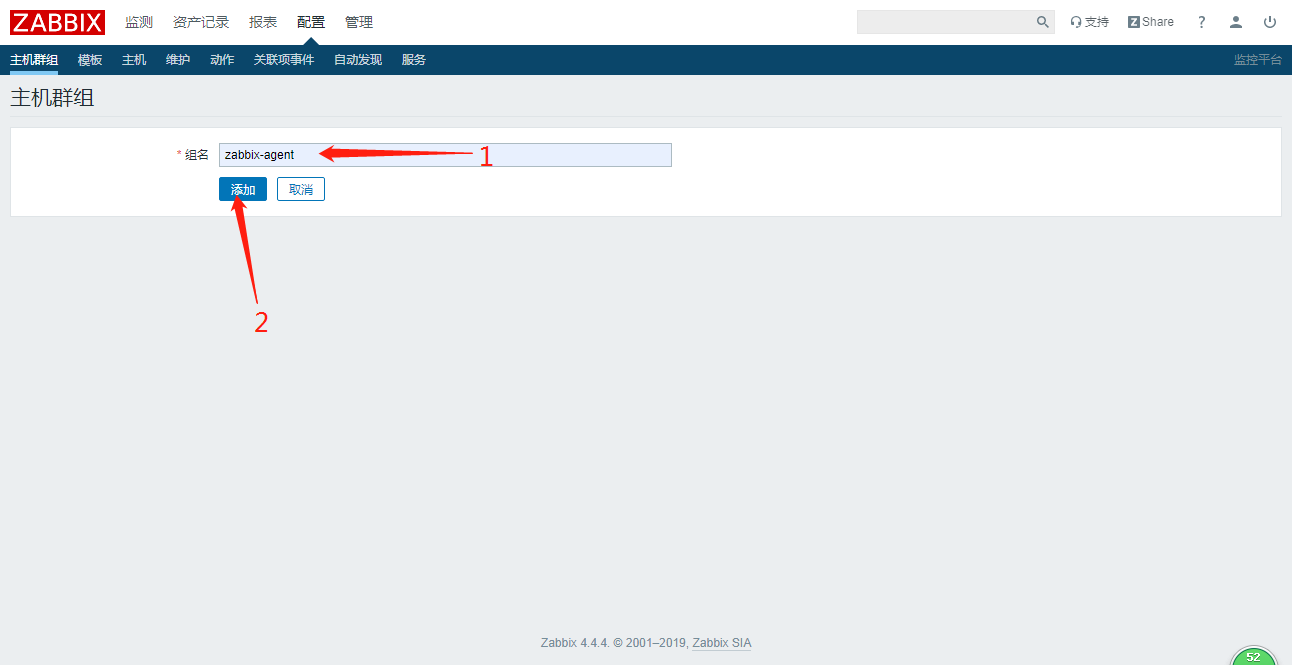
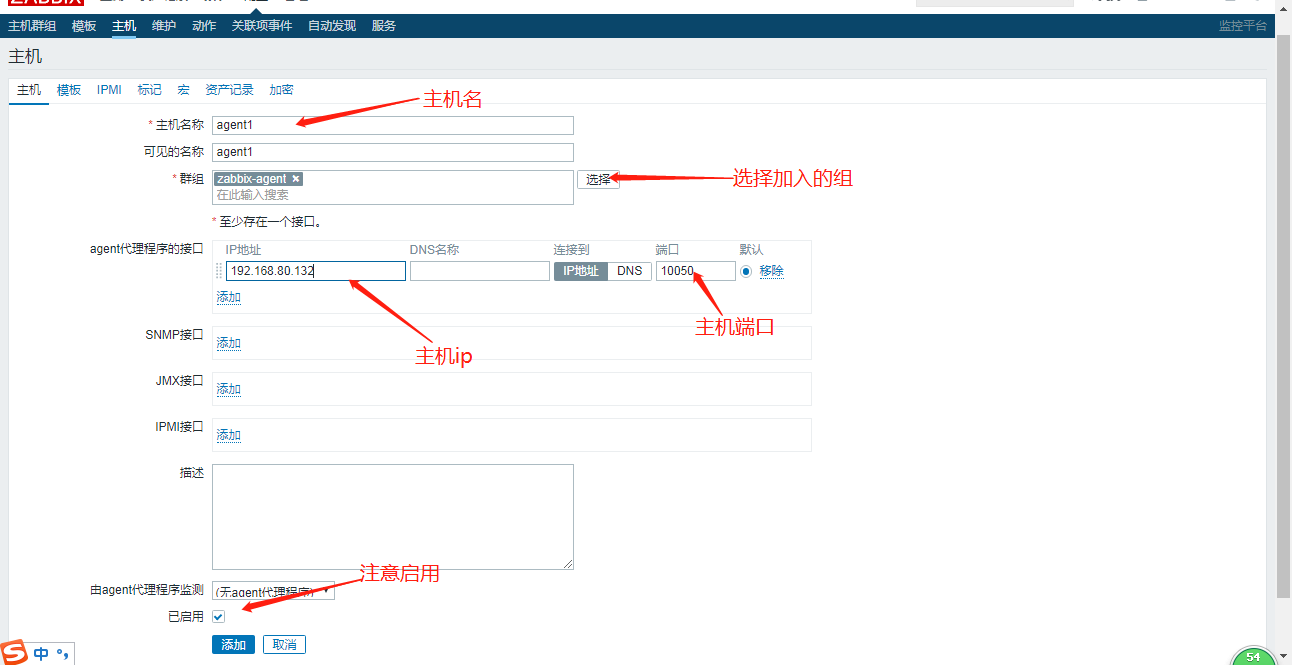
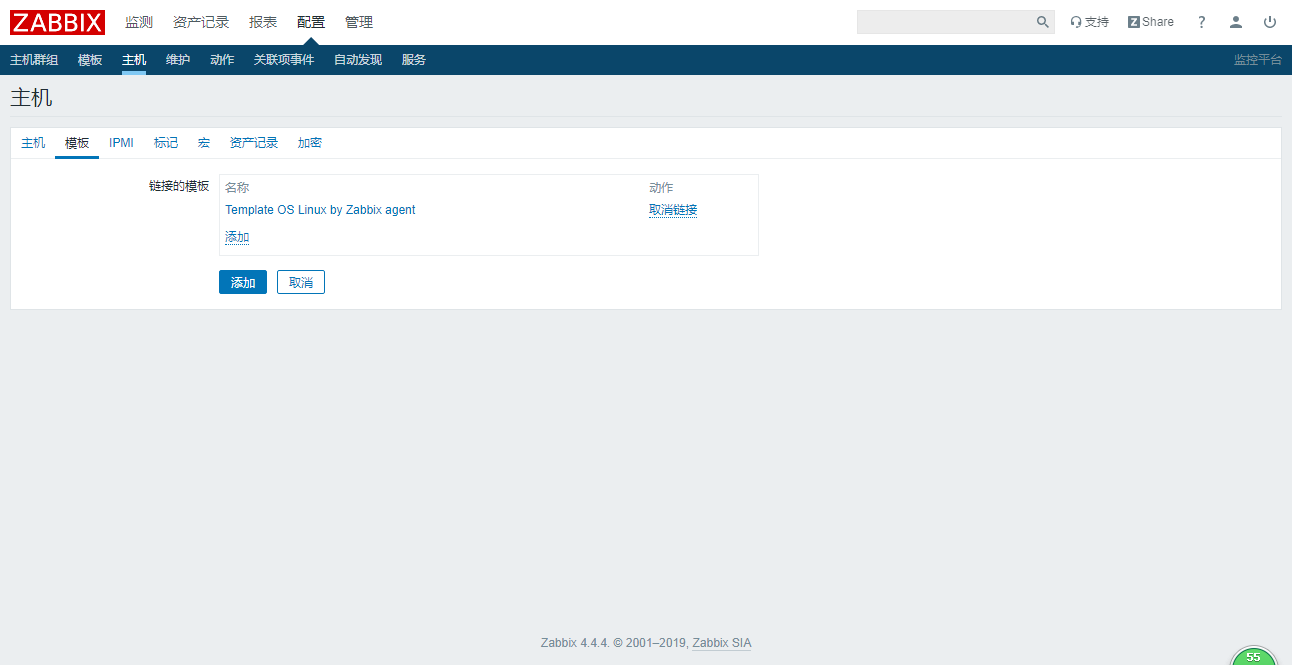
添加主机