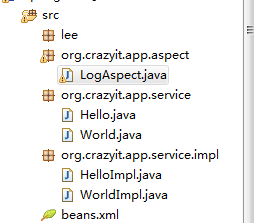
项目结构
业务代码
@Component("hello")
public class HelloImpl implements Hello
{
// 定义一个简单方法,模拟应用中的业务逻辑方法
public void foo()
{
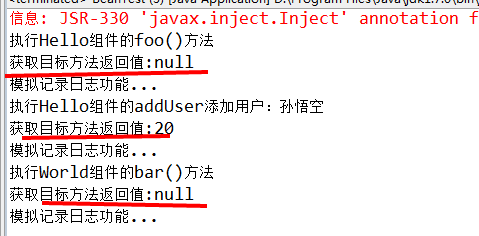
System.out.println("执行Hello组件的foo()方法");
}
// 定义一个addUser()方法,模拟应用中的添加用户的方法
public int addUser(String name , String pass)
{
System.out.println("执行Hello组件的addUser添加用户:" + name);
return 20;
}
} @Component("world")
public class WorldImpl implements World
{
// 定义一个简单方法,模拟应用中的业务逻辑方法
public void bar()
{
System.out.println("执行World组件的bar()方法");
}
}
定义切面Bean
@Aspect
public class LogAspect
{
// 匹配org.crazyit.app.service.impl包下所有类的、
// 所有方法的执行作为切入点
@AfterReturning(returning="rvt"
, pointcut="execution(* org.crazyit.app.service.impl.*.*(..))")
// 声明rvt时指定的类型会限制目标方法必须返回指定类型的值或没有返回值
// 此处将rvt的类型声明为Object,意味着对目标方法的返回值不加限制
public void log(Object rvt)
{
System.out.println("获取目标方法返回值:" + rvt);
System.out.println("模拟记录日志功能...");
}
} 说明:returing属性所指定的形参名必须对应增强处理中的一个形参名,当目标方法执行返回后,返回值作为相应的参数值传入增强处理方法中。
虽然AfterReturning增强处理可以访问到目标方法的返回值,但它不可以改变目标方法的返回值。
配置文件
<?xml version="1.0" encoding="GBK"?>
<beans xmlns="http://www.springframework.org/schema/beans"
xmlns:xsi="http://www.w3.org/2001/XMLSchema-instance"
xmlns:context="http://www.springframework.org/schema/context"
xmlns:aop="http://www.springframework.org/schema/aop"
xsi:schemaLocation="http://www.springframework.org/schema/beans
http://www.springframework.org/schema/beans/spring-beans-4.0.xsd
http://www.springframework.org/schema/context
http://www.springframework.org/schema/context/spring-context-4.0.xsd
http://www.springframework.org/schema/aop
http://www.springframework.org/schema/aop/spring-aop-4.0.xsd">
<!-- 指定自动搜索Bean组件、自动搜索切面类 -->
<context:component-scan base-package="org.crazyit.app.service
,org.crazyit.app.aspect">
<context:include-filter type="annotation"
expression="org.aspectj.lang.annotation.Aspect"/>
</context:component-scan>
<!-- 启动@AspectJ支持 -->
<aop:aspectj-autoproxy/>
</beans> 测试代码
public class BeanTest
{
public static void main(String[] args)
{
// 创建Spring容器
ApplicationContext ctx = new
ClassPathXmlApplicationContext("beans.xml");
Hello hello = ctx.getBean("hello" , Hello.class);
hello.foo();
hello.addUser("孙悟空" , "7788");
World world = ctx.getBean("world" , World.class);
world.bar();
}
} 
链接:
《@AfterReturning增强处理简单示例》http://www.cnblogs.com/ssslinppp/p/4633496.html
《@After后向增强处理简单示例》http://www.cnblogs.com/ssslinppp/p/4633427.html
《@Before前向增强处理简单示例》 http://www.cnblogs.com/ssslinppp/default.html?page=7