一、SpringBoot静态资源目录
1.1介绍
在web开发中,静态资源的访问是必不可少的,如:图片、js、css等资源的访问,SpringBoot对静态资源访问提供了很好的支持,基本使用默认配置就能满足开发需求。
1.2 位置和命名
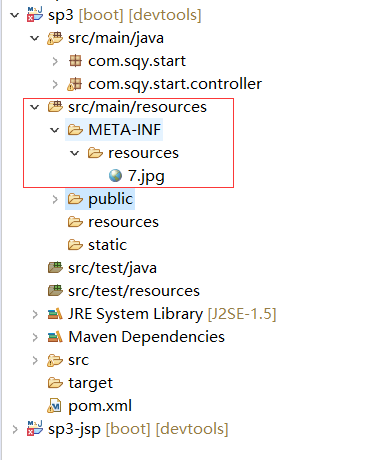
在传统的web项目中,静态资源放在项目的WebRootWEB-INF目录下,SpringBoot框架默认提供静态资源目录,在classpath(src/main/resources)下,目录名需要符合如下规则:
/static
/public
/resources
/META-INF/resources
1.3使用
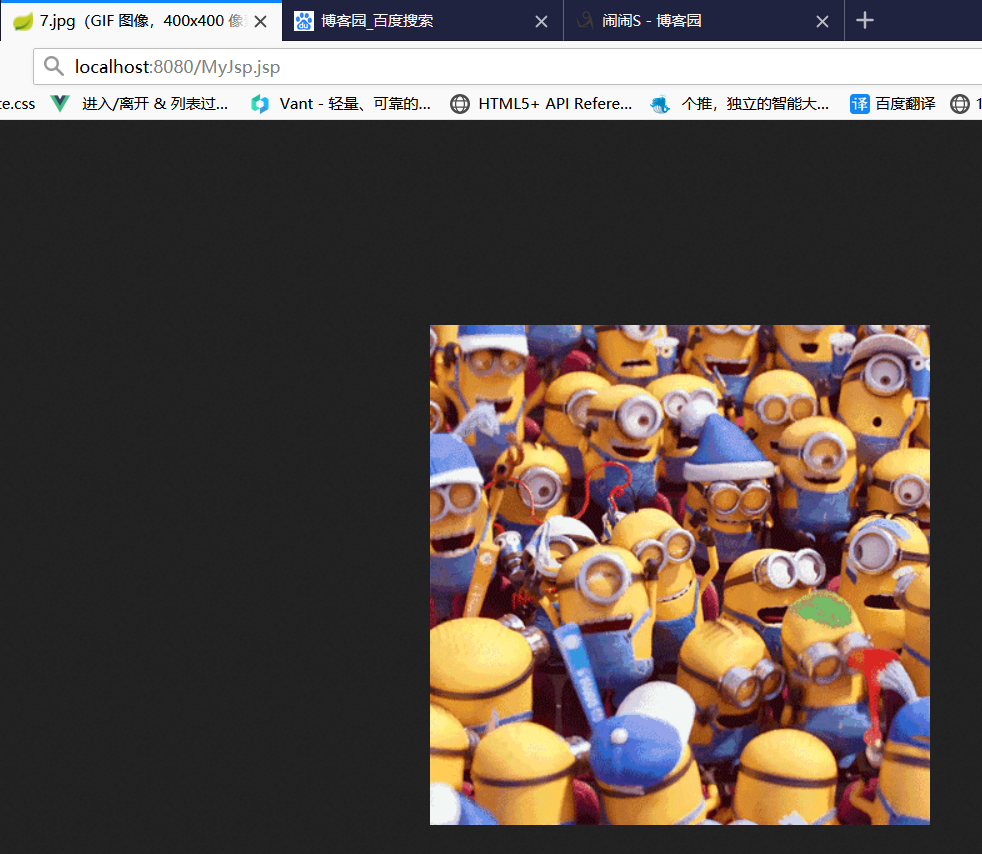
这四个目录可以在项目中任意创建一个即可,如只创建一个static文件夹存放静态资源,它们的功能都是一样的,需要注意的是:这几个目录的名称不能写错,使用时,在地址栏中输入资源的名称就可以了,如:在static中放入my.js文件,在地址栏输入:http//localhost:8080/my.js,即可直接访问到该资源了。
二、SpringBoot集成JSP
2.1 介绍
由于JSP这种技术本身有很多缺陷,所以SpringBoot默认是不支持JSP的,但是如果我们要使用JSP,那需要SpringBoot整合JSP,在整合JSP的时候,需要注意与原来的操作有所不同,项目需要打成war包,因此在创建项目的时候需要注意。
jsp本质是一个Servlet,纯java代码,不利于维护,也不便于继承
jar包和war包的区别?
2.2 集成JSP的步骤
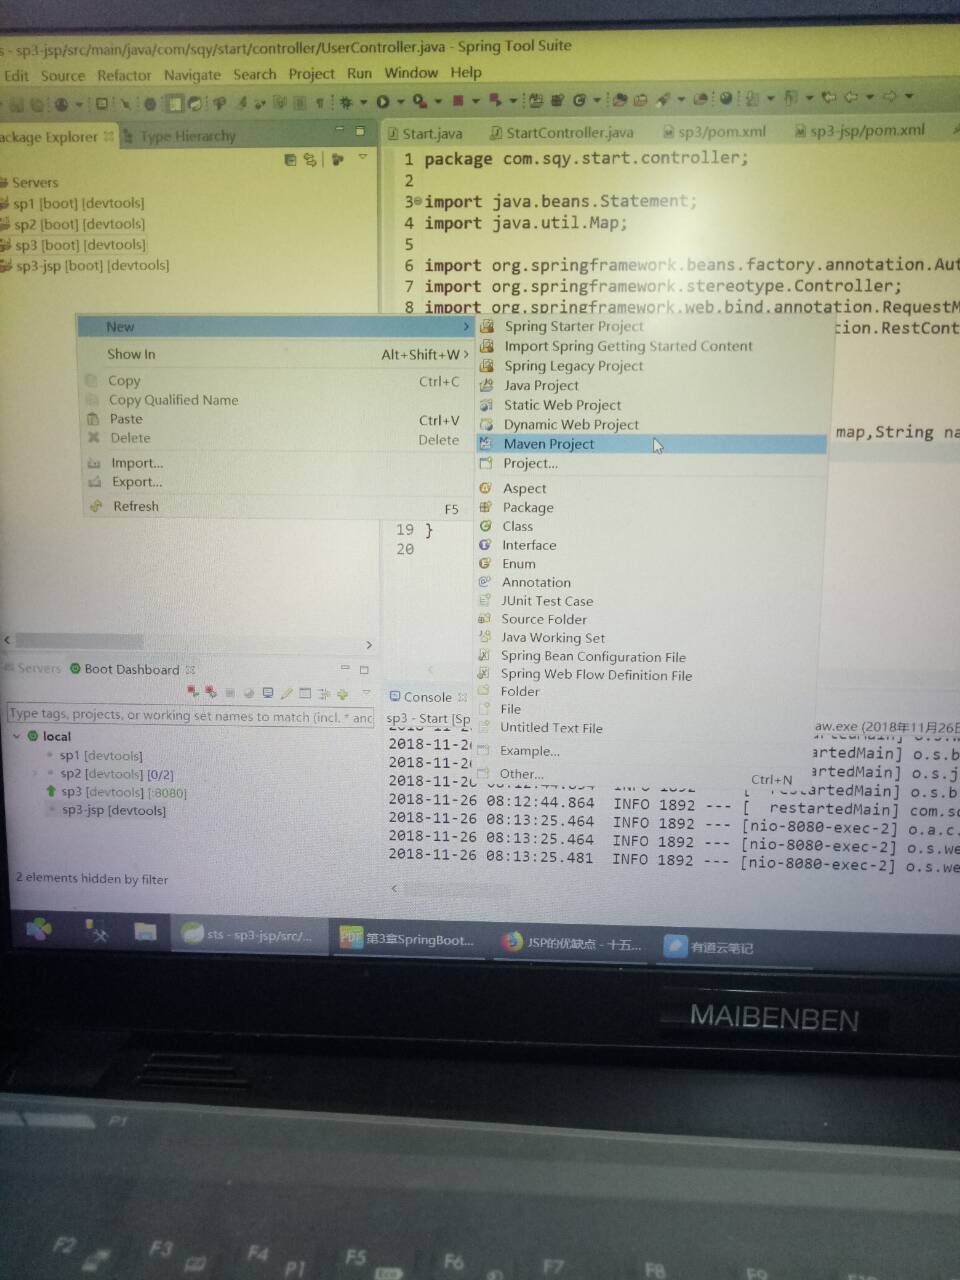
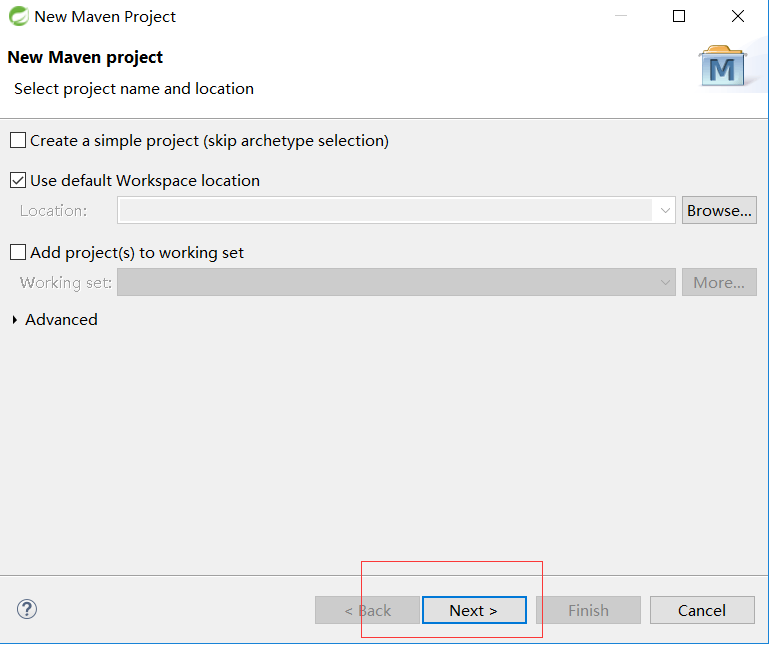
1.在创建Maven项目

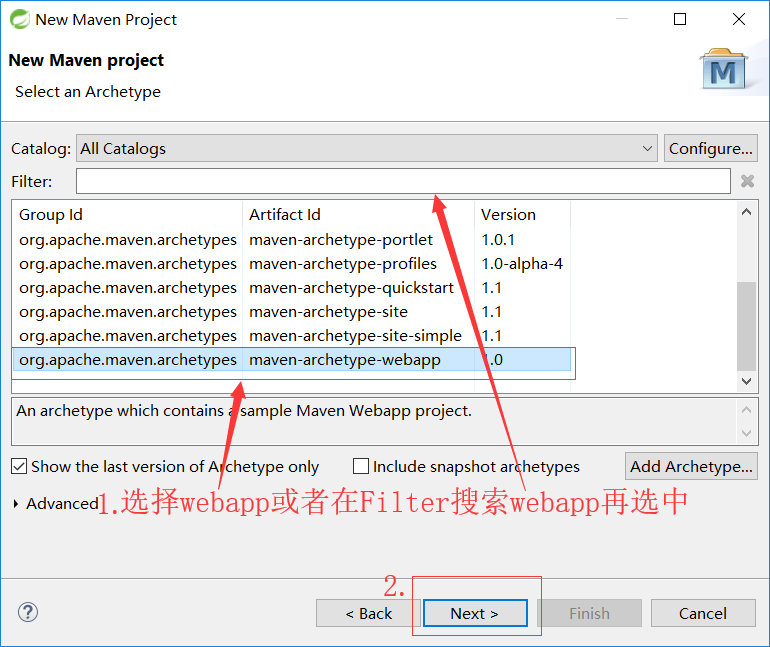
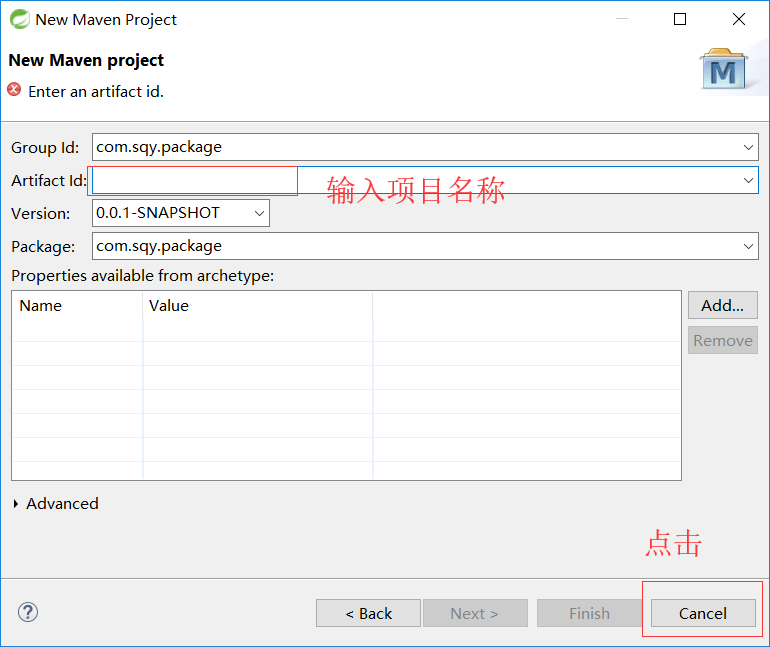
2.导入Pom依赖
在项目的pom.xml文件中导入常规依赖之外,需要额外添加JSP和JSTL两个依赖。
<!-- SpringBoot支持JSP的依赖,默认自带的tomact不支持JSP,所以引入这个依赖 -->
<dependency>
  <groupId>org.apache.tomcat.embed</groupId>
  <artifactId>tomcat-embed-jasper</artifactId>
  <scope>provided</scope>
</dependency>
<!-- JSP页面使用JSTL标签 -->
<dependency>
  <groupId>javax.servlet</groupId> <artifactId>jstl</artifactId>
</dependency>
完整pom.xml
 1     <parent>
 2         <groupId>org.springframework.boot</groupId>
 3         <artifactId>spring-boot-starter-parent</artifactId>
 4         <version>2.0.4.RELEASE</version>
 5         <relativePath/> <!-- lookup parent from repository -->
 6     </parent>
 7     <!-- 项目设置:编码格式UTF-8 -->
 8     <properties>
 9         <project.build.sourceEncoding>UTF-8</project.build.sourceEncoding>
10         <project.reporting.outputEncoding>UTF-8</project.reporting.outputEncoding>
11         <java.version>1.8</java.version>
12     </properties>
13     <dependencies>
14     <!--单元测试依赖 -->
15         <dependency>
16             <groupId>junit</groupId>
17             <artifactId>junit</artifactId>
18             <version>3.8.1</version>
19             <scope>test</scope>
20         </dependency>
21         <!-- Spring Boot SpringMVC框架依赖 -->
22         <dependency>
23             <groupId>org.springframework.boot</groupId>
24             <artifactId>spring-boot-starter-web</artifactId>
25         </dependency>
26         <!-- Spring Boot 测试依赖 -->
27         <dependency>
28             <groupId>org.springframework.boot</groupId>
29             <artifactId>spring-boot-starter-test</artifactId>
30             <scope>test</scope>
31         </dependency>
32         <!-- 热部署 -->
33         <dependency>
34             <groupId>org.springframework.boot</groupId>
35             <artifactId>spring-boot-devtools</artifactId>
36             <optional>true</optional>
37             <!-- optional=true,依赖不会传递,该项目依赖devtools;之后依赖myboot项目的项目如果想要使用
38             devtools,需要重新引入 -->
39             <scope>true</scope><!-- 热部署 -->
40         </dependency>
41         <dependency>
42             <groupId>org.springframework.boot</groupId>
43             <artifactId>spring-boot-configuration-processor</artifactId>
44             <optional>true</optional>
45         </dependency>
46         <!-- SpringBoot支持JSP的依赖 -->
47         <dependency>
48             <groupId>org.apache.tomcat.embed</groupId>
49             <artifactId>tomcat-embed-jasper</artifactId>
50             <scope>provided</scope>
51         </dependency>
52         <!-- JSP页面使用JSTL标签 -->
53         <dependency>
54             <groupId>javax.servlet</groupId>
55             <artifactId>jstl</artifactId>
56         </dependency>
57   </dependencies>
58   <build>
59       <plugins>
60         <!-- SpringBoot插件 -->
61         <plugin>
62             <groupId>org.springframework.boot</groupId>
63             <artifactId>spring-boot-maven-plugin</artifactId>
64         </plugin>
65     </plugins>
66       <!-- SpringBoot项目打包jar名称 -->
67     <finalName>sp3-jsp</finalName>
68   </build>
3.配置视图解析
出于安全考虑,SpringBoot推荐将JSP页面放入到项目的webapp/WEB-INF/view目录下,需要在application.properties配置文件中加入如下内容:
#视图前缀
spring.mvc.view.prefix=/WEB-INF/view/
#视图后缀
spring.mvc.view.suffix=.jsp
WEB-INF对于用户是不可见的,让js页面对用户不可见。
4.案例测试
4.1 新建控制器类(UserController.java)处理请求,内容如下:
 1 package com.sqy.start.controller;
 2
 3 import java.util.ArrayList;
 4 import java.util.List;
 5
 6 import org.springframework.stereotype.Controller;
 7 import org.springframework.web.bind.annotation.RequestMapping;
 8 import org.springframework.web.servlet.ModelAndView;
 9
10 @Controller
11 public class UserController {
12  @RequestMapping("/getUser")
13  public ModelAndView getUser(ModelAndView view,String name) {
14  List<String> list = new ArrayList<String>();
15  list.add(name);
16  list.add("张三");
17  list.add("李四");
18  view.addObject("list",list);
19  view.setViewName("user");
20  return view;
21  }
22 }
4.2 在webapp/WEB-INF/下新建view目录,然后新建一个user.jsp文件,内容如下:
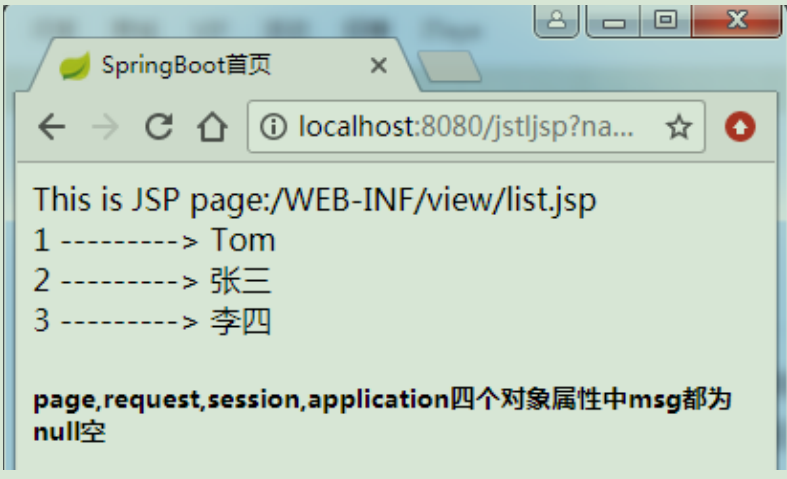
 1 <%@ page language="java" import="java.util.*" pageEncoding="UTF-8"%>
 2 <%@ taglib prefix="c" uri="http://java.sun.com/jsp/jstl/core" %>
 3 <%
 4 String path = request.getContextPath();
 5 String basePath = request.getScheme()+"://"+request.getServerName()+":"+request.getServerPort()+path+"/";
 6 %>
 7
 8 <!DOCTYPE HTML PUBLIC "-//W3C//DTD HTML 4.01 Transitional//EN">
 9 <html>
10  <head>
11  <base href="<%=basePath%>">
12
13  <title>My JSP 'MyJsp.jsp' starting page</title>
14
15  <meta http-equiv="pragma" content="no-cache">
16  <meta http-equiv="cache-control" content="no-cache">
17  <meta http-equiv="expires" content="0">
18  <meta http-equiv="keywords" content="keyword1,keyword2,keyword3">
19  <meta http-equiv="description" content="This is my page">
20  <!--
21  <link rel="stylesheet" type="text/css" href="styles.css">
22  -->
23
24  </head>
25
26  <body>
27  <c:if test="${not empty list }">
28  <c:forEach items="${list }" var="str" varStatus="sta">
29  ${sta.count }-------->${str }<br/>
30  </c:forEach>
31  </c:if>
32  <c:if test="${empty msg }">
33  <h5>page,request,session,application四个对象属性中msg都为null</h5>
34  </c:if>
35  </body>
36 </html>
4.3定义主模板,启动类
 1 package com.sqy.start;
 2
 3 import org.springframework.boot.SpringApplication;
 4 import org.springframework.boot.autoconfigure.SpringBootApplication;
 5
 6 @SpringBootApplication
 7 public class Start {
 8  public static void main(String[] args) {
 9  SpringApplication.run(Start.class, args);
10  }
11 }
4.4启动项目,在浏览器中输入http://localhost:8080/getUser?name=Tom,运行效果如下:
打war包发布项目
1.修改主程序的入口函数,打成war包需要继承org.springframework.boot.context.web.SpringBootServletInitializer类,覆盖config(SpringApplicationBuilder)方法。
 1 package com.sqy.start;
 2
 3 import org.springframework.boot.SpringApplication;
 4 import org.springframework.boot.autoconfigure.SpringBootApplication;
 5 import org.springframework.boot.web.servlet.support.SpringBootServletInitializer;
 6
 7 @SpringBootApplication
 8 public class Start extends SpringBootServletInitializer {
 9  public static void main(String[] args) {
10  SpringApplication application = new SpringApplication(Start.class);
11  application.setAddCommandLineProperties(false);
12  application.run(args);
13  }
14  /**
15  * 需要把web项目打成war包运行时需要重新此方法
16  */
17  @Override
18  protected SpringApplicationBuilder configure(SpringApplicationBuilder builder) {
19  return builder.sources(Start.class);
20  }
21 }
2.打包:右键项目 --> Run as --> Maven build... 输入clean package命令
本阶段需要注意的时,需修改pom.xml中项目的打包的方式为war,即
<packaging>war</packaging>
3. 运行
在放置war包的目录下,右键点击空白处+按shift键,选择:在命令窗口打开,输入java -jar 包名.war即可。
win10:右键点击空白处+按shift键,选择:在此处打开Powershell窗口,输入java -jar 包名.war即可。
三、SpringBoot集成Quartz框架
3.1介绍
Quartz是一个任务调度框架,它的使用场景是:
想每个月10号,信用卡自动还款
想每隔一个小时,备份自己的学习笔记到云盘
这些问题总结下来就是:在某一个有规律的事件做某件事情,并且事件的触发条件可以非常复杂,例如每月最后一个工作日的17:50,复杂到需要一个专门的框架来做这个事情,而Quartz就是做这个的,给它一个触发条件的定义,它会负责到了时间点触发相应的工作。
3.2 SpringBoot整合Quartz的步骤:
1.引入Quartz依赖:
 1 <!-- pom文件 Spring Quartz依赖 -->
 2 <dependency>
 3 <groupId>org.quartz-scheduler</groupId> <artifactId>quartz</artifactId>
 4 <version>2.2.1</version>
 5 <exclusions>
 6 <exclusion>
 7 <artifactId>slf4j-api</artifactId> <groupId>org.slf4j</groupId>
 8 </exclusion>
 9 </exclusions>
10 </dependency>
2.使用注解@Configuration定义一个配置类
 1 package com.sqy.start.tools;
 2
 3 import java.text.SimpleDateFormat;
 4
 5 import org.springframework.context.annotation.Bean;
 6 import org.springframework.context.annotation.Configuration;
 7
 8 @Configuration
 9 public class ConfigMyTools {
10  @Bean("dateFormat")
11  public SimpleDateFormat dateFormat() {
12  return new SimpleDateFormat("yyyy-MM-dd HH:mm:ss");
13  }
14 }
15
@Configuration,@Bean这两个注解代替xml配置,@Configuration相当于xml中的标签,@Bean相当于标签,通常两者结合使用。
@Configuration类上加,代表此类变成了配置类,相当于xml
@Bean方法上加入bean会把本方法生bean并放到Spring容器中
3.为了方便看清楚任务调度的次数,我们声明一个辅助类:
 1 package com.sqy.start.tools;
 2
 3 import org.springframework.stereotype.Component;
 4
 5 @Component
 6 public class MyTask {
 7  private int count = 0;
 8  public void say() {
 9  System.out.println("SpringBoot任务调度次数:"+count++);
10  }
11 }
4.创建一个任务调度类
 1 package com.sqy.start.tools;
 2
 3 import java.text.SimpleDateFormat;
 4 import java.util.Date;
 5
 6 import org.springframework.beans.factory.annotation.Autowired;
 7 import org.springframework.scheduling.annotation.EnableScheduling;
 8 import org.springframework.scheduling.annotation.Scheduled;
 9 import org.springframework.stereotype.Component;
10
11 @Component
12 @EnableScheduling
13 public class SimpleTask {
14  @Autowired
15  private MyTask myTask;
16  @Autowired
17  private SimpleDateFormat dateFormat;
18
19  @Scheduled(fixedRate=3000)
20  public void reportCurrentTime() {
21  myTask.say();
22  System.out.println("每隔3秒任务调度一次,现在时间:"+dateFormat.format(new Date()));
23  }
24 }
启动项目(入口函数),控制台输出:
SpringBoot任务调度次数:0
每隔3秒任务调度一次,现在时间:2018-11-26 11:06:40
2018-11-26 11:06:40.090 INFO 3728 --- [ restartedMain] o.s.b.w.embedded.tomcat.TomcatWebServer : Tomcat started on port(s): 8080 (http) with context path ''
2018-11-26 11:06:40.090 INFO 3728 --- [ restartedMain] com.sqy.start.Start : Started Start in 0.402 seconds (JVM running for 882.928)
2018-11-26 11:06:40.100 INFO 3728 --- [ restartedMain] .ConditionEvaluationDeltaLoggingListener : Condition evaluation unchanged
SpringBoot任务调度次数:1
每隔3秒任务调度一次,现在时间:2018-11-26 11:06:43
SpringBoot任务调度次数:2
每隔3秒任务调度一次,现在时间:2018-11-26 11:06:46
SpringBoot任务调度次数:3
每隔3秒任务调度一次,现在时间:2018-11-26 11:06:49
.......
使用cron表达式,在任务调度类中添加:
1 @Scheduled(cron="*/5 * * * * ?")
2  public void reportCurrentByCron() {
3  System.out.println("每隔5秒任务调度一次,现在时间:"+dateFormat.format(new Date()));
4  }
启动项目(入口函数),控制台输出:
每隔5秒任务调度一次,现在时间:2018-11-26 11:11:30
每隔5秒任务调度一次,现在时间:2018-11-26 11:11:35
每隔5秒任务调度一次,现在时间:2018-11-26 11:11:40
........
说明:cron="*/5 * * * *?",表达式表示秒分时日(每月的第几日)月星期(),*/5表示每隔5秒, @EnableScheduling:放在类前,标注启动定时任务,@Scheduled(表达式):放在方法前,定义某个定时任务
fixedDelay每次任务结束后才开始计算
fixedRate每次任务开始时的瞬间直接计算