继续文档的第二章
(一)pytest中可以在命令行中静态/动态添加option,这里没什么好讲的,略过...
这里面主要讲下如何试用skip/xfail,还有incremental(包含一些列的测试步骤,如果某一步出错后,该步骤之后的所有步骤都没有任何意义了,xfail掉)
1)首先来看下怎样通过命令行来skip一些case,首先要添加个option,然后使用@pytest.mark.skipif( condition) , xfail使用@pytest.mark.xfail( condition,reson,run,raise),这里不详细介绍了
import pytest
def test_func_fast():
    print 'fast'
@pytest.mark.skipif(not pytest.config.getoption("--runslow"))
def test_func_slow_1():
    print 'skip slow'
@pytest.mark.xfail(not pytest.config.getoption("--runslow"))
def test_func_slow_2():
    print 'xfail slow'
2)然后来看下如何实现incremental,首先在测试文件的目录下创建conftest.py, 代码如下:
# content of conftest.py

import pytest

def pytest_runtest_makereport(item, call):
    if "incremental" in item.keywords:
        if call.excinfo is not None:
            parent = item.parent
            parent._previousfailed = item

def pytest_runtest_setup(item):
    if "incremental" in item.keywords:
        previousfailed = getattr(item.parent, "_previousfailed", None)
        if previousfailed is not None:
            pytest.xfail("previous test failed (%s)" %previousfailed.name)
然后创建test_steps.py
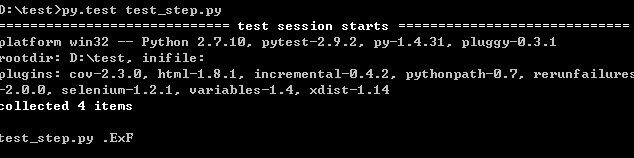
# content of test_step.py
import pytest

@pytest.mark.incremental
class TestUserHandling:
    def test_login(self, fix_err):
        pass
    def test_modification(self):
        assert 0
    def test_deletion(self):
        pass
def test_normal():
    assert 0
执行结果,在test_modification后的test_deletion 执行为x

3)由于pytest中的Error也划分到Fail中,而Unittest中是单独讲Error独立出来,说明由于case中存在异常或错误导致case未能正常运行,其实在pytest中也可以做到这样,只需要加上一点儿代码,如下:
# content of test_step.py
import pytest

@pytest.fixture
def fix_err(x):
    raise x

@pytest.mark.incremental
class TestUserHandling:
    def test_modification(self):
        pass
    def test_login(self, fix_err):
        try:
            raise RuntimeError("error")
        except AssertionError,e:
            pass
        except:
            fix_err(e)
    def test_deletion(self):
        pass
def test_normal():
    assert 0
其执行效果如下:
(二)、这里讲下关于fixture,fixture是pytest特有的功能,它用pytest.fixture标识,定义在函数前面。在你编写测试函数的时候,你可以将此函数名称做为传入参数,pytest将会以依赖注入方式,将该函数的返回值作为测试函数的传入参数。例如上面的例子fix_err.
1)准备函数usefixtures
@pytest.fixture()
def cleandir():
    newpath = tempfile.mkdtemp()
    os.chdir(newpath)

@pytest.mark.usefixtures("cleandir")
class TestDirectoryInit:
    def test_cwd_starts_empty(self):
        assert os.listdir(os.getcwd()) == []
        with open("myfile", "w") as f:
            f.write("hello")
2)销毁函数addfinalizer
@pytest.fixture()
def smtp(request):
    smtp = smtplib.SMTP("smtp.gmail.com")
    def fin():
        print ("teardown smtp")
        smtp.close()
    request.addfinalizer(fin)
    return smtp  # provide the fixture value
获取调用函数信息: request 使用fixture标记函数后,函数将默认接入一个request参数,它将包含使用该fixture函数的函数信息
3)fixture的参数,有时我们需要全面测试多种不同条件下的一个对象,功能是否符合预期。我们可以通过params参数来指定传入的参数。
class SMTP:
    def __init__(self, smtp, sender, receiver):
        self.smtp = smtp
        self.sender = sender
        self.receiver = receiver
    def __del__(self):
        self.smtp.close()

@pytest.fixture(params=[["smtp.gmail.com", "from@domain.com", "to@doamin.com"], ["mail.python.org", "from@python.org", "to@python.org"])
def smtp(request):
    return SMTP(#param)

def test_mail(smtp):
    message = "hello"
    assert smtp.sendmail(message)
4)fixture的作用域:function、module、session ,autouse=True使得函数将默认执行
work_dir = "/tmp/app"
@pytest.fixture(session="session", autouse=True)
def clean_workdir():
    shutil.rmtree(work_dir)
    os.mkdir(work_dir)
    os.chrdir(work_dir)
fixture的存在使得我们在编写测试函数的准备函数、销毁函数或者多个条件的测试提供了更加灵活的选择。py.test --fixtures 可以查看所有的fixtures,包含目录下及子目录下的conftest.py
pytest.hookimpl这个没太看明白,应该就是个钩子函数,以后弄明白了再说,今天就到这儿了,下一节再说这个参数化的问题