上一篇介绍了注册中心,这一篇介绍如何把服务注册到注册中心。
一、创建服务提供者
我们依然使用上一篇的项目,在其中创建一个spring boot模块,填好必要的信息,依赖需要选择Spring Web和Eureka Discovery Client,创建完成后主要的依赖如下:
<dependencies>
    <dependency>
        <groupId>org.springframework.boot</groupId>
        <artifactId>spring-boot-starter-web</artifactId>
    </dependency>
    <dependency>
        <groupId>org.springframework.cloud</groupId>
        <artifactId>spring-cloud-starter-netflix-eureka-client</artifactId>
    </dependency>
</dependencies>
二、添加配置
在application.properties文件中添加以下配置
server.port=8770
spring.application.name=service-provider

eureka.client.serviceUrl.defaultZone=http://localhost:8761/eureka/
三、提供服务
为了方便,我们直接在启动类添加一个提供服务的方法
@SpringBootApplication
@EnableEurekaClient
@RestController
public class ServiceProviderApplication {

    public static void main(String[] args) {
        SpringApplication.run(ServiceProviderApplication.class, args);
    }

    @RequestMapping("/callServiceProvider")
    public String callServiceProvider(@RequestParam("uid") String uid) {
        return "用户" + uid + "调用了此服务";
    }
}
通过@EnableEurekaClient开启服务注册,而其他的写法和在spring boot中添加一个api接口是一样的,因为spring cloud就是使用REST的方式对外提供服务的。
四、启动
4.1、单节点注册中心
先启动单节点的注册中心(使用的配置文件是application.properties),再启动服务提供者,都启动成功后,在浏览器访问http://localhost:8761/,可以看到,在注册中心已经有一个服务提供者了,而名称就是在配置文件中spring.application.name的值

4.2、注册中心集群
如果使用注册中心集群,那么就把eureka.client.serviceUrl.defaultZone的值改为http://eureka-1:8761/eureka/,然后分别启动上一篇中提到的Eureka集群的三个节点,再启动服务提供者,这时访问http://eureka-1:8761/
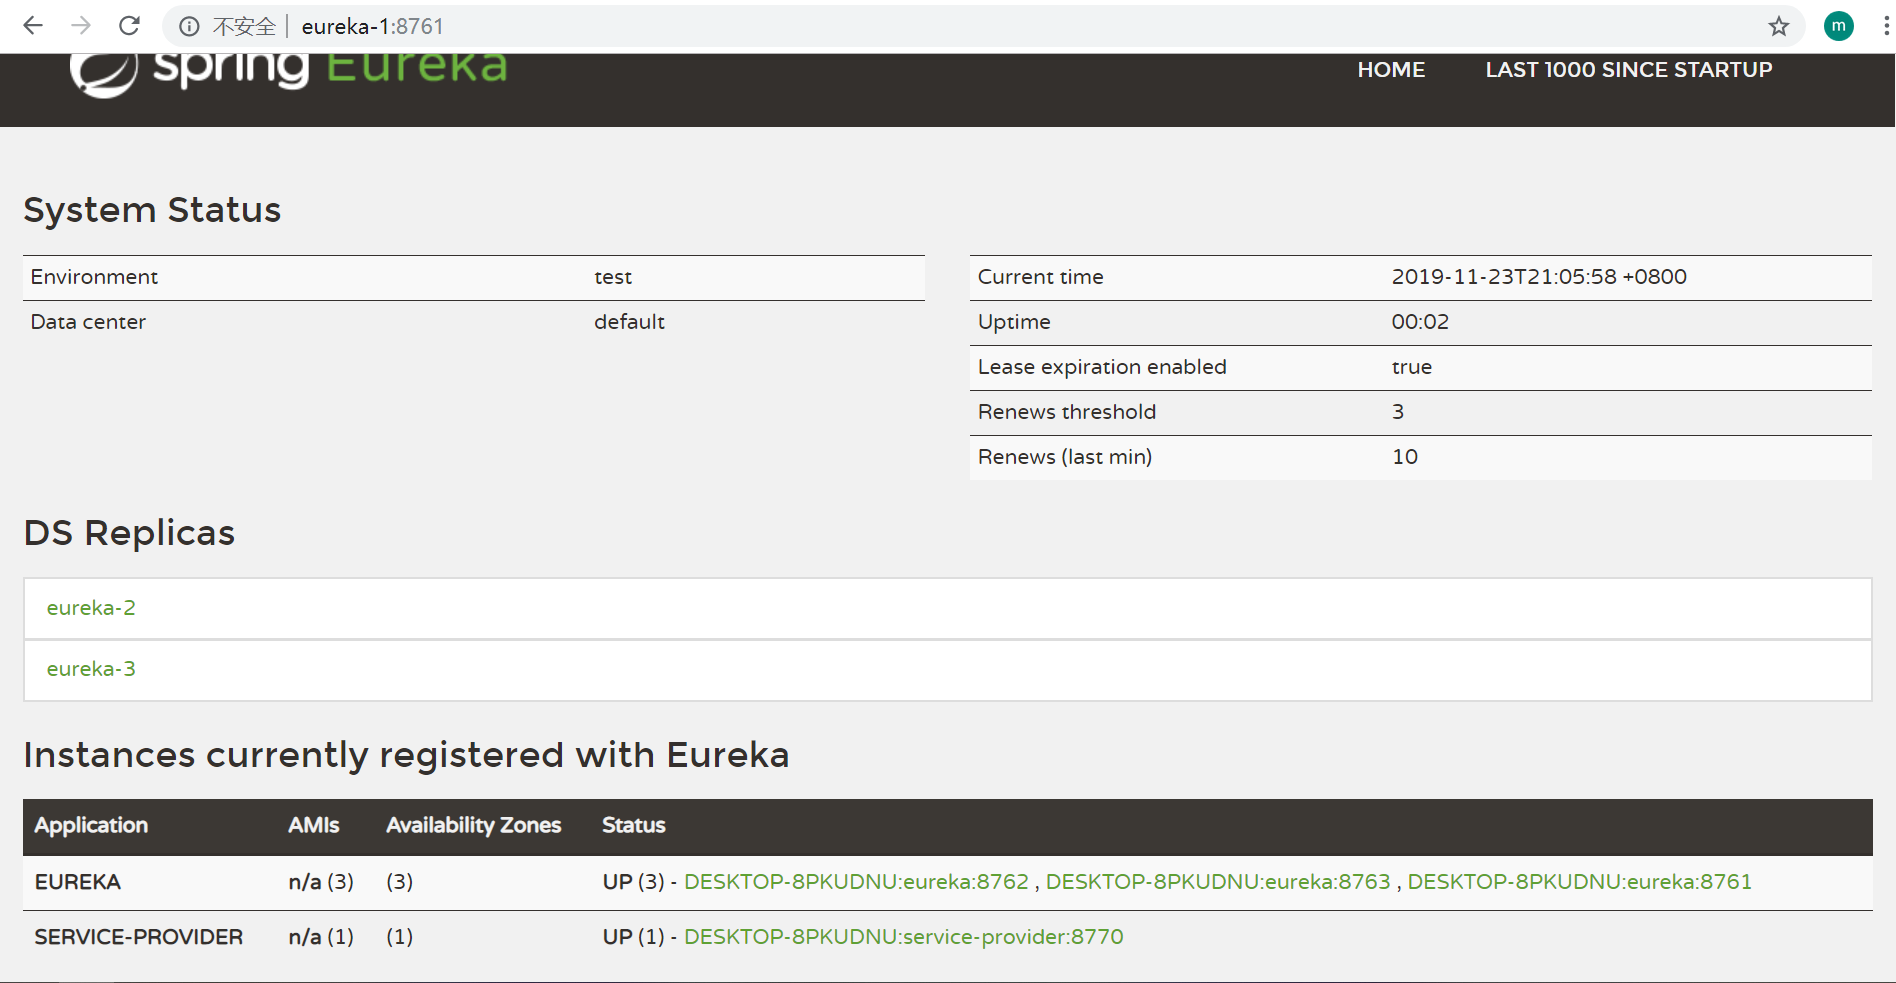
这时可以看到SERVICE-PROVIDER服务已经在其中,再访问http://eureka-2:8762/或者http://eureka-3:8763/还是可以看到SERVICE-PROVIDER服务,这是因为当一个服务注册到注册中心集群的任意一个节点,这个节点都会把这个消息发送给其它节点,这样当有服务消费者要来注册中心寻找服务的时候,无论是在哪个注册中心节点都能保证找到服务,这也是集群的意义所在。
五、总结
以上就是服务注册的过程,在实际中,服务提供者不可能只有一个,这时注册的方法还是一样的,当注册了多个服务提供者,同样可以在注册中心的后台看到所有注册了的服务。
下一篇将介绍服务的消费。
源码已经上传到github:https://github.com/spareyaya/spring-cloud-demo/tree/master/chapter2