Cobbler简介
Cobbler是一款自动化操作系统部署的实现工具,由Python语言开发,是对PXE的二次封装。融合多种特性,提供了CLI和Web的管理形式。同时,Cobbler也提供了API接口,方便二次开发使用。它不仅可以安装物理机,同时也支持kvm、xen虚拟化、Guest OS的安装。另外,它还能结合Puppet等集中化管理软件,实现自动化管理。
| 虚拟机网段 | 虚拟机IP | 发行版 | 网络模式 |
| 192.168.1.0 | 192.168.1.133 | CentOS7.4.1708 | 安装cobbler时使用桥接,验证cobbler自动装机时使用LAN Segments 1 |
温 故 而 知 新
将光驱中的内容进行挂载
mkdir /mnt/usb{1..3} #创建cdrom挂载点
mount /dev/sr1 /mnt/usb1
安装cobbler
#!/usr/bin/env bash
set -exu
command -v wget || yum -y install wget
wget -O /epel.repo http://mirrors.aliyun.com/repo/epel-7.repo
yum -y install epel-release
cd /etc/yum.repos.d/ && for i in `ls|grep -Ev '(*epel*|*Media*|*Base*)'`;do mv $i{,.bak};done
yum clean all && yum makecache
yum -y install cobbler cobbler-web pykickstart debmirror httpd dhcp tftp-server xinetd syslinux rsync
systemctl start httpd cobblerd xinetd rsyncd
systemctl enable httpd cobblerd xinetd rsyncd
检查cobbler配置,而后逐一按提示解决
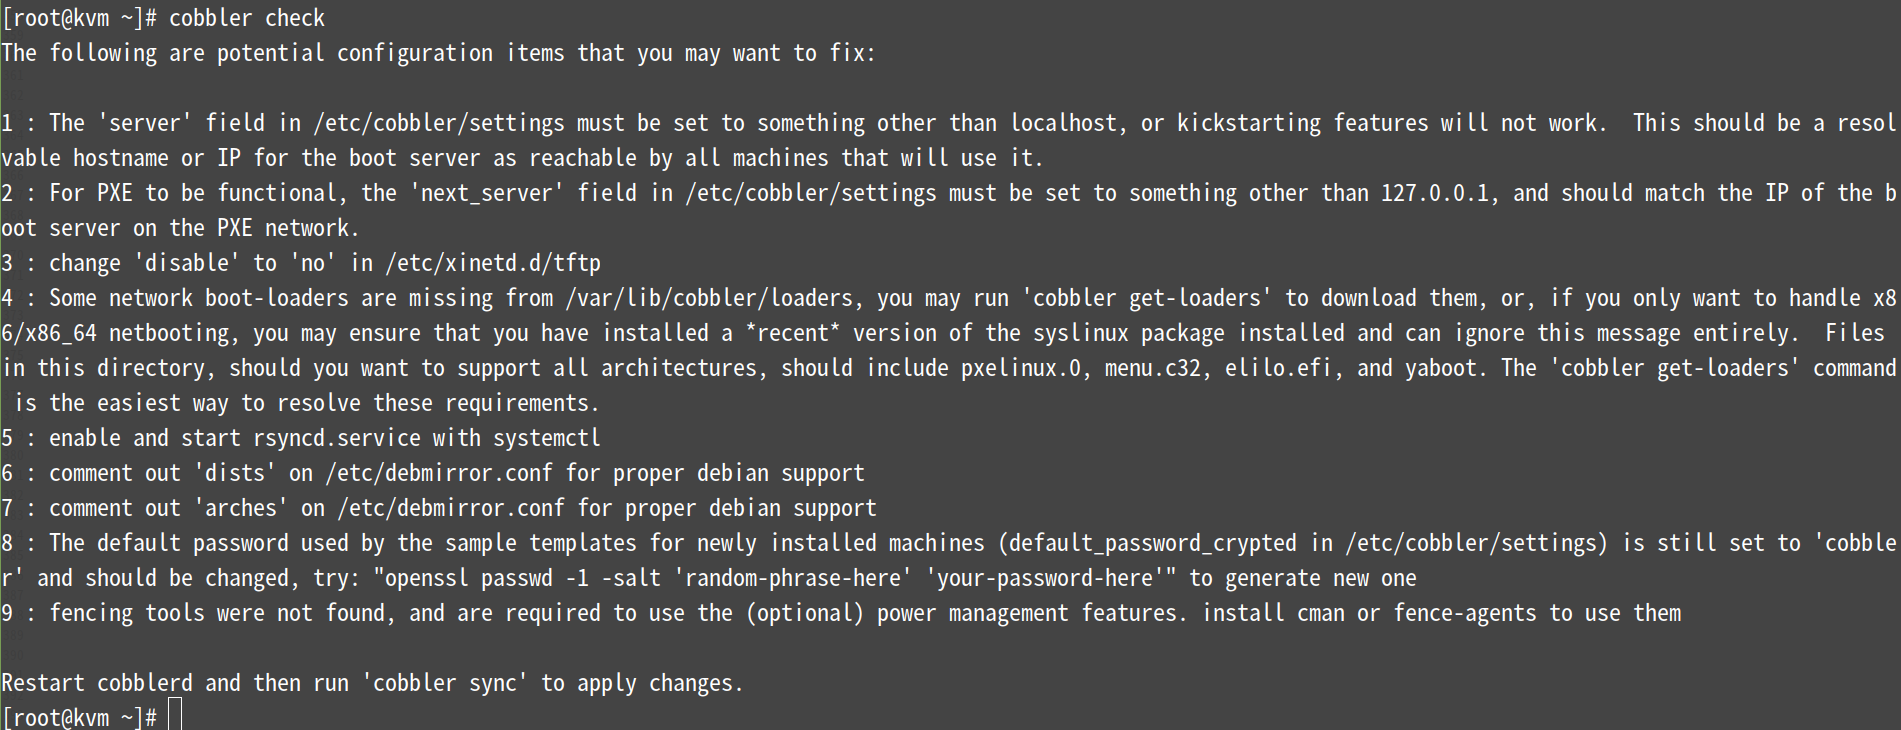
以上问题解决:
cp /etc/cobbler/settings{,.bak}
编辑/etc/cobbler/settings文件,找到server选项,修改为提供服务的ip地址,即本机ip,不能是127.0.0.1
sed -i 's#^server: 127.0.0.1#server: 192.168.1.133#' /etc/cobbler/settings
编辑/etc/cobbler/settings文件,找到next_server选项,修改为本机的ip地址,也不能是127.0.0.1
sed -i 's#^next_server: 127.0.0.1#next_server: 192.168.1.133#' /etc/cobbler/settings
#修改tftp服务
sed -i "/disable/s/yes/no/" /etc/xinetd.d/tftp
egrep "disable" /etc/xinetd.d/tftp
systemctl restart rsyncd xinetd
#下载引导操作系统
cobbler get-loaders
注释/etc/debmirror.conf文件中的@dists="sid";一行
sed -i 's/@dists="sid";/#@dists="sid";/' /etc/debmirror.conf
注释/etc/debmirror.conf文件中的@arches="i386";一行
sed -i 's/@arches="i386";/#@arches="i386";/' /etc/debmirror.conf
systemctl restart rsyncd

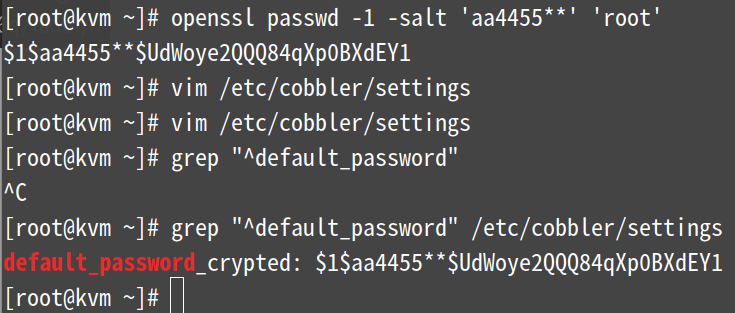
#修改 etc/cobbler/settings 中'default_password_crypted'的值
生成cobbler安装系统root初始密码
===================================================================================================================
扩展:
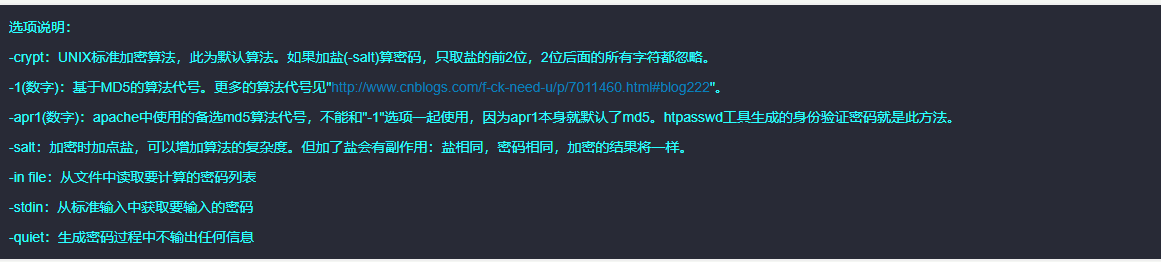
说明: openssl passwd -1 -salt 'aa4455**' 'root' 该命令中的root是最后客户端装好系统后,root用户的登录密码,root/root

=============================================================================================================
#安装电源管理工具
yum -y install fence-agents
重启cobbler并同步不检查
systemctl restart cobblerd
cobbler sync && cobbler check
注:显示No configuration problems found. All systems go.属正常情况,不必理会
#配置dhcp
cp /etc/cobbler/dhcp.template{,.bak}
sed -i '/^subnet/s/192.168.1.0/10.15.90.0/' /etc/cobbler/dhcp.template
sed -i '/routers/s/192.168.1.5/192.168.1.1/' /etc/cobbler/dhcp.template #该句要执行
sed -i '/domain-name-servers/s/192.168.1.1/144.144.144.144/' /etc/cobbler/dhcp.template
sed -i '/dynamic-bootp/s/192.168.1.100 192.168.1.254/10.15.90.100 10.15.90.150/' /etc/cobbler/dhcp.template
注:黄底的内容为参考项
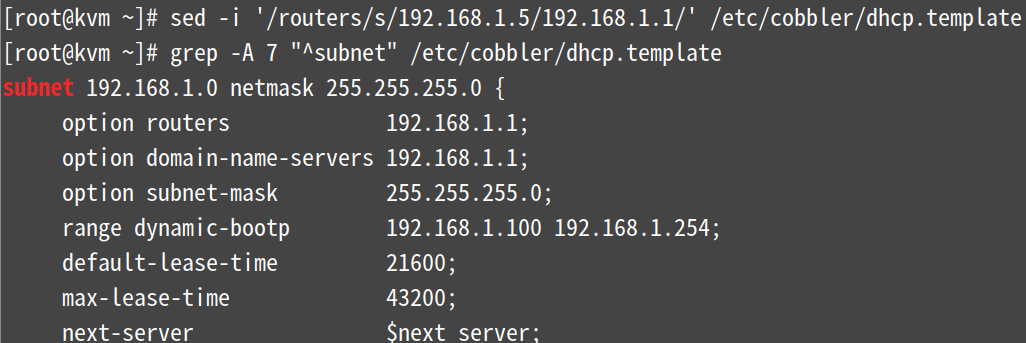
subnet 192.168.1.0 netmask 255.255.255.0 { #指定分配IP地址的网段和掩码
option routers 192.168.1.1; #设置网关
option domain-name-servers 192.168.1.1; #设置DNS
option subnet-mask 255.255.255.0; #设置掩码
range dynamic-bootp 192.168.1.150 192.168.1.160; #为客户端设置IP的范围
#绑定dhcp,tftp以及rsyncd服务托管
sed -i '/manage_dhcp:/s/0/1/' /etc/cobbler/settings
sed -i '/manage_rsync:/s/0/1/' /etc/cobbler/settings
sed -i '/manage_tftpd:/s/0/1/' /etc/cobbler/settings
#检查三个服务时候托管
sed -n -e '/manage_tftpd:/p' -e '/manage_dhcp:/p' -e '/manage_rsync:/p' /etc/cobbler/settings
systemctl restart cobblerd httpd xinetd rsyncd
systemctl restart dhcpd #此服务有可能无法重启可忽略
cobbler sync #设置同步
注意这两项:
rendering DHCP files
generating /etc/dhcp/dhcpd.conf
=============================================================================================================
因为这该文章的一开始就挂载了光盘,所以这里就不挂载了 ,如未挂载光盘,这里需要挂载光盘
导入ISO镜像文件
使用cobbler的import命令从ISO安装镜像中导入安装所需要的程序包。
命令格式;cobbler import --path=镜像路径 --name=安装引导名 --arch=32位或64位
--path表示镜像所挂载的目录
--name表示为安装源定义的名字
--arch表示指定安装源是32位还是64位,目前支持的选项:x86,x86_64,ia64.
cobbler import --path=/mnt/usb1/ --name=CentOS-7.4-x86_64 --arch=x86_64
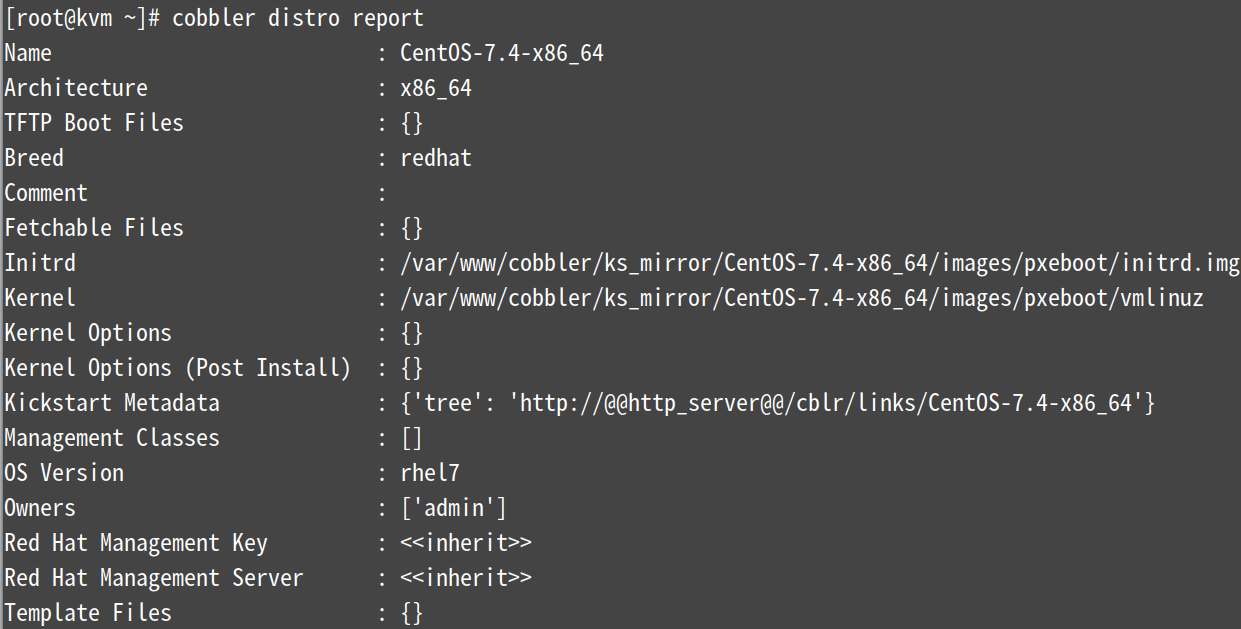
cobbler distro report #查看distro
cobbler profile report #查看导入系统之后的过程中,cobbler生成的配置文件,关联dhcp,pxe安装菜单

cobbler会将镜像中的所有安装

cd /var/lib/cobbler/kickstarts/
cp sample_end.ks{,.bak}
vim centos7.4-x64.ks #自定义配置文件
#version=RHEL7
# System authorization information
url --url=$tree
#url --url http://192.168.1.133/cobbler/ks_mirror/Cebtos7.6-x86_64/
# Run the Setup Agent on first boot
firewall --disabled
selinux --disabled
reboot
ignoredisk --only-use=sda
# Keyboard
keyboard us
# System language
lang en_US.UTF-8
# Network information
network --onboot=yes --bootproto=dhcp --device=eth0 --ipv6=no
# Installation logging level
logging --level=debug
# Root password
rootpw --iscrypted $1$aa4455**$UdWoye2QQQ84qXp0BXdEY1
# System timezone
timezone Asia/Shanghai --isUtc
# System bootloader configuration
#bootloader --location=mbr
bootloader --location=mbr --driveorder=sda
# Partition clearing information
zerombr
clearpart --all --initlabel
#clearpart --none --initlabel
# Disk partitioning information
part swap --fstype="swap" --ondisk=sda --size=2048
part /boot --fstype="ext4" --ondisk=sda --size=1024
part / --fstype="ext4" --ondisk=sda --size=99327
%packages
@base
@core
@development
@compat-libraries
@scientific
kexec-tools
tree
net-snmp
nmap
sysstat
lrzsz
dos2unix
telnet
iptraf
wget
net-tools
ncurses-devel
openssl-devel
zlib-devel
OpenIPMI-tools
%end
%post
wget -O /epel.repo http://mirrors.aliyun.com/repo/epel-7.repo
yum -y install epel-release
cd /etc/yum.repos.d/ && for i in `ls|grep -Ev '(*epel*|*Media*)'`;do mv $i{,.bak};done
mv /epel.repo /etc/yum.repos.d/
yum clean all && yum makecache
if [ -f /etc/rc.d/rc.tune ]; then
chmod +x /etc/rc.d/rc.tune
echo ". /etc/rc.d/rc.tune" >> /etc/rc.d/rc.local
echo "* soft nofile 65535" >> /etc/security/limits.conf
echo "* hard nofile 65535" >> /etc/security/limits.conf
echo "* soft nproc 65535" >> /etc/security/limits.conf
echo "* hard nproc 65535" >> /etc/security/limits.conf
else
echo Error! rc.tune can not be found!
fi
%end
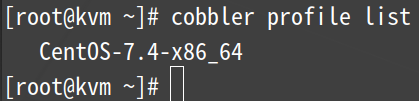
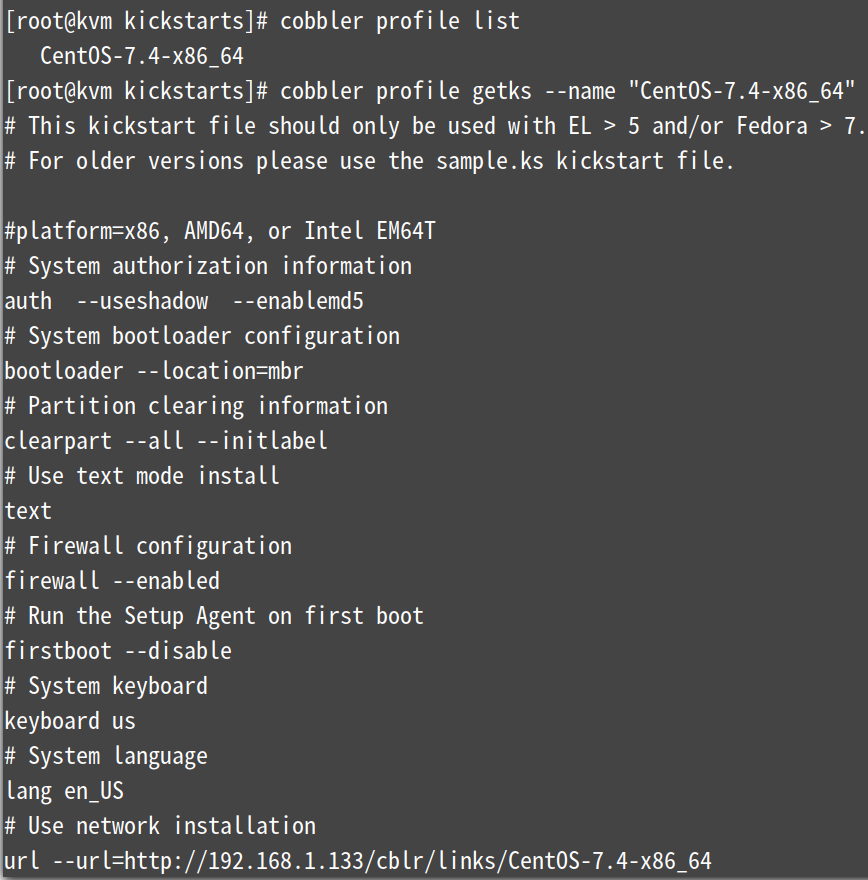
cobbler profile list
cobbler profile getks --name "CentOS7.4-x86_64" #自检
中间部分这里省略....
cobbler profile edit --name=CentOS-7.4-x86_64 --kickstart=/var/lib/cobbler/kickstarts/centos7.4-x64.ks
注:该命令没有输出
#修改centos配置文件中的kickstart值
cobbler profile edit --name=CentOS-7.4-x86_64 --kopts='net.ifnames=0 biosdevname=0'
#执行rsync同步
cobbler sync
#检查服务是否启动
systemctl restart cobblerd xinetd rsyncd tftp
netstat -npatul|grep -E "httpd|rsync|xinetd|dhcpd|25151"

验证cobbler自动装机
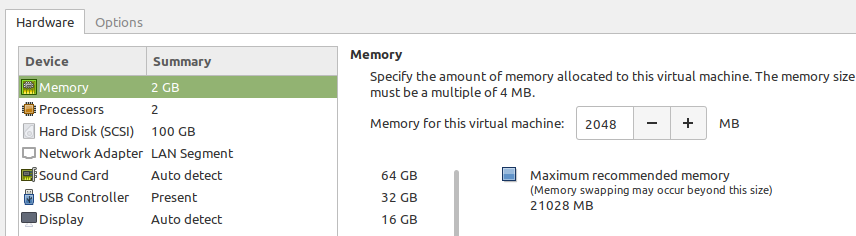
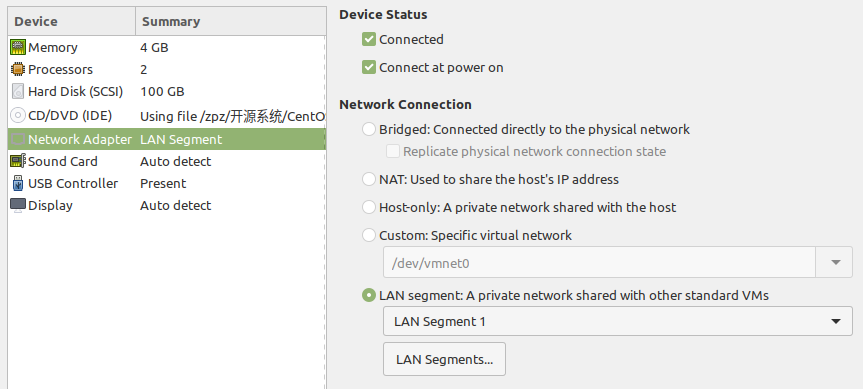
新建一台虚拟机PC进行验证,不使用镜像,网络连接方式选择LAN,内存选择2G以上(否则会因内存不够而安装失败)。
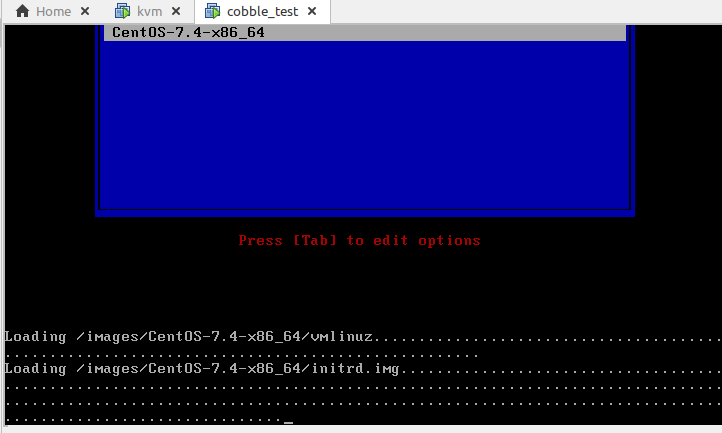
然后开启新建的虚拟机会出现cobbler画面,选择第二种回车继续等待。
新建虚机的配置
cobbler服务器网络设置,要保证客户端和服务端都在同一个网段中
客户端开机
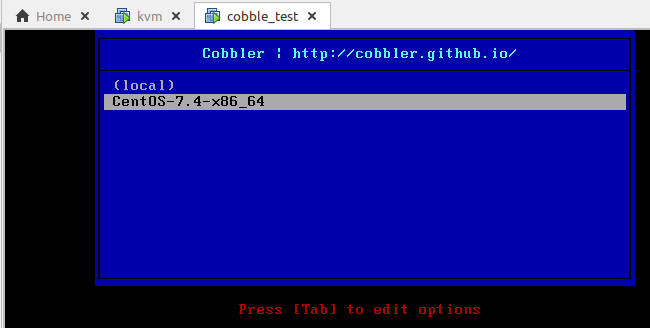
选中要安装的系统,这里是Centos7那个,然后回车

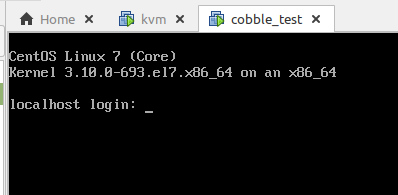
登录账号/密码是上面openssl创建的密码,root/root
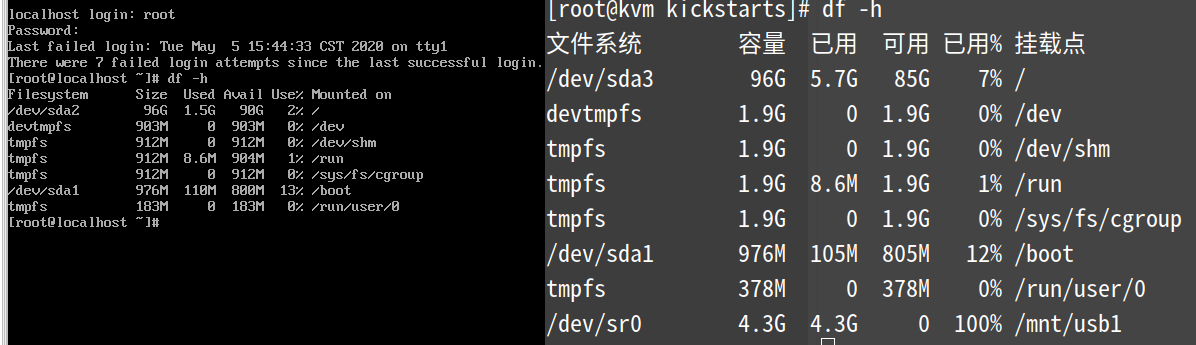
左边为客户端,右边是服务端,分区是一模一样的
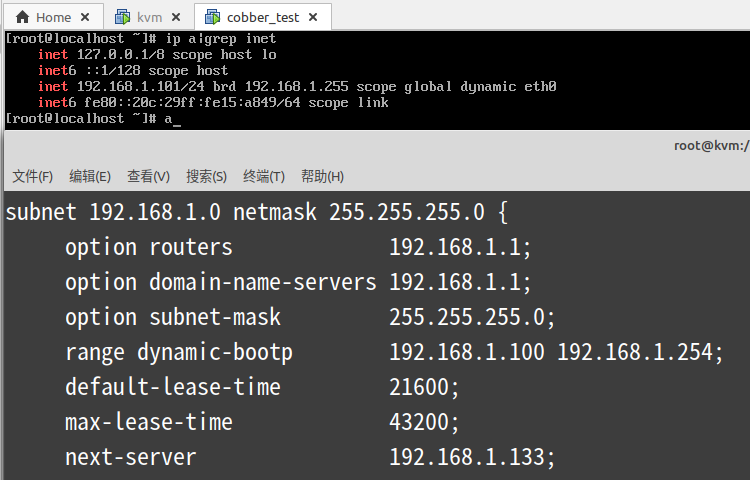
上图中下面的图是服务端dhcp配置文件,上面部分是客户端获得到的IP,上面部分获得的101在100~254~ 范围内且分区都按指定的进行了,可见整个下来无问题
欢迎一起讨论技术