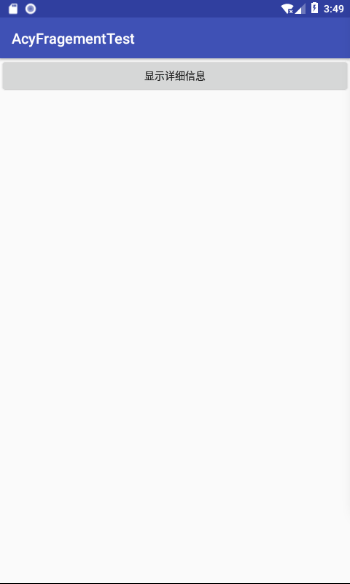
效果图:
上节学习了静态添加Fragment的方法,这节学习动态添加方法。
主页面
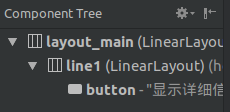
layout.xml
Fragment页面
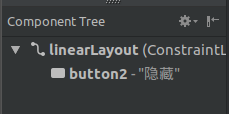
layout2.xml
实现功能,当点击主页面的button时,将Fragment页面添加到主页面上,使用replace。
注意:在layout.xml中添加一个LinearLayout并设置为水平排列,就是因为添加Fragment时让其水平排列,即分成左右两部分,这时要确定左右两部分的大小,用到
layout.setLayoutParams(new LinearLayout.LayoutParams(getWindowManager().getDefaultDisplay().getWidth()/3,
        getWindowManager().getDefaultDisplay().getHeight()));
说明layout占这个屏幕宽度的1/3,高度是屏幕显示的高度。
实现点击隐藏按钮时,去掉Fragment页面并使显示详细信息的按钮扩展整个屏幕。
在MyFragment.java里添加
button.setOnClickListener(new View.OnClickListener() {
    @Override
    public void onClick(View v) {
        manager=getFragmentManager();
        FragmentTransaction transaction=manager.beginTransaction();
        transaction.remove(MyFragement.this);
        transaction.commit();
        maxScreen();
    }
});
这样一个简单的动态页面添加就完成了,如果想要添加其他文本内容或控件的话,可以自行添加进去。代码如下:
layout.xml


<?xml version="1.0" encoding="utf-8"?>
<LinearLayout xmlns:android="http://schemas.android.com/apk/res/android"
    android:orientation="horizontal"
    android:id="@+id/layout_main"
    android:layout_width="match_parent"
    android:layout_height="match_parent">

    <LinearLayout
        android:id="@+id/line1"
        android:layout_width="match_parent"
        android:layout_height="match_parent"
        android:orientation="horizontal">

        <Button
            android:id="@+id/button"
            android:layout_width="wrap_content"
            android:layout_height="wrap_content"
            android:layout_weight="1"
            android:text="显示详细信息" />
    </LinearLayout>

</LinearLayout>
layout2.xml
<?xml version="1.0" encoding="utf-8"?>
<android.support.constraint.ConstraintLayout xmlns:android="http://schemas.android.com/apk/res/android"
    xmlns:app="http://schemas.android.com/apk/res-auto"
    android:id="@+id/linearLayout"
    android:layout_width="match_parent"
    android:background="#fffff0"
    android:layout_height="match_parent">

    <Button
        android:id="@+id/button2"
        android:layout_width="wrap_content"
        android:layout_height="wrap_content"
        android:layout_marginBottom="8dp"
        android:layout_marginEnd="8dp"
        android:text="隐藏"
        app:layout_constraintBottom_toBottomOf="parent"
        app:layout_constraintEnd_toEndOf="parent" />
</android.support.constraint.ConstraintLayout>
MainActivity.java
package com.example.aimee.acyfragementtest;

import android.support.v4.app.FragmentManager;
import android.support.v4.app.FragmentTransaction;
import android.support.v7.app.AppCompatActivity;
import android.os.Bundle;
import android.view.View;
import android.widget.Button;
import android.widget.LinearLayout;
import android.widget.Toast;

public class MainActivity extends AppCompatActivity {
    Button button;
    FragmentManager manager;
    LinearLayout layout;

    @Override
    protected void onCreate(Bundle savedInstanceState) {
        super.onCreate(savedInstanceState);
        setContentView(R.layout.layout);

        button=findViewById(R.id.button);
        layout=findViewById(R.id.line1);
        manager=getSupportFragmentManager();
        button.setOnClickListener(new View.OnClickListener() {
            @Override
            public void onClick(View v) {
                layout.setLayoutParams(new LinearLayout.LayoutParams(getWindowManager().getDefaultDisplay().getWidth()/3,
                        getWindowManager().getDefaultDisplay().getHeight()));
                FragmentTransaction transaction=manager.beginTransaction();
                transaction.replace(R.id.layout_main,new MyFragement());
                transaction.addToBackStack(null);
                transaction.commit();

            }
        });
    }
}
MyFragment.java
package com.example.aimee.acyfragementtest;

import android.os.Bundle;
import android.support.annotation.NonNull;
import android.support.annotation.Nullable;
import android.support.v4.app.Fragment;
import android.support.v4.app.FragmentManager;
import android.support.v4.app.FragmentTransaction;
import android.view.LayoutInflater;
import android.view.View;
import android.view.ViewGroup;
import android.widget.Button;
import android.widget.LinearLayout;

public class MyFragement extends Fragment {
    LinearLayout layout;
    Button button;
    FragmentManager manager;
    @Nullable
    @Override
    public View onCreateView(@NonNull LayoutInflater inflater, @Nullable ViewGroup container, @Nullable Bundle savedInstanceState) {
        layout=getActivity().findViewById(R.id.line1);
        View view=inflater.inflate(R.layout.layout2,container,false);
        button=view.findViewById(R.id.button2);
        button.setOnClickListener(new View.OnClickListener() {
            @Override
            public void onClick(View v) {
                manager=getFragmentManager();
                FragmentTransaction transaction=manager.beginTransaction();
                transaction.remove(MyFragement.this);
                transaction.commit();
                maxScreen();
            }
        });
        return view;
    }

//    @Override
//    public void onDestroyView() {
//        super.onDestroyView();
//        maxScreen();
//    }

    private void maxScreen(){
        layout.setLayoutParams(new LinearLayout.LayoutParams(getActivity().getWindowManager().getDefaultDisplay().getWidth(),
                getActivity().getWindowManager().getDefaultDisplay().getHeight()));
    }
}
注释的那一段,是表示如果你点返回的时候,程序不会直接退出,而是原本的主页面,即只有显示详细信息这一个button。