1. apollo在liunx环境实战(三)
1.1. 准备
- 下载apollo源码
https://github.com/ctripcorp/apollo
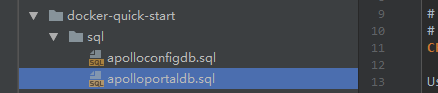
1.2. 创建数据库
- 在自己的liunx环境下的mysql运行它的创库语句
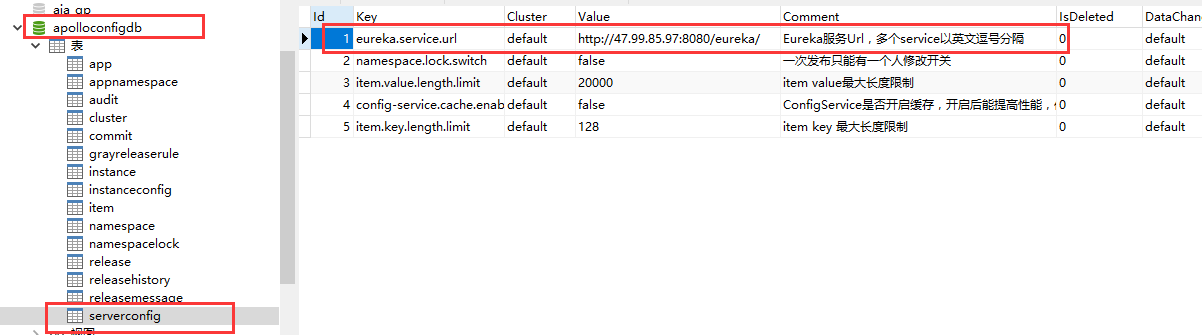
1.3. 配置数据库
-
其中环境列表配置,部门配置,请配置数据库

-
eureka地址配置
1.4. 构建三个服务configservice,adminservice,portal
- 它提供了两种方式,一种不用自己定制的直接下载它已经打包好的zip包,地址如下
- 另一种就是自己打包源码,我采用的自己打包源码,优点就是可以保证代码最新
1.4.1. 打包源码
-
打包前

-
打包
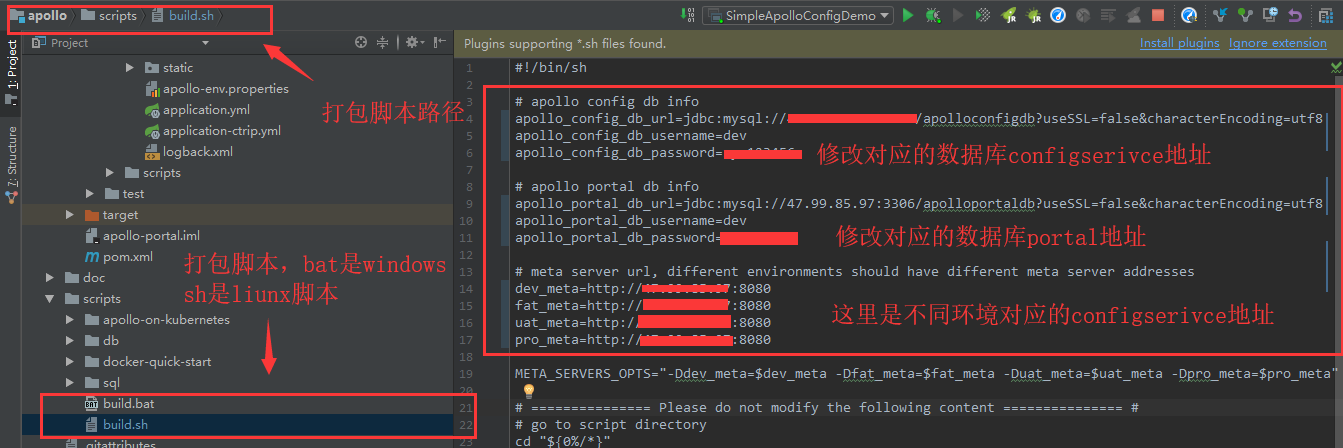
-
我用的git bash模拟liunx运行sh的打包脚本,然后被坑了一把,不知道为什么,打包后对应的数据库url地址就是没有配进去,有知道原因和如何解决的麻烦告知一声,Thanks♪(・ω・)ノ
-
我后来是直接手动打开压缩包,把配置文件数据库地址修改了一遍,然后覆盖
1.5. 上传服务器
-
把三个服务打包后的zip包上传到服务器

-
我编写了一点脚本启动顺手点
[root@izbp1itlw36onyj4m9b4hiz docker-apollo]# ls
adminservice  configservice  deleteAll.sh  portal
[root@izbp1itlw36onyj4m9b4hiz docker-apollo]# cd adminservice/
[root@izbp1itlw36onyj4m9b4hiz adminservice]# ls
apollo-adminservice-1.4.0-SNAPSHOT-github.zip  build.sh  Dockerfile  start.sh
[root@izbp1itlw36onyj4m9b4hiz adminservice]# cat build.sh
#!/bin/bash
docker build -t apollo-adminservice .
[root@izbp1itlw36onyj4m9b4hiz adminservice]# cat start.sh
#!/bin/bash
docker run -p 8090:8090 -d -v /tmp/logs:/opt/logs --name apollo-adminservice apollo-adminservice
[root@izbp1itlw36onyj4m9b4hiz adminservice]# cd ../configservice/
[root@izbp1itlw36onyj4m9b4hiz configservice]# ls
apollo-configservice-1.4.0-SNAPSHOT-github.zip  build.sh  Dockerfile  start.sh
[root@izbp1itlw36onyj4m9b4hiz configservice]# cat build.sh
#!/bin/bash
docker build -t apollo-configservice .
[root@izbp1itlw36onyj4m9b4hiz configservice]# cat start.sh
#!/bin/bash
docker run -p 8080:8080 -d -v /tmp/logs:/opt/logs --name apollo-configservice apollo-configservice
[root@izbp1itlw36onyj4m9b4hiz configservice]# cd ../portal/
[root@izbp1itlw36onyj4m9b4hiz portal]# ls
apollo-portal-1.4.0-SNAPSHOT-github.zip  build.sh  Dockerfile  start.sh
[root@izbp1itlw36onyj4m9b4hiz portal]# cat build.sh
#!/bin/bash
docker build -t apollo-portal .
[root@izbp1itlw36onyj4m9b4hiz portal]# cat start.sh
#!/bin/bash
docker run -p 8070:8070 -d -v /tmp/logs:/opt/logs --name apollo-portal apollo-portal
[root@izbp1itlw36onyj4m9b4hiz portal]# cd ..
[root@izbp1itlw36onyj4m9b4hiz docker-apollo]# cat deleteAll.sh
#!/bin/bash
docker stop `docker ps -a | grep apollo-adminservice | awk '{print $1}'`&docker rm `docker ps -a | grep apollo-adminservice | awk '{print $1}'`&docker rmi `docker images | grep apollo-adminservice | awk '{print $3}'`

docker stop `docker ps -a | grep apollo-configservice | awk '{print $1}'`&docker rm `docker ps -a | grep apollo-configservice | awk '{print $1}'`&docker rmi `docker images | grep apollo-configservice | awk '{print $3}'`

docker stop `docker ps -a | grep apollo-portal | awk '{print $1}'`&docker rm `docker ps -a | grep apollo-portal | awk '{print $1}'`&docker rmi `docker images | grep apollo-portal | awk '{print $3}'`
- 最后的删除脚本没优化过,我用来一键删除部署的三个docker容器的,删除一次失败隔个几秒再删,直到全部镜像删掉
1.6. 构建镜像运行
- 基于1.4的脚本,先后运行configservice的build.sh,start.sh,再是adminserivce,portal
1.7. 测试
-
访问服务器地址:8080,显示了adminservice和configservice就正确了

-
访问服务器地址:8070,显示如下,我已经创建了两个项目
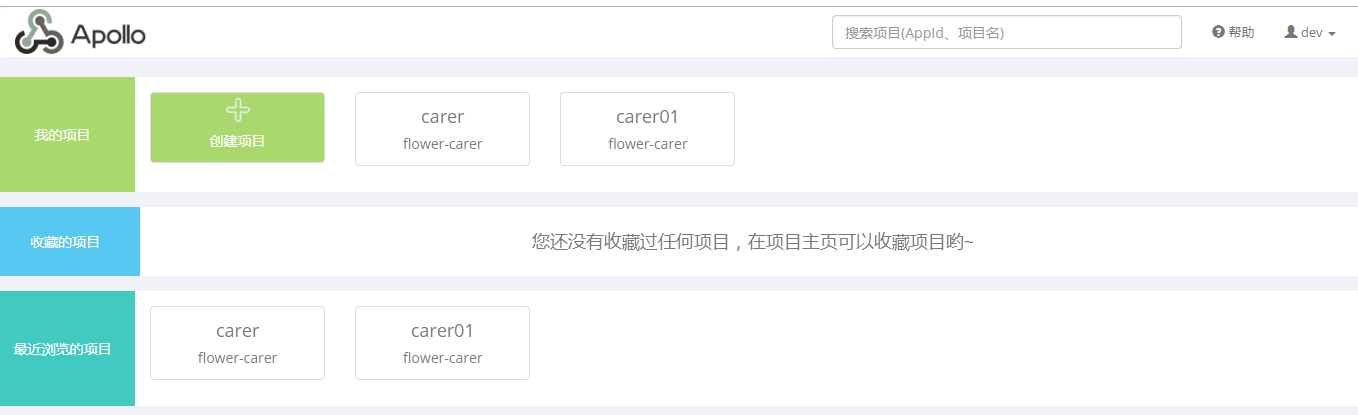
- 创建新项目,进去后如下

1.8. 接入客户端
- 仍旧以apollo提供的demo为例
1.8.1. 前置准备
- 在window中需要配置
C:optsettingsserver.properties该文件属性,内容如下,模拟该客户端环境,eureka地址
env=DEV
apollo.meta=http://ip:8080
- 修改客户端app.properties中,app.id=你新建项目中配置的appid
1.8.2. 启动客户端

-
第一次启动可能有些警告啥的,因为第一次没有本地缓存读不到,忽略它,只要你再界面配置了属性,第一次启动后就会有本地缓存了
-
控制台输入属性名回车,后台界面修改属性提交,客户端也能接收到改变,再次获取,属性值改变
Apollo Config Demo. Please input key to get the value. Input quit to exit.
> count
> [apollo-demo][main]2019-03-19 10:49:27,240 INFO  [com.ctrip.framework.apollo.demo.api.SimpleApolloConfigDemo] Loading key : count with value: 20
[apollo-demo][Apollo-Config-1]2019-03-19 11:33:50,330 INFO  [com.ctrip.framework.apollo.demo.api.SimpleApolloConfigDemo] Changes for namespace application
[apollo-demo][Apollo-Config-1]2019-03-19 11:33:50,334 INFO  [com.ctrip.framework.apollo.demo.api.SimpleApolloConfigDemo] Change - key: count, oldValue: 20, newValue: 30, changeType: MODIFIED
count
> [apollo-demo][main]2019-03-19 11:33:54,232 INFO  [com.ctrip.framework.apollo.demo.api.SimpleApolloConfigDemo] Loading key : count with value: 30