上篇我们实现了数据的存储,包括把数据存储到MongoDB,Mysql以及本地文件,本篇说下分布式。
我们目前实现的是一个单机爬虫,也就是只在一个机器上运行,想象一下,如果同时有多台机器同时运行这个爬虫,并且把数据都存储到同一个数据库,那不是美滋滋,速度也得到了很大的提升。
要实现分布式,只需要对settings.py文件进行适当的配置就能完成。
文档时间:官方文档介绍如下:
Use the following settings in your project:
# Enables scheduling storing requests queue in redis.
SCHEDULER = "scrapy_redis.scheduler.Scheduler"

# Ensure all spiders share same duplicates filter through redis.
DUPEFILTER_CLASS = "scrapy_redis.dupefilter.RFPDupeFilter"
# Default requests serializer is pickle, but it can be changed to any module
# with loads and dumps functions. Note that pickle is not compatible between
# python versions.
# Caveat: In python 3.x, the serializer must return strings keys and support
# bytes as values. Because of this reason the json or msgpack module will not
# work by default. In python 2.x there is no such issue and you can use
# 'json' or 'msgpack' as serializers.
#SCHEDULER_SERIALIZER = "scrapy_redis.picklecompat"

# Don't cleanup redis queues, allows to pause/resume crawls.
#SCHEDULER_PERSIST = True

# Schedule requests using a priority queue. (default)
#SCHEDULER_QUEUE_CLASS = 'scrapy_redis.queue.PriorityQueue'

# Alternative queues.
#SCHEDULER_QUEUE_CLASS = 'scrapy_redis.queue.FifoQueue'
#SCHEDULER_QUEUE_CLASS = 'scrapy_redis.queue.LifoQueue'

# Max idle time to prevent the spider from being closed when distributed crawling.
# This only works if queue class is SpiderQueue or SpiderStack,
# and may also block the same time when your spider start at the first time (because the queue is empty).
#SCHEDULER_IDLE_BEFORE_CLOSE = 10

# Store scraped item in redis for post-processing.
ITEM_PIPELINES = {
    'scrapy_redis.pipelines.RedisPipeline': 300
}

# The item pipeline serializes and stores the items in this redis key.
#REDIS_ITEMS_KEY = '%(spider)s:items'

# The items serializer is by default ScrapyJSONEncoder. You can use any
# importable path to a callable object.
#REDIS_ITEMS_SERIALIZER = 'json.dumps'

# Specify the host and port to use when connecting to Redis (optional).
#REDIS_HOST = 'localhost'
#REDIS_PORT = 6379

# Specify the full Redis URL for connecting (optional).
# If set, this takes precedence over the REDIS_HOST and REDIS_PORT settings.
#REDIS_URL = 'redis://user:pass@hostname:9001'

# Custom redis client parameters (i.e.: socket timeout, etc.)
#REDIS_PARAMS  = {}
# Use custom redis client class.
#REDIS_PARAMS['redis_cls'] = 'myproject.RedisClient'

# If True, it uses redis' ``spop`` operation. This could be useful if you
# want to avoid duplicates in your start urls list. In this cases, urls must
# be added via ``sadd`` command or you will get a type error from redis.
#REDIS_START_URLS_AS_SET = False

# Default start urls key for RedisSpider and RedisCrawlSpider.
#REDIS_START_URLS_KEY = '%(name)s:start_urls'

# Use other encoding than utf-8 for redis.
#REDIS_ENCODING = 'latin1'
写的很长对不对,完全不想看对不对,那我就直接把里面重点的一部分挑出来说下。
- 核心配置(要实现分布式,这个必须要设置):
SCHEDULER = "scrapy_redis.scheduler.Scheduler"   #将调度器修改
DUPEFILTER_CLASS = "scrapy_redis.dupefilter.RFPDupeFilter"  #去重过滤器修改
- 请求队列:
# Schedule requests using a priority queue. (default)
#SCHEDULER_QUEUE_CLASS = 'scrapy_redis.queue.PriorityQueue' #优先级队列,源码里面用分数来设置优先级,有兴趣可以看看

# Alternative queues.
#SCHEDULER_QUEUE_CLASS = 'scrapy_redis.queue.FifoQueue'  #先进先出,也就是说先放进来的请求先取走
#SCHEDULER_QUEUE_CLASS = 'scrapy_redis.queue.LifoQueue'  #先进后出,栈,也就是说后放进来的请求先取走
- redis连接信息配置(必须要配置,如果有密码也要把密码写上):
#REDIS_HOST = 'localhost'  #这个地址肯定是要换成服务器的地址的
#REDIS_PORT = 6379          #默认端口,当然你也可以自己改
#REDIS_PASSWORD = xxx      #这个就是redis数据库的密码啦
- 队列、指纹处理:
# Don't cleanup redis queues, allows to pause/resume crawls.
#SCHEDULER_PERSIST = True   #爬取完成保留队列、不进行清空,默认是不保留。当然如果是手动停止的话,里面没有请求过的还会继续保留,下次运行爬虫继续从里面拿请求
- 配置爬虫开始动作:
SCHEDULER_FLUSH_ON_START = True #是否在开始之前清空 调度器和去重记录,True=清空,False=不清空。分布式爬虫不建议设置该项
- 配置pipeline(数据量多的时候不建议从这个redis数据库存,redis基于内存,我们看重的是速度):
ITEM_PIPELINES = {
    'scrapy_redis.pipelines.RedisPipeline': 300  #如果配置了该项,数据item就会存储到redis数据库
}
当然还有很多其他的配置,可以根据实际需要进行选择。
- 下面我们完成我们自己的设置,对settings.py文件修改如下(包括redis和mysql)
#The following is scrapy_redis settings

SCHEDULER = "scrapy_redis.scheduler.Scheduler"
DUPEFILTER_CLASS = "scrapy_redis.dupefilter.RFPDupeFilter"

REDIS_HOST = '47.98.xx.xx'  #修改未自己的服务器redis地址
REDIS_PORT = 6379

SCHEDULER_PERSIST = True
#The following is mysql settings
MYSQL_HOST = '47.98.xx.xx' #修改为自己的mysql所在的服务器地址
MYSQL_DATABASE = 'lagou'
MYSQL_USER = 'root'
MYSQL_PASSWORD = '@Fxxxxx'  #修改为自己的mysql的密码
MYSQL_PORT = 3306
- 把代码打包好上传到远程主机上(打包好后,直接拖动到xshell窗口里)
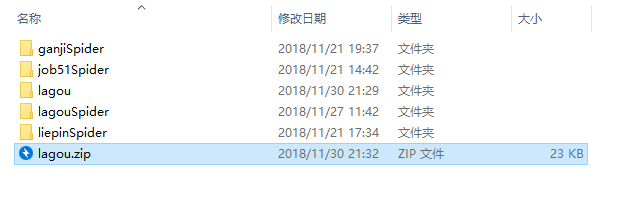
- 我这里打包成zip格式。建立好项目目录后,把这个zip文件拖进去。
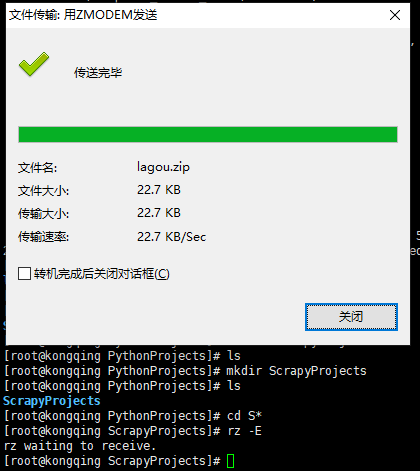
- 解压

现在我们使用python main.py把这个远程主机上的爬虫给跑起来。(注意:远程主机需要安装python3环境,还有scrapy以及相关的包。)
运行本地爬虫,运行远程主机上的爬虫,这样分布式就完成了。
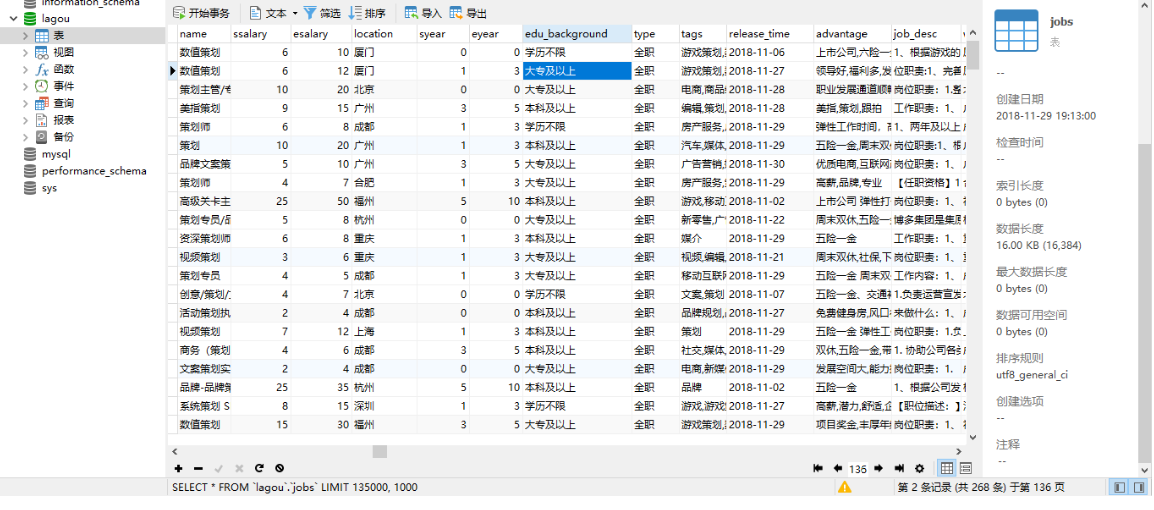
爬虫正常运行,而且数据都存在了远程服务器的mysql上。

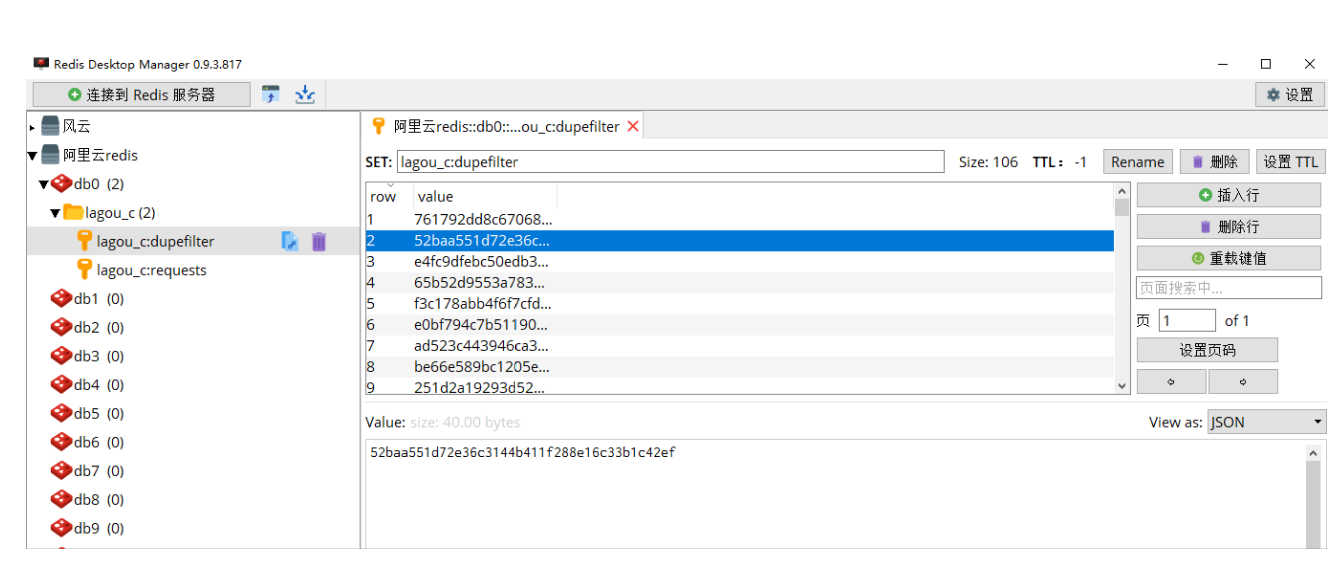
同时redis上可以看到requests和du'pefilter指纹信息。
最终爬取的数据图片(总共存储了136页,每一页1000个数据):