-------------------siwuxie095
基于 AspectJ 的 XML 方式进行 AOP 开发
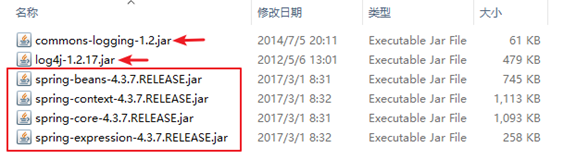
1、首先导入 jar 包(共 10 个包)
(1)导入核心 jar 包和日志相关的 jar 包
(2)导入 AOP 和 AspectJ 的 jar 包
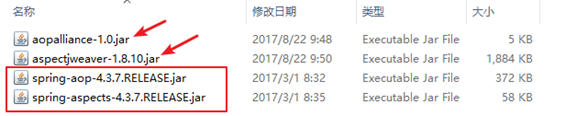
其中:
aopalliance 下载链接:
http://mvnrepository.com/artifact/aopalliance/aopalliance
aspectjweaver 下载链接:
http://mvnrepository.com/artifact/org.aspectj/aspectjweaver
2、创建 Spring 核心配置文件,引入新的 XML 约束
spring-aop-4.3.xsd
注意:要引入和 Spring 版本对应的 XML 约束
在 applicationContext.xml 中添加如下约束:
<?xml version="1.0" encoding="UTF-8"?> <beans xmlns="http://www.springframework.org/schema/beans" xmlns:xsi="http://www.w3.org/2001/XMLSchema-instance" xmlns:aop="http://www.springframework.org/schema/aop" xsi:schemaLocation=" http://www.springframework.org/schema/beans http://www.springframework.org/schema/beans/spring-beans.xsd |
3、使用表达式配置切入点:切入点表达式
(1)切入点,即 实际被增强的方法
(2)常用表达式:
execution(<访问修饰符>? <返回值类型> <类型声明>? <方法名>(<参数>) <异常>?)
1)必选:返回值类型、方法名、参数
2)可选:访问修饰符、类型声明、异常
(3)通配符:
1)*:匹配任意数量的字符
2)..:匹配任意数量的包 或 参数
(4)举例如下:
1)execution(* com.siwuxie095.aop.Book.add(..))
匹配特定包和类下的 add 方法
2)execution(* com.siwuxie095.aop.Book.*(..))
匹配特定包和类下的所有方法
3)execution(* *.*(..))
匹配所有方法
4)execution(* add*(..))
匹配所有 add 开头的方法
参考链接:http://www.cnblogs.com/softidea/p/6102770.html
4、具体实现
(1)编写一个被增强类
Book.java:
package com.siwuxie095.aop;
//被增强类 public class Book {
public void add() { System.out.println("----- add -----"); }
} |
(2)编写一个增强类
MyBook.java:
package com.siwuxie095.aop;
import org.aspectj.lang.ProceedingJoinPoint;
// 增强类 public class MyBook {
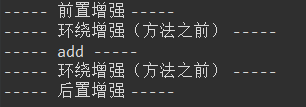
public void beforeAdd() { System.out.println("----- 前置增强 -----"); }
public void afterAdd(){ System.out.println("----- 后置增强 -----"); }
public void aroundAdd(ProceedingJoinPoint proceedingJoinPoint) throws Throwable { System.out.println("----- 环绕增强(方法之前) -----"); //执行被增强的方法 proceedingJoinPoint.proceed(); System.out.println("----- 环绕增强(方法之前) -----"); }
} |
(3)在配置文件中进行配置
applicationContext.xml:
<?xml version="1.0" encoding="UTF-8"?> <beans xmlns="http://www.springframework.org/schema/beans" xmlns:xsi="http://www.w3.org/2001/XMLSchema-instance" xmlns:aop="http://www.springframework.org/schema/aop" xsi:schemaLocation=" http://www.springframework.org/schema/beans http://www.springframework.org/schema/beans/spring-beans.xsd http://www.springframework.org/schema/aop http://www.springframework.org/schema/aop/spring-aop.xsd">
<!-- 配置对象 --> <bean id="book" class="com.siwuxie095.aop.Book"></bean> <bean id="myBook" class="com.siwuxie095.aop.MyBook"></bean>
<!-- 配置 AOP --> <aop:config>
<!-- 配置切入点:哪些类的哪些方法需要增强 --> <aop:pointcut expression="execution(* com.siwuxie095.aop.Book.add(..))" id="pt"/>
<!-- 配置切面:把增强应用到切入点上 --> <aop:aspect ref="myBook"> <aop:before method="beforeAdd" pointcut-ref="pt"/> <aop:after-returning method="afterAdd" pointcut-ref="pt"/> <aop:around method="aroundAdd" pointcut-ref="pt"/> </aop:aspect>
</aop:config>
</beans> |
(4)编写一个测试类
TestAop.java:
package com.siwuxie095.aop;
import org.junit.Test; import org.springframework.context.ApplicationContext; import org.springframework.context.support.ClassPathXmlApplicationContext;
public class TestAop {
/** * 手动加上 @Test 以进行单元测试(将自动导入 JUnit 4 的 jar 包) * * 选中方法名,右键->Run As->JUint Test */ @Test public void testAop() {
ApplicationContext context=new ClassPathXmlApplicationContext("applicationContext.xml");
Book book=(Book) context.getBean("book");
book.add(); }
} |
(5)运行一览:
【made by siwuxie095】