领导来了封邮件:C# 创建 windows service ,扫描相应目录,并将扫描到文件使用DOS 命令方式调用第三方Ftp工具上传到Ftp服务器。
短短几句话,看了好几遍。分析之后,由于对这个之前没有接触,一步一步来。这里也写一篇,一来跟新人分享下,二来希望前辈拍砖指点。
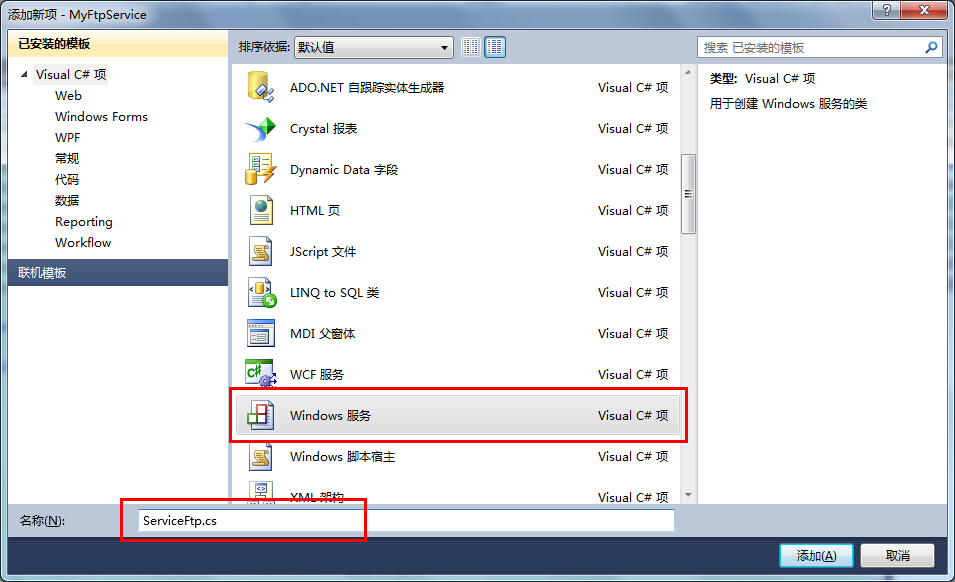
1.创建windows Service 服务。
(这里参考http://blog.csdn.net/yysyangyangyangshan/article/details/10515035 前辈的博文,不过前辈的博文有两点没懂,一是安装代码,我不知道写在哪,也不知道利用什么事件触发调用它,所以安装的时候,用命令行手动安装了。二是当服务运行起来的时候,在运行目录下没有看到记录的文件,而是当我停止或者卸载服务的时候,在目录下有这个记录文件,因此也拜读了http://blog.csdn.net/xxj_jing/article/details/7542654 前辈的文章。)
ServiceFtp.cs 的代码:
public ServiceFtp()
       {
          InitializeComponent();
       }

       protected override void OnStart(string[] args)
       {
       }

       protected override void OnStop()
       {
       }
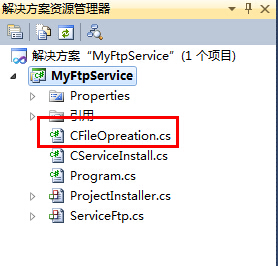
要做的方法放在OnStart()里面即可,当启动服务时就可调用。这边记录时间文件。新建一个类:CFileOpreation.cs 用于记录时间操作。
该类的代码完全参考前辈的(嘿嘿):
public class CFileOpreation
    {
        #region SaveRecord
        /// 服务测试:写一个文件到本地
        /// <summary>
        /// 保存至本地文件
        /// </summary>
        /// <param name="ETMID"></param>
        /// <param name="content"></param>
        public static void SaveRecord(string content)
        {
            if (string.IsNullOrEmpty(content))
            {
                return;
            }
            FileStream fileStream = null;
            StreamWriter streamWriter = null;
            try
            {
                string path = Path.Combine(System.AppDomain.CurrentDomain.SetupInformation.ApplicationBase, string.Format("{0:yyyyMMdd}", DateTime.Now));
                using (fileStream = new FileStream(path, FileMode.Append, FileAccess.Write))
                {
                    using (streamWriter = new StreamWriter(fileStream))
                    {
                        streamWriter.Write(content);
                        if (streamWriter != null)
                        {
                            streamWriter.Close();
                        }
                    }
                    if (fileStream != null)
                    {
                        fileStream.Close();
                    }
                }
            }
            catch { }
        }
    #endregion
    }
然后在ServiceFtp.cs中调用该类中的方法,代码如下:


 1 public ServiceFtp()
 2         {
 3             InitializeComponent();
 4             //InitService();另一个测试使用
 5         }
 6
 7         protected override void OnStart(string[] args)
 8         {
 9             IntialSaveRecord();
10             string strStart = "服务开启";
11         }
12
13         protected override void OnStop()
14         {
15             if (recordTimer != null)
16             {
17                 //释放
18                 recordTimer.Dispose();
19             }
20             string strStop = "服务停止";
21         }
22         protected override void OnContinue()
23         {
24             string strCtn = "服务继续运行";
25             base.OnContinue();
26         }
27         protected override void OnPause()
28         {
29             string strPause = "服务暂停";
30             base.OnPause();
31         }
32
33         /// <summary>
34         /// 初始化服务
35         /// </summary>
36         private void InitService()
37         {
38             base.AutoLog = false;
39             base.CanShutdown = true;
40             base.CanStop = true;
41             base.CanPauseAndContinue = true;
42             base.ServiceName = "ServiceFtp";  //这个名字很重要,设置不一致会产生 1083 错误哦!
43         }
44         private void IntialSaveRecord()
45         {
46             TimerCallback timerCallback = new TimerCallback(CallbackTask);
47             AutoResetEvent autoEvent = new AutoResetEvent(false);
48
49             recordTimer = new System.Threading.Timer(timerCallback, autoEvent, 10000, 60000 * 10);
50         }
51         private void CallbackTask(Object stateInfo)
52         {
53             //调用文件操作类的方法
54             CFileOpreation.SaveRecord(string.Format(@"当前记录时间:{0},状况:程序运行正常!", DateTime.Now));
55         }
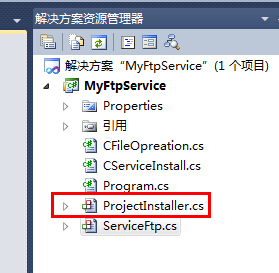
这边服务写得差不多了,添加下安装程序:
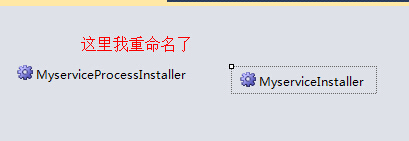
项目中会出现Install的东西:
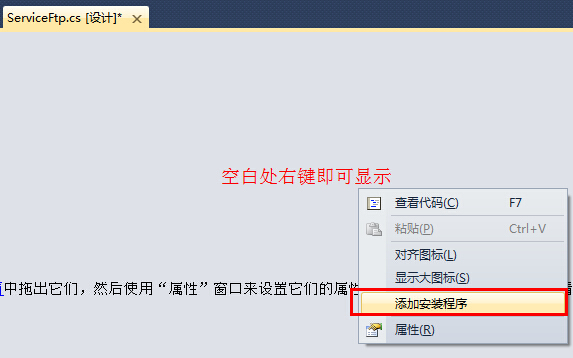
视图设计器的界面出现:
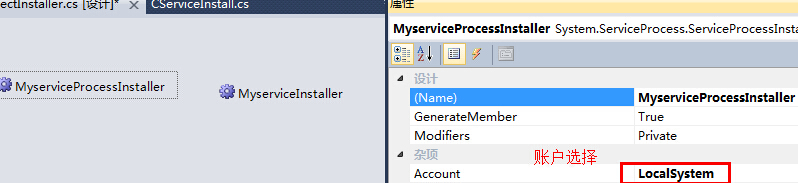
右键设置一下属性,这里启动方式前辈们一般都是设置为手动,我想试试自动有什么不一样,设为自动:

然后设置一下账户类型:localsystem。
到这就差不多了,生成项目,找到EXE文件,进行添加到服务面板,根据.NET 版本4.0 和2.0 的不同,4.0的同学:
C:WindowsMicrosoft.NETFrameworkv4.0.30319InstallUtil.exe MyFtpService.exe
2.0的同学:
C:WindowsMicrosoft.NETFrameworkv2.0.50727InstallUtil.exe MyFtpService.exe
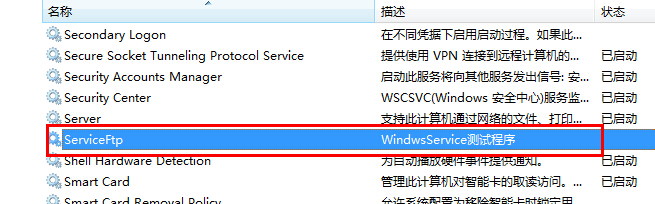
上面两行命令在控制台输入即可安装服务,之后在服务面板中就可以看到了,感觉很是亲切:
这是手动控制台安装方式,在网上逛逛,发现了“.bat”文件好像蛮好用的,果断试试:
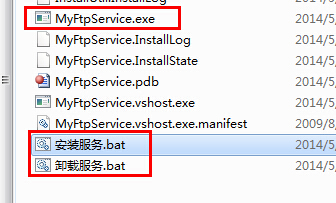
在EXE文件目录建立两个文件,必须是以“.bat”作为文件格式,叫做安装服务.bat和卸载服务.bat
安装服务.bat代码(我的版本是4.0):
C:WindowsMicrosoft.NETFrameworkv4.0.30319InstallUtil.exe MyFtpService.exe
pause
卸载服务.bat代码:
C:WindowsMicrosoft.NETFrameworkv4.0.30319InstallUtil.exe /u MyFtpService.exe
pause
pause的作用:保持控制台窗口不关闭
这两个方便,双击下就安装/卸载好了。
运行下,一下是没有记录时间文件,可是我卸载服务后,却发现有,求指点:
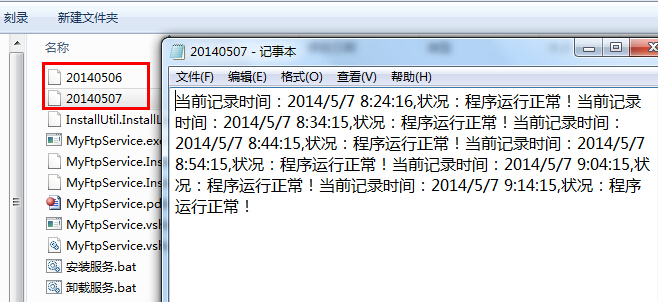
上面写入时间已经完成,但是我还加了个扫描指定目录的代码:
        //root dir
        const string strPath = @"D:/DOS命令扫描目录";
        //go through dir
        private void ExploreDir(DirectoryInfo di)
        {
            //write dir name
            Console.WriteLine(di.FullName);
            //write file name
            FileInfo[] files = di.GetFiles();
            foreach (FileInfo item in files)
            {
                Console.WriteLine(item.FullName);
            }
            // recursive do it
            DirectoryInfo[] dirs = di.GetDirectories();
            foreach (DirectoryInfo d in dirs)
            {
                ExploreDir(d);
            }
            Console.ReadLine();
调用一下该递归方法
            Program pp = new Program();
            DirectoryInfo dir = new DirectoryInfo(strPath);
            pp.ExploreDir(dir);
扫描的目录文件中只能识别常见格式的文件,rar txt doc, VS 生成的这么多文件他一个都没扫出来。

接下来就要使用DOS 命令调用第三方Ftp 工具将扫描到的文件发送到Ftp服务器,热烈欢迎前辈们指点。