过多介绍我就不叙述了,奉上官方文档
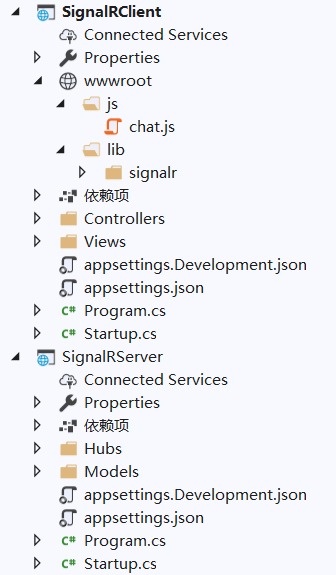
本文使用的是.NET Core 3.1版本,创建SignalR的服务端和客户端,结构如下:
一、创建服务端
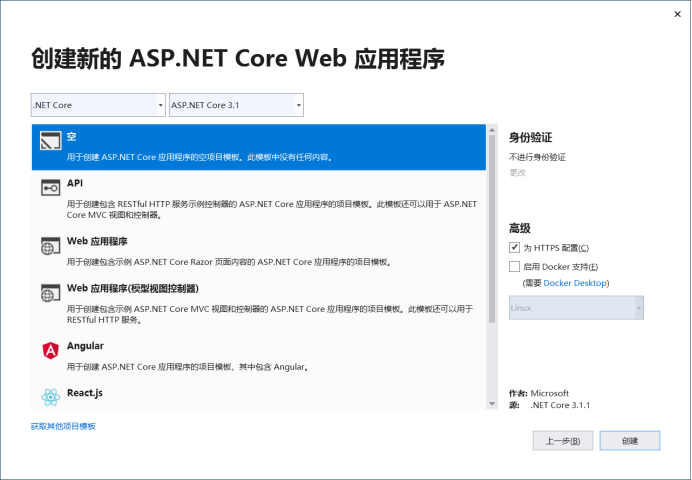
用VS2019创建一个空的Web应用程序,命名为SignalRServer
1. 添加ResultModel类:
    public class ResultModel
    {
        public int Status { get; set; }
        public string Message { get; set; }
        public List<UserModel> OnlineUser { get; set; }
    }
2. 添加UserModel类:
    public class UserModel
    {
        public string ID { get; set; }
        public string UserName { get; set; }
        public string Password { get; set; }
        public string GroupName { get; set; }
    }
3. 添加ChatHub类:
  1     public class ChatHub : Hub
  2     {
  3         /// <summary>
  4         /// 已登录的用户信息
  5         /// </summary>
  6         public static List<UserModel> OnlineUser { get; set; } = new List<UserModel>();
  7
  8         /// <summary>
  9         /// 模拟存放在数据库里的用户信息
 10         /// </summary>
 11         private static readonly List<UserModel> _dbuser = new List<UserModel> {
 12           new UserModel{
 13             UserName = "test1", Password = "111", GroupName = "Group1"
 14           },
 15           new UserModel{
 16             UserName = "test2", Password = "111", GroupName = "Group2"
 17           },
 18           new UserModel{
 19             UserName = "test3", Password = "111", GroupName = "Group2"
 20           },
 21           new UserModel{
 22             UserName = "test4", Password = "111", GroupName = "Group1"
 23           },
 24           new UserModel{
 25             UserName = "test5", Password = "111", GroupName = "Group3"
 26           },
 27         };
 28
 29         /// <summary>
 30         /// 登录验证
 31         /// </summary>
 32         public async Task Login(string username, string password)
 33         {
 34             string connid = Context.ConnectionId;
 35             ResultModel result = new ResultModel
 36             {
 37                 Status = 0,
 38                 Message = "登录成功!"
 39             };
 40             if (!OnlineUser.Exists(u => u.ID == connid))
 41             {
 42                 var model = _dbuser.Find(u => u.UserName == username && u.Password == password);
 43                 if (model != null)
 44                 {
 45                     model.ID = connid;
 46                     OnlineUser.Add(model);
 47                     //给当前的连接分组
 48                     await Groups.AddToGroupAsync(connid, model.GroupName);
 49                 }
 50                 else
 51                 {
 52                     result.Status = 1;
 53                     result.Message = "账号或密码错误!";
 54                 }
 55             }
 56             //给当前连接返回消息
 57             await Clients.Client(connid).SendAsync("LoginResponse", result);
 58         }
 59
 60         /// <summary>
 61         /// 获取所在组的在线用户
 62         /// </summary>
 63         public async Task GetUsers()
 64         {
 65             var model = OnlineUser.Find(u => u.ID == Context.ConnectionId);
 66             ResultModel result = new ResultModel();
 67             if (model == null)
 68             {
 69                 result.Status = 1;
 70                 result.Message = "请先登录!";
 71             }
 72             else
 73             {
 74                 result.OnlineUser = OnlineUser.FindAll(u => u.GroupName == model.GroupName);
 75             }
 76             //给所在组返回消息
 77             await Clients.Group(model.GroupName).SendAsync("GetUsersResponse", result);
 78         }
 79
 80         public async Task SendMessage(string user, string message)
 81         {
 82             ResultModel result = new ResultModel();
 83             var model = OnlineUser.Find(u => u.ID == Context.ConnectionId);
 84             if (model == null)
 85             {
 86                 result.Status = 1;
 87                 result.Message = "请先登录!";
 88             }
 89             else
 90             {
 91                 result.Status = 0;
 92                 result.Message = $"“{user}”发送的消息:{message}";
 93             }
 94             await Clients.Group(model.GroupName).SendAsync("SendMessageResponse", result);
 95         }
 96
 97         public override Task OnConnectedAsync()
 98         {
 99             return base.OnConnectedAsync();
100         }
101
102         /// <summary>
103         /// 当连接断开时的处理
104         /// </summary>
105         public override Task OnDisconnectedAsync(Exception exception)
106         {
107             string connid = Context.ConnectionId;
108             var model = OnlineUser.Find(u => u.ID == connid);
109             int count = OnlineUser.RemoveAll(u => u.ID == connid);
110             if (model != null)
111             {
112                 ResultModel result = new ResultModel()
113                 {
114                     Status = 0,
115                     OnlineUser = OnlineUser.FindAll(u => u.GroupName == model.GroupName)
116                 };
117                 Clients.Group(model.GroupName).SendAsync("GetUsersResponse", result);
118             }
119             return base.OnDisconnectedAsync(exception);
120         }
121     }
可以重写基类的两个方法:
OnConnectedAsync 当连接成功时执行
OnDisconnectedAsync 当连接断开时执行,关闭、刷新 浏览器或标签页都会执行
服务端发送给客户端的信息,我是通过分组推送,就是在同一个组里的用户才会收到(类似群聊):
Clients.Group(groupName).SendAsync();
也可以所有在线用户都收到:
Clients.All.SendAsync();
4. Startup类的配置如下:
 1     public class Startup
 2     {
 3         // This method gets called by the runtime. Use this method to add services to the container.
 4         // For more information on how to configure your application, visit https://go.microsoft.com/fwlink/?LinkID=398940
 5         public void ConfigureServices(IServiceCollection services)
 6         {
 7             services.AddCors(options => options.AddPolicy("CorsPolicy",
 8             builder =>
 9             {
10                 builder.AllowAnyMethod().AllowAnyHeader()
11                        .WithOrigins("https://localhost:44395")
12                        .AllowCredentials();
13             }));
14
15             services.AddSignalR();
16         }
17
18         // This method gets called by the runtime. Use this method to configure the HTTP request pipeline.
19         public void Configure(IApplicationBuilder app, IWebHostEnvironment env)
20         {
21             if (env.IsDevelopment())
22             {
23                 app.UseDeveloperExceptionPage();
24             }
25
26             app.UseRouting();
27
28             app.UseCors("CorsPolicy");
29
30             app.UseEndpoints(endpoints =>
31             {
32                 endpoints.MapGet("/", async context =>
33                 {
34                     await context.Response.WriteAsync("Hello World!");
35                 });
36                 endpoints.MapHub<ChatHub>("/chatHub");
37             });
38         }
39     }
注意:跨域是要指定地址的,不能是全部,否则客户端无法连接;当前你先留空,等客户端建立好了记得回来修改。
二、创建客户端
用VS2019创建一个空的Web应用程序,命名为SignalRClient
1. 新建文件夹,命名为wwwroot(如果不是这个名字,需要在中间件中指定了)
2. chat.js代码如下,注意withUrl中的地址,改为你的SignalRServer实际运行成功后的地址
 1 "use strict";
 2
 3 var connection = new signalR.HubConnectionBuilder()
 4     .withUrl("https://localhost:44317/chatHub")
 5     .withAutomaticReconnect() //断线自动重连
 6     .build();
 7
 8 connection.start();
 9
10 //自动重连成功后的处理
11 connection.onreconnected(connectionId => {
12     alert(connectionId);
13 });
14
15
16 //---消息---
17 document.getElementById("sendButton").addEventListener("click", function (event) {
18     var user = document.getElementById("userInput").value;
19     var message = document.getElementById("messageInput").value;
20     connection.invoke("SendMessage", user, message).catch(function (err) {
21         return console.error(err.toString());
22     });
23     event.preventDefault();
24 });
25
26 connection.on("SendMessageResponse", function (res) {
27     if (res && res.status == 0) {
28         var li = document.createElement("li");
29         li.textContent = res.message;
30         document.getElementById("messagesList").appendChild(li);
31     } else {
32         alert(res.message);
33     }
34 });
35 //---消息---
36
37
38 //---登录---
39 document.getElementById("btnLogin").addEventListener("click", function (event) {
40     var user = document.getElementById("userInput").value;
41     var message = document.getElementById("messageInput").value;
42     connection.invoke("Login", user, message).catch(function (err) {
43         return console.error(err.toString());
44     });
45     event.preventDefault();
46 });
47
48 connection.on("LoginResponse", function (res) {
49     if (res && res.status == 0) {
50         sessionStorage.setItem('curuser', res.data);
51         alert(res.message);
52         getUsers();
53     }
54     else {
55         alert('登录失败!');
56     }
57 });
58 //---登录---
59
60
61 //获取在线用户
62 function getUsers() {
63     connection.invoke("GetUsers").catch(function (err) {
64         return console.error(err.toString());
65     });
66     connection.on("GetUsersResponse", function (res) {
67         if (res && res.status == 0) {
68             var _lis = '<li>在线用户:</li>';
69             for (var i = 0; i < res.onlineUser.length; i++) {
70                 _lis += `<li>${res.onlineUser[i].userName}</li>`;
71             }
72             document.getElementById("usersList").innerHTML = _lis;
73         }
74     });
75 }
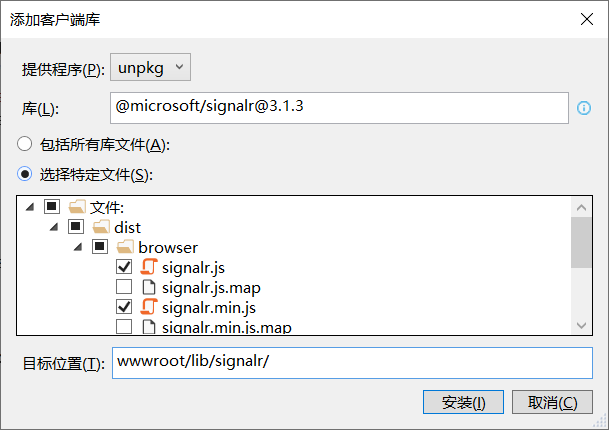
3. signalr的js库,你可以自行下载;或者“项目右键 -> 添加 -> 客户端库”;
提供程序改为“unpkg”,输入“@microsoft/signalr”按回车搜索,勾选自己需要的,最后注意存放的位置

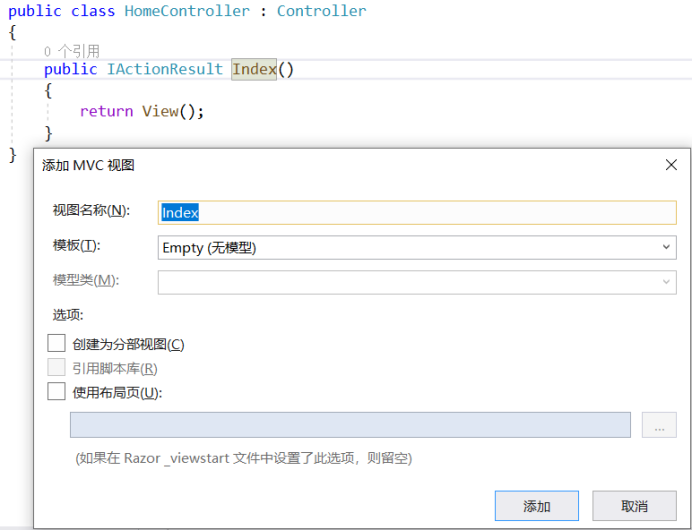
4. 创建页面:新建一个HomeController,添加视图,去掉布局页勾选
Index.cshtml代码如下:
 1 @{
 2     Layout = null;
 3 }
 4
 5 <!DOCTYPE html>
 6
 7 <html>
 8 <head>
 9     <meta name="viewport" content="width=device-width" />
10     <title>Index</title>
11 </head>
12 <body>
13     <div>
14         <input id="userInput" type="text" /><br />
15         <input id="messageInput" type="text" /><br />
16         <input id="btnLogin" type="button" value="登录" />
17         <input id="sendButton" type="button" value="发送" />
18     </div>
19     <ul id="usersList">
20     </ul>
21     <ul id="messagesList">
22     </ul>
23     <script src="~/lib/signalr/signalr.js"></script>
24     <script src="~/js/chat.js"></script>
25 </body>
26 </html>
5. Startup类的配置如下:
 1     public class Startup
 2     {
 3         // This method gets called by the runtime. Use this method to add services to the container.
 4         // For more information on how to configure your application, visit https://go.microsoft.com/fwlink/?LinkID=398940
 5         public void ConfigureServices(IServiceCollection services)
 6         {
 7             services.AddControllersWithViews();
 8         }
 9
10         // This method gets called by the runtime. Use this method to configure the HTTP request pipeline.
11         public void Configure(IApplicationBuilder app, IWebHostEnvironment env)
12         {
13             if (env.IsDevelopment())
14             {
15                 app.UseDeveloperExceptionPage();
16             }
17             app.UseStaticFiles();
18
19             app.UseRouting();
20
21             app.UseEndpoints(endpoints =>
22             {
23                 endpoints.MapControllerRoute(
24                     name: "default",
25                     pattern: "{controller=Home}/{action=Index}/{id?}");
26             });
27         }
28     }
服务端跑起来,客户端跑起来,最后来看下效果:
(test1和test4是一组的,注意它们的变化,test5的组只有它一个,所以它收不到其它用户的消息)
本文代码:https://files.cnblogs.com/files/shousiji/SignalRDemo.rar