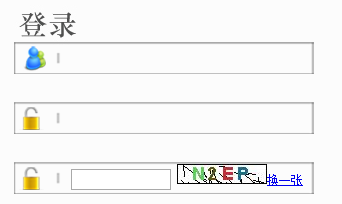
先上效果图:(图标请忽略)
生成验证码和验证码图片的工具类
package util;

import java.awt.Color;
import java.awt.Font;
import java.awt.Graphics;
import java.awt.image.BufferedImage;
import java.awt.image.RenderedImage;
import java.io.FileOutputStream;
import java.io.OutputStream;
import java.util.HashMap;
import java.util.Map;
import java.util.Random;

import javax.imageio.ImageIO;

public class CodeUtil {
    private static int width = 90;// 定义图片的width
    private static int height = 20;// 定义图片的height
    private static int codeCount = 4;// 定义图片上显示验证码的个数
    private static int xx = 15;
    private static int fontHeight = 18;
    private static  int codeY = 16;
    private static char[] codeSequence = { 'A', 'B', 'C', 'D', 'E', 'F', 'G', 'H', 'I', 'J', 'K', 'L', 'M', 'N', 'O', 'P', 'Q', 'R',
            'S', 'T', 'U', 'V', 'W', 'X', 'Y', 'Z', '0', '1', '2', '3', '4', '5', '6', '7', '8', '9' };

    /**
     * 生成一个map集合
     * code为生成的验证码
     * codePic为生成的验证码BufferedImage对象
     * @return
     */
    public static Map<String,Object> generateCodeAndPic() {
        // 定义图像buffer
        BufferedImage buffImg = new BufferedImage(width, height, BufferedImage.TYPE_INT_RGB);
        // Graphics2D gd = buffImg.createGraphics();
        // Graphics2D gd = (Graphics2D) buffImg.getGraphics();
        Graphics gd = buffImg.getGraphics();
        // 创建一个随机数生成器类
        Random random = new Random();
        // 将图像填充为白色
        gd.setColor(Color.WHITE);
        gd.fillRect(0, 0, width, height);

        // 创建字体,字体的大小应该根据图片的高度来定。
        Font font = new Font("Fixedsys", Font.BOLD, fontHeight);
        // 设置字体。
        gd.setFont(font);

        // 画边框。
        gd.setColor(Color.BLACK);
        gd.drawRect(0, 0, width - 1, height - 1);

        // 随机产生40条干扰线,使图象中的认证码不易被其它程序探测到。
        gd.setColor(Color.BLACK);
        for (int i = 0; i < 30; i++) {
            int x = random.nextInt(width);
            int y = random.nextInt(height);
            int xl = random.nextInt(12);
            int yl = random.nextInt(12);
            gd.drawLine(x, y, x + xl, y + yl);
        }

        // randomCode用于保存随机产生的验证码,以便用户登录后进行验证。
        StringBuffer randomCode = new StringBuffer();
        int red = 0, green = 0, blue = 0;

        // 随机产生codeCount数字的验证码。
        for (int i = 0; i < codeCount; i++) {
            // 得到随机产生的验证码数字。
            String code = String.valueOf(codeSequence[random.nextInt(36)]);
            // 产生随机的颜色分量来构造颜色值,这样输出的每位数字的颜色值都将不同。
            red = random.nextInt(255);
            green = random.nextInt(255);
            blue = random.nextInt(255);

            // 用随机产生的颜色将验证码绘制到图像中。
            gd.setColor(new Color(red, green, blue));
            gd.drawString(code, (i + 1) * xx, codeY);

            // 将产生的四个随机数组合在一起。
            randomCode.append(code);
        }
        Map<String,Object> map  =new HashMap<String,Object>();
        //存放验证码
        map.put("checkCode", randomCode);
        //存放生成的验证码BufferedImage对象
        map.put("codePic", buffImg);
        return map;
    }

    public static void main(String[] args) throws Exception {
        //创建文件输出流对象
        OutputStream out = new FileOutputStream("D://image_log/checkCode/"+System.currentTimeMillis()+".jpg");
        Map<String,Object> map = CodeUtil.generateCodeAndPic();
        ImageIO.write((RenderedImage) map.get("codePic"), "jpeg", out);
        System.out.println("验证码的值为:"+map.get("code"));
    }
}
jsp页面前端代码
<form action="" method="post" id="loginForm" name="loginForm">
  <input type="hidden" name="s" id="s" value="">
  <input type="hidden" name="t" id="t" value="">
  <tr>
    <td style="background: url(${prjpath}/images/login/qr-06.png) no-repeat center; padding-left:100px; height: 60px;" >
    <input type="text" id="loginName" name="loginName" value="" style="240px;background-color: #DFDFDF;color:black;vertical-align:middle;text-align:left; height:30px; line-height:26px;font-size: 20px;border:0px solid red;background:transparent;font-weight: bolder;"/>
    </td>
  </tr>
  <tr>
    <td style="background: url(${prjpath}/images/login/qr-07.png) no-repeat  center; padding-left: 100px; height: 60px;" align="left" >
    <input type="password" id="password" name="password" value="" style="240px;background-color: #DFDFDF;color:#999999;vertical-align:middle;text-align:left; height:30px; line-height:26px;font-size: 20px;border:0px solid red;background:transparent;font-weight: bolder;"/>
    </td>
  </tr>
  <tr>
    <td style="background: url(${prjpath}/images/login/qr-07.png) no-repeat  center; padding-left: 100px; height: 60px;" align="left" >
    <input type="text" name="checkCode" id="checkCode" style="100px;"/>
    <img id="imgObj" alt="验证码"  src="${prjpath}/user/getCode.do"><a href="#" onclick="changeImg()">换一张</a>
    </td>
  </tr>
</form>
<script type="text/javascript">
function mysubmit(){
if(formCheck()){
var aa = $.base64.encode($("#loginName").val());
loginForm.s.value = aa;
loginForm.t.value = $.md5($("#password").val());
loginForm.password.value = $("#password").val();
loginForm.checkCode.value = $('#checkCode').val();
loginForm.action = '<%=request.getContextPath() %>/user/loginUser.do?timestamp='+new Date().getTime();
document.loginForm.submit();
}
}
function changeImg() {
var imgSrc = $("#imgObj");
var src = imgSrc.attr("src");
imgSrc.attr("src", chgUrl(src));
}
// 时间戳
// 为了使每次生成图片不一致,即不让浏览器读缓存,所以需要加上时间戳
function chgUrl(url) {
var timestamp = (new Date()).valueOf();
if ((url.indexOf("&") >= 0)) {
url = url + "×tamp=" + timestamp;
} else {
url = url + "?timestamp=" + timestamp;
}
return url;
}
</script>
后台生成验证码的servlet
public void getCode() {
        // 调用工具类生成的验证码和验证码图片
        Map<String, Object> codeMap = CodeUtil.generateCodeAndPic();

        // 将四位数字的验证码保存到Session中。
        session.setAttribute("checkCode", codeMap.get("checkCode").toString());
        log.info("验证码==="+codeMap.get("checkCode").toString());

        // 禁止图像缓存。
        response.setHeader("Pragma", "no-cache");
        response.setHeader("Cache-Control", "no-cache");
        response.setDateHeader("Expires", -1);

        response.setContentType("image/jpeg");

        // 将图像输出到Servlet输出流中。
        ServletOutputStream sos;
        try {
            sos = response.getOutputStream();
            ImageIO.write((RenderedImage) codeMap.get("codePic"), "jpeg", sos);
            sos.close();
        } catch (IOException e) {
            e.printStackTrace();
        }
    }
登录校验验证码的servlet
public String loginUser(){
        String loginName = Convert.toReadStr(request.getParameter("s"));
        String password = Convert.toReadStr(request.getParameter("t")).toUpperCase();
        String checkCode = Convert.toReadStr(request.getParameter("checkCode"));//验证码
        String msg = "";
        if ("".equals(loginName)) {
            msg = "登录失败,用户名为空!";
        }
        if ("".equals(password)) {
            msg = "登录失败,密码为空!";
        } else {
            // 验证验证码
            String sessionCode = request.getSession().getAttribute("checkCode").toString();
            if (checkCode != null && !"".equals(checkCode) && sessionCode != null && !"".equals(sessionCode)) {
                if (checkCode.equalsIgnoreCase(sessionCode)) {//验证通过
                   msg = "登录成功!";
                } else {
                    msg = "登录失败,验证码输入错误!";
                }
            } else {
                msg = "登录失败,请输入验证码!";
            }
        }
    }