cobbler功能介绍
安装
yum install -y httpd tftp dhcp cobbler cobbler-web pykickstart xinetd
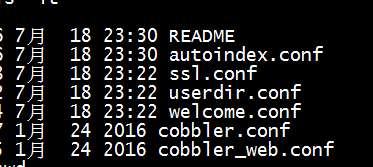
/etc/httpd/conf.d目录下存在cobbler的配置文件,如下图中cobbler.conf、cobbler_web.conf
启动apache
systemctl start httpd
查看开启服务
netstat -ntlp
启动cobbler
systemctl start cobblerd
检查cobbler
cobbler check
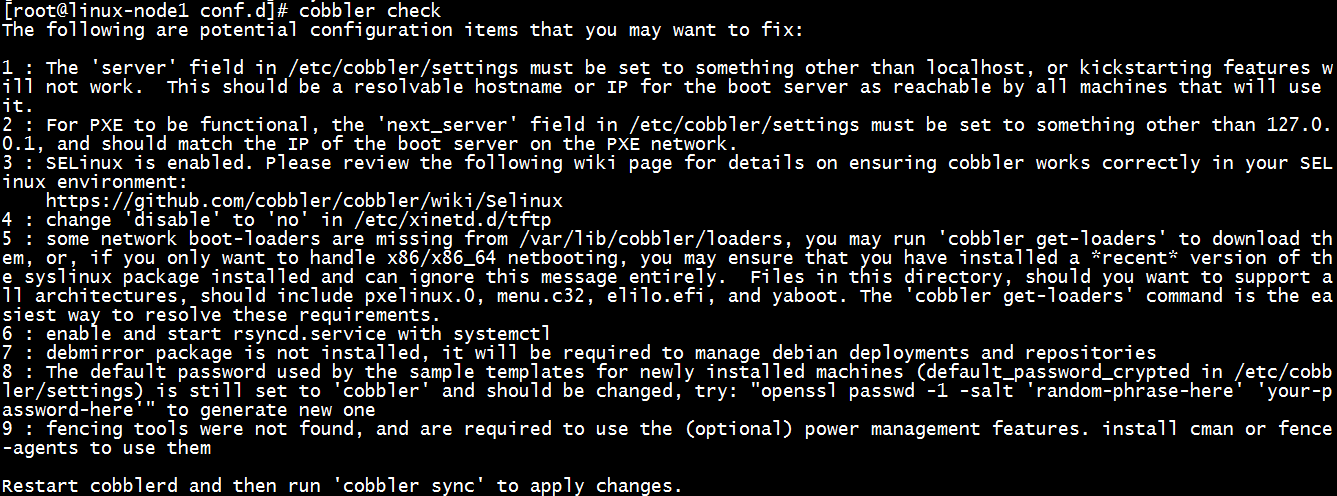
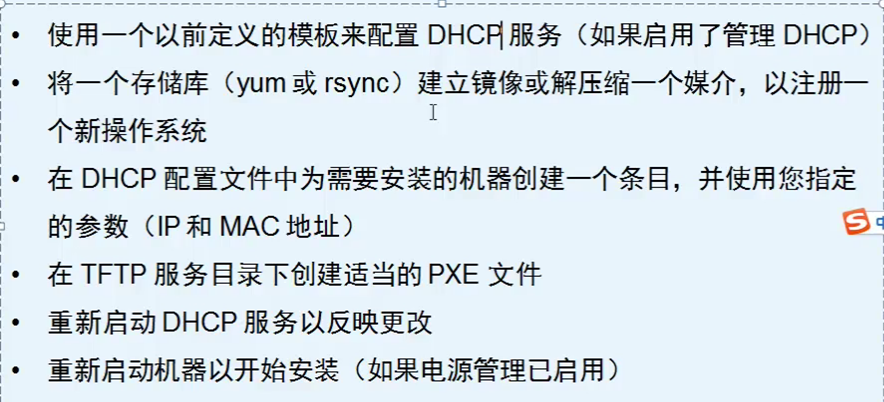
根据上图可以看到,使用cobbler需要完成的9个步骤。
修改 vim /etc/cobbler/settings

1) 找到next_server这行,将ip地址修改,next_server参数的值为提供PXE服务的主机相应的IP地址
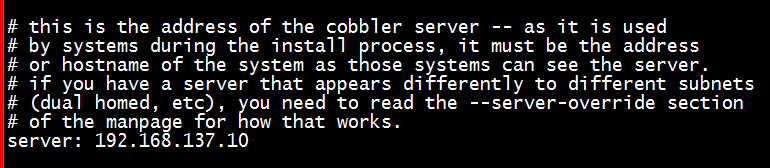
2) 找到server这行,将ip地址修改,server参数的值为提供cobbler服务的主机相应的IP地址或主机名
3) 关闭并确认SELinux 处于关闭状态
vi /etc/sysconfig/selinux
SELINUX=disabled #修改为disabled
4) vim /etc/xinetd.d/tftp
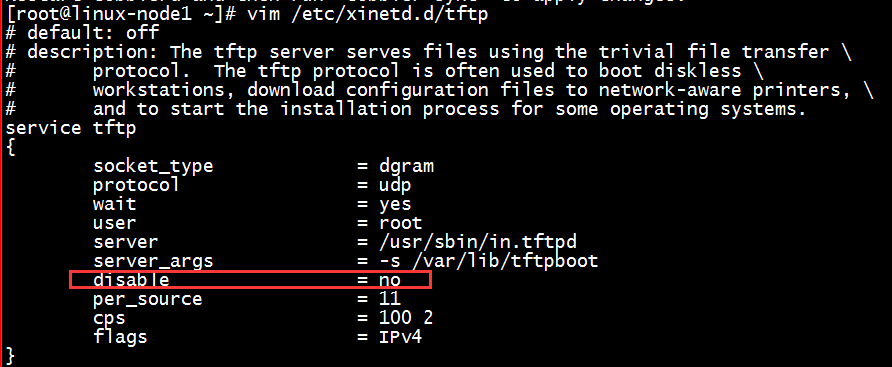
将disable设置为no
5)执行 cobbler get-loaders 命令
6) 启动rsyncd服务
systemctl start rsyncd.service
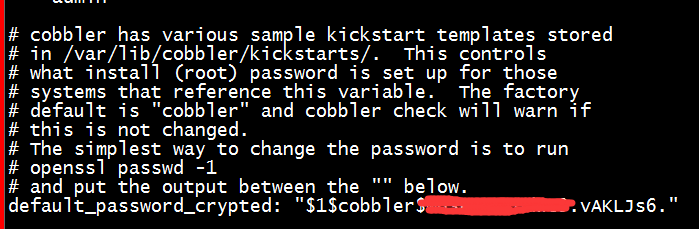
7) openssl passwd -1 -salt 'cobbler' 'cobbler'
生成一串密码

vim /etc/cobbler/settings
将生成的密码写入default_password_crypted
8) yum -y install cman fence-agents
9) 重启systemctl restart cobblerd
配置DHCP
vim /etc/cobbler/settings
将manage_dhcp的值改成1

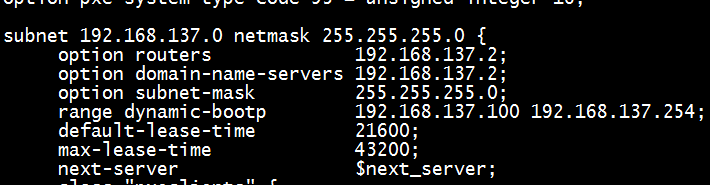
修改dhcp的模板文件
vim /etc/cobbler/dhcp.template
systemctl restart cobblerd
systemctl start xinetd
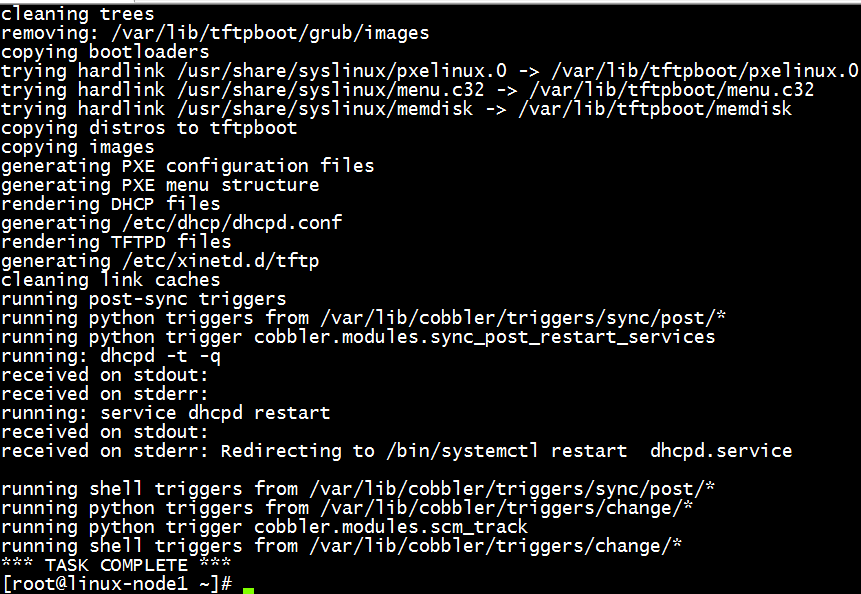
同步cobbler
cobbler sync
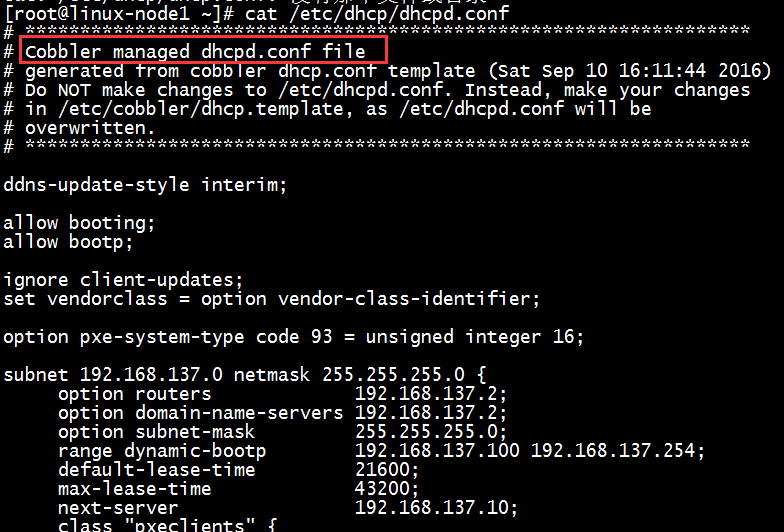
cat /etc/dhcp/dhcpd.conf
查看生成的dhcp配置文件
管理cobbler
mount /dev/cdrom /mnt/ #挂在ISO光盘至服务器

cobbler import --path=/mnt/ --name=CentOS-7.1-x86_64 --arch=x86_64 # 导入镜像文件
# --path 镜像路径
# --name 为安装源定义一个名字
# --arch 指定安装源是32位、64位、ia64, 目前支持的选项有: x86│x86_64│ia64
镜像存放目录,cobbler会将镜像中的所有安装文件拷贝到本地一份,放在/var/www/cobbler/ks_mirror下的CentOS-7.1-x86_64-distro-x86_64目录下。因此/var/www/cobbler目录必须具有足够容纳安装文件的空间。

管理profile
cobbler profile

cobbler profile list 查看导入的镜像文件

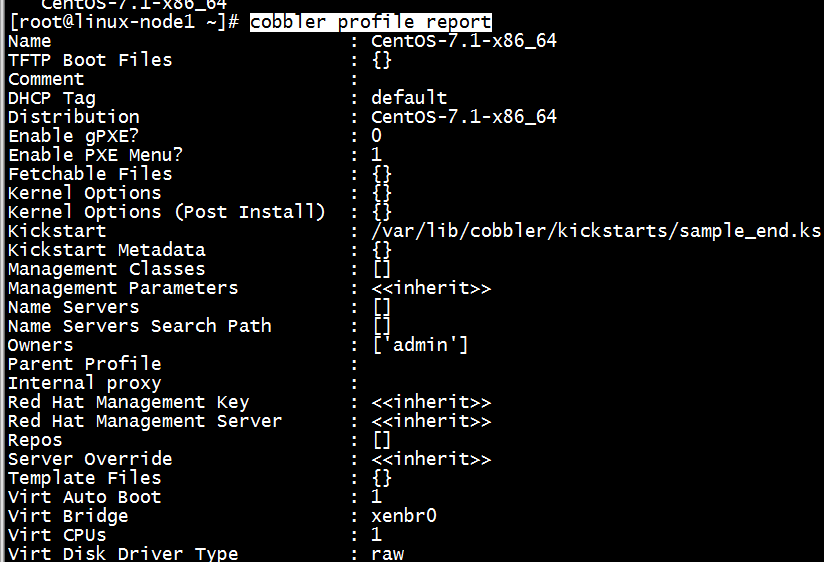
cobbler profile report 查看profile的内容
cobbler profile edit --name=CentOS-7.1-x86_64 --kickstart=/var/lib/cobbler/kickstarts/CentOS-7-x86_64.cfg
cobbler profile edit --name=CentOS-6.8-x86_64 --kickstart=/var/lib/cobbler/kickstarts/CentOS-6-x86_64.cfg
修改名称为CentOS-7.1-x86_64和CentOS-6.8-x86_64的自定义的kickstart文件
CentOS-6.8-x86_64文件
#Kickstart Configurator for cobbler by Jason Zhao
#platform=x86, AMD64, or Intel EM64T
key --skip
#System  language
lang en_US
#System keyboard
keyboard us
#Sytem timezone
timezone Asia/Shanghai
#Root password
rootpw --iscrypted $default_password_crypted
#Use text mode install
text
#Install OS instead of upgrade
install
#Use NFS installation Media
url --url=$tree
#System bootloader configuration
bootloader --location=mbr
#Clear the Master Boot Record
zerombr yes
#Partition clearing information
clearpart --all --initlabel
#Disk partitioning information
part /boot --fstype ext4 --size 1024 --ondisk sda
part swap --size 16384 --ondisk sda
part / --fstype ext4 --size 1 --grow --ondisk sda
#System authorization infomation
auth  --useshadow  --enablemd5
#Network information
$SNIPPET('network_config')
#network --bootproto=dhcp --device=em1 --onboot=on
#Reboot after installation
reboot
#Firewall configuration
firewall --disabled
#SELinux configuration
selinux --disabled
#Do not configure XWindows
skipx
#Package install information
%packages
@ base
@ chinese-support
@ core
sysstat
iptraf
ntp
e2fsprogs-devel
keyutils-libs-devel
krb5-devel
libselinux-devel
libsepol-devel
lrzsz
ncurses-devel
openssl-devel
zlib-devel
OpenIPMI-tools
mysql
lockdev
minicom
nmap

%post
#/bin/sed -i 's/#Protocol 2,1/Protocol 2/' /etc/ssh/sshd_config
/bin/sed  -i 's/^ca::ctrlaltdel:/#ca::ctrlaltdel:/' /etc/inittab
/sbin/chkconfig --level 3 diskdump off
/sbin/chkconfig --level 3 dc_server off
/sbin/chkconfig --level 3 nscd off
/sbin/chkconfig --level 3 netfs off
/sbin/chkconfig --level 3 psacct off
/sbin/chkconfig --level 3 mdmpd off
/sbin/chkconfig --level 3 netdump off
/sbin/chkconfig --level 3 readahead off
/sbin/chkconfig --level 3 wpa_supplicant off
/sbin/chkconfig --level 3 mdmonitor off
/sbin/chkconfig --level 3 microcode_ctl off
/sbin/chkconfig --level 3 xfs off
/sbin/chkconfig --level 3 lvm2-monitor off
/sbin/chkconfig --level 3 iptables off
/sbin/chkconfig --level 3 nfs off
/sbin/chkconfig --level 3 ipmi off
/sbin/chkconfig --level 3 autofs off
/sbin/chkconfig --level 3 iiim off
/sbin/chkconfig --level 3 cups off
/sbin/chkconfig --level 3 openibd off
/sbin/chkconfig --level 3 saslauthd off
/sbin/chkconfig --level 3 ypbind off
/sbin/chkconfig --level 3 auditd off
/sbin/chkconfig --level 3 rdisc off
/sbin/chkconfig --level 3 tog-pegasus off
/sbin/chkconfig --level 3 rpcgssd off
/sbin/chkconfig --level 3 kudzu off
/sbin/chkconfig --level 3 gpm off
/sbin/chkconfig --level 3 arptables_jf off
/sbin/chkconfig --level 3 dc_client off
/sbin/chkconfig --level 3 lm_sensors off
/sbin/chkconfig --level 3 apmd off
/sbin/chkconfig --level 3 sysstat off
/sbin/chkconfig --level 3 cpuspeed off
/sbin/chkconfig --level 3 rpcidmapd off
/sbin/chkconfig --level 3 rawdevices off
/sbin/chkconfig --level 3 rhnsd off
/sbin/chkconfig --level 3 nfslock off
/sbin/chkconfig --level 3 winbind off
/sbin/chkconfig --level 3 bluetooth off
/sbin/chkconfig --level 3 isdn off
/sbin/chkconfig --level 3 portmap off
/sbin/chkconfig --level 3 anacron off
/sbin/chkconfig --level 3 irda off
/sbin/chkconfig --level 3 NetworkManager off
/sbin/chkconfig --level 3 acpid off
/sbin/chkconfig --level 3 pcmcia off
/sbin/chkconfig --level 3 atd off
/sbin/chkconfig --level 3 sendmail off
/sbin/chkconfig --level 3 haldaemon off
/sbin/chkconfig --level 3 smartd off
/sbin/chkconfig --level 3 xinetd off
/sbin/chkconfig --level 3 netplugd off
/sbin/chkconfig --level 3 readahead_early off
/sbin/chkconfig --level 3 xinetd off
/sbin/chkconfig --level 3 ntpd on
/sbin/chkconfig --level 3 avahi-daemon off
/sbin/chkconfig --level 3 ip6tables off
/sbin/chkconfig --level 3 restorecond off
/sbin/chkconfig --level 3 postfix off
CentOS-7-x86_64.cfg文件
#Kickstart Configurator for cobbler by Jason Zhao
#platform=x86, AMD64, or Intel EM64T
#System  language
lang en_US
#System keyboard
keyboard us
#Sytem timezone
timezone Asia/Shanghai
#Root password
rootpw --iscrypted $default_password_crypted
#Use text mode install
text
#Install OS instead of upgrade
install
#Use NFS installation Media
url --url=$tree
#System bootloader configuration
bootloader --location=mbr
#Clear the Master Boot Record
zerombr
#Partition clearing information
clearpart --all --initlabel
#Disk partitioning information
part /boot --fstype xfs --size 1024 --ondisk sda
part swap --size 16384 --ondisk sda
part / --fstype xfs --size 1 --grow --ondisk sda
#System authorization infomation
auth  --useshadow  --enablemd5
#Network information
$SNIPPET('network_config')
#network --bootproto=dhcp --device=em1 --onboot=on
# Reboot after installation
reboot
#Firewall configuration
firewall --disabled
#SELinux configuration
selinux --disabled
#Do not configure XWindows
skipx
#Package install information
%pre
$SNIPPET('log_ks_pre')
$SNIPPET('kickstart_start')
$SNIPPET('pre_install_network_config')
# Enable installation monitoring
$SNIPPET('pre_anamon')
%end

%packages
@ base
@ core
sysstat
iptraf
ntp
lrzsz
ncurses-devel
openssl-devel
zlib-devel
OpenIPMI-tools
mysql
nmap
screen
%end

%post
systemctl disable postfix.service
%end

cobbler profile edit --name=CentOS-7.1-x86_64 --kopts='net.ifnames=0 biosdevname=0'
修改centos7内核

cobbler profile report CentOS-7.1-x86_64 查看CentOS-7.1-x86_64的更改内容是否完成
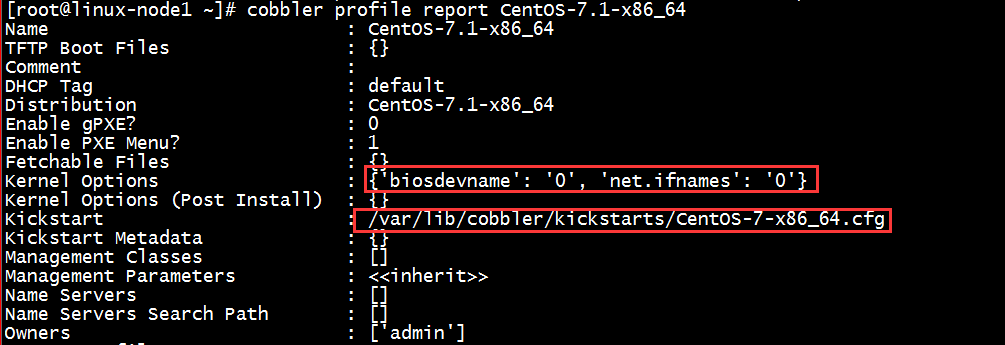
cobbler sync 每次修改profile都需要同步
cobbler部署操作系统
通过vmware创建一个虚拟机
参考http://www.cnblogs.com/shhnwangjian/p/5839112.html
一直做到下图,点击完成按钮
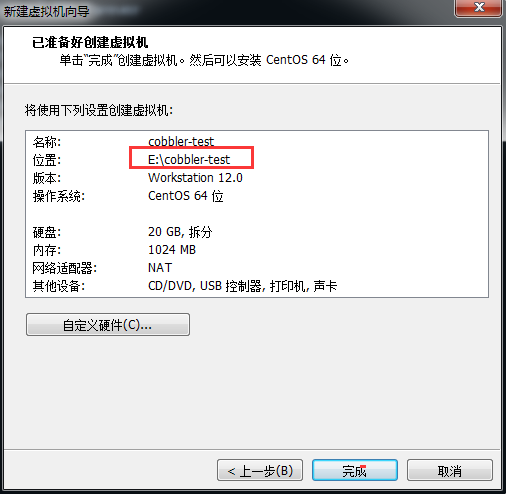
点击“开启此虚拟机”

tail -f /var/log/messages
备注:在cobbler主机上查看日志,可以通过messages看到需要安装主机的信息

新cobbler-test虚拟机

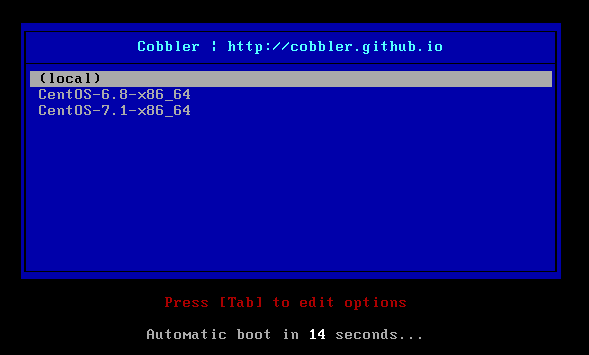
选择centos 7安装

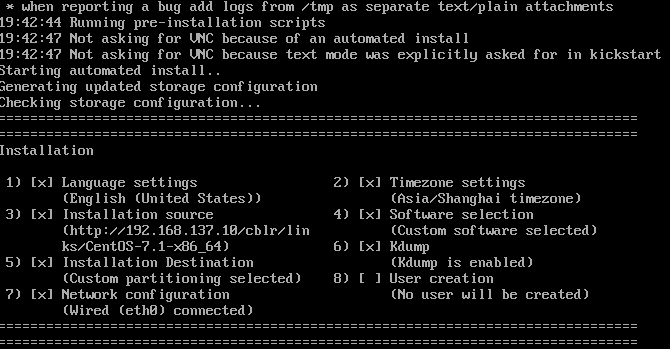
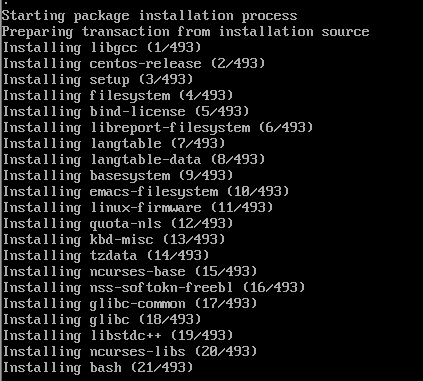
自动安装过程几张截图

安装完成,登录成功,注意root密码为上面openssl passwd步骤设置的cobbler

cobbler重装、web、定制化 : http://www.cnblogs.com/shhnwangjian/p/5861927.html
系统开机流程:https://www.unixhot.com/wiki/unixhot/2.htm