首先查看系统有没有安装mysql
[root@VM_167_102_centos ~]# rpm -qa|grep mysql
[root@VM_167_102_centos ~]#
结果发现没有,那么我们先下载mysql得rpm包
首先下载server
[root@VM_167_102_centos mysql]# wget https://cdn.mysql.com//Downloads/MySQL-5.7/mysql-community-server-5.7.17-1.el7.x86_64.rpm
--2017-04-02 17:51:11--  https://cdn.mysql.com//Downloads/MySQL-5.7/mysql-community-server-5.7.17-1.el7.x86_64.rpm
Resolving cdn.mysql.com (cdn.mysql.com)... 23.219.134.205
Connecting to cdn.mysql.com (cdn.mysql.com)|23.219.134.205|:443... connected.
HTTP request sent, awaiting response... 200 OK
Length: 169496800 (162M) [application/x-redhat-package-manager]
Saving to: 'mysql-community-server-5.7.17-1.el7.x86_64.rpm'

 0% [                                                                                                                              ] 593,988     65.3KB/s  eta 42m 14s
然后下载client
wget https://cdn.mysql.com//Downloads/MySQL-5.7/mysql-community-client-5.7.17-1.el7.x86_64.rpm
--2017-04-02 17:55:12--  https://cdn.mysql.com//Downloads/MySQL-5.7/mysql-community-client-5.7.17-1.el7.x86_64.rpm
Resolving cdn.mysql.com (cdn.mysql.com)... 23.211.97.88
Connecting to cdn.mysql.com (cdn.mysql.com)|23.211.97.88|:443... connected.
HTTP request sent, awaiting response... 200 OK
Length: 25037548 (24M) [application/x-redhat-package-manager]
Saving to: 'mysql-community-client-5.7.17-1.el7.x86_64.rpm'

 7% [=======>                                                                                                                      ] 1,762,140   60.9KB/s  eta 3m 50s
然后先安装server
[root@VM_167_102_centos mysql]# rpm -ivh mysql-community-server-5.7.17-1.el7.x86_64.rpm  --nodeps --force
warning: mysql-community-server-5.7.17-1.el7.x86_64.rpm: Header V3 DSA/SHA1 Signature, key ID 5072e1f5: NOKEY
Preparing...                          ################################# [100%]
Updating / installing...
   1:mysql-community-server-5.7.17-1.e################################# [100%]
然后安装client
[root@VM_167_102_centos mysql]# rpm -ivh mysql-community-client-5.7.17-1.el7.x86_64.rpm --nodeps
warning: mysql-community-client-5.7.17-1.el7.x86_64.rpm: Header V3 DSA/SHA1 Signature, key ID 5072e1f5: NOKEY
Preparing...                          ################################# [100%]
Updating / installing...
   1:mysql-community-client-5.7.17-1.e################################# [100%]
然后启动mysql服务
[root@VM_167_102_centos mysql]# service mysqld start
Redirecting to /bin/systemctl start  mysqld.service
[root@VM_167_102_centos mysql]#
获取临时密码
[root@VM_167_102_centos mysql]# grep 'temporary password' /var/log/mysqld.log
2017-04-02T14:55:58.589047Z 1 [Note] A temporary password is generated for root@localhost: k1pki)rKa6HL
然后使用临时密码进入mysql修改密码
[root@VM_167_102_centos mysql]# mysql -uroot -p
Enter password:
Welcome to the MySQL monitor.  Commands end with ; or g.
Your MySQL connection id is 5
Server version: 5.7.17

Copyright (c) 2000, 2016, Oracle and/or its affiliates. All rights reserved.

Oracle is a registered trademark of Oracle Corporation and/or its
affiliates. Other names may be trademarks of their respective
owners.

Type 'help;' or 'h' for help. Type 'c' to clear the current input statement.

mysql>
然后进入etc/my.cnf在[mysqld]下添加一行如下代码
skip-grant-tables
然后在使用刚才得临时密码进入mysql修改root密码
mysql> update mysql.user set authentication_string=password('root') where user='root' and Host = 'localhost';
Query OK, 1 row affected, 1 warning (0.00 sec)
然后再把my.cnf文件下刚刚添加得那行代码删除
重新启动mysql:service mysqld restart,这个时候可以使用mysql -u root -p'root'
进入到sql后以后在通过如下命令修改一次密码,否则无法进行其他操作:
mysql> SET PASSWORD = PASSWORD('root');
这个时候可能会出现错误
ERROR 1819 (HY000): Your password does not satisfy the current policy requirements
这个其实与validate_password_policy的值有关。
validate_password_policy有以下取值:
默认是1,即MEDIUM,所以刚开始设置的密码必须符合长度,且必须含有数字,小写或大写字母,特殊字符。
有时候,只是为了自己测试,不想密码设置得那么复杂,譬如说,我只想设置root的密码为123456。
必须修改两个全局参数:
首先,修改validate_password_policy参数的值
mysql> set global validate_password_policy=0;
Query OK, 0 rows affected (0.00 sec)
这样,判断密码的标准就基于密码的长度了。这个由validate_password_length参数来决定。
mysql> set global validate_password_length=1;
Query OK, 0 rows affected (0.00 sec)
然后再次执行重置密码
mysql> SET PASSWORD = PASSWORD('root');
然后重启mysql
[root@VM_167_102_centos /]# service mysqld restart
Redirecting to /bin/systemctl restart  mysqld.service
[root@VM_167_102_centos /]#
然后就可以使用刚才设置得密码进入mysql了
[root@VM_167_102_centos /]# mysql -uroot -p
Enter password:
Welcome to the MySQL monitor.  Commands end with ; or g.
Your MySQL connection id is 3
Server version: 5.7.17

Copyright (c) 2000, 2016, Oracle and/or its affiliates. All rights reserved.

Oracle is a registered trademark of Oracle Corporation and/or its
affiliates. Other names may be trademarks of their respective
owners.

Type 'help;' or 'h' for help. Type 'c' to clear the current input statement.
  mysql> show databases;
  +--------------------+
  | Database |
  +--------------------+
  | information_schema |
  | mysql |
  | performance_schema |
  | sys |
+--------------------+
4 rows in set (0.00 sec)
设置开机自动重启
[root@VM_167_102_centos /]# systemctl enable mysqld
[root@VM_167_102_centos /]# systemctl daemon-reload
配置远程连接
mysql> use mysql;
mysql> select user,host from user;
+-----------+-----------+
| user      | host      |
+-----------+-----------+
| mysql.sys | localhost |
| root      | localhost |
+-----------+-----------+
2 rows in set (0.00 sec)
mysql> update user set host='%' where user='root';
Query OK, 1 row affected (0.00 sec)
mysql> flush privileges;
Query OK, 0 rows affected (0.00 sec)
为了确保远程能访问还得增加3306端口开放
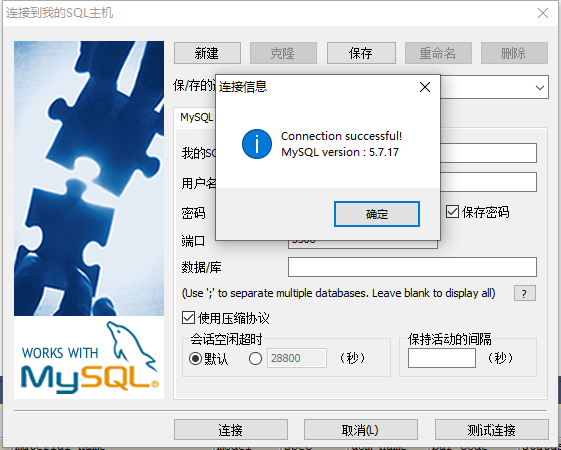
这样centos7_64位安装mysql5.7.17就搞定啦。
不对得地方请各位大佬指正