又到了樱花的季节,教大家使用canvas画出飞舞的樱花树效果。
废话少说,先看效果。
演示效果地址:http://suohb.com/work/tree4.htm

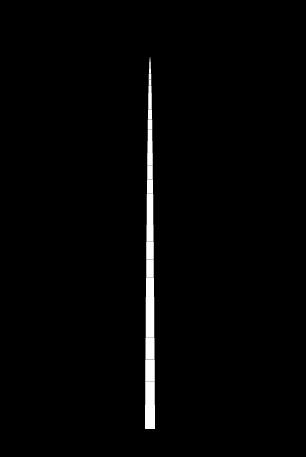
第一步,我们先画出一棵树的主体。
我画树的使用的原理是,定义一个起始点,从这个点开始,向一个角度移动一段距离。得到另一个点。
画出一条线连接两个点。
以新得到的点,依旧向这个角度,移动一段距离。得到第三个点,连写第二第三个点。
以此类推。一定步长之后,就得到一条射线。
我们根据自然界中的真实树的情况,这条线越来越细,直到最细地方结束。
<body bgcolor="#000000">
<canvas id="tree"></canvas>
<script>
var treeCanvas = document.getElementById("tree");
treeCanvas.width = window.innerWidth;
treeCanvas.height = window.innerHeight ;
var tCxt = treeCanvas.getContext("2d");
var rootTop = 450 ;//树起始位置
var treeColor = "#FFF" ;//树颜色

function drawTree(x,y,deg,step){
    var x1 = x + Math.cos(deg) * step ;//越细的枝干越短,所以以步长来做
    var y1 = y + Math.sin(deg) * step ;
    tCxt.beginPath();
    tCxt.lineWidth = step/3;//树干越来越细
    tCxt.moveTo(x,y);
    tCxt.lineTo(x1,y1);
    tCxt.strokeStyle = treeColor ;
    tCxt.stroke();
    step -- ;
    if(step > 0){
        drawTree(x1,y1,deg,step);
    }
}

drawTree(treeCanvas.width/2,rootTop,-Math.PI/2,30);
</script>
</body>
树干出来之后,要做分叉,每个分叉其实就是向另一个方向的树干。
而且分叉要比主干细一些。我们在第二阶段树干位置,每三步向左右分叉。
if(step > 0){
        drawTree(x1,y1,deg,step);
        if(step%3 == 1)
            drawTree(x1,y1,deg+0.5 ,Math.round(step/1.13));//右分叉
        if(step%3 == 0)
            drawTree(x1,y1,deg-0.5, Math.round(step/1.13));//左分叉
    }
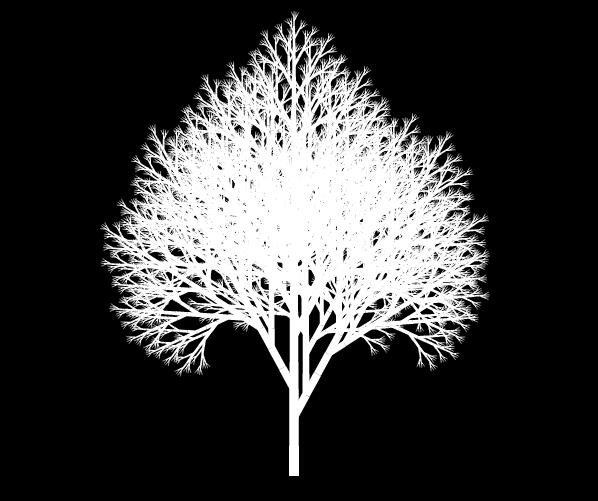
这样一棵树的主干基本上就已经完成了。
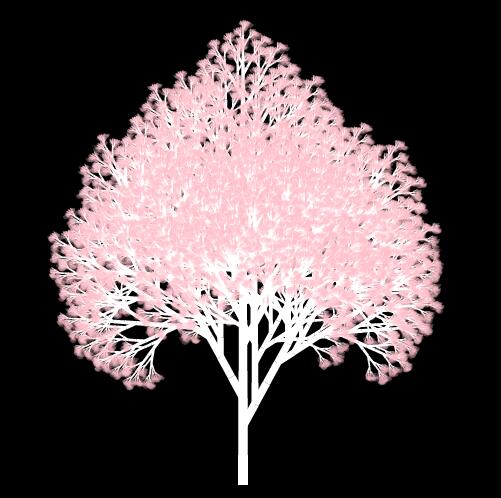
我们在树的末端几个节点,画一个粉色的半透明的圆。当做樱花。
为了保证所有樱花不是千篇一律的一个角度,我们随机一个起始角度。
function drawTree(x,y,deg,step){
    var x1 = x + Math.cos(deg) * step ;//越细的枝干越短,所以以步长来做
    var y1 = y + Math.sin(deg) * step ;
    tCxt.beginPath();
    tCxt.lineWidth = step/3;//树干越来越细
    tCxt.moveTo(x,y);
    tCxt.lineTo(x1,y1);
    tCxt.strokeStyle = treeColor ;
    tCxt.stroke();
    if(step < 5 ){//在末端五个节点,画一个半圆,作为樱花效果
        var r = 2+Math.random()*2
        tCxt.fillStyle = flowerColor ;
        tCxt.arc(x1+Math.random()*3,y1+Math.random()*3,r,0,Math.PI)
        tCxt.fill();
    }
    step -- ;
    if(step > 0){
        drawTree(x1,y1,deg,step);
        if(step%3 == 1)
            drawTree(x1,y1,deg+0.5 ,Math.round(step/1.13));//右分叉
        if(step%3 == 0)
            drawTree(x1,y1,deg-0.5, Math.round(step/1.13));//左分叉
    }
}
这个时候,如果没有特别的要求的,基本算是已经完成了。
之后再要做的就是精益求精,对现在效果做出微调。
1、树干都是直线,在计算下一个点的时候,做一些偏移。
2、樱花树形态比较扁平。给X轴方向上偏移稍微大点,Y轴稍微偏小一点。
3、至少做两种花瓣颜色,一种稍微深一些,一种浅一些。
4、在新建一个canvas层,做一些飘落樱花的效果。
5、在分叉,画花瓣等地方多使用一些随机数,树形状不能太单一
最终效果如下:
完整代码如下:
<!doctype html>
<html>
<head>
<meta http-equiv="Pragma" content="no-cache" />
<meta http-equiv="Cache-Control" content="no-cache" />
<meta http-equiv="Expires" content="0" />
<meta http-equiv="Content-Type" content="text/html;charset=utf-8" />
<meta name="viewport" content="width=device-width,initial-scale=1.0,user-scalable=no" />
<style type="text/css">
canvas{
    position: absolute;
    left: 0;
    top: 0;
}
</style>
</head>
<body bgcolor="#000000">
<canvas id="tree"></canvas>
<canvas id="flower"></canvas>
<script>
//两个canvas
var tree = document.getElementById("tree");
tree.width = window.innerWidth;
tree.height = window.innerHeight ;
var tCxt = tree.getContext("2d");
var flower = document.getElementById("flower");
flower.width = window.innerWidth;
flower.height = window.innerHeight ;
var cxt = flower.getContext("2d");

var flowerList = [];//樱花列表
var rootTop = 450 ;//树起点
var flowerColor = "rgba(255,192,203,.3)" ;//花色
var flowerColorDeep = "rgba(241,158,194,.5)" ;//花色深
var treeColor2 = "rgba(255,192,203,.5)" ;//树枝颜色
var treeColor = "#FFF" ;//树干颜色
var fallList = [];//飘落樱花列表
var g = 0.01 ;//重力加速度
var gWind = 0.005;//风力加速度
var limitSpeedY = 1;//速度上限
var limitSpeedX = 1 ;//速度上限

cxt.shadowColor= "#FFF" ;
cxt.shadowBlur = 10 ;

function drawTree(x,y,deg,step,type){
    var deg1 = step%2 == 0 ? 0.1 : -0.1 ;
    var x1 = x + Math.cos(deg+deg1) * (step+4) * 0.8 ;//以步长来判断枝干长度 x轴偏移大一些
    var y1 = y + Math.sin(deg+deg1) * (step-1) * 0.8 ;//以步长来判断枝干长度 Y轴压缩一些
    tCxt.beginPath();
    tCxt.lineWidth = step/3;
    tCxt.moveTo(x,y);
    tCxt.lineTo(x1,y1);
    tCxt.strokeStyle = (step > 5 ) ? treeColor : treeColor2 ;//细纸条都换成花的颜色
    tCxt.stroke();
    if(step > 20){//树干相交的位置有间隙,以一个圆填充
        tCxt.fillStyle = treeColor ;
        tCxt.arc(x,y,step/6,0,Math.PI*2);
        tCxt.fill();
    }
    if(step < 3 || (step < 23 && Math.random() > 0.1)){
        //末梢位置 画花瓣
        var color = [flowerColorDeep,flowerColor,flowerColor][Math.round(Math.random()+0.2)] ;
        var r = 2+Math.random()*2
        tCxt.fillStyle = color ;
        tCxt.arc(x1+Math.random()*3,y1+Math.random()*3,r,0,Math.PI)
        tCxt.fill();
        flowerList.push({x:x,y:y,sx:(Math.random()-0.5),sy:0,color:color,r:r,deg:deg});//保存下画樱花的位置
    }
    step -- ;
    if(step > 0){
        drawTree(x1,y1,deg,step,type);
        if(step%3 == 1 && step > 0 && step < 30)
            drawTree(x1,y1,deg+0.2 + 0.3 * Math.random(),Math.round(step/1.13));//右分叉
        if(step%3 == 0 && step > 0 && step < 30)
            drawTree(x1,y1,deg-0.2 - 0.3 * Math.random(),Math.round(step/1.13));//左分叉
    }
}

drawTree(tree.width/2,rootTop,-Math.PI/2,30,1);//执行

var len = flowerList.length ;
function step(){
    if(Math.random() > 0.3)    fallList.push(flowerList[Math.floor(Math.random()*len)]);//随机取出一个,花瓣复制到飘落花瓣的列表中

    cxt.clearRect(0,0,tree.width,tree.height);
    for(var i = 0 ;i < fallList.length ; i ++){
        if(fallList[i].sy < limitSpeedY) fallList[i].sy += g ;
        fallList[i].sx += gWind ;
        fallList[i].x += fallList[i].sx ;
        fallList[i].y += fallList[i].sy ;
        if(fallList[i].y > rootTop){//飘到树根的花瓣移除
            fallList.splice(i,1);
            i -- ;
            continue ;
        }
        cxt.beginPath();
        cxt.fillStyle = fallList[i].color ;
        fallList[i].deg += fallList[i].sx*0.05 ;//跟速度相关的旋转花瓣
        cxt.arc(fallList[i].x,fallList[i].y,fallList[i].r,fallList[i].deg,fallList[i].deg+Math.PI*1.3);
        cxt.fill();
    }
    requestAnimationFrame(step);
}
requestAnimationFrame(step);
</script>
</body>
</html>
更多特效,请关注我的微信公众号。
