线程中的一些方法
线程加入:public final void join()
等待该线程终止,其他线程才能抢着执行。
练习代码如下:


 1 public static void main(String[] args) {
 2         //创建三个线程
 3         MyThread mt1 = new MyThread();
 4         MyThread mt2 = new MyThread();
 5         MyThread mt3 = new MyThread();
 6
 7         //给线程起名字
 8         mt1.setName("刘备");
 9         mt2.setName("曹操");
10         mt3.setName("孙权");
11
12         //开启三个线程
13         mt1.start();
14
15         //接着让mt1这个线程设置为加入线程,其他线程就没有抢占cpu执行权的权利了,只能等待该线程执行完毕之后,才能开始抢占
16         try {
17             mt1.join();
18         } catch (InterruptedException e) {
19             // TODO Auto-generated catch block
20             e.printStackTrace();
21         }
22
23
24         mt2.start();
25         mt3.start();
26
27     }
线程礼让:public final void yield()
暂停当时正在执行的县城对象,并执行其他线程。
作用:让线程间的执行更和谐,但实际上做不到。
练习代码下:
 1 public class MyThread extends Thread{
 2     @Override
 3     public void run() {
 4         for (int i = 0; i < 100; i++) {
 5             System.out.println(getName()+"---"+i);
 6             //实现线程礼让
 7             Thread.yield();
 8         }
 9     }
10
11 }
线程死亡:
public final void stop():直接杀死。
练习代码如下:
run方法
 1 MyThread mt = new MyThread();
 2
 3         //开启线程对象
 4         mt.start();
 5
 6         //在线程处于睡眠的过程中将他杀死
 7
 8         try {
 9             Thread.sleep(3000);
10             //杀死刚刚开启的线程
11             //调用stop()方法将线程直接杀死
12             mt.stop();//划了一条横线表示该方法已经过时,但是还可以使用
13         } catch (InterruptedException e) {
14             // TODO Auto-generated catch block
15             e.printStackTrace();
16         }
结果如下:

public void interrupt():直接杀死,在死前还有遗言。
练习代码:
 1 public void run() {
 2         //打印一下开始执行的时间
 3         System.out.println("开始时间:"+new SimpleDateFormat("HH:mm:ss").format(new Date()));
 4         //休眠10秒钟
 5         try {
 6             Thread.sleep(10000);
 7         } catch (InterruptedException e) {
 8             // TODO Auto-generated catch block
 9             //e.printStackTrace();
10             System.out.println("我被杀死了");
11         }
12         System.out.println("结束时间:"+new SimpleDateFormat("HH:mm:ss").format(new Date()));
13     }
 1 MyThread mt = new MyThread();
 2
 3         //开启线程对象
 4         mt.start();
 5
 6         //在线程处于睡眠的过程中将他杀死
 7
 8         try {
 9             Thread.sleep(3000);
10             //杀死刚刚开启的线程
11             //interrupt():直接杀死,在死前,还可以有遗言。
12             mt.interrupt();//线程被杀死之后会将后面的代码执行完毕之后,再死去
13
14         } catch (InterruptedException e) {
15             // TODO Auto-generated catch block
16             e.printStackTrace();
17         }

线程休眠:
static void sleep(lang millis):
在指定的毫秒数内让当前正在执行的线程休眠(暂停执行),此操作受到系统计时器和调度程序精度和准确性的影响。
线程间通信(生产消费者问题):不同类型线程针对同一个资源操作。我们常见一个Student对象,然后再创建一个设置Student对象的线程和一个获取Student对象的线程。
1 public class Student {
2     String name;
3     int age;
4 }
public class SetThread implements Runnable{

    private Student s;
    private int x=0;

    public SetThread(Student s){
        this.s = s;
    }

    @Override
    public void run() {
        //给学生对象设置姓名和年龄
        //Student s = new Student();
        while (true) {
            synchronized (s) {
                if (x%2==0) {
                    s.name = "大明";
                    s.age = 14;
                }else {
                    s.name = "陈小宝";
                    s.age = 12;
                }
                x++;
            }

        }

    }

}
 1 public class GetThread implements Runnable{
 2     private Student s;
 3
 4     public GetThread(Student s){
 5         this.s = s;
 6     }
 7     @Override
 8     public void run() {
 9         //获取线程,获取学生对象的姓名和年龄
10         //Student s = new Student();
11         while (true) {
12             synchronized (s) {
13                 System.out.println(s.name+"--"+s.age);
14             }
15         }
16     }
17
18 }
 1 public class StudentDemo {
 2     public static void main(String[] args) {
 3         //创建一个学生对象
 4         Student s = new Student();
 5
 6         //创建设置和获取线程,并开启线程
 7         SetThread st = new SetThread(s);
 8         GetThread gt = new GetThread(s);
 9
10         Thread t1 = new Thread(st);
11         Thread t2 = new Thread(gt);
12
13         //开启线程
14         t1.start();
15         t2.start();
16
17     }
18
19 }
当我们运行这些代码时我们会发现一些问题,就是陈小宝和大明并不是交替出现的而是一个人出现好多次才出现另一个人。这是因为CPU的运行速的很快,而两个线程的抢占是随机的。
用wait方法和notify方法改进上述案例。
1 public class Student {
2     String name;
3     int age;
4     boolean flag;//在这里可以作为对象的一个标记,如果是false说明该对象没有数据,如果是true说明该对象有数据
5
6 }
 1 public class SetThread implements Runnable{
 2     private Student s;
 3     private int x = 0;
 4
 5     public SetThread(Student s){
 6         this.s = s;
 7     }
 8     @Override
 9     public void run() {
10         while (true) {
11             synchronized (s) {
12                 //判断该对象此时有没有数据
13                 if (s.flag) {
14                     //等待
15                     try {
16                         s.wait();//设置线程等待,释放锁s
17                     } catch (InterruptedException e) {
18                         // TODO Auto-generated catch block
19                         e.printStackTrace();
20                     }
21                 }
22
23                 if (x%2==0) {
24                     s.name = "大明";
25                     s.age = 14;
26                 }else {
27                     s.name = "陈小宝";
28                     s.age = 13;
29                 }
30                 x++;//x=1
31
32                 //此时对象有数据了
33                 s.flag = true;
34                 s.notify();//如果有等待的线程就唤醒,如果没有等待的线程,则没有任何效果
35             }//在此时释放锁对象s
36         }
37
38     }
 1 public class GetThread implements Runnable{
 2     private Student s;
 3
 4     public GetThread(Student s){
 5         this.s = s;
 6     }
 7
 8     @Override
 9     public void run() {
10         while (true) {
11             synchronized (s) {
12                 //判断对象有没有数据
13                 if (!s.flag) {
14                     //等待设置线程给对象设置数据
15                     try {
16                         s.wait();//获取线程处于等待状态,释放锁对象s,在哪里跌倒在哪里爬起来
17                     } catch (InterruptedException e) {
18                         // TODO Auto-generated catch block
19                         e.printStackTrace();
20                     }
21                 }
22
23                 System.out.println(s.name+"--"+s.age);
24
25                 //当获取线程从学生对象中获取了数据之后,我们就默认他已经没有数据了,此时我们应该
26                 //继续让设置线程继续给学生对象设置信息
27                 s.flag = false;
28                 s.notify();
29             }
30         }
31
32     }
33
34 }
当此程序运行时就不会出现一个人名连续出现好多次的情况了;
结果如下:
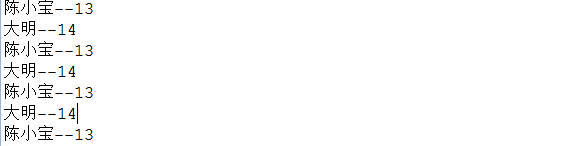
这个代码有一些绕,要细细的揣摩才能想明白。
线程池
为什么要使用线程池?
程序启动一个新线程成本是比较高的,因为它涉及到要与操作系统进行交互。而使用线程池可以很好的提高性能,
尤其是当程序中要创建大量生存期很短的线程时,更应该考虑使用线程池。
线程池的特点:
线程池里的每一个线程代码结束后,并不会死亡,而是再次回到线程池中成为空闲状态,等待下一个对象来使用。
在JDK5之前,我们必须手动实现自己的线程池,从JDK5开始,Java内置支持线程池
线程池如何创建?
JDK5新增了一个Executors工厂类来产生线程池,有如下几个方法
public static ExecutorService newFixedThreadPool(int nThreads)
线程池的使用步骤:
1.创建线程池对象
ExecutorService pool = Executors.newFixedThreadPool(2);
2.创建Runnable实例
MyRunnable my = new MyRunnable();
3.提交Runnable实例
pool.submit(my);
pool.submit(my);
4.关闭线程池
pool.shutdown();
练习代码:
 1 public class MyCallable implements Callable{
 2     //也是一个任务,只不过这个任务需要执行的方法是call(),这个方法有返回值
 3     @Override
 4     public Object call() throws Exception {
 5         for (int i = 0; i < 100; i++) {
 6             System.out.println(Thread.currentThread().getName()+"---"+i);
 7         }
 8         return null;
 9     }
10
11 }
 1 public class ThreadPool {
 2     public static void main(String[] args) {
 3         //案例2:实现Callable接口实现线程池的使用
 4         //1.创建线程池
 5         ExecutorService pool = Executors.newFixedThreadPool(2);
 6
 7         //创建一个任务
 8         MyCallable my1 = new MyCallable();
 9         MyCallable my2 = new MyCallable();
10
11         //3.提交任务
12         pool.submit(my1);
13         pool.submit(my2);
14
15         //4.关闭线程池
16         pool.shutdown();
17
18     }
 1 public class MyRunnbale implements Runnable {
 2
 3     @Override
 4     public void run() {
 5         for (int i = 0; i < 100; i++) {
 6             System.out.println(Thread.currentThread().getName()+"---"+i);
 7         }
 8
 9     }
10
11 }
 1 public static void main(String[] args) {
 2         //线程池如何创建?
 3         //1.调用工厂类Executors
 4         //的public static ExecutorService newFixedThreadPool(int nThreads),返回一个线程池对象
 5         ExecutorService pool = Executors.newFixedThreadPool(2);
 6
 7         //2.提交给线程池两个任务,都是打印0-99
 8         //创建任务
 9         MyRunnbale my1 = new MyRunnbale();
10         MyRunnbale my2 = new MyRunnbale();
11
12         //3.提交任务
13         pool.submit(my1);
14         pool.submit(my2);
15
16         //关闭线程池
17         //void shutdown()
18         pool.shutdown();
定时器
Timer
public Timer()构造
public void schedule(TimerTask task, long delay)延迟多久执行任务
public void schedule(TimerTask task,long delay,long period)延迟多久执行任务,并以后每隔多久执行一次
public boolean cancel()取消这个任务
 1 public class TimerTest {
 2     public static void main(String[] args) {
 3         //需求:在10秒钟后,在控制台打印一句话,helloworld
 4         //public Timer()构造
 5         Timer t = new Timer();
 6
 7         //public void schedule(TimerTask task, long delay)延迟多久执行任务
 8         t.schedule(new MyTimerTask(t), 10000);
 9
10         //public void cancel()终止此计时器
11         //t.cancel();//如果在这里关闭的话,我们还没等任务执行完毕呢,计时器已经被关闭了
12
13     }
14
15 }
16
17 //创建TimerTask的子类
18 class MyTimerTask extends TimerTask{
19     private Timer t;
20     public MyTimerTask(Timer t){
21         this.t = t;
22     }
23
24     @Override
25     public void run() {
26         //此计时器任务要执行的操作。
27         System.out.println("helloworld");
28         t.cancel();//当任务被执行完毕之后,关闭定时器
29     }
30
31 }