遇到的问题
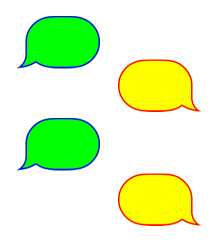
比如我现在有以下这个图片:

然后我想做到以下这种效果:
第一种方法
应该是最简单的一种方法,直接提供带描边的图片,在这里例子里就是提供一张篮框绿底的图片以及一张红框黄底的图片。
但是问题来了,如果需要提供多种配色方案怎么办?比如白天模式下是一种配色方案,夜晚模式下是另一种配色方案,或者哪天想把当前配色方案修改掉,这会导致程序里需要存储大量的图片。目前iOS每种图片都需要提供三种分辨率的图片,多一张图片就意味着其实要多三张图片。
还有一个问题就是,泡泡有两种方向,难道我们也需要提供两种图片吗?再结合第一个问题,好像我们需要提供很多图片。
第二种方法
这就是这篇文章所要阐述的方法。该方法就是由程序自动给图片上色。
让我们定义如下这个方法:
- (UIImage *)imageMaskedWithColor:(UIColor *)color {
	UIImage *bubbleImage = [UIImage imageNamed:@"bubble"];
	CGRect imageRect = CGRectMake(0.0f, 0.0f, bubbleImage.size.width, bubbleImage.size.height);
	UIImage *newImage = nil;

    UIGraphicsBeginImageContextWithOptions(imageRect.size, NO, bubbleImage.scale);
    {
        CGContextRef context = UIGraphicsGetCurrentContext();

        // 根据文档,使用这种方式展示图片会是上下颠倒的
        // 因此先要将图片向下反转
        CGContextScaleCTM(context, 1.0f, -1.0f);
        // 反转之后再把反转后的图片移回到原来位置
        CGContextTranslateCTM(context, 0.0f, -(imageRect.size.height));

        CGContextClipToMask(context, imageRect, bubbleImage.CGImage);
        // 填充所期望的颜色
        CGContextSetFillColorWithColor(context, color.CGColor);
        CGContextFillRect(context, imageRect);

        // 生成新的图片返回
        newImage = UIGraphicsGetImageFromCurrentImageContext();
    }
    UIGraphicsEndImageContext();
    return newImage;
}
该函数调用方式如下:
self.imageview.image = [self imageMaskedWithColor:[UIColor yellowColor]];
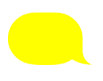
展示效果如下:
那接下来我们再来处理描边的问题。这里我也研究了很久,如果想纯粹用程序自动来做一个通用的非规则图片描边,目前看来好像比较困难(如果大家有比较好的办法,请不吝告知)。
因此我选择了相对简单的办法,就是直接用泡泡的图片把中间扣掉,然后生成一张描边图片,如以下图片:

然后我们直接使用上面的技术,分别为实心的泡泡图片和描边的泡泡图片填充想要的颜色,然后再把两种图片画在一起,这样一张带描边的实心泡泡图片就出来了。
让我们定义如下这个新的方法:
- (UIImage *)imageMaskedWithColor:(UIColor *)color strokeColor:(UIColor *)strokeColor {
    UIImage *bubbleImage = [UIImage imageNamed:@"bubble"];
    UIImage *strokeImage = [UIImage imageNamed:@"bubble_stroke"];
    CGRect imageRect = CGRectMake(0.0f, 0.0f, bubbleImage.size.width, bubbleImage.size.height);
    UIImage *newImage = nil;

    UIGraphicsBeginImageContextWithOptions(imageRect.size, NO, bubbleImage.scale);
    {
        CGContextRef context = UIGraphicsGetCurrentContext();

        CGContextScaleCTM(context, 1.0f, -1.0f);
        CGContextTranslateCTM(context, 0.0f, -(imageRect.size.height));

        // 设置底色
        CGContextClipToMask(context, imageRect, bubbleImage.CGImage);
        CGContextSetFillColorWithColor(context, color.CGColor);
        CGContextFillRect(context, imageRect);

        // 设置描边色
        CGContextClipToMask(context, imageRect, strokeImage.CGImage);
        CGContextSetFillColorWithColor(context, strokeColor.CGColor);
        CGContextFillRect(context, imageRect);

        newImage = UIGraphicsGetImageFromCurrentImageContext();
    }
    UIGraphicsEndImageContext();
    return newImage;
}
该函数调用方式如下:
self.imageview.image = [self strokeImageWithColor:[UIColor yellowColor]
                                      strokeColor:[UIColor redColor]];
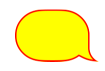
展示效果如下:
那我们还就剩下最后一个问题了,反向的泡泡怎么办?
我们在定义一个方法,用来使得泡泡图片转向:
- (UIImage *)horizontallyFlippedImageFromImage:(UIImage *)image
{
    return [UIImage imageWithCGImage:image.CGImage
                               scale:image.scale
                         orientation:UIImageOrientationUpMirrored];
}
和之前定义的方法结合起来使用:
UIImage *newImage = [self strokeImageWithColor:[UIColor greenColor]
                                   strokeColor:[UIColor blueColor]];
self.imageview.image = [self horizontallyFlippedImageFromImage:newImage];
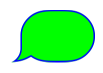
展示效果如下:
总结
到这里这次要介绍的内容都已经介绍完了,这篇博客所介绍方法的最大好处就是可以非常容易适应各种配色方案,同时提供了一种比较实用的描边方式,也解决图片过多导致程序无谓膨胀的问题。
当然也有缺点,比如描边的宽度无法自定义,除非重新截图。另外如果泡泡形状发生改变,也需要重新截图。
其实我这里使用的一些方法基本都来自于JSQMessagesViewController这个第三方库。在我们目前的程序中也使用到了这个库,当然为了适应我们自己的程序,已经被我改的有些面目全非了,哈哈。