[root@server vusers_home]# rpm -ql rsyslog|more ###.so结尾为模块,模块有分im为输入模块,om 为输出模块
/etc/logrotate.d/syslog
/etc/pki/rsyslog
/etc/rc.d/init.d/rsyslog
/etc/rsyslog.conf
/etc/rsyslog.d
/etc/sysconfig/rsyslog
/lib64/rsyslog
/lib64/rsyslog/imfile.so
/lib64/rsyslog/imklog.so
/lib64/rsyslog/immark.so
/lib64/rsyslog/impstats.so
/lib64/rsyslog/imptcp.so
/lib64/rsyslog/imtcp.so
/lib64/rsyslog/imudp.so
/lib64/rsyslog/imuxsock.so
/lib64/rsyslog/lmnet.so
/lib64/rsyslog/lmnetstrms.so
/lib64/rsyslog/lmnsd_ptcp.so
/lib64/rsyslog/lmregexp.so
/lib64/rsyslog/lmstrmsrv.so
/lib64/rsyslog/lmtcpclt.so
/lib64/rsyslog/lmtcpsrv.so
/lib64/rsyslog/lmzlibw.so
/lib64/rsyslog/ommail.so
/lib64/rsyslog/omprog.so
/lib64/rsyslog/omruleset.so
/lib64/rsyslog/omtesting.so
/lib64/rsyslog/omuxsock.so
/lib64/rsyslog/pmlastmsg.so
/sbin/rsyslogd
......
主程序:rsyslogd
配置文件:/etc/rsyslog.conf
服务脚本:/etc/rc.d/init.d/rsyslog
/var/log/dmesg #是用来记录系统启动日志的
rsyslog.conf(配置文件)
RULES:
facility.priority target
日志收集方:
facility:设施,从功能或程序上对日志进行分类;
auth, authpriv, cron, daemon, kern, lpr, mail, mark, news, security, user, uucp, local0-local7, syslog
priority
debug, info, notice, warn(warning), err(error), crit(critical), alert, emerg(panic)
示例:
*.info;mail.none;authpriv.none;cron.none /var/log/messages
# The authpriv file has restricted access.
authpriv.* /var/log/secure
# Log all the mail messages in one place.
mail.* -/var/log/maillog
# Log cron stuff
cron.* /var/log/cron
# Everybody gets emergency messages
*.emerg *
# Save news errors of level crit and higher in a special file.
uucp,news.crit /var/log/spooler
# Save boot messages also to boot.log
local7.* /var/log/boot.log
指定级别:
*: 所有级别
none: 没有级别
priority: 此级别及更高级别的日志信息
=priority:此级别
target:
文件路径:记录于指定的日志文件中,通常应该在/var/log目录下;文件路径前的“-”表示异步写入;
用户:将日志通知给指定用户
*: 所有用户
日志服务器:@host
host: 必须要监听在tcp或udp协议514端口上提供服务;
管道: |COMMAND
测试实例:
ssh 服务单独记录一个日志文件:
[root@server vusers_home]# vim /etc/ssh/sshd_config
# Logging
# obsoletes QuietMode and FascistLogging
#SyslogFacility AUTH
#SyslogFacility AUTHPRIV
SyslogFacility local2 #将原有的换成local2
[root@server vusers_home]# service sshd reload
Reloading sshd: [ OK ]
[root@server vusers_home]# vim /etc/rsyslog.conf
# Save boot messages also to boot.log
local7.* /var/log/boot.log
local2.* /var/log/sshd.log
[root@server vusers_home]# service rsyslog restart
Shutting down system logger: [ OK ]
Starting system logger: [ OK ]
在另外一个端口重新登录并查看日志:
[root@server vusers_home]# cat /var/log/sshd.log
May 18 16:04:50 server sshd[5290]: reverse mapping checking getaddrinfo for bogon [192.168.244.2] failed - POSSIBLE BREAK-IN ATTEMPT!
May 18 16:04:50 server sshd[5290]: Accepted password for root from 192.168.244.2 port 62797 ssh2
[root@server vusers_home]# cat /var/log/sshd.log
May 18 16:04:50 server sshd[5290]: reverse mapping checking getaddrinfo for bogon [192.168.244.2] failed - POSSIBLE BREAK-IN ATTEMPT!
May 18 16:04:50 server sshd[5290]: Accepted password for root from 192.168.244.2 port 62797 ssh2
文件记录的日志的格式:
事件产生的日期时间 主机 进程(pid):事件内容
例:
May 18 16:02:27 server sshd[5239]: Server listening on :: port 22.
May 18 16:03:46 server kernel: Kernel logging (proc) stopped.
有些日志记录二进制格式:/var/log/wtmp,/var/log/btmp
/var/log/wtmp: 当前系统上成功登录的日志;
last
例子:
[root@server ~]# last
root pts/1 192.168.244.2 Thu May 18 16:04 still logged in
root pts/1 192.168.244.2 Thu May 18 16:04 - 16:04 (00:00)
root pts/0 192.168.244.2 Thu May 18 10:40 - 16:37 (05:56)
root pts/0 192.168.244.2 Wed May 17 11:43 - 10:39 (22:55)
root pts/1 192.168.244.2 Mon Jun 13 19:19 - 11:24 (337+16:05)
root pts/0 192.168.244.2 Mon Jun 13 18:57 - 11:24 (337+16:27)
root pts/1 192.168.244.2 Mon Jun 13 08:55 - 18:45 (09:50)
root pts/0 192.168.244.2 Mon Jun 13 03:59 - 10:45 (06:46)
reboot system boot 2.6.32-573.el6.x Mon Jun 13 03:58 - 16:37 (339+12:39)
root pts/1 192.168.244.2 Sun Jun 12 23:58 - down (03:59)
root pts/0 192.168.244.2 Sun Jun 12 23:39 - 01:52 (02:13)
root tty1 Sun Jun 12 23:28 - down (04:29)
reboot system boot 2.6.32-573.el6.x Sun Jun 12 23:27 - 03:57 (04:30)
root tty1 Sun Jun 12 23:26 - down (00:01)
reboot system boot 2.6.32-573.el6.x Sun Jun 12 23:25 - 23:27 (00:01)
/var/log/btmp:当前系统上失败的登录尝试;
lastb
[root@server ~]# lastb
root ssh:notty 192.168.244.101 Thu May 18 16:33 - 16:33 (00:00)
lastlog命令:显示当前系统每一个用户最近一次的登录时间;
例子:
[root@server ~]# lastlog
Username Port From Latest
root pts/0 192.168.244.2 Thu May 18 16:37:34 +0800 2017
bin **Never logged in**
daemon **Never logged in**
####日志服务器如何完成(也就是如何作为收集其他机器日志信息的日志服务器)#############
环境:日志服务器:192.168.244.100
被收集服务器:192.168.244.101
#要成为rsyslog只需打开监听模块即可
[root@192.168.244.100 ~]# vim /etc/rsyslog.conf #需要监听514端口,用udp还是tcp可自选
# Provides UDP syslog reception
$ModLoad imudp
$UDPServerRun 514
# Provides TCP syslog reception
$ModLoad imtcp
$InputTCPServerRun 514
[root@server ~]# netstat -lntup
Active Internet connections (only servers)
Proto Recv-Q Send-Q Local Address Foreign Address State PID/Program name
tcp 0 0 0.0.0.0:514 0.0.0.0:* LISTEN 5407/rsyslogd
tcp 0 0 0.0.0.0:3306 0.0.0.0:* LISTEN 2785/mysqld
tcp 0 0 0.0.0.0:21 0.0.0.0:* LISTEN 5112/vsftpd
tcp 0 0 0.0.0.0:22 0.0.0.0:* LISTEN 5239/sshd
tcp 0 0 127.0.0.1:25 0.0.0.0:* LISTEN 1389/master
tcp 0 0 :::514 :::* LISTEN 5407/rsyslogd
tcp 0 0 :::22 :::* LISTEN 5239/sshd
tcp 0 0 ::1:25 :::* LISTEN 1389/master
udp 0 0 0.0.0.0:514 0.0.0.0:* 5407/rsyslogd
udp 0 0 :::514 :::* 5407/rsyslogd
[root@192.168.244.101 ~]# vi /etc/rsyslog.conf
#*.info;mail.none;authpriv.none;cron.none /var/log/messages
*.info;mail.none;authpriv.none;cron.none @192.168.244.100
[root@192.168.244.101 ~]# service rsyslog restart
[root@192.168.244.101 ~]# yum install -y vsftpd
在rsyslog服务器的/var/log/message上可以看到:
[root@192.168.244.100 ~]# tail -f /var/log/messages
May 18 05:19:29 localhost yum[5817]: Installed: vsftpd-3.0.2-21.el7.x86_64
注意点:如果有防火墙,需放行514端口
#####################如何让rsyslog服务器将日志记录到远端mysql数据库中#####################
环境:
mysql-server:192.168.244.101
rsyslog-server:192.168.244.100
[root@server ~]# ip addr|grep global
inet 192.168.244.100/24 brd 192.168.244.255 scope global eth0
[root@centos7 ~]# ip addr|grep inet|grep global
inet 192.168.244.101/24 brd 192.168.244.255 scope global eno16777736
[root@centos7 ~]# rpm -qa mariadb
mariadb-5.5.52-1.el7.x86_64
[root@centos7 ~]# ss -tnl|grep 3306
LISTEN 0 50 *:3306 *:*
[root@server src]# yum list all rsyslog* #查看相关包,最主要的需要rsyslog-mysql 这个程序包,连接mysql的驱动
rsyslog-mysql.x86_64 5.8.10-10.el6_6 base
[root@server ~]# yum install -y rsyslog-mysql
[root@server ~]# rpm -ql rsyslog-mysql
/lib64/rsyslog/ommysql.so #模块
/usr/share/doc/rsyslog-mysql-5.8.10
/usr/share/doc/rsyslog-mysql-5.8.10/createDB.sql #mysql命令包,需要在mysql中运行
[root@centos7 ~]# mysql #登陆mysql-server 为sysloguser 这个用户授权
Welcome to the MariaDB monitor. Commands end with ; or g.
Your MariaDB connection id is 5
Server version: 5.5.52-MariaDB MariaDB Server
Copyright (c) 2000, 2016, Oracle, MariaDB Corporation Ab and others.
Type 'help;' or 'h' for help. Type 'c' to clear the current input statement.
MariaDB [(none)]> grant all on Syslog.* to 'sysloguser'@'192.168.%.%' identified by 'syslogpass';
[root@centos7 ~]# vim /etc/my.cnf #增加如下两行
[mysqld]
skip_name_resolve = on
innodb_file_per_table = on
[root@centos7 ~]# systemctl restart mariadb.service #重启mysql-server
[root@server ~]# mysql -usysloguser -h192.168.244.101 -p #在rsyslog服务器连接测试mysql-server中新建的用户可连接性
Enter password:
Welcome to the MySQL monitor. Commands end with ; or g.
Your MySQL connection id is 2
Server version: 5.5.52-MariaDB MariaDB Server
Copyright (c) 2000, 2013, Oracle and/or its affiliates. All rights reserved.
Oracle is a registered trademark of Oracle Corporation and/or its
affiliates. Other names may be trademarks of their respective
owners.
Type 'help;' or 'h' for help. Type 'c' to clear the current input statement.
mysql>
接下来导入下面的sql 包:
[root@server ~]# mysql -usysloguser -h192.168.244.101 -p < /usr/share/doc/rsyslog-mysql-5.8.10/createDB.sql
[root@server ~]# mysql -usysloguser -h192.168.244.101 -p #登陆mysql-server 查看操作是否成功,Syslog库是否建立
Enter password:
Welcome to the MySQL monitor. Commands end with ; or g.
Your MySQL connection id is 5
Server version: 5.5.52-MariaDB MariaDB Server
Copyright (c) 2000, 2013, Oracle and/or its affiliates. All rights reserved.
Oracle is a registered trademark of Oracle Corporation and/or its
affiliates. Other names may be trademarks of their respective
owners.
Type 'help;' or 'h' for help. Type 'c' to clear the current input statement.
mysql> show databases;
+--------------------+
| Database |
+--------------------+
| information_schema |
| Syslog |
| test |
+--------------------+
3 rows in set (0.00 sec)
mysql> use Syslog;
Database changed
mysql> show tables;
+------------------------+
| Tables_in_Syslog |
+------------------------+
| SystemEvents |
| SystemEventsProperties |
+------------------------+
2 rows in set (0.00 sec)
mysql> desc SystemEvents;
+--------------------+------------------+------+-----+---------+----------------+
| Field | Type | Null | Key | Default | Extra |
+--------------------+------------------+------+-----+---------+----------------+
| ID | int(10) unsigned | NO | PRI | NULL | auto_increment |
| CustomerID | bigint(20) | YES | | NULL | |
| ReceivedAt | datetime | YES | | NULL | |
| DeviceReportedTime | datetime | YES | | NULL | |
| Facility | smallint(6) | YES | | NULL | |
| Priority | smallint(6) | YES | | NULL | |
| FromHost | varchar(60) | YES | | NULL | |
| Message | text | YES | | NULL | |
| NTSeverity | int(11) | YES | | NULL | |
| Importance | int(11) | YES | | NULL | |
| EventSource | varchar(60) | YES | | NULL | |
| EventUser | varchar(60) | YES | | NULL | |
| EventCategory | int(11) | YES | | NULL | |
| EventID | int(11) | YES | | NULL | |
| EventBinaryData | text | YES | | NULL | |
| MaxAvailable | int(11) | YES | | NULL | |
| CurrUsage | int(11) | YES | | NULL | |
| MinUsage | int(11) | YES | | NULL | |
| MaxUsage | int(11) | YES | | NULL | |
| InfoUnitID | int(11) | YES | | NULL | |
| SysLogTag | varchar(60) | YES | | NULL | |
| EventLogType | varchar(60) | YES | | NULL | |
| GenericFileName | varchar(60) | YES | | NULL | |
| SystemID | int(11) | YES | | NULL | |
+--------------------+------------------+------+-----+---------+----------------+
24 rows in set (0.00 sec)
mysql> desc SystemEventsProperties;
+---------------+------------------+------+-----+---------+----------------+
| Field | Type | Null | Key | Default | Extra |
+---------------+------------------+------+-----+---------+----------------+
| ID | int(10) unsigned | NO | PRI | NULL | auto_increment |
| SystemEventID | int(11) | YES | | NULL | |
| ParamName | varchar(255) | YES | | NULL | |
| ParamValue | text | YES | | NULL | |
+---------------+------------------+------+-----+---------+----------------+
4 rows in set (0.01 sec)
mysql>
##################接下里配置rsyslog服务器能使用mysql###################
[root@server ~]# vim /etc/rsyslog.conf #编辑文件,在MODULES 里,增加一行
#### MODULES ####
$ModLoad ommysql
#### RULES ####
#*.info;mail.none;authpriv.none;cron.none /var/log/messages
*.info;mail.none;authpriv.none;cron.none :ommysql:192.168.244.101,Syslog,sysloguser,syslogpass
注释::ommysql:192.168.244.101,Syslog,sysloguser,syslogpass
输出到mysql模块:mysql地址,数据库名,数据库登陆名,数据库登陆密码
[root@server ~]# /etc/init.d/rsyslog restart #重启rsyslog
[root@server ~]# yum install -y zile
[root@centos7 ~]# mysql #mysql-server #查看安装zile是否有记录
MariaDB [Syslog]> select count(*) from SystemEvents;
+----------+
| count(*) |
+----------+
| 4 |
+----------+
1 row in set (0.01 sec)
MariaDB [Syslog]> select count(*) from SystemEventsProperties;
+----------+
| count(*) |
+----------+
| 0 |
+----------+
1 row in set (0.00 sec)
MariaDB [Syslog]> select * from SystemEventsG;
*************************** 1. row ***************************
ID: 1
CustomerID: NULL
ReceivedAt: 2017-05-18 18:25:57
DeviceReportedTime: 2017-05-18 18:25:57
Facility: 0
Priority: 6
FromHost: server
Message: imklog 5.8.10, log source = /proc/kmsg started.
NTSeverity: NULL
Importance: NULL
EventSource: NULL
EventUser: NULL
EventCategory: NULL
EventID: NULL
EventBinaryData: NULL
MaxAvailable: NULL
CurrUsage: NULL
MinUsage: NULL
MaxUsage: NULL
InfoUnitID: 1
SysLogTag: kernel:
EventLogType: NULL
GenericFileName: NULL
SystemID: NULL
*************************** 2. row ***************************
ID: 2
CustomerID: NULL
ReceivedAt: 2017-05-18 18:25:57
DeviceReportedTime: 2017-05-18 18:25:57
Facility: 5
Priority: 6
FromHost: server
Message: [origin software="rsyslogd" swVersion="5.8.10" x-pid="5626" x-info="http://www.rsyslog.com"] start
NTSeverity: NULL
Importance: NULL
EventSource: NULL
EventUser: NULL
EventCategory: NULL
EventID: NULL
EventBinaryData: NULL
MaxAvailable: NULL
CurrUsage: NULL
MinUsage: NULL
MaxUsage: NULL
InfoUnitID: 1
SysLogTag: rsyslogd:
EventLogType: NULL
GenericFileName: NULL
SystemID: NULL
*************************** 3. row ***************************
ID: 3
CustomerID: NULL
ReceivedAt: 2017-05-18 18:28:51
DeviceReportedTime: 2017-05-18 18:28:51
Facility: 1
Priority: 6
FromHost: server
Message: Installed: gc-7.1-12.el6_4.x86_64
NTSeverity: NULL
Importance: NULL
EventSource: NULL
EventUser: NULL
EventCategory: NULL
EventID: NULL
EventBinaryData: NULL
MaxAvailable: NULL
CurrUsage: NULL
MinUsage: NULL
MaxUsage: NULL
InfoUnitID: 1
SysLogTag: yum[5666]:
EventLogType: NULL
GenericFileName: NULL
SystemID: NULL
*************************** 4. row ***************************
ID: 4
CustomerID: NULL
ReceivedAt: 2017-05-18 18:28:51
DeviceReportedTime: 2017-05-18 18:28:51
Facility: 1
Priority: 6
FromHost: server
Message: Installed: zile-2.4.9-1.el6.x86_64
NTSeverity: NULL
Importance: NULL
EventSource: NULL
EventUser: NULL
EventCategory: NULL
EventID: NULL
EventBinaryData: NULL
MaxAvailable: NULL
CurrUsage: NULL
MinUsage: NULL
MaxUsage: NULL
InfoUnitID: 1
SysLogTag: yum[5666]:
EventLogType: NULL
GenericFileName: NULL
SystemID: NULL
4 rows in set (0.00 sec)
###################安装loganalyzer##################
[root@server ~]# yum install -y httpd php php-mysql php-gd(后面数据统计,出图形需要用到)
[root@server ~]# netstat -ant
tcp 0 0 :::80 :::* LISTEN
测试下php,与mysql的连通性:
[root@server ~]# cd /var/www/html/
You have new mail in /var/spool/mail/root
[root@server html]# ll
total 8
-rw-r--r-- 1 root root 329 May 18 18:45 index.php
-rw-r--r-- 1 root root 20 May 18 18:42 phpinfo.php
[root@server html]# cat phpinfo.php
<?php
phpinfo();
?>
[root@server html]# cat index.php
<?php
$conn = mysql_connect('192.168.244.101','sysloguser','syslogpass');
if ($conn)
echo "OK";
else
echo "Failure";
mysql_close();
?>
[root@server ~]# curl 192.168.244.100/index.php #可以连接上数据库
OK
[root@server ~]# curl -I 192.168.244.100/phpinfo.php #访问php页面OK
HTTP/1.1 200 OK
################安装LogAnalyzer#################
[root@server ~]# cd /usr/local/src/
[root@server src]# wget http://download.adiscon.com/loganalyzer/loganalyzer-3.6.5.tar.gz
[root@server src]# mv loganalyzer-3.6.5 /var/www/html/loganalyzer
[root@server src]# cd /var/www/html/loganalyzer/
[root@server ~]# cd /var/www/html/loganalyzer/contrib/
[root@server contrib]# cat configure.sh
#!/bin/sh
touch config.php
chmod 666 config.php
[root@server contrib]# chmod +x *.sh
[root@server contrib]# ./configure.sh #让其生成config.php 文件
[root@server src]# chmod 666 config.php
[root@server src]# pwd
/var/www/html/loganalyzer/src
[root@server src]# ll config.php
-rw-rw-rw- 1 root root 0 May 19 15:02 config.php
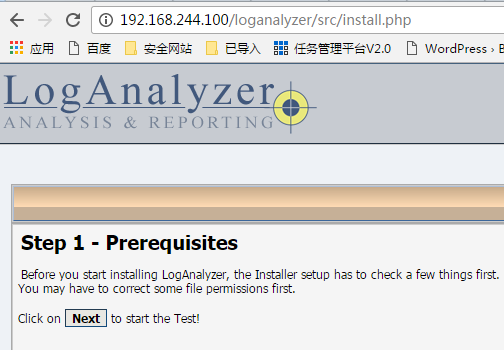
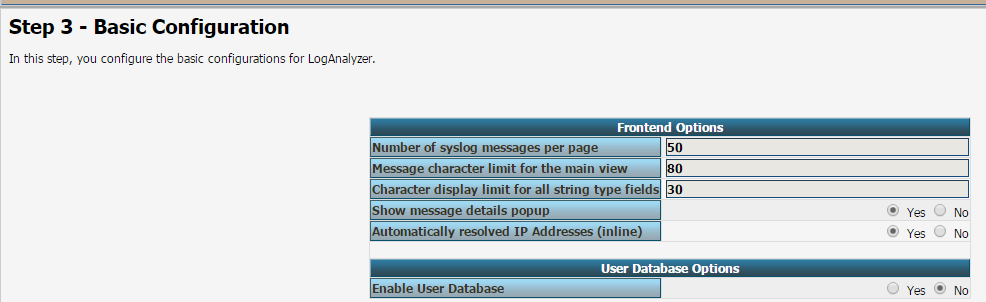
然后去浏览器操作:


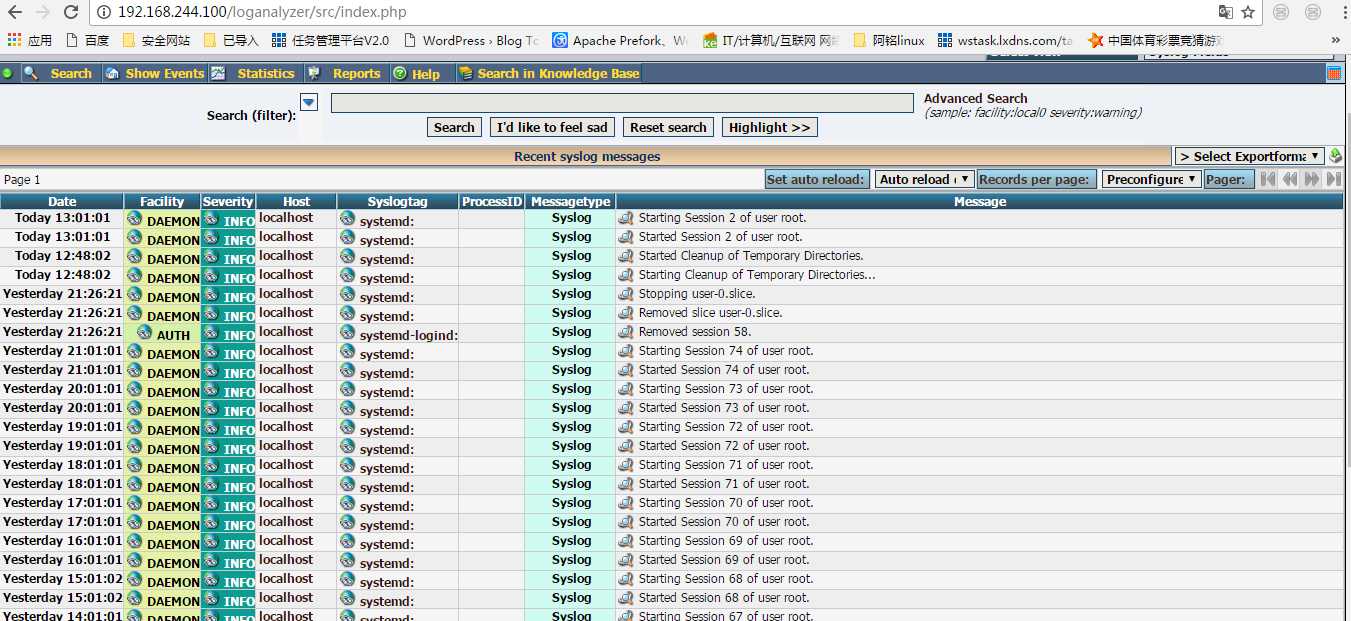
完成!!!!!!!!!!!!!!!!!!
大致总结下过程:
配置使用基于mysql存储日志信息:
(1) 准备好MySQL服务器,创建用户,授权对Syslog数据库的全部访问权限;
(2) 安装rsyslog-mysql程序包;
(3) 创建rsyslog-mysql依赖的数据库;
# mysql -uUSERNAME -hHOST -pPASSWORD < /usr/share/doc/rsyslog-mysql-VERSION/createDB.sql
(4) 配置rsyslog使用ommysql模块
#### MODULES ####
$ModLoad ommysql
#### RULES ####
facility.priority :ommysql:DBHOST,DB,DBUSER,USERPASS
重启rsyslog服务
(5) 安装loganalyzer
(a) 配置webserver, 支持php
# yum install httpd php php-mysql php-gd
# service httpd start
(b) loganalyzer
# cp -r loganalyzer-3.6.5/src /var/www/html/loganalyzer
# cp loganalyzer-3.6.5/contrib/*.sh /var/www/html/loganalyzer
# cd /var/www/html/loganalyzer
# chmod +x *.sh
# ./configure.sh
# ./secure.sh
# chmod 666 config.php