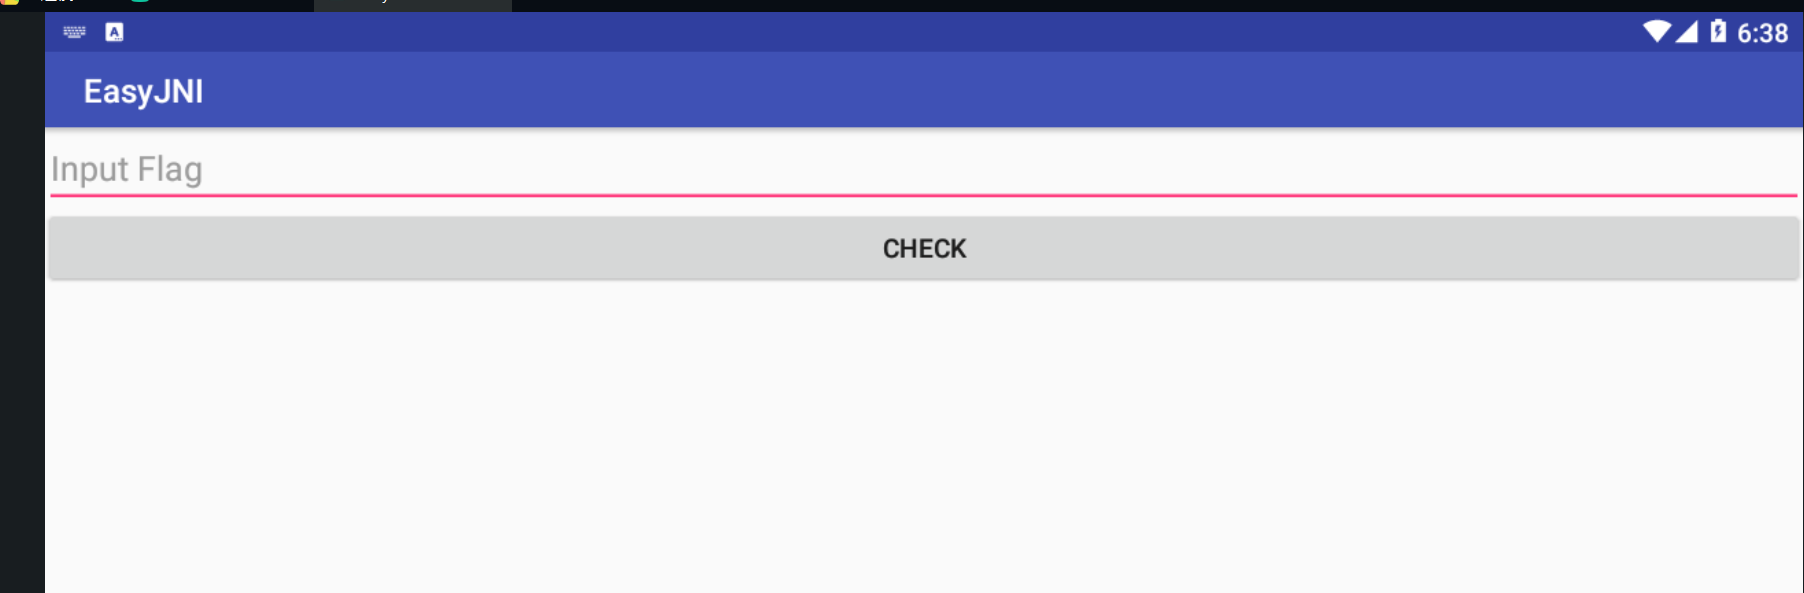
EA5yB45e64
package com.a.easyjni;

import android.content.Context;
import android.os.Bundle;
import android.support.v7.app.c;
import android.view.View$OnClickListener;
import android.view.View;
import android.widget.Toast;

public class MainActivity extends c {
    static {
        System.loadLibrary("native");                //导入一个名为“native”的so文件
    }

    public MainActivity() {
        super();
    }

    static boolean a(MainActivity arg1, String arg2) {
        return arg1.a(arg2);
    }

    private boolean a(String arg3) {
        boolean v0_1;
        try {
            v0_1 = this.ncheck(new a().a(arg3.getBytes()));
        }
        catch(Exception v0) {
            v0_1 = false;
        }

        return v0_1;
    }

    private native boolean ncheck(String arg1) {
    }

    protected void onCreate(Bundle arg3) {
        super.onCreate(arg3);
        this.setContentView(0x7F04001B);
        this.findViewById(0x7F0B0076).setOnClickListener(new View$OnClickListener(((Context)this)) {
            public void onClick(View arg4) {
                if(MainActivity.a(this.b, this.a.findViewById(0x7F0B0075).getText().toString())) {
                    Toast.makeText(this.a, "You are right!", 1).show();
                }
                else {
                    Toast.makeText(this.a, "You are wrong! Bye~", 1).show();
                }
            }
        });
    }
}
从onCreate开始分析
首先用到了一个MainActivity.a()方法,接下来跟到MainActivity.a()
static boolean a(MainActivity arg1, String arg2) {
return arg1.a(arg2);
}
//又调用了一个a方法,继续跟到a方法
private boolean a(String arg3) {
boolean v0_1;
try {
v0_1 = this.ncheck(new a().a(arg3.getBytes())); //new a():实例化了一个a类对象,跟进去看看这个a类对象(双击)
} //还调用了ncheck函数(ida)
catch(Exception v0) {
v0_1 = false;
}
return v0_1;
}
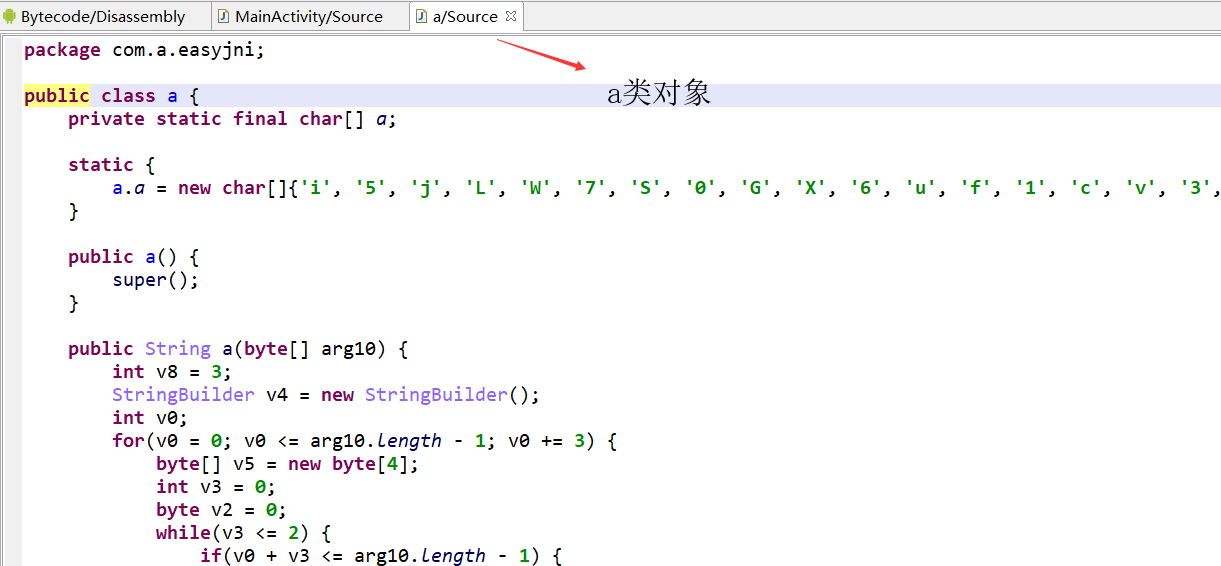
a类对象
package com.a.easyjni;
public class a {
private static final char[] a;
static {
a.a = new char[]{'i', '5', 'j', 'L', 'W', '7', 'S', '0', 'G', 'X', '6', 'u', 'f', '1', 'c', 'v', '3', 'n', 'y', '4', 'q', '8', 'e', 's', '2', 'Q', '+', 'b', 'd', 'k', 'Y', 'g', 'K', 'O', 'I', 'T', '/', 't', 'A', 'x', 'U', 'r', 'F', 'l', 'V', 'P', 'z', 'h', 'm', 'o', 'w', '9', 'B', 'H', 'C', 'M', 'D', 'p', 'E', 'a', 'J', 'R', 'Z', 'N'};
}
public a() {
super();
}
public String a(byte[] arg10) {
int v8 = 3;
StringBuilder v4 = new StringBuilder();
int v0;
for(v0 = 0; v0 <= arg10.length - 1; v0 += 3) {
byte[] v5 = new byte[4];
int v3 = 0;
byte v2 = 0;
while(v3 <= 2) {
if(v0 + v3 <= arg10.length - 1) {
v5[v3] = ((byte)(v2 | (arg10[v0 + v3] & 0xFF) >>> v3 * 2 + 2));
v2 = ((byte)(((arg10[v0 + v3] & 0xFF) << (2 - v3) * 2 + 2 & 0xFF) >>> 2));
}
else {
v5[v3] = v2;
v2 = 0x40;
}
++v3;
}
v5[v8] = v2;
int v2_1;
for(v2_1 = 0; v2_1 <= v8; ++v2_1) {
if(v5[v2_1] <= 0x3F) {
v4.append(a.a[v5[v2_1]]);
}
else {
v4.append('=');
}
}
}
return v4.toString();
}
}
ida打开so文件,找到ncheck函数
signed int __fastcall Java_com_a_easyjni_MainActivity_ncheck(int a1, int a2, int a3)
{
  int v3; // r8
  int v4; // r5
  int v5; // r8
  const char *v6; // r6
  int v7; // r0
  char *v8; // r2
  char v9; // r1
  int v10; // r0
  bool v11; // nf
  unsigned __int8 v12; // vf
  int v13; // r1
  signed int result; // r0
  char s1[32]; // [sp+3h] [bp-35h]
  char v16; // [sp+23h] [bp-15h]
  int v17; // [sp+28h] [bp-10h]

  v17 = v3;
  v4 = a1;
  v5 = a3;
  v6 = (const char *)(*(int (__fastcall **)(int, int, _DWORD))(*(_DWORD *)a1 + 676))(a1, a3, 0);          //猜测为输入
  if ( strlen(v6) == 32 )
  {
    v7 = 0;
    do
    {
      v8 = &s1[v7];
      s1[v7] = v6[v7 + 16];
      v9 = v6[v7++];
      v8[16] = v9;
    }          //将我们传入的字符串的前16位与后16位字符对调
    while ( v7 != 16 );
    (*(void (__fastcall **)(int, int, const char *))(*(_DWORD *)v4 + 680))(v4, v5, v6);
    v10 = 0;
    do
    {
      v12 = __OFSUB__(v10, 30);
      v11 = v10 - 30 < 0;
      v16 = s1[v10];
      s1[v10] = s1[v10 + 1];
      s1[v10 + 1] = v16;
      v10 += 2;
    }
    while ( v11 ^ v12 );
    v13 = memcmp(s1, "MbT3sQgX039i3g==AQOoMQFPskB1Bsc7", 0x20u);
    result = 0;
    if ( !v13 )
      result = 1;
  }
  else
  {
    (*(void (__fastcall **)(int, int, const char *))(*(_DWORD *)v4 + 680))(v4, v5, v6);
    result = 0;
  }
  return result;
}
推测是base64加密的三个特点:
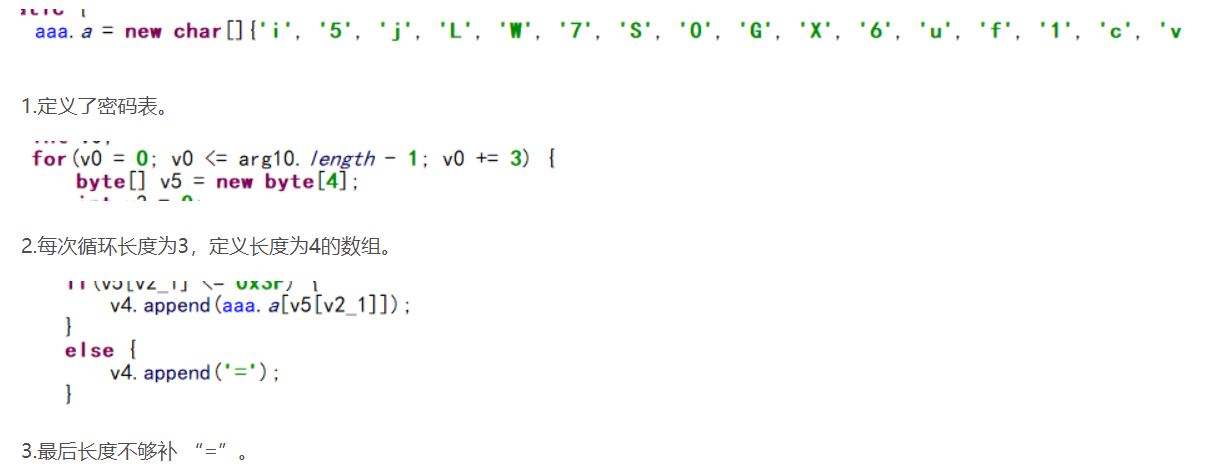
# 先每两位变换位置,然后前16位和后16位进行变换,最后是变异的base64解密
import base64
# 每两位变换位置
str1 = list("MbT3sQgX039i3g==AQOoMQFPskB1Bsc7")
str1_result = ''
for i in range(0, len(str1), 2):
    str1_result += str1[i+1] + str1[i]
#前16和后16交换位置
str2 = list(str1_result)
str2_result = ''.join(str2[i] for i in range(16, 32)) + ''.join(str2[j] for j in range(0, 16))
#变异base64解密
base_now = ['i', '5', 'j', 'L', 'W', '7', 'S', '0', 'G', 'X', '6', 'u', 'f', '1', 'c', 'v',
            '3', 'n', 'y', '4', 'q', '8', 'e', 's', '2', 'Q', '+', 'b', 'd', 'k', 'Y', 'g',
            'K', 'O', 'I', 'T', '/', 't', 'A', 'x', 'U', 'r', 'F', 'l', 'V', 'P', 'z', 'h',
            'm', 'o', 'w', '9', 'B', 'H', 'C', 'M', 'D', 'p', 'E', 'a', 'J', 'R', 'Z', 'N']
base_now_str = ''.join(i for i in base_now)
base_original_str = 'ABCDEFGHIJKLMNOPQRSTUVWXYZabcdefghijklmnopqrstuvwxyz0123456789+/'
flag = base64.b64decode(str2_result.translate(str.maketrans(base_now_str, base_original_str)))
print(flag)
flag{just_ANot#er_@p3}