一、前言
本文主要从框架应用、框架原理、框架搭建来讲述对SpringBoot框架的理解。
应用案例:实验室数据构造,卡口车辆通过记录表数据构造
二、SpringBoot框架的应用
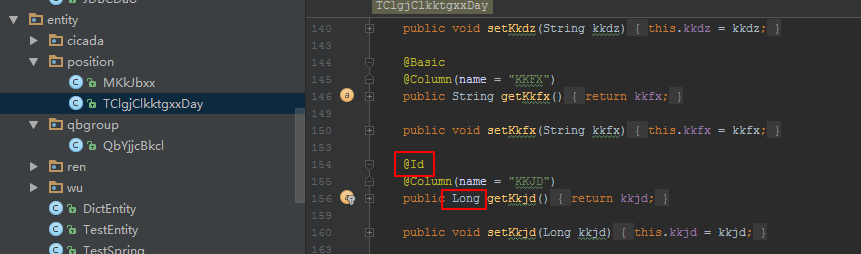
1、创建实体Entity类,获取卡口车辆通过记录表实体对象
该步骤参考文档《IDEA中Hibernate的引入与使用》中章节2.配置数据库和3.生产Hiberante的实体类及配置文件,使用Spring框架无需手动操作配置文件,只需按操作生成实体类即可。
创建的实体类如下所示:

2、创建数据操作Dao类,用于卡口车辆通过记录数据的保存,及与其他表相关操作的查询
1)Dao类引入Spring注解@Repository,用于标注数据访问组件,即DAO组件;
2)该类继承JpaRepository,带两个参数,第一个参数为实体对象,例:TClgjClkktgxxDay,第二个参数是该实体对象Id类型,例:Long
3)引入Spring注解@Query实现查询功能,value内容输入sql语句,指定nativeQuery=true即使用原生的sql语句查询。List<Object[]>为返回的数据格式,getKkjbxxData()为方法内容。
原生sql中涉及参数化使用?1代表第一个参数,方法对应带入参数即可。

实体Id类型
3、创建service类,用于实现数据组装及插入
1)引入Spring注解@Component,作用:把普通pojo实例化到spring容器中,相当于配置文件中的
例:
注解@Service未设置bean名字

main是静态方法无法获取到这个实例的属性,从容器中获取到该bean的写法如下:
FxfzxyrServiceImpl fxfzxyrService = (FxfzxyrServiceImpl) SpringBeanUtil.getBean("fxfzxyrServiceImpl");
若有设置bean名字则按bean名字填写。
2)引入Spring注解@Autowired,作用:注入Dao类
3)由于使用JDBC的批量提交方法,故需要写sql,sql的values后面对应的是实体对象定义的字段名,sql语句后面List
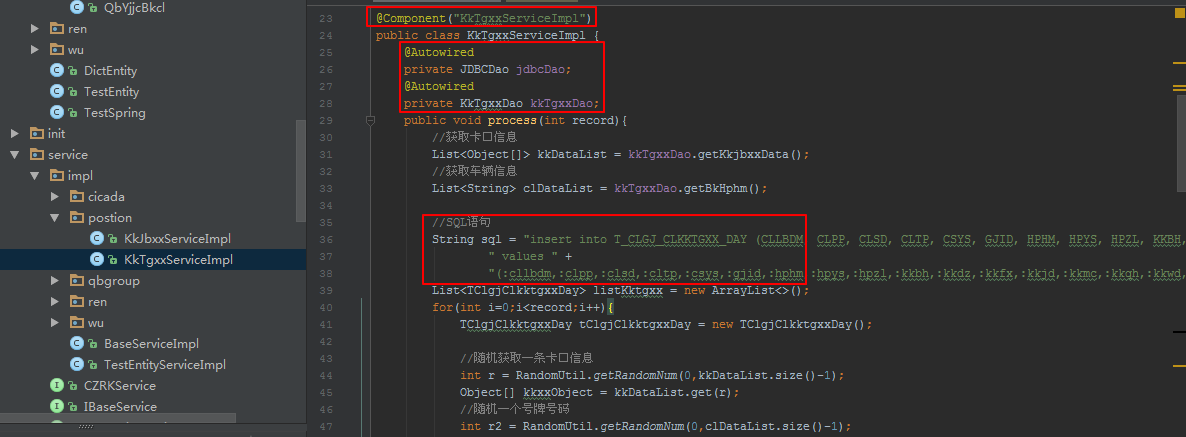
批量提交方法如下:

4、创建测试类,执行测试程序
1)@RunWith:指定SpringRunner类来运行
2)@SpringBootTest:配置文件的读取
3)@Autowired:注入service类
4)@Test:测试方法

综上所述,我们已经了解到springboot框架在数据构造中的应用操作。接下来了解下SpringBoot框架的原理。
三、SpringBoot框架的原理
1、启动原理
1)场景应用测试类中指定从Start类启动(可配置),启动类主要包含以下配置
@Configuration:配置Spring并启动Spring容器
@SpringBootAplication:继承@Configuration注解,加载配置文件
@EnableJpaRepositories:用来扫描和发现指定包及其子包中的Repository定义,Spring Boot只会扫描启动类当前包和以下的包 ,例:启动类的包是在com.forezp.helloworld下面,然后就只会扫描com.forezp.helloworld或者com.forezp.helloworld.下面的包。
@EntityScan:用来扫描和发现指定包及其子包中的Entity定义,Spring Boot只会扫描启动类当前包和以下的包 ,例:启动类的包是在com.forezp.helloworld下面,然后就只会扫描com.forezp.helloworld或者com.forezp.helloworld.下面的包。
@ComponentScan:用来扫描和发现指定包及其子包中的Component定义,自动装配到spring的bean容器中,Spring Boot只会扫描启动类当前包和以下的包 ,例:启动类的包是在com.forezp.helloworld下面,然后就只会扫描com.forezp.helloworld或者com.forezp.helloworld.*下面的包。

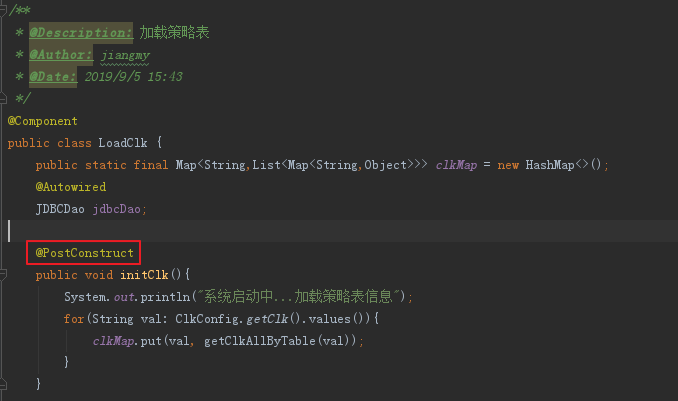
- @PostConstruct
被@PostConstruct修饰的方法会在服务器加载Servlet的时候运行,并且只会被服务器调用一次,类似于Serclet的inti()方法。被@PostConstruct修饰的方法会在构造函数之后,init()方法之前运行。
3)@PropertySource加载局部配置文件
/**
 * 表码表配置
 */
@Configuration
@PropertySource("classpath:tables.properties")
@ConfigurationProperties(prefix = "table")
public class DictConfig {
    private static Map<String,String> bm = new HashMap<>();
    public static Map<String, String> getBm() {
        return bm;
    }
    public void setBm(Map<String, String> bm) {
        this.bm = bm;
    }
}
2、SpringBoot配置文件application.properties
配置数据库信息,容器端口信息(默认使用Tomcat作为内嵌的Servlet容器,通过pom文件可以修改成其他容器如jetty)等其他
1)容器端口号设置
server.port=8080
2)上下文路径设置
server.contex-path=/DataLab
3)配置文件切换
spring.profiles.active=dev 则读取的配置文件是application-dev.properties
4)多配置文件
配置多个配置文件,分类存放配置信息
spring.profiles.active=server1,server2
3、pom中引入springboot相关的依赖包
<parent>
    <groupId>org.springframework.boot</groupId>
    <artifactId>spring-boot-starter-parent</artifactId>
    <version>2.1.3.RELEASE</version>
</parent>

<!-- Add typical dependencies for a web application -->
<dependencies>
    <dependency>
        <groupId>org.springframework.boot</groupId>
        <artifactId>spring-boot-starter-web</artifactId>
    </dependency>

    <dependency>
        <groupId>org.springframework.boot</groupId>
        <artifactId>spring-boot-starter-test</artifactId>
    </dependency>

    <dependency>
        <groupId>org.springframework.boot</groupId>
        <artifactId>spring-boot-starter-data-jpa</artifactId>
    </dependency>

    <dependency>
        <groupId>org.springframework.boot</groupId>
        <artifactId>spring-boot-configuration-processor</artifactId>
        <optional>true</optional>
    </dependency>
4、SpringBoot打成可执行jar包,需要引入插件,并指定主函数入口
如下图所示:
<plugin>
    <groupId>org.springframework.boot</groupId>
    <artifactId>spring-boot-maven-plugin</artifactId>
    <configuration>
        <mainClass>com.dragonsoft.testlab.TestSpringJMY</mainClass>
        <executable>true</executable>
    </configuration>
    <executions>
        <execution>
            <goals>
                <goal>repackage</goal>
            </goals>
        </execution>
    </executions>
</plugin>
四、SpringBoot框架的搭建
1、搭建方法1
1)File>New>Project,New Project界面选择Spring Initializr

2)选择Spring Initializr,Project SDK选择安装的JDK,点击Next

3)group:选择包路径,例如:com.xxx.example;Artifact:填写项目名称,例如:demo;,其他的不用管,点击Next

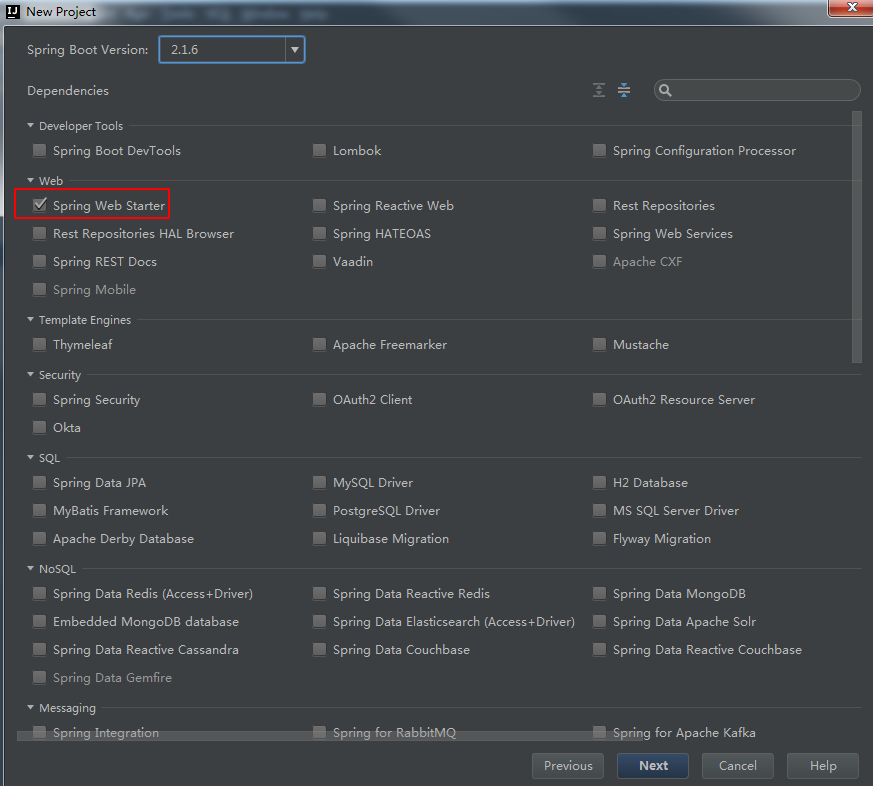
4)选择SpringBoot版本
选择2.1.6,Web选择Spring Web Starter,完成后点击【Next】
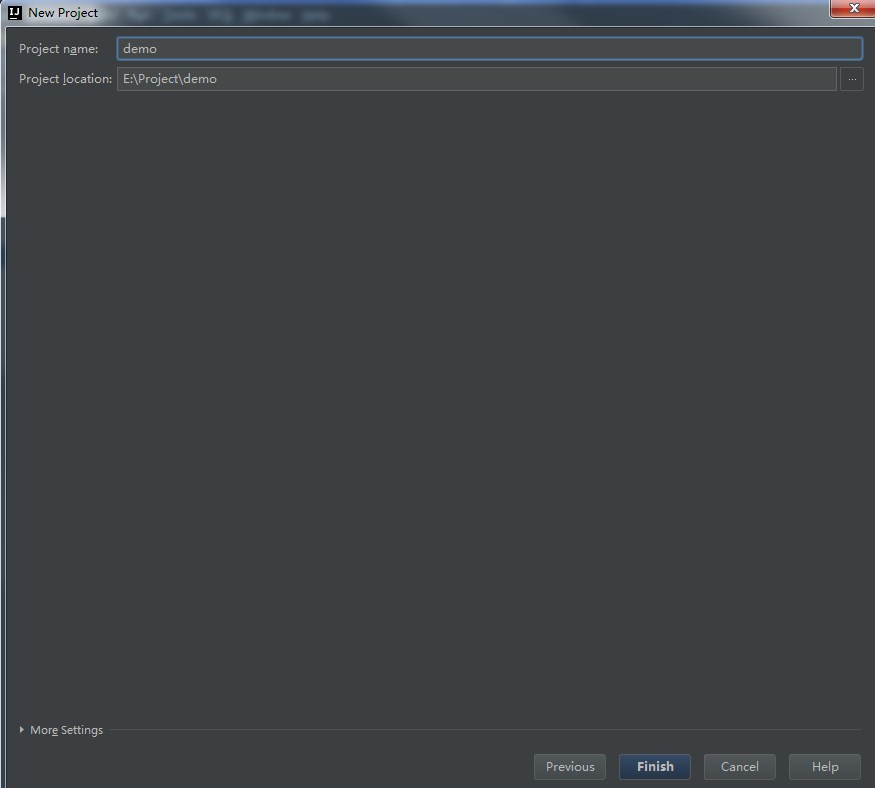
5)project name:项目名称;project location :项目路径,点击Finish
6)选择创建一个新的空间 New Window
7)删除没有的文件 .mvn、mvnw、mvnw.cmd
至此一个SpringBoot框架搭建完成。
2、搭建方法2(推荐)
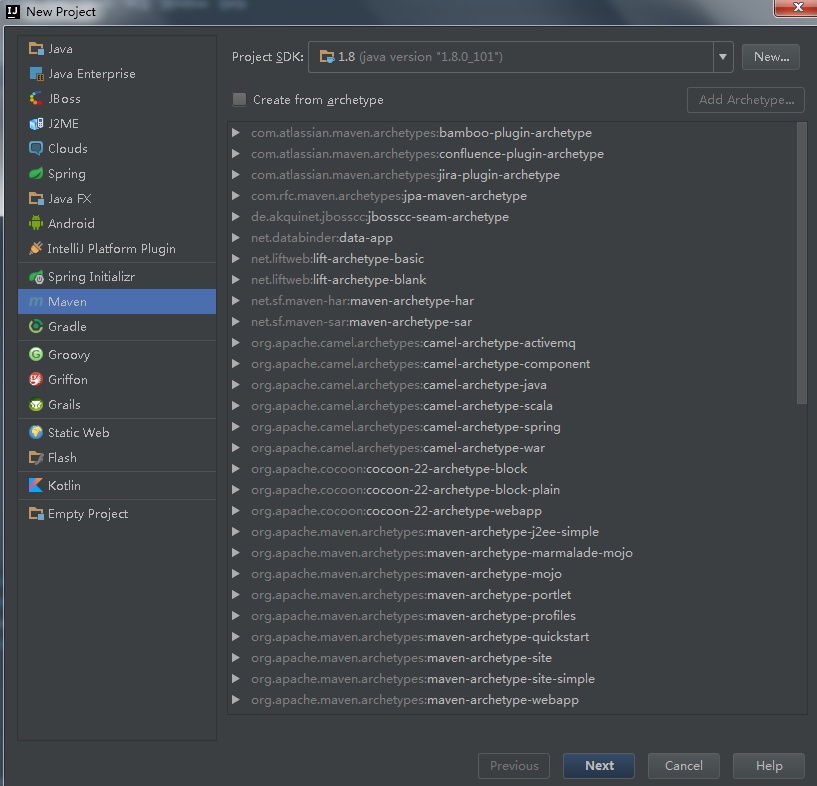
1)File->new,选择maven,创建一个空项目,直接next
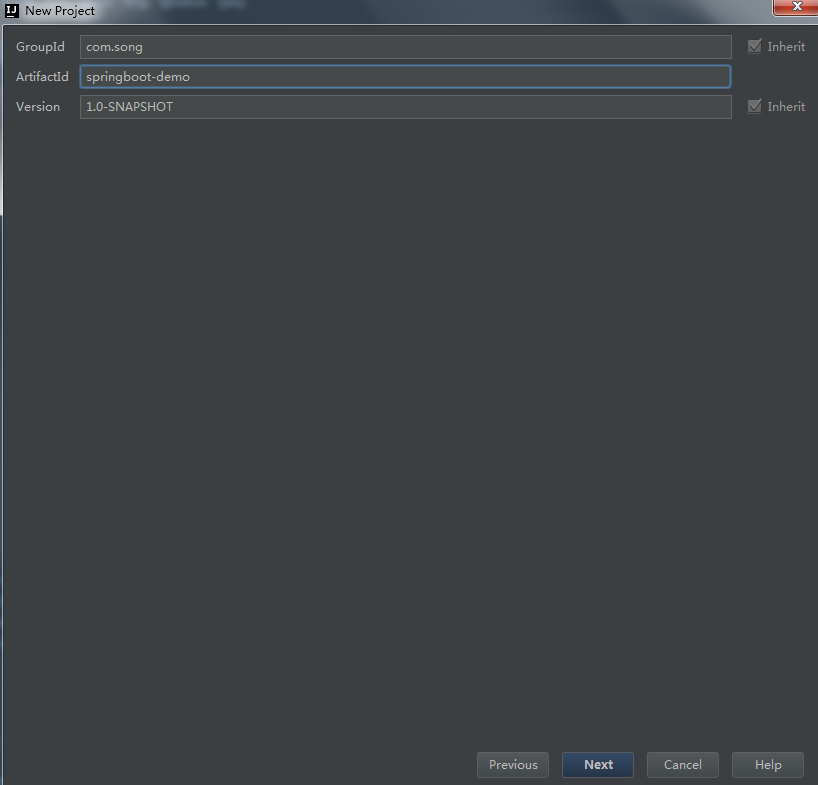
2)填写工程名,点击Next
3)填写Project Name 和location,点击Finish
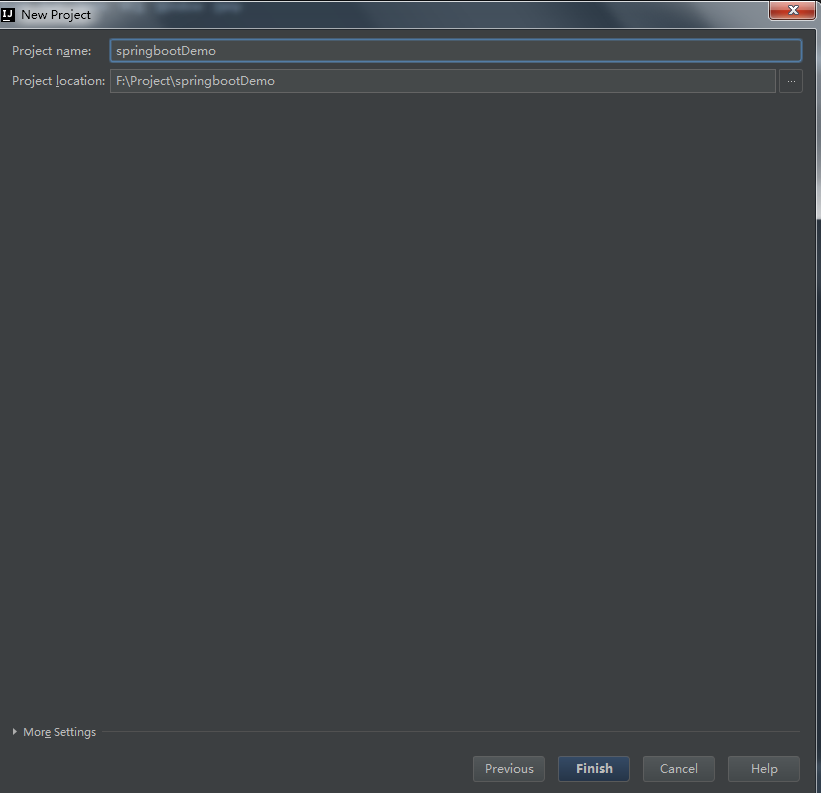
4)在pom文件中引入SpringBoot相关依赖
<parent>
    <groupId>org.springframework.boot</groupId>
    <artifactId>spring-boot-starter-parent</artifactId>
    <version>2.1.3.RELEASE</version>
</parent>
<dependencies>
    <dependency>
        <groupId>org.springframework.boot</groupId>
        <artifactId>spring-boot-starter-web</artifactId>
    </dependency>
</dependencies>
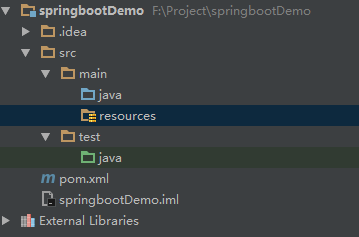
5)在resource目录下新建一个application.properties文件
配置tomcat端口
server.port=8080 server.tomcat.uri-encoding=utf-8
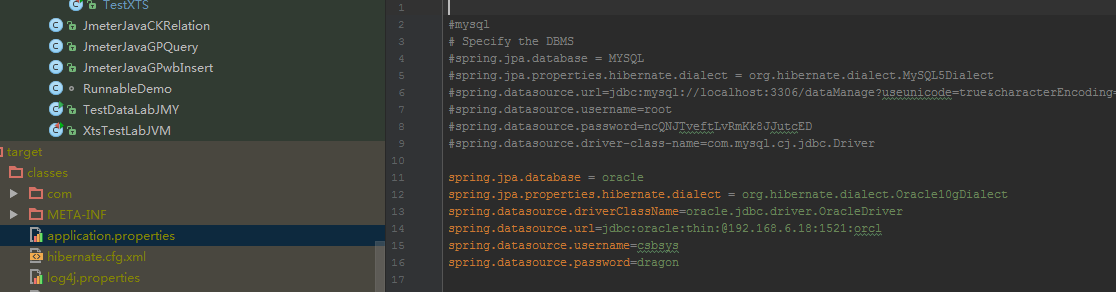
6)在application.properties中配置数据库连接信息
spring.datasource.driverClassName=oracle.jdbc.driver.OracleDriver
spring.datasource.url=jdbc:oracle:thin:@192.168.6.18:1521:orcl
spring.datasource.username=csbsys
spring.datasource.password=dragon
7)在application.properties中配置Spring Data JPA
spring.jpa.database = oracle
spring.jpa.properties.hibernate.dialect = org.hibernate.dialect.Oracle10gDialect
spring.jpa.show-sql = true
spring.jpa.hibernate.naming-strategy = org.hibernate.cfg.ImprovedNamingStrategy
8)设计Controller层(controller),Service层(service),Dao层(dao),创建配置类包(config),创建实体类包(entity),创建组件类包(component),创建公共类包(util)

9)配置项目启动类Application
@Configuration
@SpringBootApplication(exclude = {MongoAutoConfiguration.class,MongoDataAutoConfiguration.class})
@EnableJpaRepositories(basePackages = {"com.dragonsoft.dataManage.*"})
@EntityScan(value={"com.dragonsoft.dataManage.*"})
@ComponentScan(value = {"com.dragonsoft.dataManage.*"})
public class Application {
    public static void main(String[] args) throws Exception {
        //启动springboot
        ApplicationContext ac = SpringApplication.run(Application.class,args);
        SpringBeanUtil.setApplicationContext(ac);
}
10)启动项目(运行启动类Application)
页面访问地址tomcat配置的端口