在本文章中,主要使用jenkins和编写的自动化测试代码,来生成漂亮的测试报告,关于什么是CI这些
我就不详细的介绍了,这里我们主要是实战为主。
首先搭建java的环境,这个这里不做介绍。搭建好java的环境后,在https://jenkins.io/上下载jenkins,以及
在https://jenkins.io/上下载tomcat,都下载完成后,进行解压,把jenkins.war放在tomcat的webapps的目录下,
在tomcat的bin目录下,点击start.bat启动tomcat,启动后,在浏览器中访问http://localhost:8080/jenkins,首次
使用会看到需要输入密码,在windows环境下,密码是在C:UsersAdministrator.jenkinssecrets目录下,打开
initialAdminPassword文件,复制该内容,把它copy到jenkins的密码输入,然后下来选择安装插件,关于插件
这里就不详细的说明了。
这里我们使用allure来生成测试报告,我们知道,在python的自动化测试中,常用生成测试报告使用的是
HTMLTestRunner库,但是该库生成的测试报告不是很漂亮,我们使用allure可以生成很直观的测试报告而且
测试报告比较渲,下面就来详细的说明如何使用它来生成很酷的测试报告步骤。
首先需要在jenkins中安装插件Allure Jenkins Plugin,在jenkins的插件管理中,直接搜索allure可以搜索到,然后
选择安装就可以了。安装该插件成功后,点击jenkins的“系统管理”,在系统管理中,点击Global Tool Configuration,
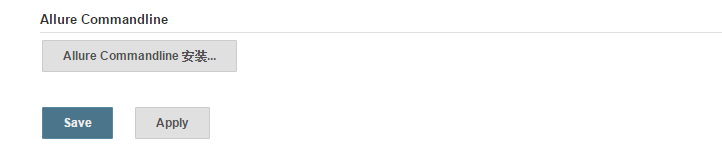
在Global Tool Configuration的界面安装allure,见截图:
点击“Allure Commandline安装...”,会出现如下的界面,见截图:
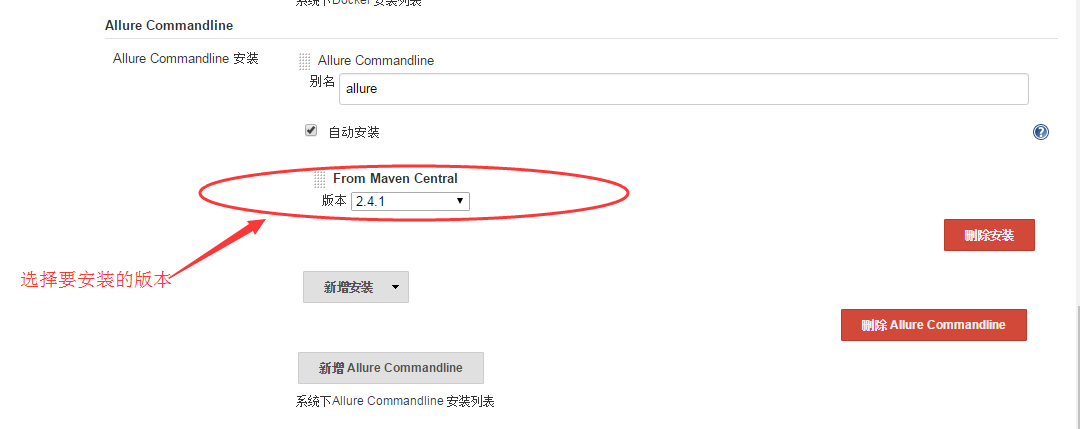
选择好后,点击save保存成功。
下来我们需要安装pytest,安装的命令为:
pip install pytest
pip install pytest-allure-adaptor
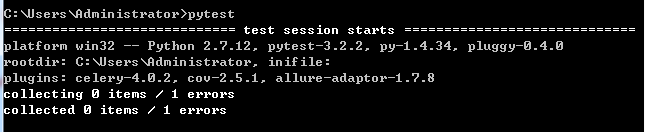
在线安装成功后,在cmd的命令中输入pytest,如果显示信息如下,表示安装OK,见截图:
OK,下面我们来编写代码,来进行测试,比如编写如下的测试代码,见编写后的源码:

#!/usr/bin/env python
#-*-coding:utf-8-*-

import  unittest

def div(a,b):
    return a-b


class DivTest(unittest.TestCase):
    def test_div_001(self):
        self.assertEqual(div(3,2),1)

    def test_div_002(self):
        self.assertEqual(div(3,3),0)

    def test_div_003(self):
        self.assertEqual(abs(div(2,3)),1)
下面我们通过pytest来执行该文件,见执行后的结果信息,见如下的截图:

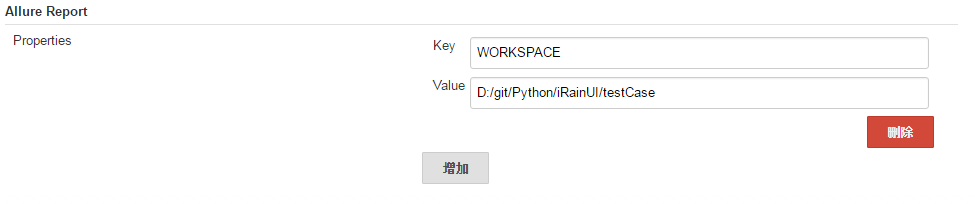
下面我们结合jenkins,pytest,allure来生成测试报告,在jenekins的系统设置中指定allure的测试报告目录,见
配置的截图:
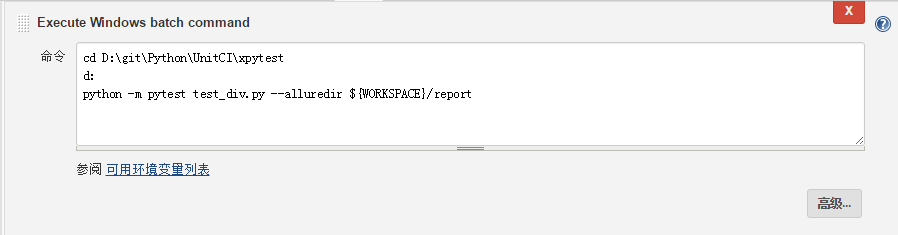
我们创建新的job,在构建步骤中选择windows batch command,填写执行的命令,见截图:
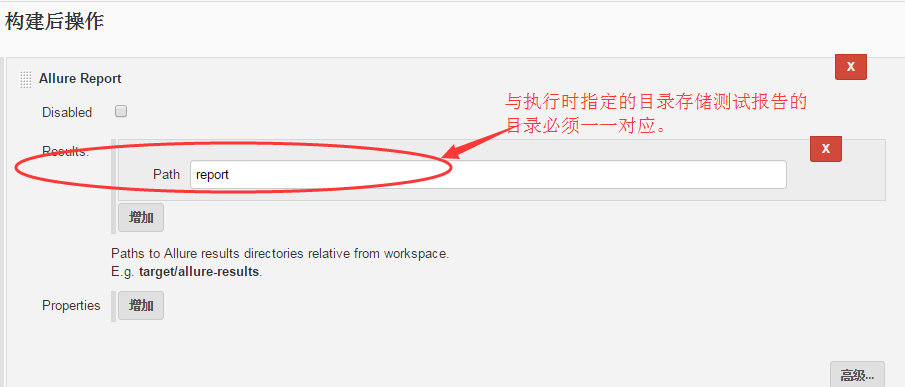
在构建后操作选择Allure Report,见截图:
点击保存,刚才创建的 job是blog,创建成功后,在项目详情页面,可以看到显示allure测试报告的图标,我们立即构建后,见构建后打印出的信息:
Started by user admin
Building in workspace C:UsersAdministrator.jenkinsworkspacelog
[blog] $ cmd /c call E:	oolsapache-tomcat-8.0.33	empjenkins8291797922995927059.bat

C:UsersAdministrator.jenkinsworkspacelog>cd D:gitPythonUnitCIxpytest

C:UsersAdministrator.jenkinsworkspacelog>d:

D:gitPythonUnitCIxpytest>python -m pytest test_div.py --alluredir ${WORKSPACE}/report
============================= test session starts =============================
platform win32 -- Python 2.7.12, pytest-3.2.2, py-1.4.34, pluggy-0.4.0
rootdir: D:gitPythonUnitCIxpytest, inifile:
plugins: celery-4.0.2, cov-2.5.1, allure-adaptor-1.7.8
collected 3 items

test_div.py ...

========================== 3 passed in 0.05 seconds ===========================

D:gitPythonUnitCIxpytest>exit 0
[blog] $ C:UsersAdministrator.jenkins	ools
u.yandex.qatools.allure.jenkins.tools.AllureCommandlineInstallationallureinallure.bat generate C:UsersAdministrator.jenkinsworkspacelog
eport -c -o C:UsersAdministrator.jenkinsworkspacelogallure-report
Report successfully generated to C:UsersAdministrator.jenkinsworkspacelogallure-report
Allure report was successfully generated.
Creating artifact for the build.
Artifact was added to the build.
Finished: SUCCESS
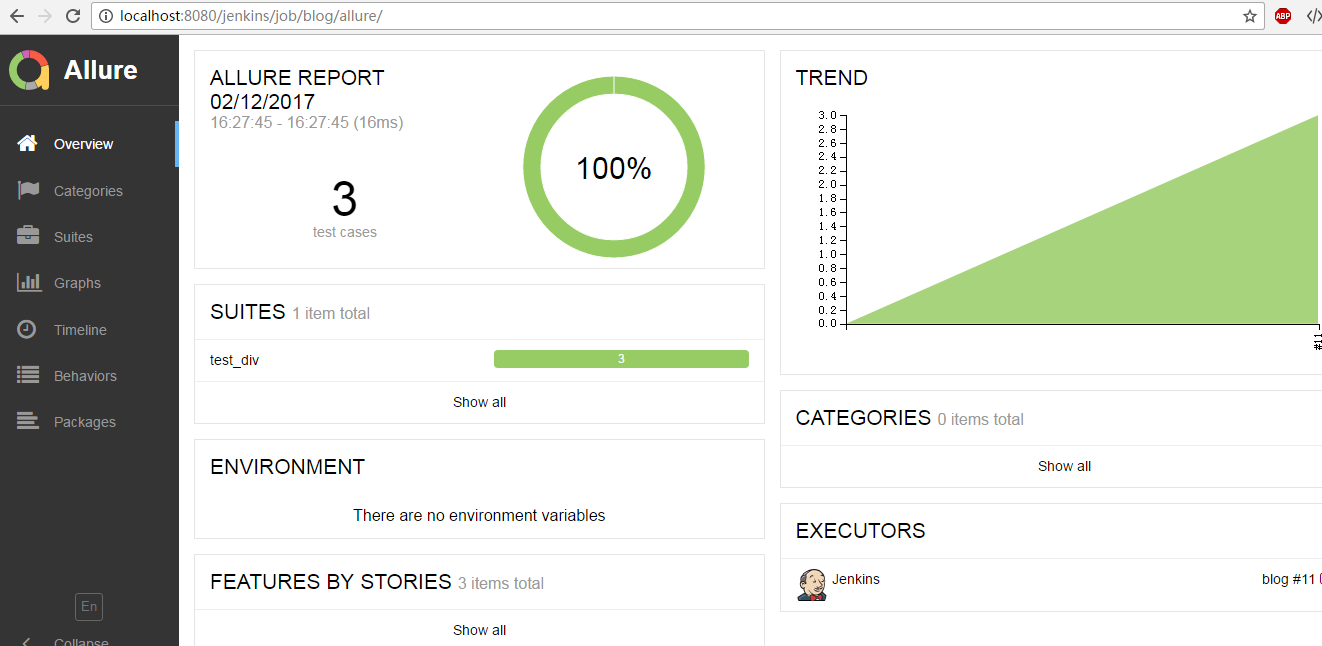
见blog的job的详情页面,见截图:
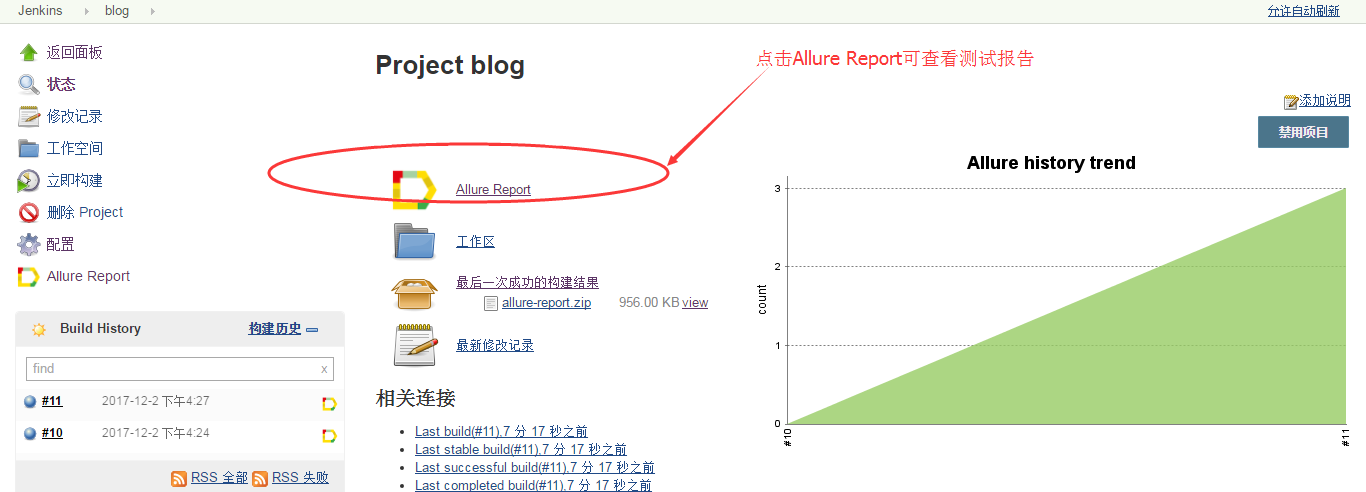
见点击Allure Report后的测试报告,见截图: