Pytest
它具有如下特点:
- 非常容易上手,入门简单,文档丰富,文档中有很多实例可以参考
- 能够支持简单的单元测试和复杂的功能测试
- 支持参数化
- 执行测试过程中可以将某些测试跳过(skip),或者对某些预期失败的case标记成失败
- 支持重复执行(rerun)失败的 case
- 支持运行由 nose, unittest 编写的测试 case
- 可生成 html 报告
- 方便的和持续集成工具 jenkins 集成
- 可支持执行部分用例
- 具有很多第三方插件,并且可以自定义扩展
安装Pytest
cmd运行
pip install -U pytest

pip3 install pytest -i http://pypi.douban.com/simple/ --trusted-host pypi.douban.com
查看版本
pytest --version
快速开始,创建测试文件ptest1.py如下:
# -*- coding: utf-8 -*-

"""
__title__  = pytest study
__Time__   = 2021-04-12 08:47
__Author__ = sary

"""

def func(x):
    return x + 1


def test_answer():
    assert func(3) == 5


class TestClass:
    def test_one(self):
        x = "this"
        assert "h" in x

    def test_two(self):
        x = "hello"
        assert hasattr(x, "check")
执行:cmd进入当前文件目录,直接执行
pytest ptest1.py
输出如下:
D:PythonCodepytest_study>pytest ptest1.py
================================================= test session starts =================================================
platform win32 -- Python 3.9.0, pytest-6.2.3, py-1.10.0, pluggy-0.13.1
rootdir: D:PythonCodepytest_study
collected 3 items

ptest1.py F.F                                                                                                    [100%]

====================================================== FAILURES =======================================================
_____________________________________________________ test_answer _____________________________________________________

    def test_answer():
>       assert func(3) == 5
E       assert 4 == 5
E        +  where 4 = func(3)

ptest1.py:15: AssertionError
_________________________________________________ TestClass.test_two __________________________________________________

self = <ptest1.TestClass object at 0x000001BA4DF8BF70>

    def test_two(self):
        x = "hello"
>       assert hasattr(x, "check")
E       AssertionError: assert False
E        +  where False = hasattr('hello', 'check')

ptest1.py:25: AssertionError
=============================================== short test summary info ===============================================
FAILED ptest1.py::test_answer - assert 4 == 5
FAILED ptest1.py::TestClass::test_two - AssertionError: assert False
============================================= 2 failed, 1 passed in 0.34s =============================================
知识点
- 如果只执行 pytest ,会查找当前目录及其子目录下以 test_*.py 或 *_test.py 文件,找到文件后,在文件中找到以 test 开头函数并执行
- 如果只想执行某个文件,可以 pytest ptest1.py
- 加上-q,就是显示简单的结果: pytest -q ptest1.py
Pytest用例的设计原则
用Pytest写用例时候,一定要按照下面的规则去写,否则不符合规则的测试用例是不会执行的
- 文件名以 test_*.py 文件和*_test.py
- 以 test_ 开头的函数
- 以 Test 开头的类,不能包含 __init__ 方法
- 以 test_ 开头的类里面的方法
- 所有的包 pakege 必须要有__init__.py 文件
Pytest执行用例规则
注意,下面讲的都是在cmd中执行pytest命令
1、某个目录下所有的用例
pytest
2、执行某一个 py 文件下用例
pytest 脚本名称.py
3、运行ptest1.py 模块里面的某个函数,或者某个类,某个类里面的方法
加v和不加-v都可以,加-v的话,打印的信息更详细
pytest -v ptest1.py::TestClass::test_method

pytest ptest1.py::TestClass::test_method

pytest ptest1.py::test_answer
4、运行ptest1.py 模块里面,测试类里面的某个方法
pytest ptest1.py::TestClass::test_two
5、-m 标记表达式
将运行用 @pytest.mark.login 装饰器修饰的所有测试
6、-q 简单打印,只打印测试用例的执行结果
7、-s 详细打印
8、-x 遇到错误时停止测试
9、—maxfail=num,当用例错误个数达到指定数量时,停止测试
10、-k 匹配用例名称
执行测试用例名称包含http的所有用例
pytest -s -k http ptest1.py
11、-k 根据用例名称排除某些用例(not)
pytest -s -k "not http" ptest1.py
12、-k 同时匹配不同的用例名称(or)
pytest -s -k "method or weibo" ptest1.py
调用pytest通过python -m pytest
在新的版本中,我们可以python -m pytest来进行调用,比如:
python -m pytest ...
Possible Exit codes
运行pytest可能导致6种不同的退出执行的方式,分别是:
退出代码0成功地收集并传递了所有测试
退出代码1测试被收集和运行, 但一些测试失败
退出代码2测试执行被用户中断
退出代码3执行测试时发生内部错误
退出代码 4 pytest 命令行使用错误
退出代码5未收集任何测试
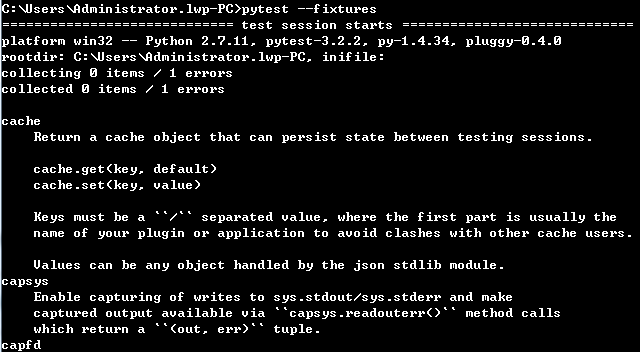
显示可用的内置函数参数
分析测试执行持续时间
我们编写一个模块,来执行该模块,看测试执行的时间,模块的代码是为:
#!/usr/bin/env python
from __future__ import unicode_literals
# -*- coding: utf-8 -*-

def test_answser():
    assert 3 in [3,4,5]
执行pytest --durations=10看持续执行的时间,见执行的截图:

创建JUnitXML 格式文件
我们通过pytest --junitxml=path可以创建junit xml的格式文件,执行命令成功后,在当前的目录下创建了path的文件夹,该文件夹中
生成了xml的文件,见执行的命令和执行命令后输出的结果信息:

见当前目录生成的path文件夹以及里面的内容:
