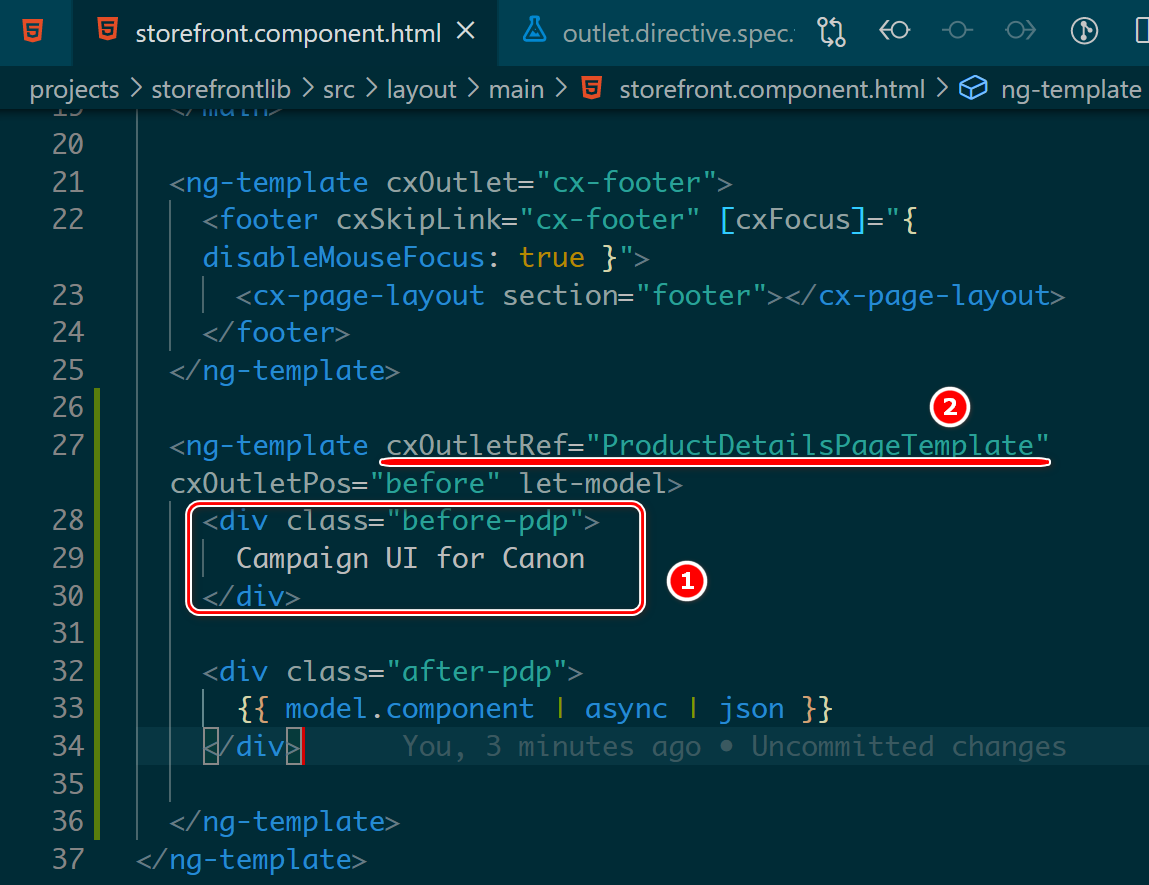
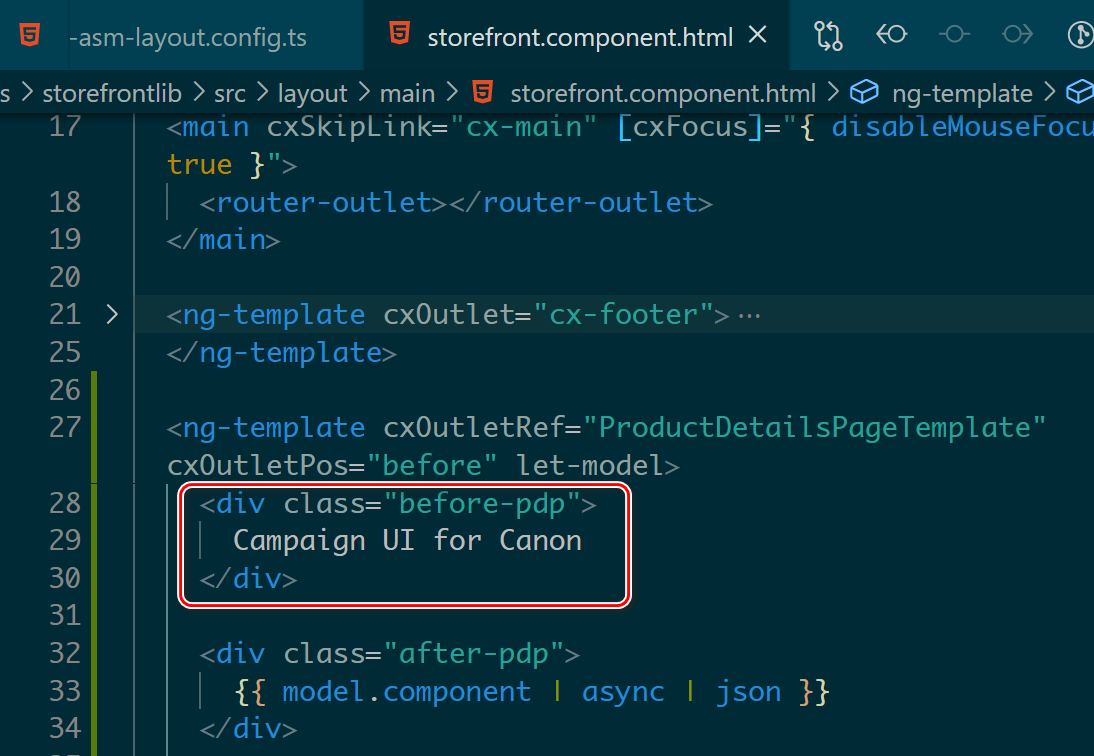
先看 cxOutletRef 指令的效果:ng-template 里定义了如下图标 1 区域所示的自定义 UI,通过 cxOutletRef, 将其插入到图标 2 所示的 ProductDetailsPageTemplate里:
源代码:
<ng-template cxOutletRef="ProductDetailsPageTemplate" cxOutletPos="before" let-model>
    <div class="before-pdp">
      Campaign UI for Canon
    </div>

    <div class="after-pdp">
      {{ model.component | async | json }}
    </div>

  </ng-template>
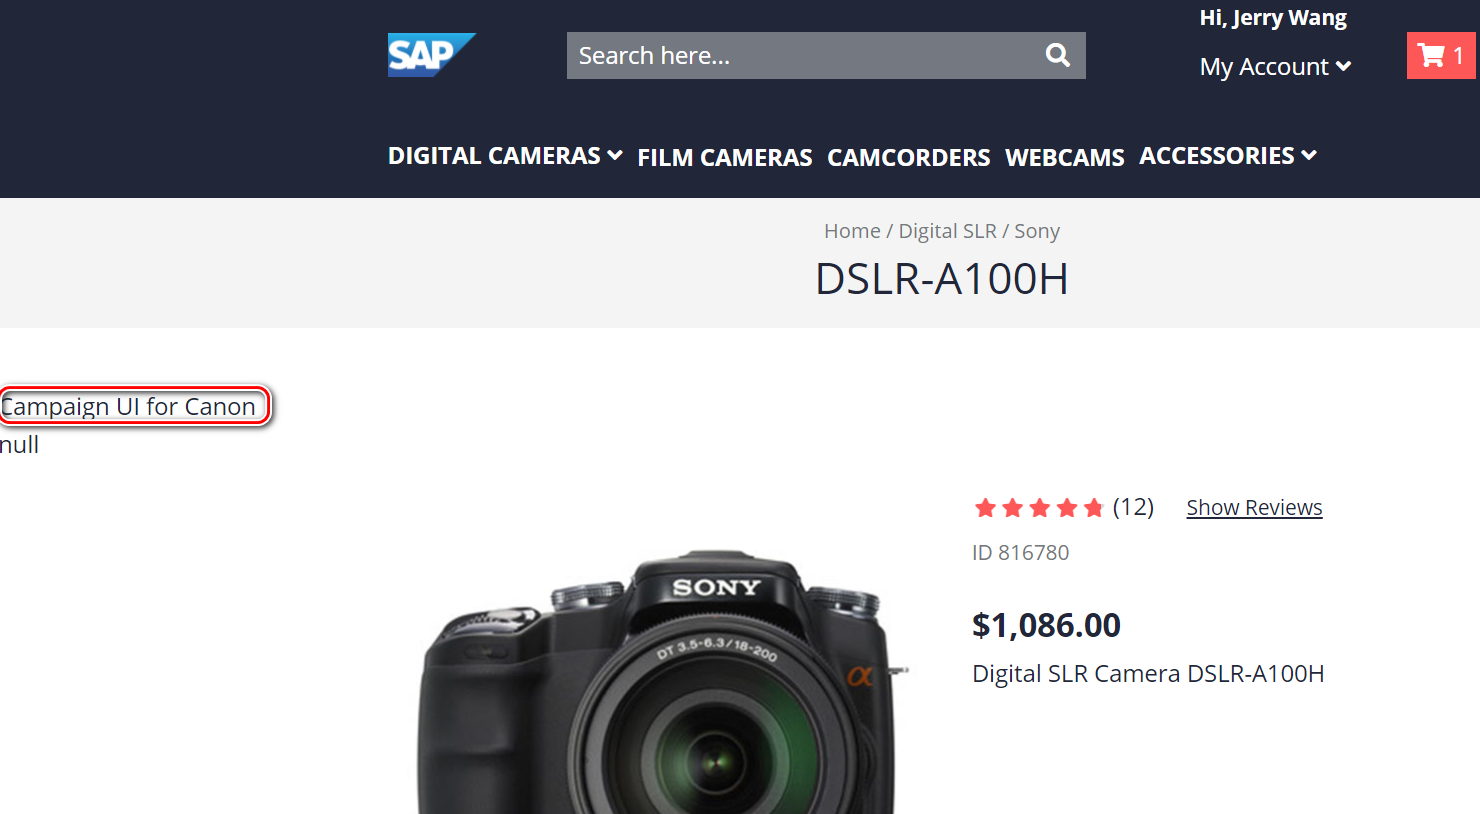
运行时的效果:
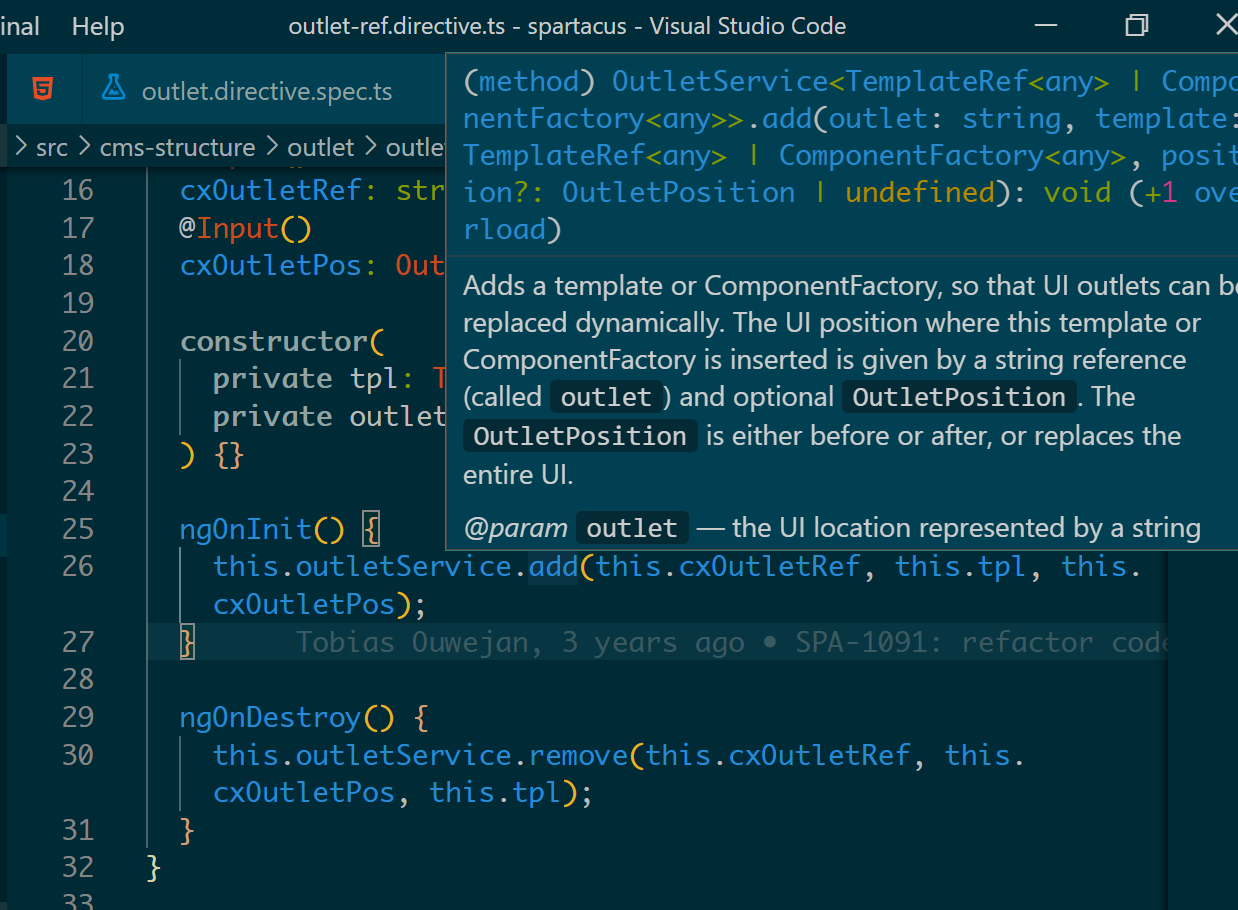
查看源代码,发现该指令的有效实现不多,仅仅调用 OutletService.add 方法:
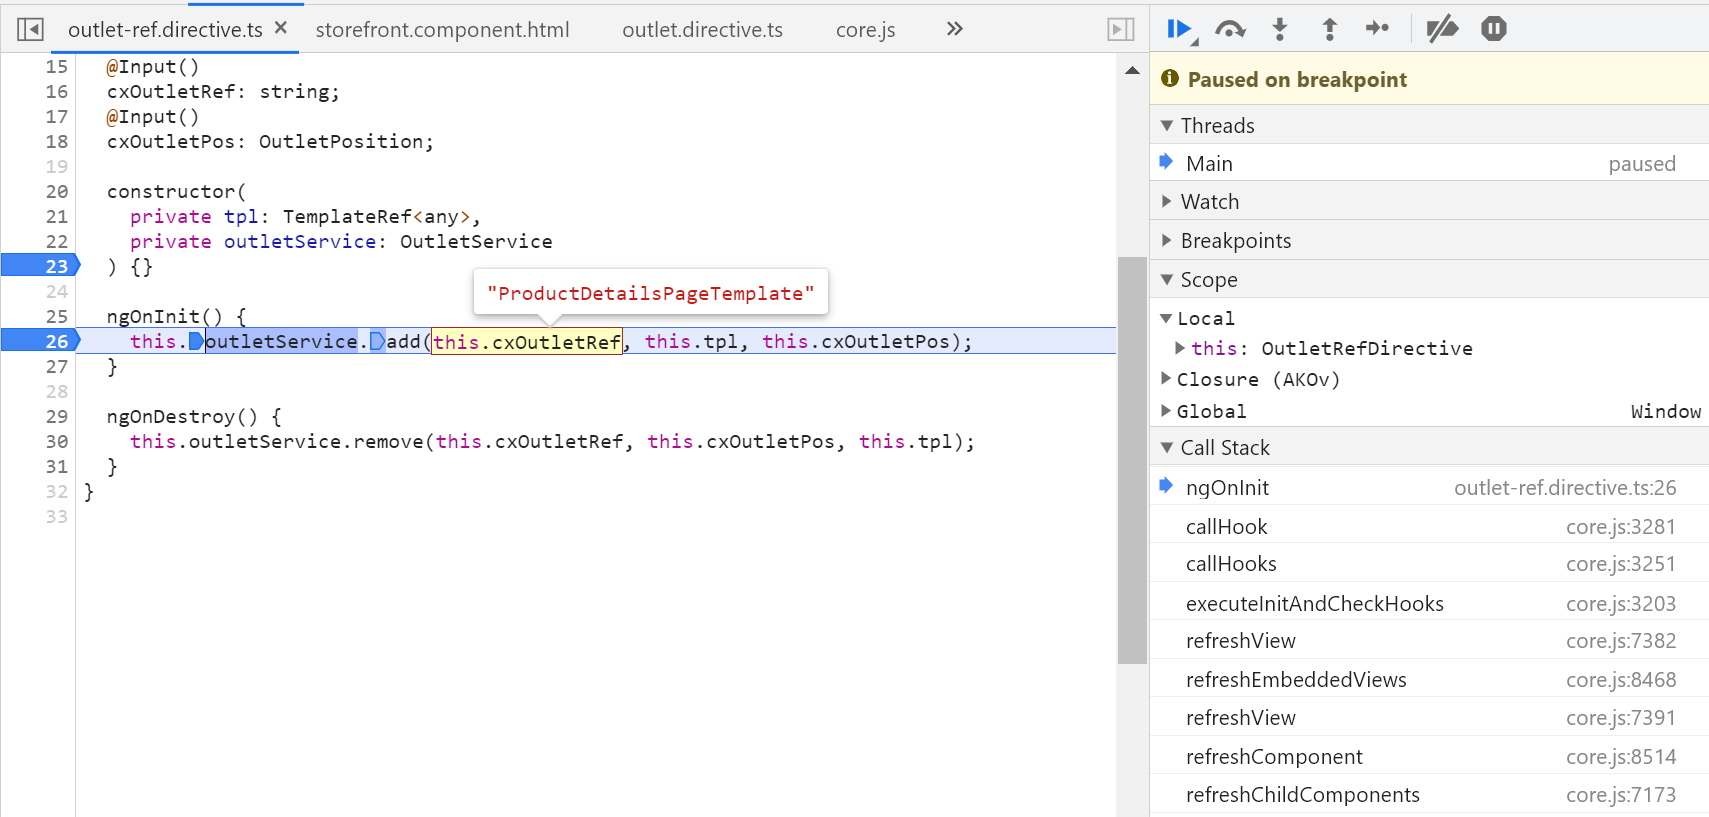
仔细阅读 add 方法的三个参数:
-
outlet:代表自定义 UI 插入的 UI 位置,通过字符串代表。可以将 template 或者 ComponentFactory 插入该字符串代表的 UI 位置。
-
tpl: 待插入的自定义 UI 所在的页面模板实例。

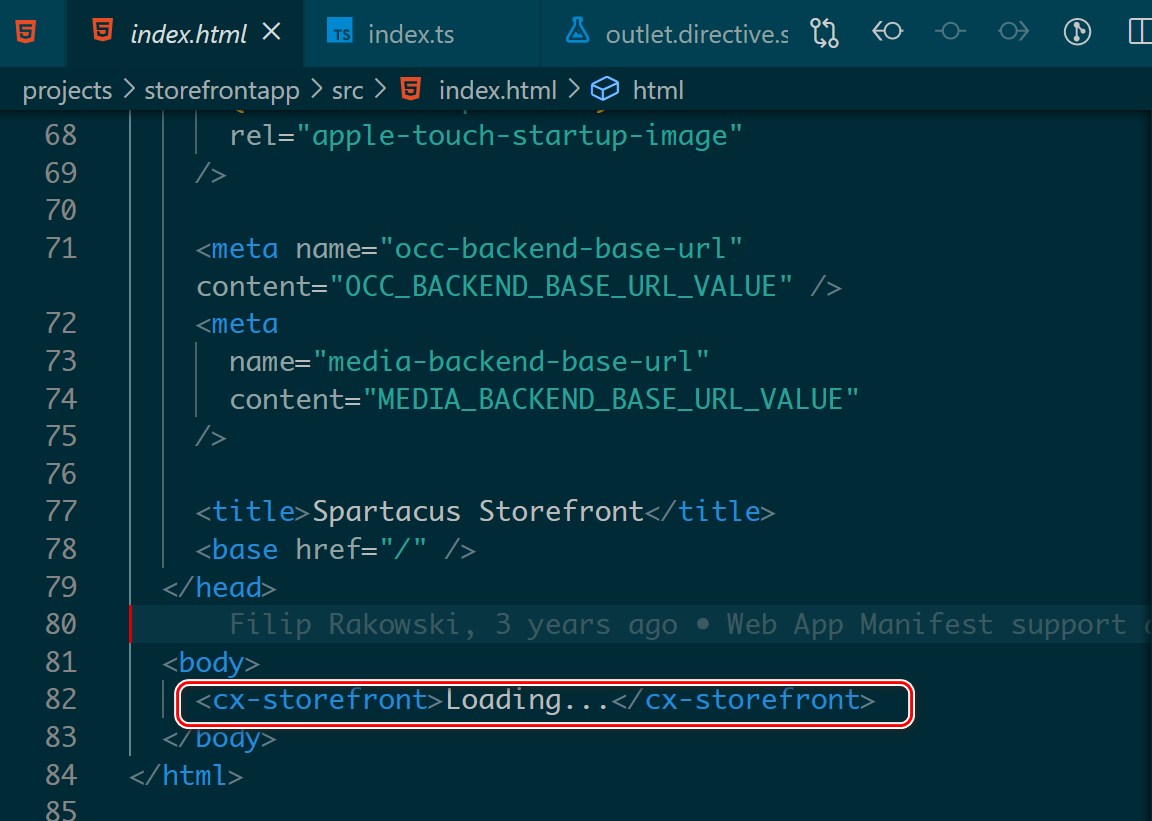
index.html 页面里只有一个 cx-storefront selector, 对应 StorefrontComponent:
Outlet.service.ts 里维护了一个字典结构,key 为 outlet 名称,值为 cxOutletRef 指令所在的 ng-template 实例。

Storefront Component refresh 时,会调用 hook,包含施加在其上的 Directive:
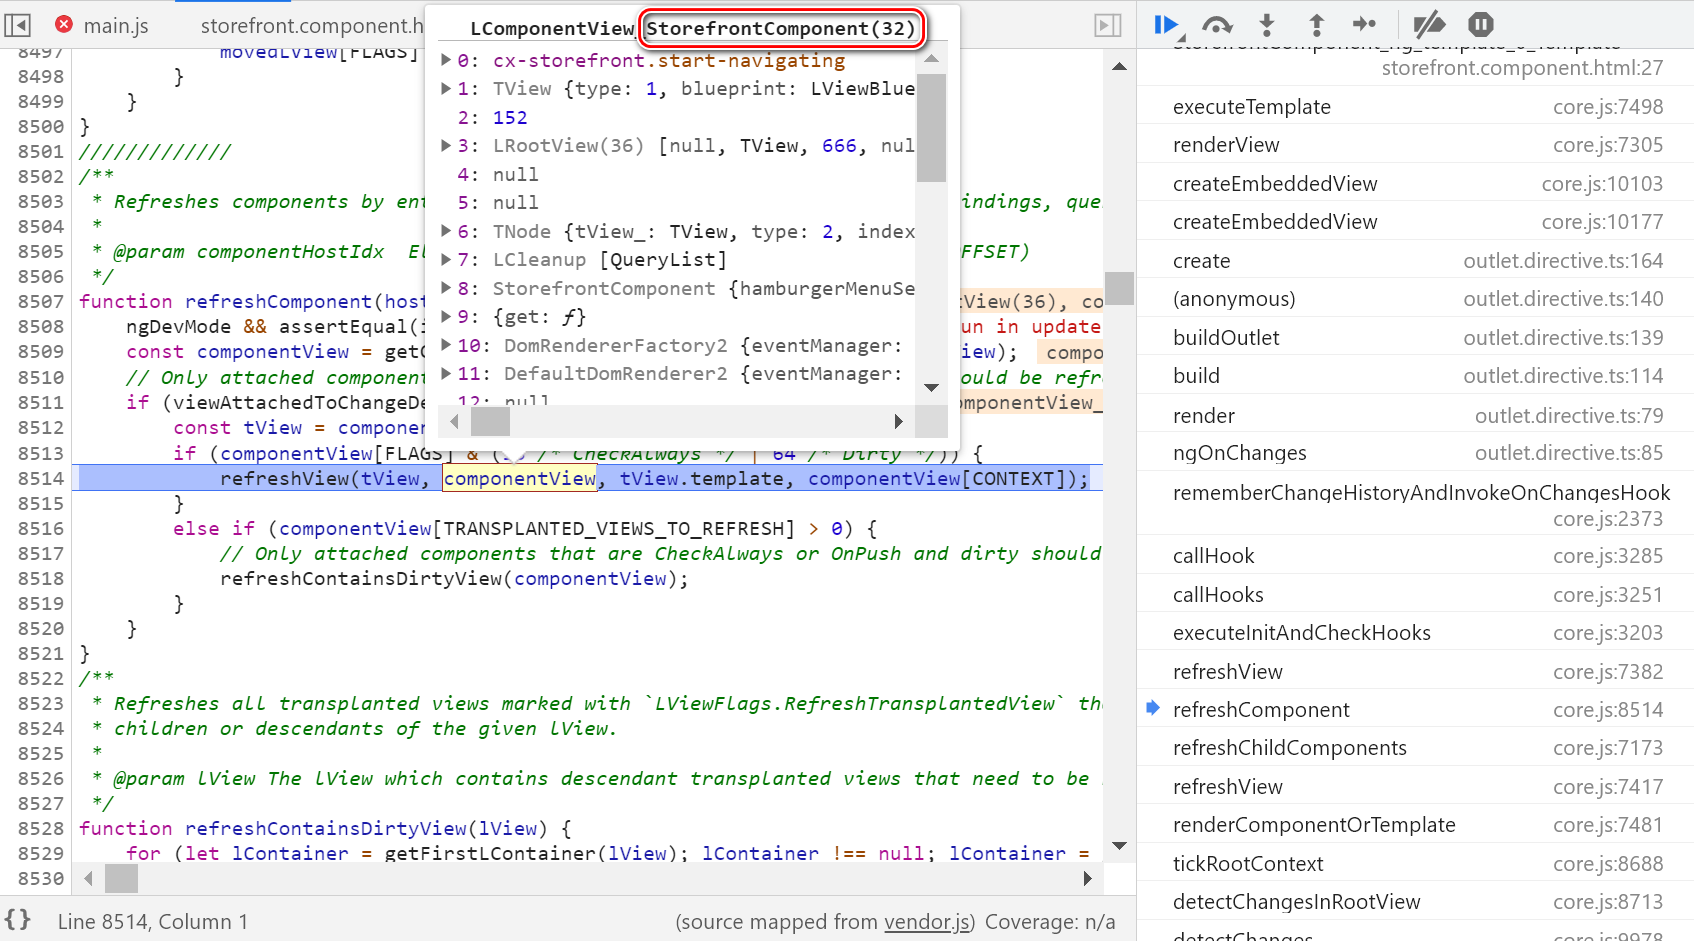
通过 Angular 标准的 ngOnChanges lifecycle hook,触发该 cxOutlet Directive 的 render 方法:


在渲染 embedded view 时,如果遇到该视图包含了 cxOutlefRef 指令,就触发依赖注入机制,生成该指令的实例。


从 Angular 内部变量 _lView 里,我们可以轻易辨别出当前 ng_template 实例代表的页面:
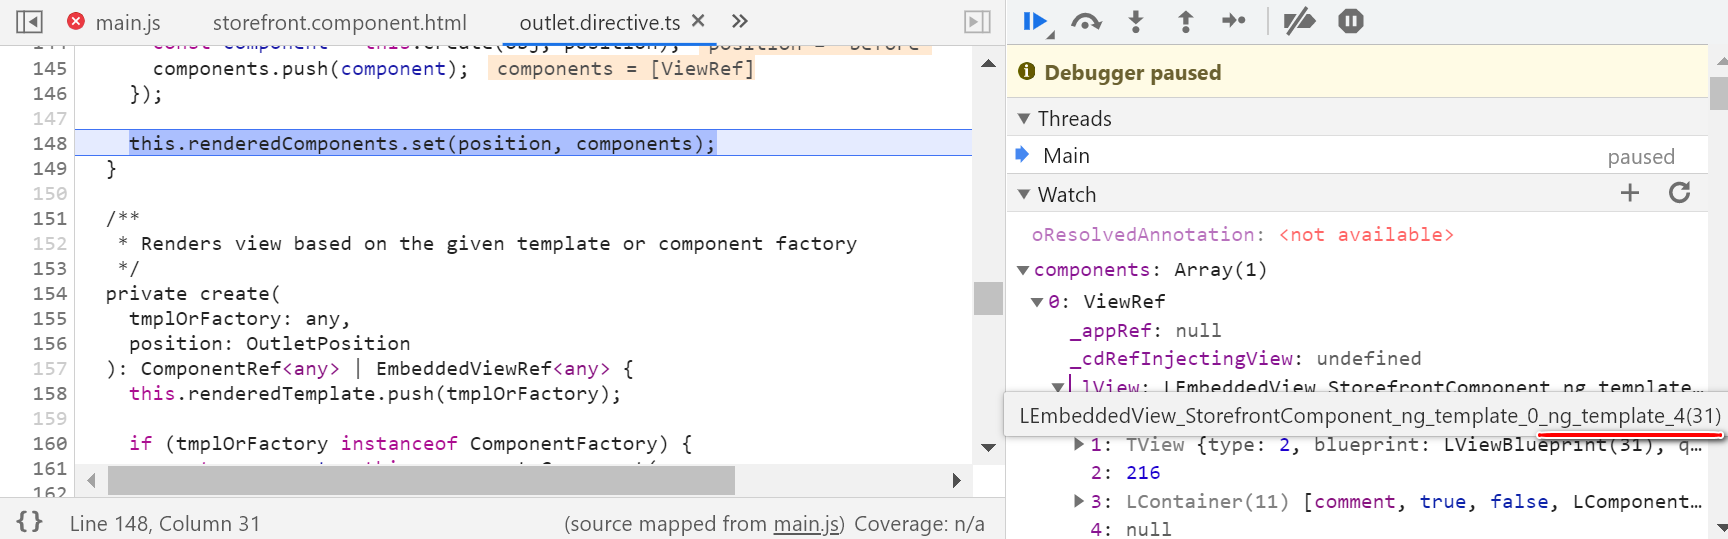
比如这个高亮的结构:
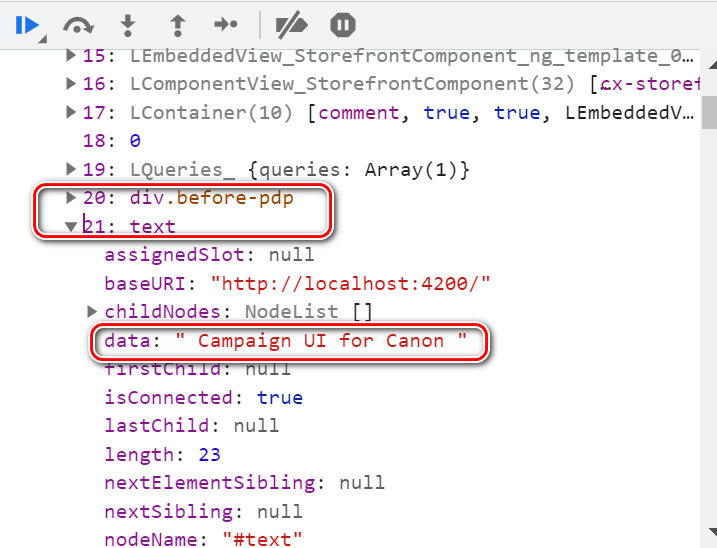
对应了 HTML 里这段 ng-template 声明:
而 div.after-pdp 及 text, JsonPipe 和 AsyncPipe:

对应 template 里这段代码:

直接在 .html 文件里设置断点:

在最新版本的 Chrome 里,这些断点可以直接触发了:

在渲染 cxOutletRef 指向的 ProductDetailsPageTemplate 时,会触发 outlet Directive 的 ngOnChanges 方法:

这一切,都归功于 SAP Spartacus 独特的设计,即所有 Angular Component,都通过 PageLayoutComponent 进行渲染:
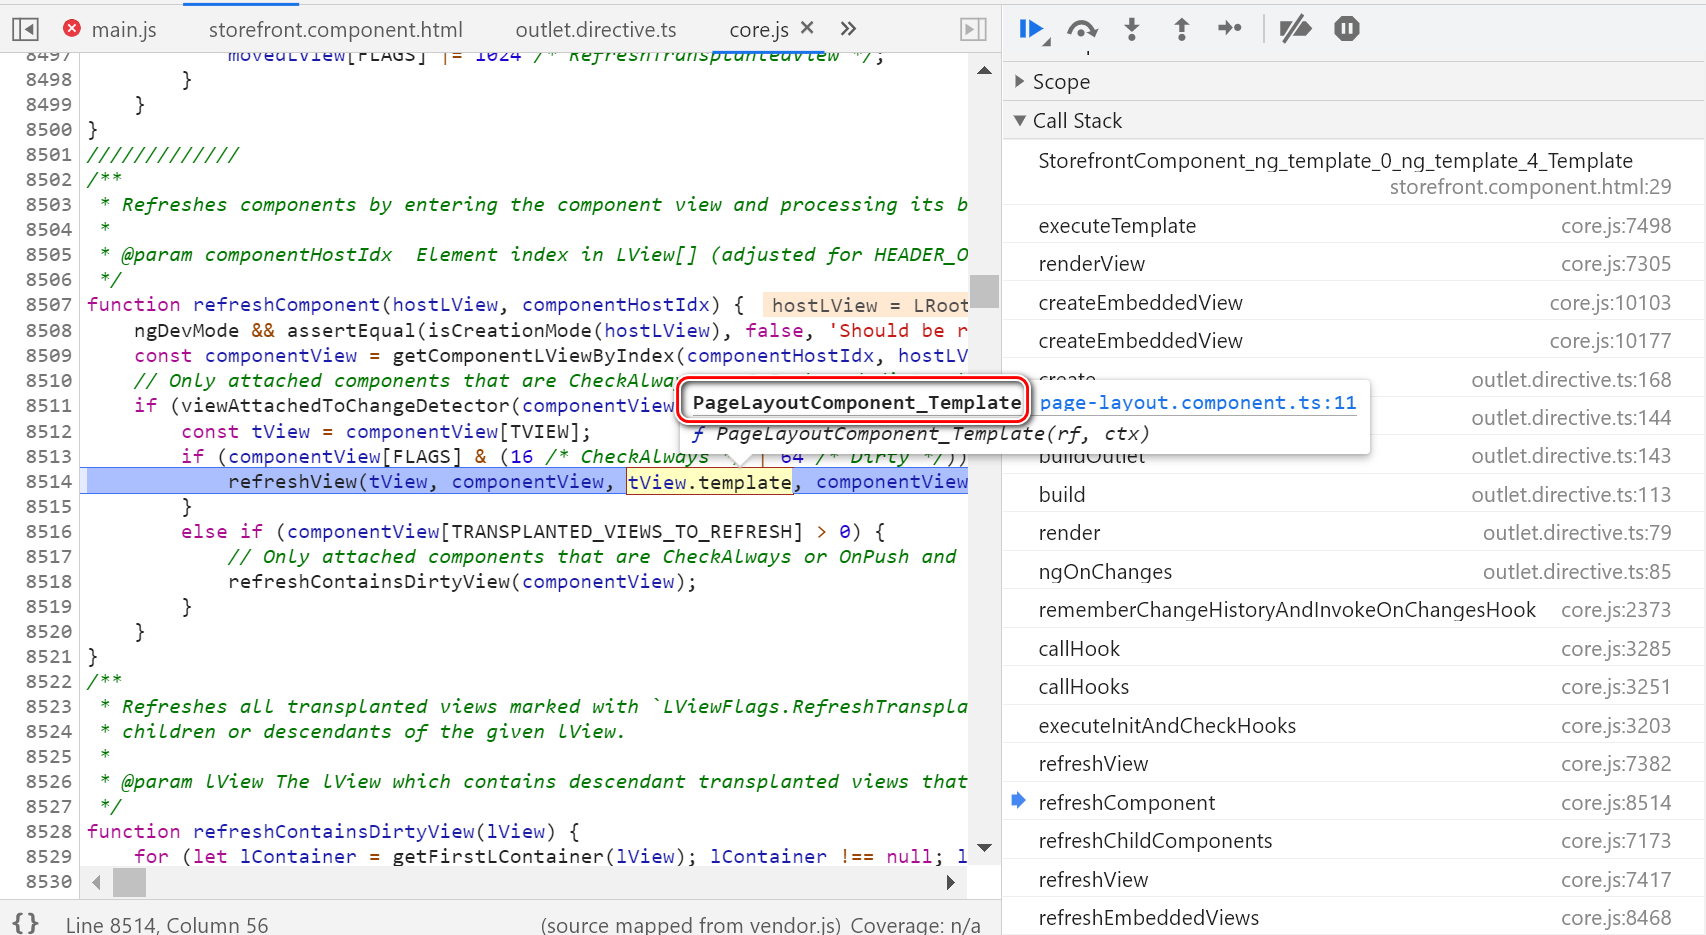

而 PageLayoutComponent 实现里,包含了 cxOutlet 的消费:

更多Jerry的原创文章,尽在:"汪子熙":