一、在线安装
官网地址:
https://www.envoyproxy.io/docs/envoy/latest/
本案例 envoy 是安装在虚拟机上,虚拟机的操作系统为:centos8
1、执行以下命令,通过 yum 进行安装
yum install yum-utils
yum-config-manager --add-repo https://getenvoy.io/linux/centos/tetrate-getenvoy.repo
yum install getenvoy-envoy
|
2、校验安装是否成功
| envoy --vesion |

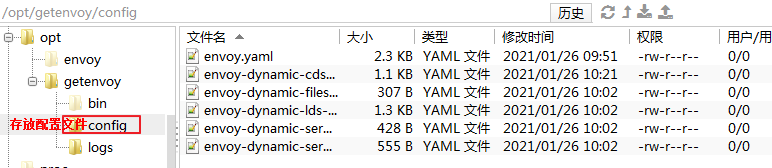
可以看到被默认安装在了 /opt/getenvoy下,补充其它目录,可以看到完整目录结构如下:
3、启动
(1) 配置简单的 envoy.yaml (envoy 启动需要的配置文件)
static_resources:

  listeners:
  - name: listener_0
    address:
      socket_address:
        address: 0.0.0.0
        port_value: 10001     //listener 提供的对外的端口
    filter_chains:
    - filters:
      - name: envoy.filters.network.http_connection_manager
        typed_config:
          "@type": type.googleapis.com/envoy.extensions.filters.network.http_connection_manager.v3.HttpConnectionManager
          stat_prefix: ingress_http
          access_log:
          - name: envoy.access_loggers.file
            typed_config:
              "@type": type.googleapis.com/envoy.extensions.access_loggers.file.v3.FileAccessLog
              path: /dev/stdout    //拦截的请求日志,这里配置输出到控制台上
          http_filters:
          - name: envoy.filters.http.router   // route 过滤器
          route_config:    // 静态路由配置,这里表示 10001 端口上的进入流量 "/" 被路由到集群 service_envoyproxy_io 上
            name: local_route
            virtual_hosts:
            - name: local_service
              domains: ["*"]
              routes:
              - match:
                  prefix: "/"
                route:
                  host_rewrite_literal: www.envoyproxy.io
                  cluster: service_envoyproxy_io

  clusters:
  - name: service_envoyproxy_io   //集群 service_envoyproxy_io 的相关配置
    connect_timeout: 30s
    type: LOGICAL_DNS
    # Comment out the following line to test on v6 networks
    dns_lookup_family: V4_ONLY
    load_assignment:   //配置集群中的多个实例信息
      cluster_name: service_envoyproxy_io
      endpoints:
      - lb_endpoints:
        - endpoint:    //配置一个实例信息
            address:
              socket_address:
                address: www.envoyproxy.io
                port_value: 443
    transport_socket:
      name: envoy.transport_sockets.tls
      typed_config:
        "@type": type.googleapis.com/envoy.extensions.transport_sockets.tls.v3.UpstreamTlsContext
        sni: www.envoyproxy.io

admin:    //envoy 的管理服务
  access_log_path: logs/admin_envoy.log
  address:
    socket_address:
      address: 0.0.0.0
      port_value: 9901
(2) 在 控制台上执行启动命令
|
cd /opt/getenvoy envoy -c config/envoy.yaml --log-path logs/envoy.log -l trace |
其中:
- --log-path 配置日志输出地址
- -l 配置日志等级
二、离线安装
待续