官方文档地址:https://swiftype.com/documentation/app-search/getting-started
Elastic App Search 架构图:
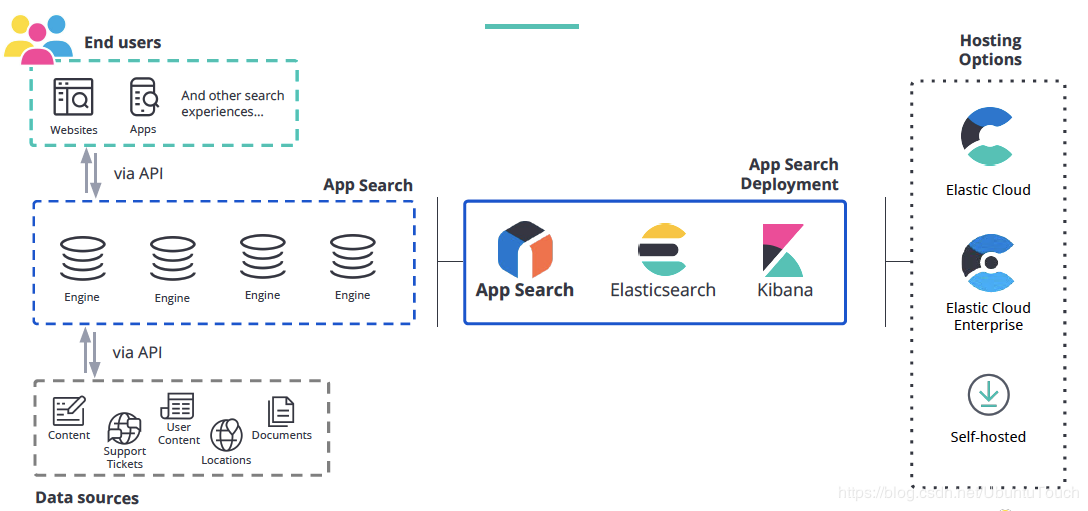
它的特点是帮助开发者随心所欲的为已有的或者正在开发的项目增加功能强大的搜索功能,而且将搜索功能的实施成本降低到无痛点的程度。App Search 可以覆盖的使用场景如下:
SaaS / web 应用
复杂的电商应用
客户支持服务站点
Geo 地理搜索
公司官网
内部的搜索
还有更多其他
1.安装好elasticsearch和kibana,不使用https,不开启安全,不设置账号密码等,分别启动等
2.配置java环境,详看这篇文章:https://www.cnblogs.com/sanduzxcvbnm/p/12522735.html
3.在Elasticsearch的安装根目录中打开文件config/elasticsearch.yml文件,并添加如下的配置:
action.auto_create_index: ".app-search-*-logs-*,-.app-search-*,+*"
等修改完后,重新启动Elasticsearch
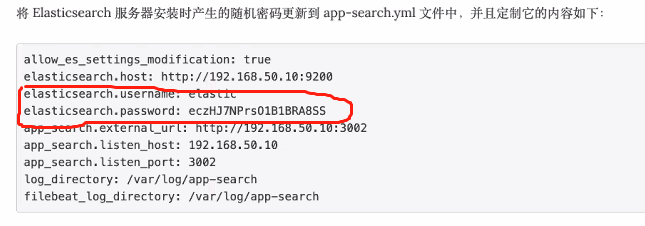
4.打开App search安装目录下的confing/app-search.yml文件,做如下的配置:
allow_es_settings_modification: true
elasticsearch.host: http://192.168.80.10:9200 # 连接es的地址,根据实际情况而定

# Define the exposed URL at which users will reach App Search.定义用户访问应用程序搜索的公开URL
app_search.external_url: http://192.168.80.10:3002

# Web application listen_host and listen_port.Web应用程序侦听主机和侦听端口
app_search.listen_host: 192.168.80.10
app_search.listen_port: 3002
# app_search连接es的话配置的es的有账号和密码,则在初始化app_search的时候会自动给app_search创建账号密码

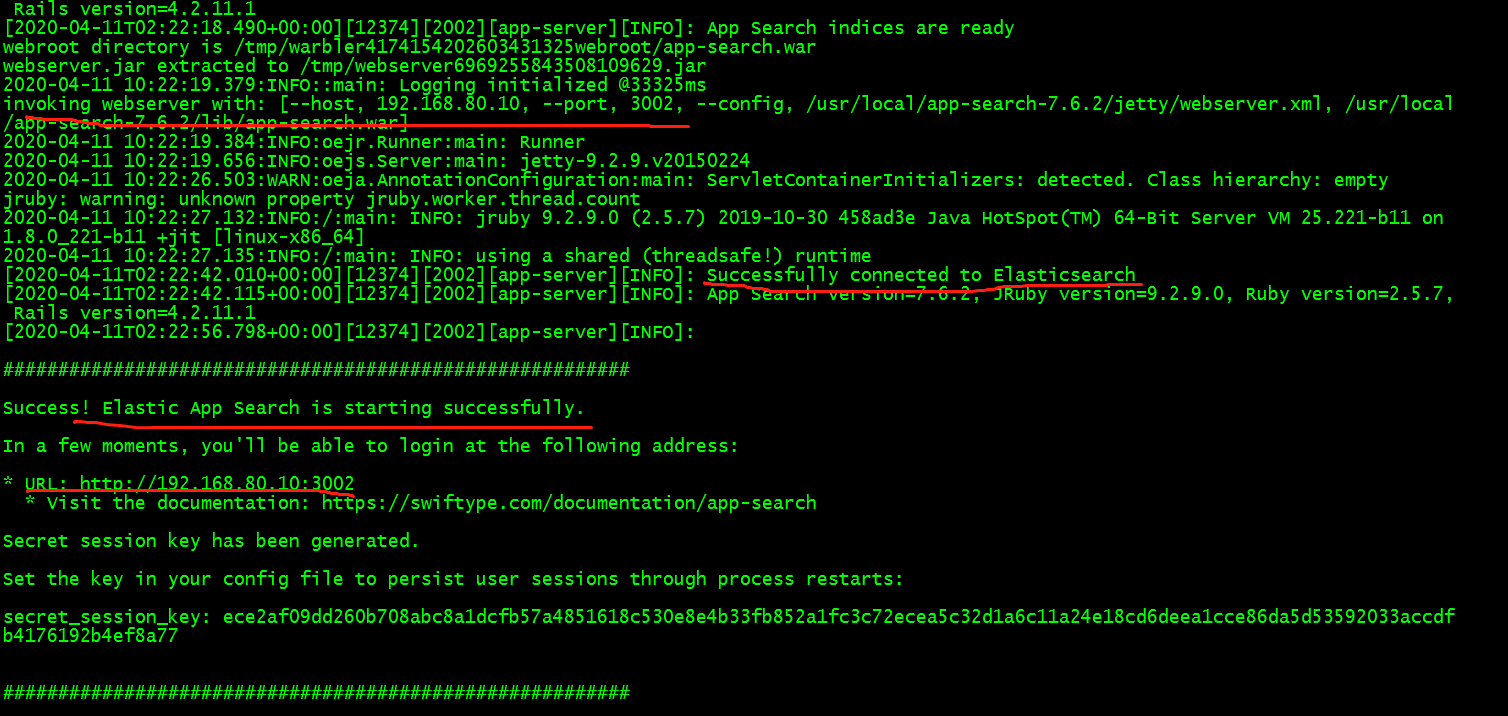
启动app_search,信息如下:
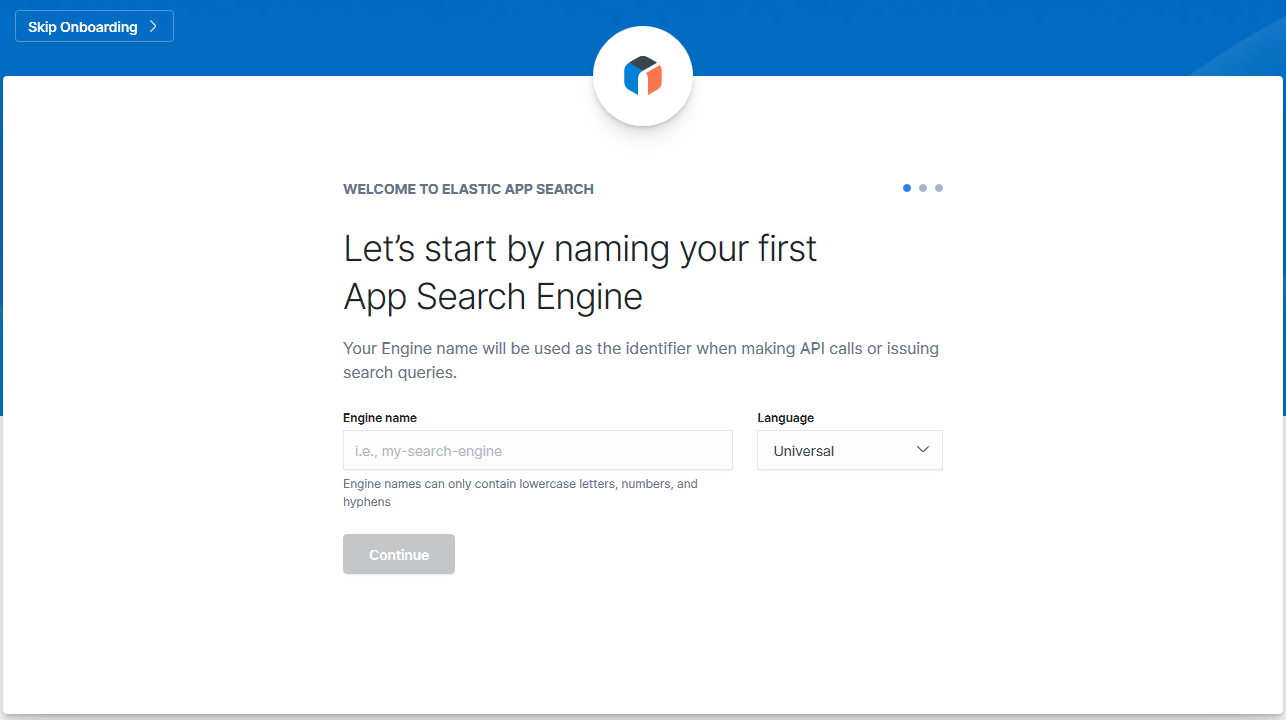
5.打开浏览器,输入地址http://192.168.80.10:3002,出现的界面如下:
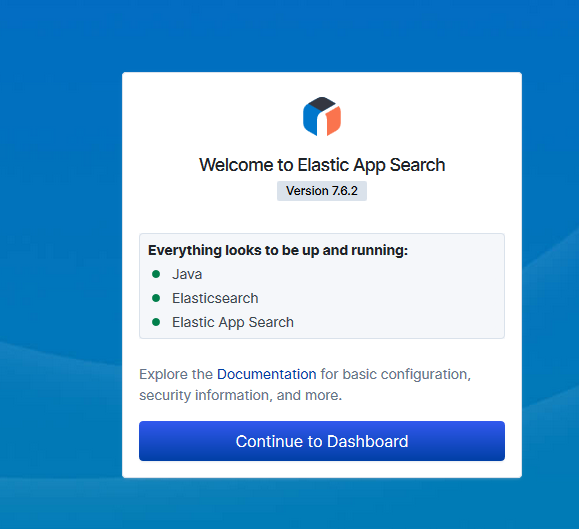
到此为止,App Search 服务器的安装就完成了。它其实是一个基于 Elasticsearch 的搜索服务平台。
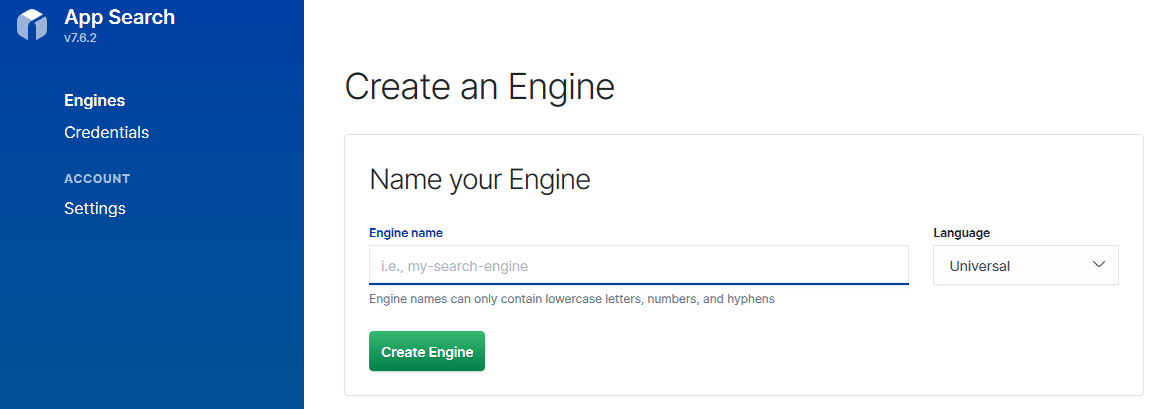
点击上面的Continue to Dashboard按钮:
点击右上角的Skip跳过的话则会进入这个界面:
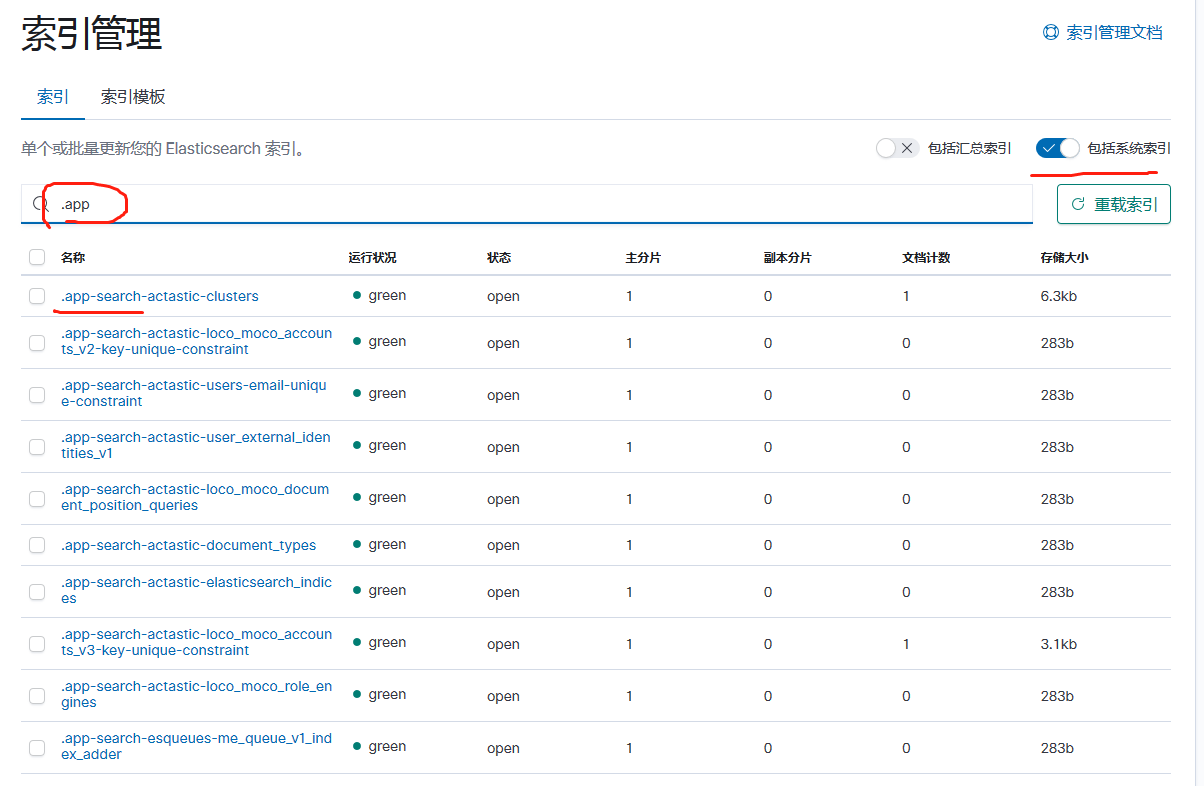
查看kibana索引管理信息,会看到有好多.app-search的系统索引
6.导入json文件
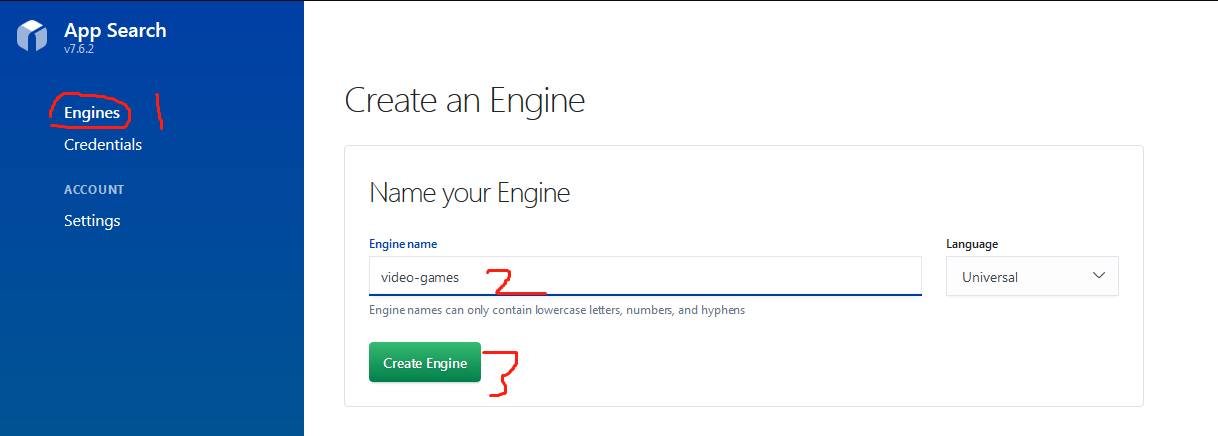
点击左上角的"Engines",然后再点击右上角的"Create an Engines",输入Engines名称,然后点击"Create Engines"
进入到如下界面:
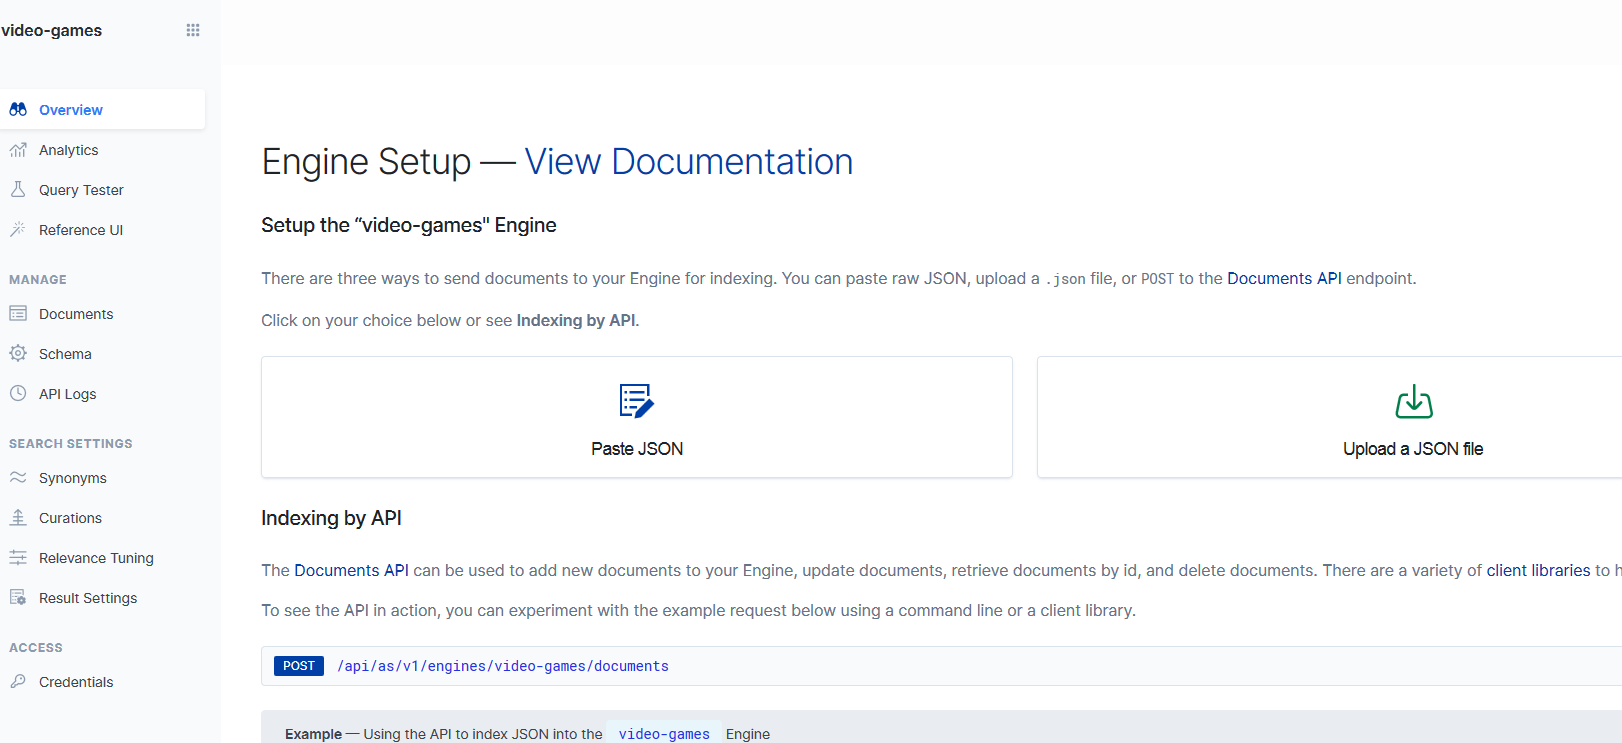
有三种导入数据的方式:
第一种:选择"Paste JSON",粘贴json数据,然后导入
第二种:选择"Upload a JSON File",选择一个json文件,然后导入
第三种:使用API接口导入文件
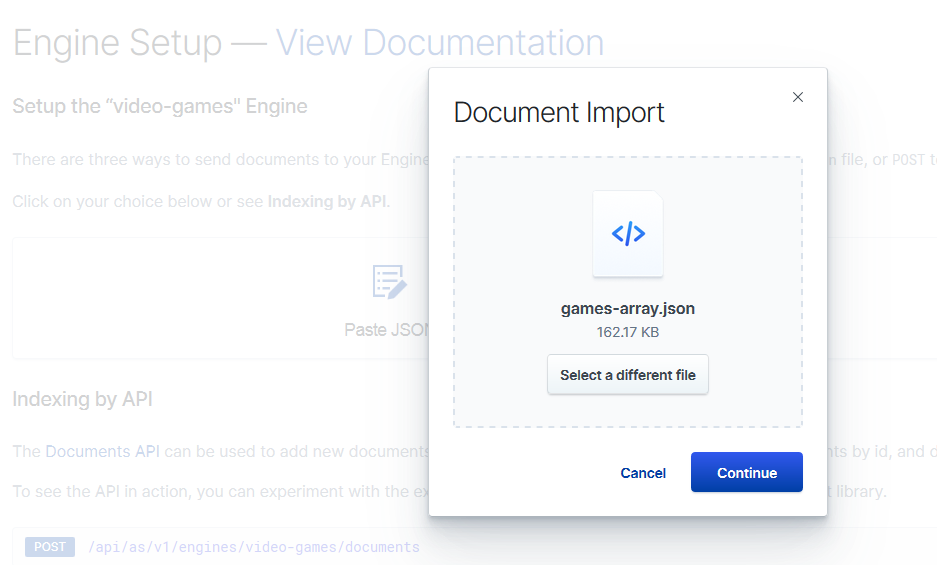
我这边采用第二种方式:
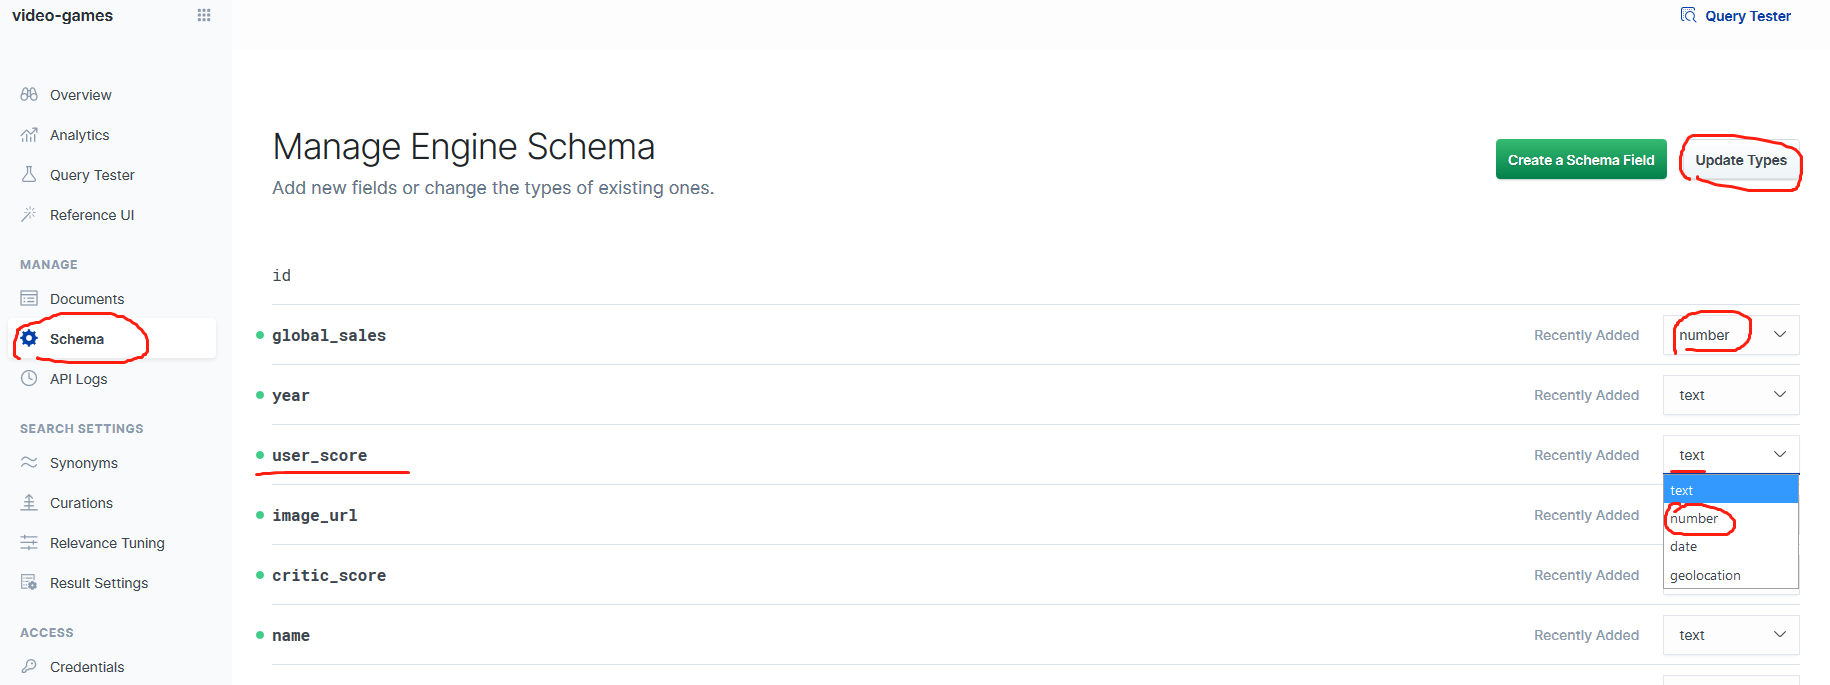
7.修改索引的schema
这是因为在默认的情况下,所有的11个字段都被视为text类型。
在完成我们的修改过后,点击Update Types按钮。这样我们的索引将会被重新更新。
8.调节相关度
具有三个关键的相关功能:Synonyms(同义词),Curations(管理)和Relevance Tuning(相关度调整)。
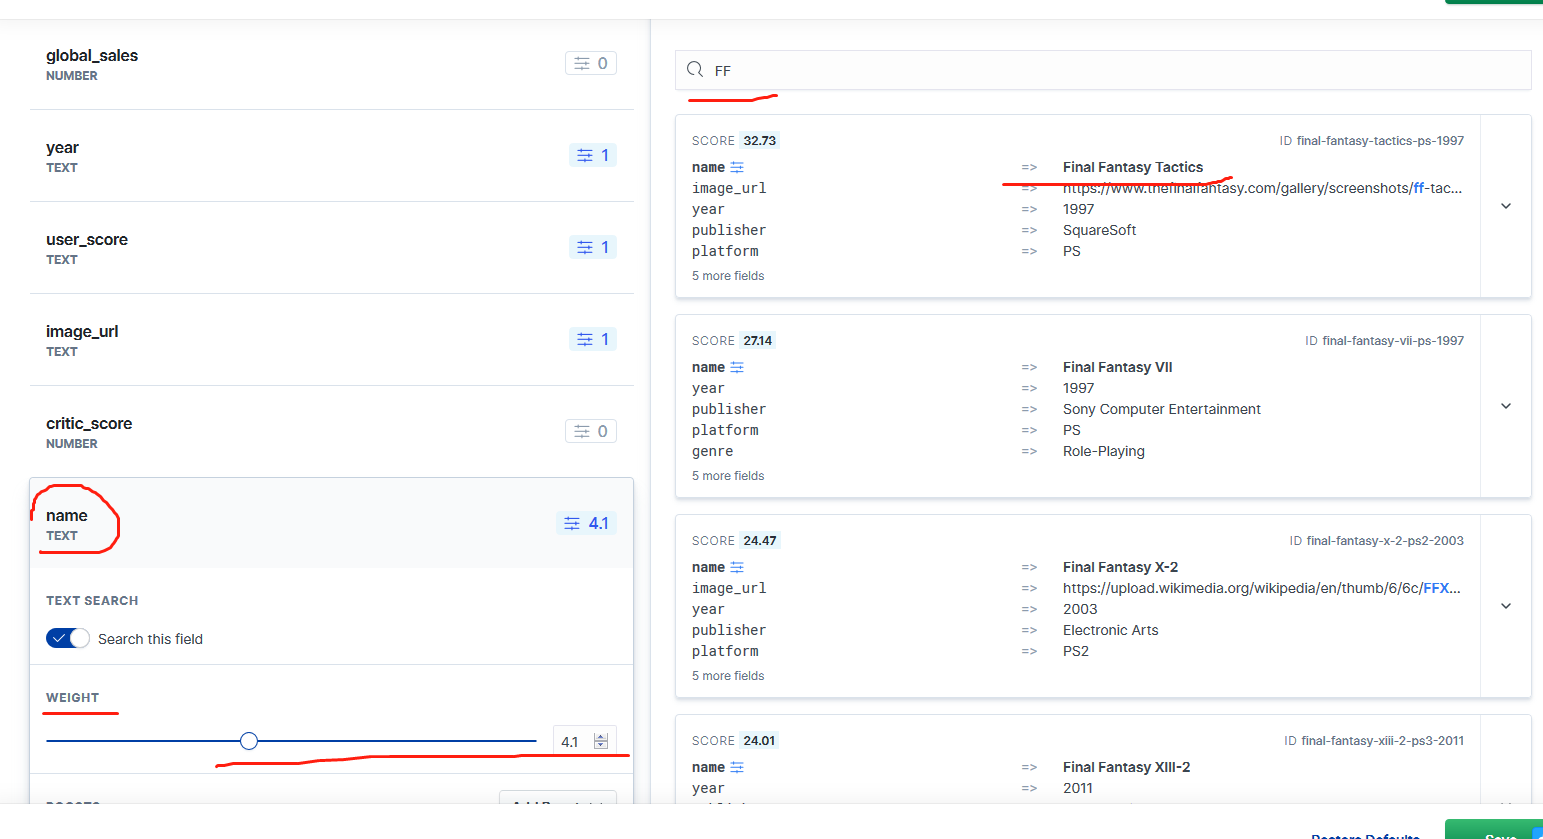
8.1 Synonyms
单击进入同义词,然后选择创建同义词集并输入术语:
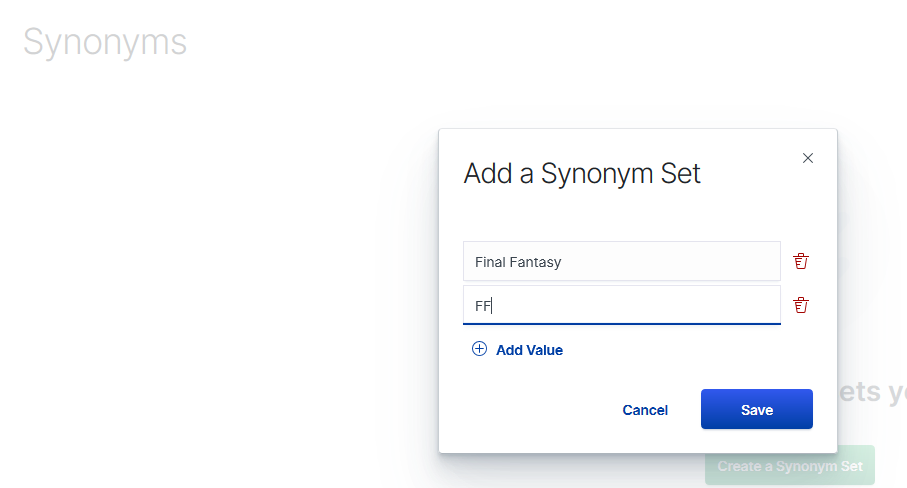
现在,搜索FF与搜索Final Fantasy的权重相同。
8.2 Curations
单击“Curations”,然后输入查询:“Final Fantasy”。
接下来,通过抓住表格最左侧的把手将“Final FantasyVII”文档拖到“Promoted Documents”部分:
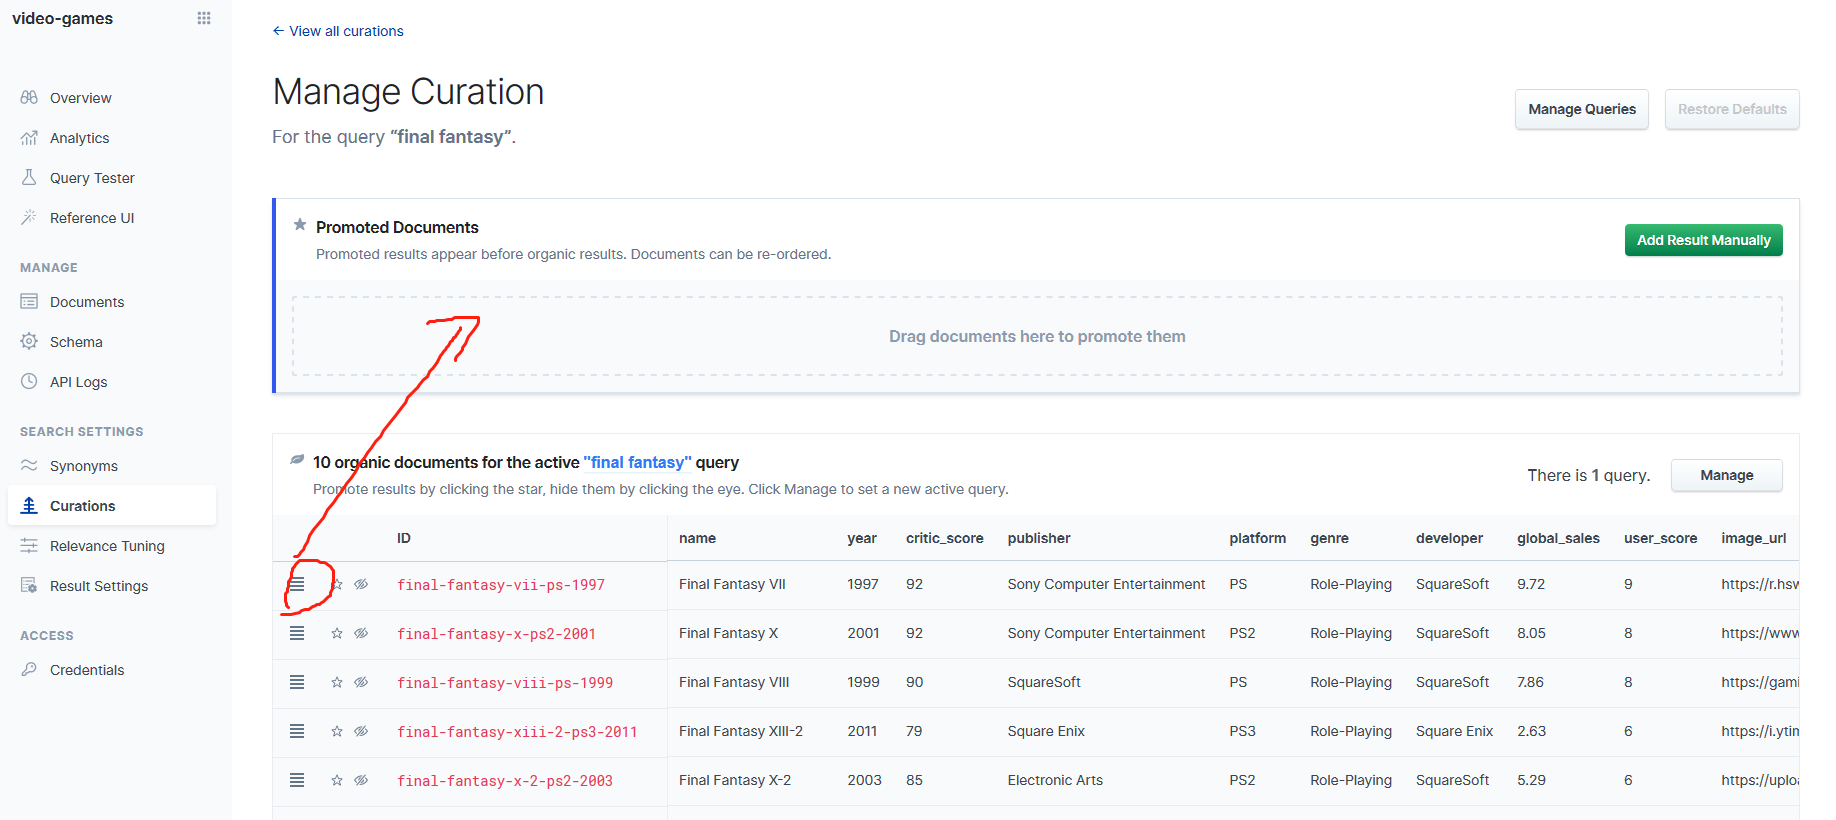
然后单击“Final Fantasy XIII”文档上的“Hide Result”按钮(那个有一条线穿过眼睛的图标,下图列表中第三个图标):
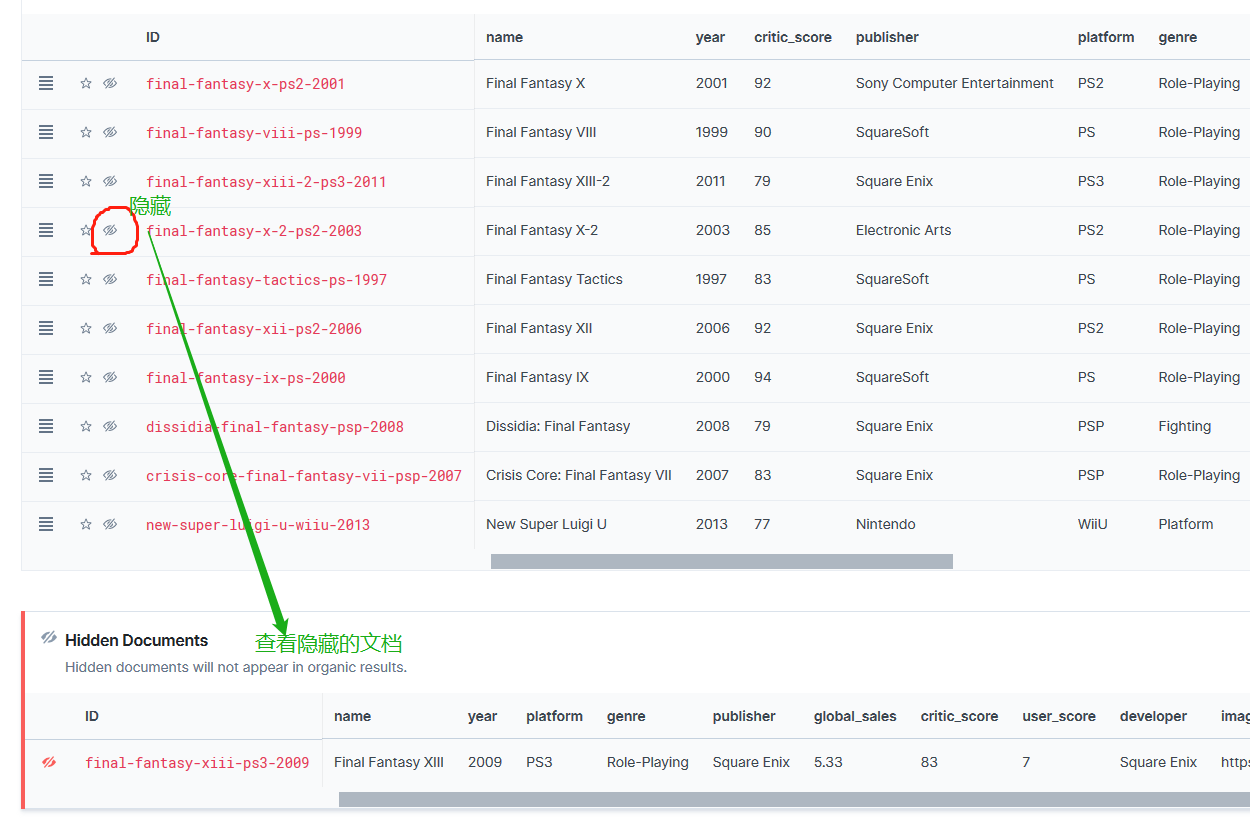
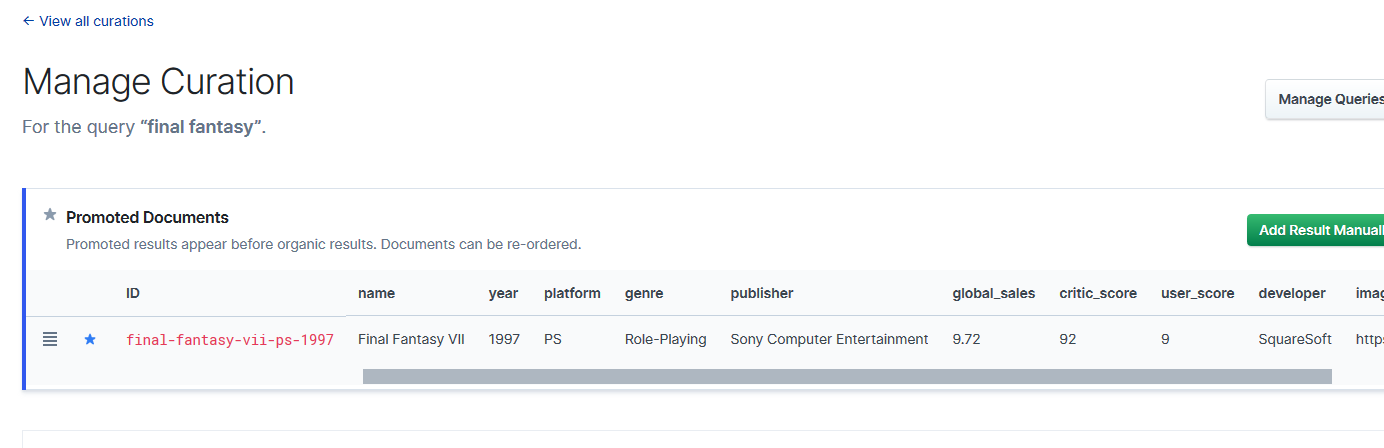
现在,执行“Final Fantasy”或“FF”搜索的任何人都将首先看到“Final Fantasy VII”:
可以升级和隐藏许多文档。 我们甚至可以对升级后的文档进行排序,因此我们可以完全控制每个查询顶部显示的内容。
8.3 Relevance tuning
单击边栏中的“Relevance Tuning”,可以选择一个字段,可以增加其相关性的权重,在右侧可以实时查看调整权重后搜索文档的排名效果
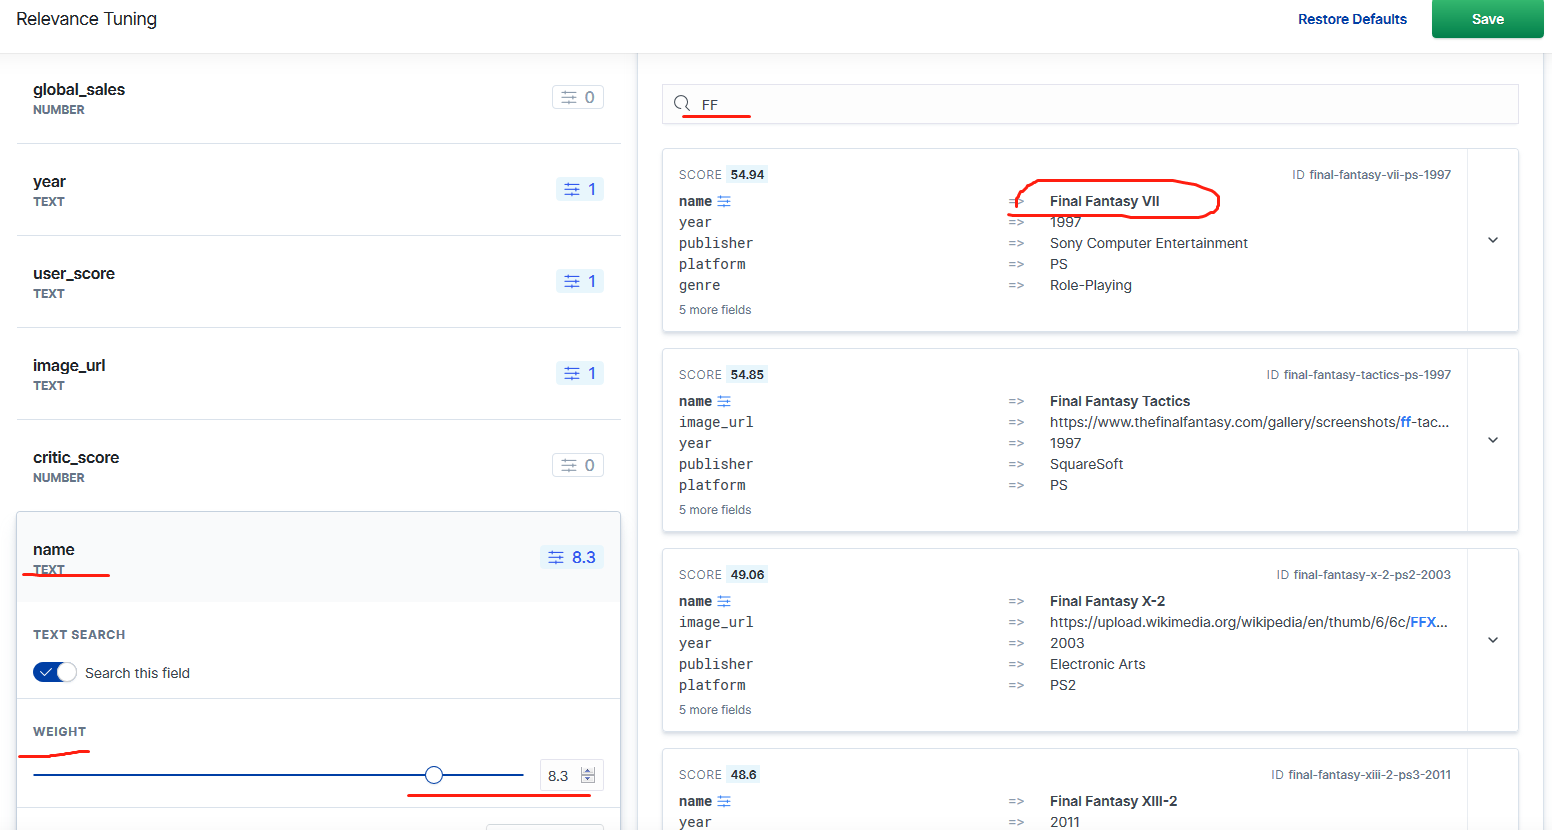
将滑块拖动到更高的值,然后单击“Save”。
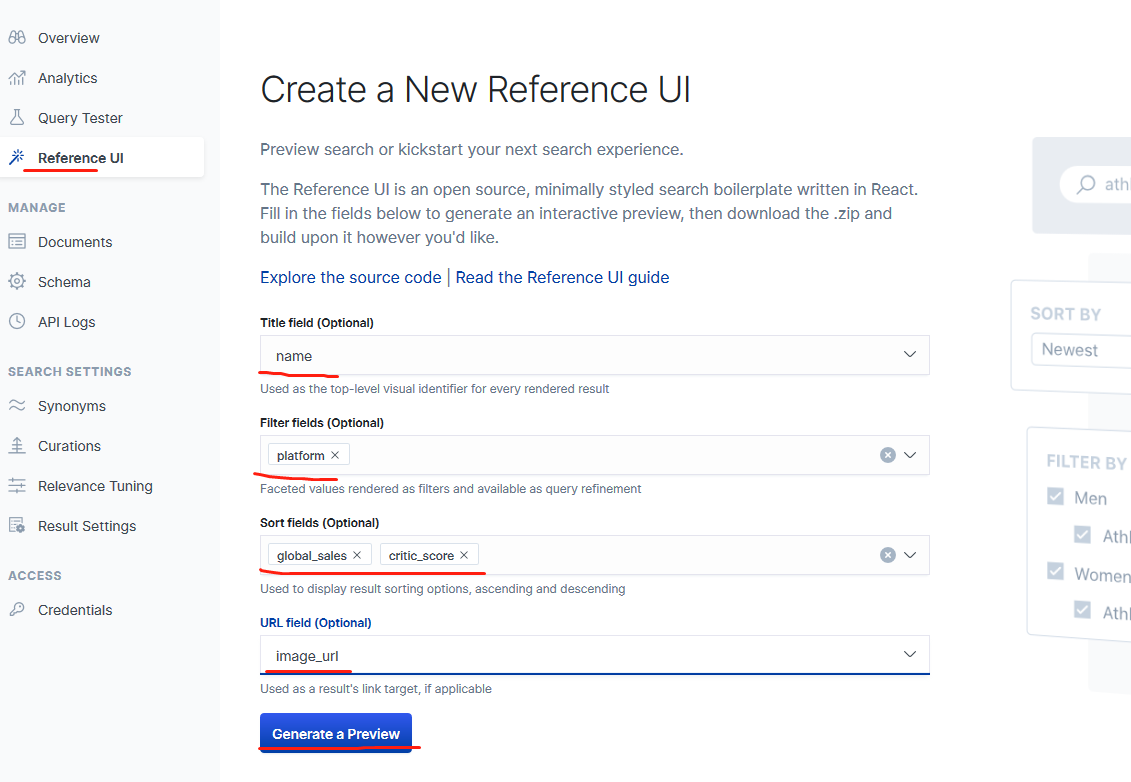
9.Reference UI
Reference UI 是提供给用户使用的搜索界面,它可以是只有一个输入框,也可以是比较复杂的条件查询
点击Reference UI,并做相应的配置。点击Generate a Preview按钮:
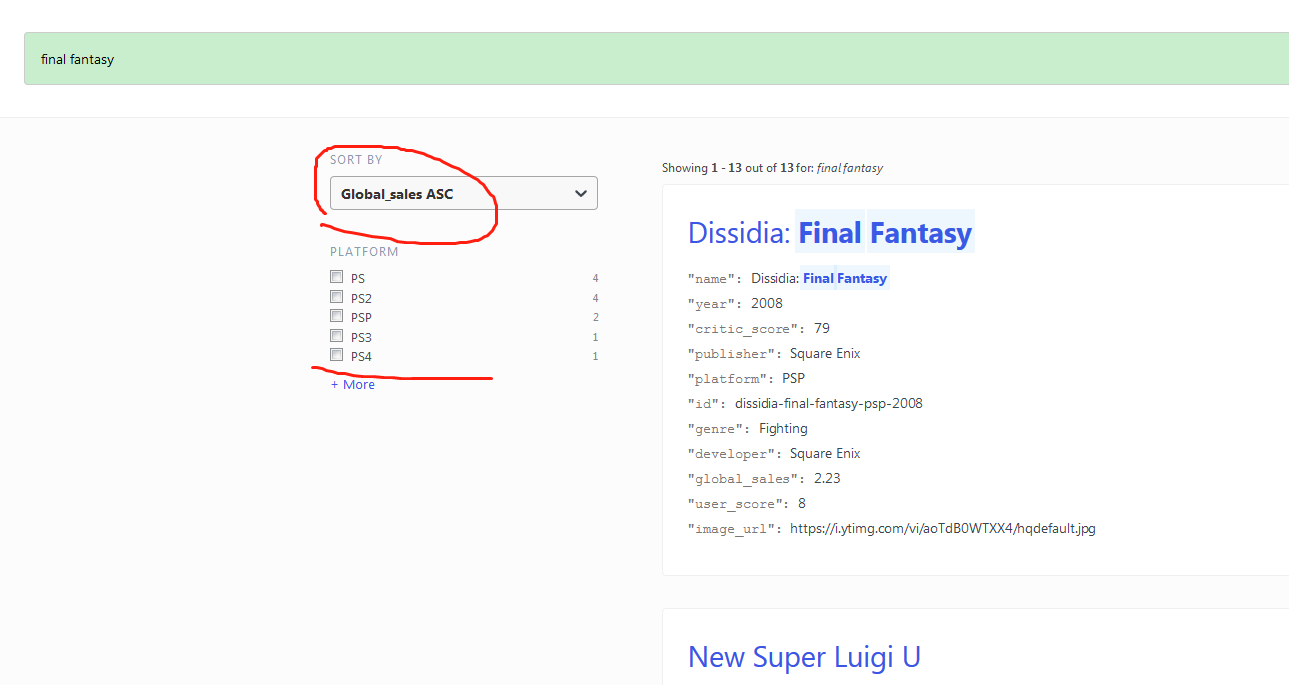
这样我们就可以看到如上所示的用户界面。我们可以尝试输入一个关键字比如 final fantasy来进行搜索:
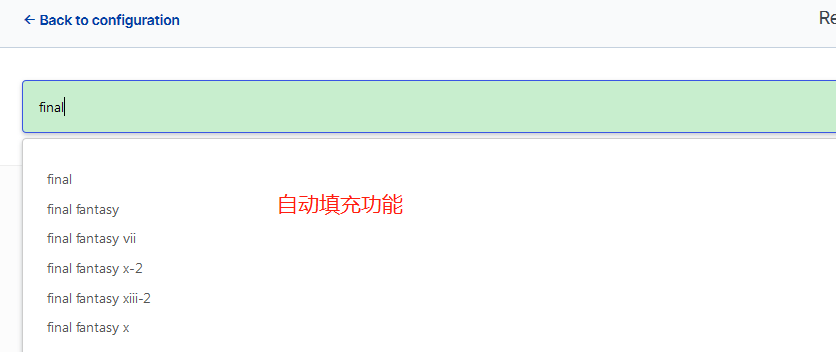

马上看到我们想要的结果了。
还可以点击上面显示的filter及sort by,作进一步操作
没有做任何的开发就有一个非常酷的界面给我们进行搜索了。
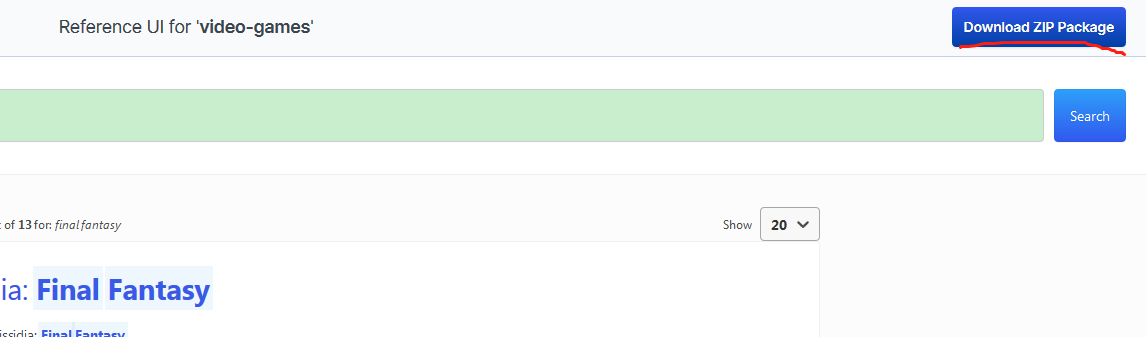
10.导出
点击上面屏幕右上角的Download Zip Package,并保存于一个文件目录中
解压这个压缩包:
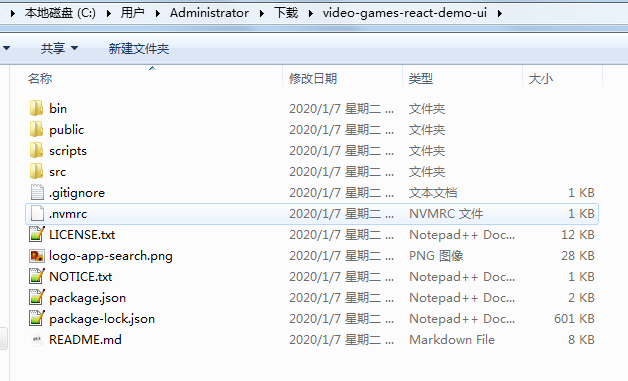
可以看到这是一个nodejs的应用程序。使用如下的命令来进行安装,本机先安装nodejs:
npm install
一旦安装完后,我们可以使用如下的命令来进行运行:
npm start
可以看到和之前一样的界面。
部署到nginx项目中:
然后运行 npm run build 命令,会把nodejs应用打包到一个名为bulid的文件夹中,
npm run build
最后把bulid的文件夹中的所有内容移动到nginx的html目录下,启动nginx,就能使再次使用浏览器访问了。
mv -f build/* /usr/share/nginx/html
app-search的安全设置链接
https://swiftype.com/documentation/app-search/self-managed/security
Default Configuration File
## ===================== Elastic App Search Configuration =====================
#
# NOTE: Elastic App Search comes with reasonable defaults.
#       Before adjusting the configuration, make sure you understand what you
#       are trying to accomplish and the consequences.
#
# NOTE: For passwords, the use of environment variables is encouraged
#       to keep values from being written to disk, e.g.
#       elasticsearch.password: ${ELASTICSEARCH_PASSWORD:changeme}
#
# ------------------------------- Elasticsearch -------------------------------
#
# App Search needs one-time permission to alter Elasticsearch settings.
# Ensure the Elasticsearch settings are correct, then set the following to
# true.
# Or, adjust Elasticsearch's config/elasticsearch.yml instead.
# See README.md for more details.
#
#allow_es_settings_modification: false
#
# Elasticsearch full cluster URL:
#
#elasticsearch.host: http://127.0.0.1:9200
#
# Elasticsearch credentials:
#
#elasticsearch.username: elastic
#elasticsearch.password: changeme
#
# Elasticsearch custom HTTP headers to add to each request:
#
#elasticsearch.headers:
#  X-My-Header: Contents of the header
#
# Elasticsearch SSL settings:
#
#elasticsearch.ssl.enabled: false
#elasticsearch.ssl.certificate:
#elasticsearch.ssl.certificate_authority:
#elasticsearch.ssl.key:
#elasticsearch.ssl.key_passphrase:
#elasticsearch.ssl.verify: true
#
# ------------------------------- Hosting & Network ---------------------------
#
# Define the exposed URL at which users will reach App Search.
# Defaults to localhost:3002 for testing purposes.
# Most cases will use one of:
#
# * An IP: http://255.255.255.255
# * A FQDN: http://example.com
# * Shortname defined via /etc/hosts: http://app-search.search
#
#app_search.external_url: http://localhost:3002
#
# Web application listen_host and listen_port.
# Your application will run on this host and port.
#
# * app_search.listen_host: Must be a valid IPv4 or IPv6 address.
# * app_search.listen_port: Must be a valid port number (1-65535).
#
#app_search.listen_host: 127.0.0.1
#app_search.listen_port: 3002
#
# ------------------------------ Authentication -------------------------------
#
# The origin of authenticated App Search users.
# Options are standard, elasticsearch-native, and elasticsearch-saml.
#
# Docs: https://swiftype.com/documentation/app-search/self-managed/security
#
# * standard: Users are created within the App Search dashboard.
# * elasticsearch-native: Users are managed via the Elasticsearch native realm.
# * elasticsearch-saml: Users are managed via the Elasticsearch SAML realm.
#
#app_search.auth.source: standard
#
# (SAML only) Name of the realm within the Elasticsearch realm chain.
#
#app_search.auth.name:
#
# ---------------------------------- Workers ----------------------------------
#
# Configure the number of worker threads.
#
#worker.threads: 4
#
# ----------------------------------- APIs ------------------------------------
#
# Set to true hide product version information from API responses.
#
#hide_version_info: false
#
# ---------------------------------- Mailer -----------------------------------
#
# Connect App Search to a mailer.
# Docs:
#   https://swiftype.com/documentation/app-search/self-managed/configuration
#
#email.account.enabled: false
#email.account.smtp.auth: plain
#email.account.smtp.starttls.enable: false
#email.account.smtp.host: 127.0.0.1
#email.account.smtp.port: 25
#email.account.smtp.user:
#email.account.smtp.password:
#email.account.email_defaults.from:
#
# ---------------------------------- Logging ----------------------------------
#
# Choose your log export path.
#
#log_directory: log
#
# Log level can be: debug, info, warn, error, fatal, or unknown.
#
#log_level: info
#
# Log format can be: default, json
#
#log_format: default
#
# Choose your Filebeat logs export path.
#
#filebeat_log_directory: log
#
# Enable logging app logs to stdout (enabled by default).
#
#enable_stdout_app_logging: true
#
# Enable ECS-style API and Analytics Logs.
#
#enable_ecs_logs: false
#
# ---------------------------------- TLS/SSL ----------------------------------
#
# Configure TLS/SSL encryption.
#
#app_search.ssl.enabled: false
#app_search.ssl.keystore.path:
#app_search.ssl.keystore.password:
#app_search.ssl.keystore.key_password:
#app_search.ssl.redirect_http_from_port:
#
# ---------------------------------- Session ----------------------------------
#
# Set key to persist user sessions through process restarts.
#
#secret_session_key:
#
# ----------------------------- Diagnostics report ----------------------------
#
# Path where diagnostic reports will be generated.
#
#diagnostic_report_directory: diagnostics