前言
本篇博客将会简要介绍andriod开发过程中的一些界面元素和编程的实现,我将大家走进安卓的XML世界,当然可能会涉及到java代码,当然本文主要是介绍XML文件的界面布局。
那么我们的XML存在哪里呢?很简单,就在资源文件里面,什么?你不知道资源文件是哪个?拜托,打开项目文件,看见res,那么这个文件低下就是我们的资源文件了!哇哦,那么我们在这上面编程吗?NO,我基本上把逻辑都写在src文件下的.java文件!
如何使用API文档
在开发的时候,我们最需要知道的就是如何使用API啦,有人老喜欢去百度啦,那么告诉你,这样不好!我们其实有现成的,你为何不用呢?
看,在你的SDK下载的文件夹下有docs文件夹,打开它,直接点击index,那么你就可以直接读API帮助文档啦!
注意,我们的帮助文档是英文的,而且你会发现在你在上网的时候,你的帮助文档非常之卡顿,甚至加载不出来,那是因为它在向官网寻求请求,但是google被封,你懂的!这不是坑爹吗?不用着急!英文不好,加载慢,OK,我给大家一个网址,国内的,而且已经对API全部进行了翻译!
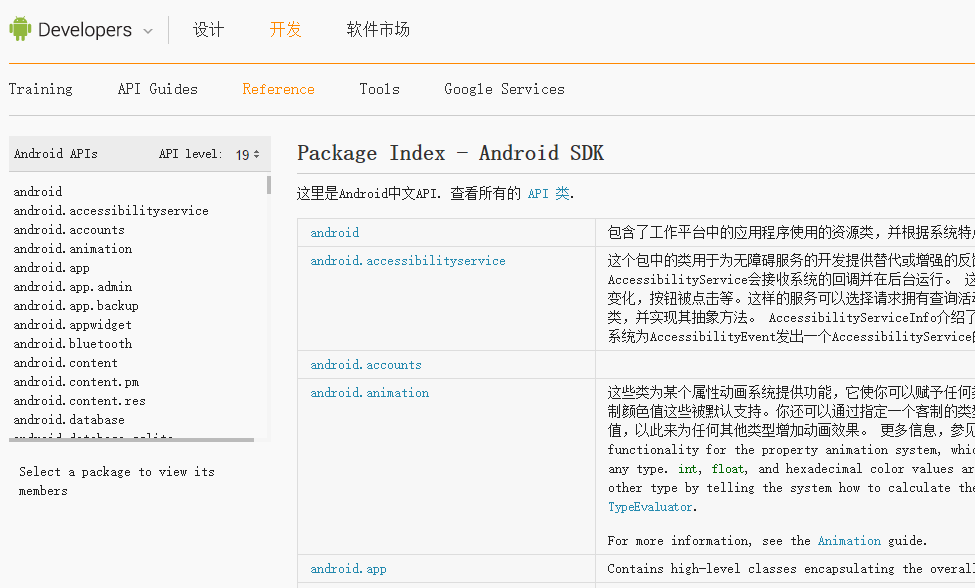
快顺手保存这个网址吧!那么我们是如何使用开发文档的呢?又是在哪里找到这些API呢?在首页中找到Develop->API Guides!这个是android开发的一些介绍,而Reference,全部都是相应的API文件!
控制组件简介
相信开发android的朋友都有这样的感受,就是我们用XML来定制界面,用java来实现功能。但安卓总是给程序员们开发相应的空间,让程序员们也可以通过代码来控制组件!在这里,我就不一一列举View类下的UI组件,但一定要知道这个既然有XML属性,那么一般会有java的相应方法!在这里我也不举例来使用java代码来设定相应的界面了,一般情况下,我们绝对不是使用这样的模式来写自己的应用的,如果您非要这要做的话,疯狂的android讲义上有大量这样的例子~~~至于如何使用构造器来重新绘制View,我觉得实在有必要再写一篇文章来论一论了!(呵呵,我又有新的文章可写了!)
布局管理
我记得最清楚的是:当时新建一个安卓的helloworld Project时,我的布局模式就是相对布局,那么了解布局的模式是必不可少的啦!
对了,对于新手的你,知道布局文件在什么地方吗?不错,就在新建项目时产生activity_main.xml的地方,即res文件下的layout文件!
那么我在这里就不介绍我们最常用的线性布局LinearLayout(相信每个入门的人都会直接使用线性布局来写demo),主要来介绍我们常用到的相对布局。
帧布局FrameLayout
帧布局是一帧布局的,是可以覆盖的一个布局,那么我们在使用TabHost组件的时候必然会用到帧布局的!那么在这里我就不详细说明它的用法!大家可以参考别人的博客!
谈Android五大布局(一)——LinearLayout、FrameLayout和AbsoulteLayout
题外话:当你用线性布局做好了demo,请多写写相对布局的文件,因为我感觉我在开发中最常用到的永远是相对布局!
相对布局RelativeLayout
相对布局是在开发过程中最常用到的开发模式了!下面是对相对布局的是xml的属性!
LayoutParams里的属性,只能赋予true或者flase
- android:layout_centerHorizontal 控制子控件是否在容器中水平居中
- android:layout_centerInParent 控制子控件是否在容器中居中
- android:layout_centerVerical 控制子控件是否在容器中垂直居中
属性赋值为ID的
- android:layout_toRightOf 控制子控件位于ID控件的右边
- android:layout_toLeftOf 控制子控件位于ID控件的左边
- android:layout_above 控制子控件位于ID控件的上方
- android:layout_below 控制子控件位于ID控件的下方
- android:layout_alignTop 控制子控件位于ID控件自身的上边界对齐
- android:layout_alignBottom 控制子控件位于ID控件自身的下边界对齐
- android:layout_alignLeft 控制子控件位于ID控件自身的左边界对齐
- android:layout_alignRight 控制子控件位于ID控件自身的右边界对齐
属性为px
- android:layout_marginLeft 控制子控件与容器左边的距离
- android:layout_paddingLeft 控制子控件与自身左边的距离
仅举出2例子,其他也是和上面的一样变化为Right、Top
组件
在组件中,经常会用到菜单栏,那么今天我们就介绍使用TabHost这个控件,其他的,比如TextView,Button等最常用的组件我就不介绍了,至于后面几个控件,在后期的博客中会一一介绍出来的!
TabHost组件
盛放Tab的容器就是TabHost。TabHost的实现有两种方式:
- 第一种继承TabActivity,从TabActivity中用getTabHost()方法获取TabHost。各个Tab中的内容在布局文件中定义就行了。
- 第二种方式,不继承TabActivity,在布局文件中定义TabHost即可,但是TabWidget的id必须是@android:id/tabs,FrameLayout的id必须是@android:id/tabcontent。
继承TabActivity
先来看一下布局文件,
 <?xml version="1.0" encoding="utf-8"?>
 <!-- 定义TabHost组件 -->
 <TabHost xmlns:android="http://schemas.android.com/apk/res/android" android:layout_width="fill_parent" android:layout_height="fill_parent">
   <!-- 定义第一个标签页的内容 -->
   <LinearLayout android:id="@+id/tab01" android:orientation="vertical" android:layout_width="fill_parent" android:layout_height="fill_parent">
     <!-- 定义两个TextView用于显示标签页中的内容 -->
     <TextView android:layout_width="fill_parent" android:layout_height="wrap_content" android:text="你好"/>
     <TextView android:layout_width="fill_parent" android:layout_height="wrap_content" android:text="我好"/>
   </LinearLayout>
   <!-- 定义第二个标签页的内容 -->
   <LinearLayout android:id="@+id/tab02" android:orientation="vertical" android:layout_width="fill_parent" android:layout_height="fill_parent">
     <TextView android:layout_width="fill_parent" android:layout_height="wrap_content" android:text="大家好"/>
     <TextView android:layout_width="fill_parent" android:layout_height="wrap_content" android:text="你没救了"/>
   </LinearLayout>
   <!-- 定义第三个标签页的内容 -->
   <LinearLayout android:id="@+id/tab03" android:orientation="vertical" android:layout_width="fill_parent" android:layout_height="fill_parent">
     <TextView android:layout_width="fill_parent" android:layout_height="wrap_content" android:text="真的吗"/>
     <TextView android:layout_width="fill_parent" android:layout_height="wrap_content" android:text="呵呵"/>
   </LinearLayout>
 </TabHost>
java文件
public class HelloTabHost extends TabActivity {

   @Override
   public void onCreate(Bundle savedInstanceState) {
     super.onCreate(savedInstanceState);

     //调用TabActivity的getTabHost()方法获取TabHost对象
     TabHost tabHost = getTabHost();

     //设置使用TabHost布局
     LayoutInflater.from(this).inflate(R.layout.main, tabHost.getTabContentView(),true);

     //添加第一个标签页
     tabHost.addTab(tabHost.newTabSpec("tab01").setIndicator("题外话").setContent(R.id.tab01));

     //添加第二个标签页,并在其标签上添加一个图片
     tabHost.addTab(tabHost.newTabSpec("tab02").setIndicator("天涯",getResources().getDrawable(R.drawable.icon)).setContent(R.id.tab02));

     //添加第三个标签页
     tabHost.addTab(tabHost.newTabSpec("tab03").setIndicator("无芳草").setContent(R.id.tab03));
   }
 }
直接找TabHost的ID实现
xml文件:
<?xml version="1.0" encoding="utf-8"?>
  <!-- TabHost必须包含一个 TabWidget和一个FrameLayout-->
  <TabHost android:id="@+id/tabhost" android:layout_width="fill_parent" android:layout_height="wrap_content">
        <LinearLayout android:orientation="vertical" android:layout_width="fill_parent" android:layout_height="fill_parent">
            <!-- TabWidget的id属性必须为 @android:id/tabs-->
            <TabWidget android:id="@android:id/tabs" android:orientation="horizontal" android:layout_width="fill_parent"
              android:layout_height="wrap_content" />
            <!-- FrameLayout的id属性必须为 @android:id/tabcontent-->
             <FrameLayout android:id="@android:id/tabcontent" android:layout_width="fill_parent" android:layout_height="fill_parent">
                <TextView android:id="@+id/view1" android:layout_width="fill_parent" android:layout_height="fill_parent"/>
                <TextView android:id="@+id/view2" android:layout_width="fill_parent" android:layout_height="fill_parent"/>
                <TextView android:id="@+id/view3" android:layout_width="fill_parent" android:layout_height="fill_parent"/>
             </FrameLayout>
         </LinearLayout>
    </TabHost>
java代码:
   public class TabHostTest extends Activity {
    @Override
    public void onCreate(Bundle savedInstanceState) {
        super.onCreate(savedInstanceState);
        setContentView(R.layout.main);
        // 获取TabHost对象
        TabHost tabHost = (TabHost) findViewById(R.id.tabhost);
        // 如果没有继承TabActivity时,通过该种方法加载启动tabHost
        tabHost.setup();
        tabHost.addTab(tabHost.newTabSpec("tab1").setIndicator("第一个标签",
                getResources().getDrawable(R.drawable.icon)).setContent(
                R.id.view1));

        tabHost.addTab(tabHost.newTabSpec("tab3").setIndicator("第三个标签")
                .setContent(R.id.view3));

        tabHost.addTab(tabHost.newTabSpec("tab2").setIndicator("第二个标签")
                .setContent(R.id.view2));
    }
}
感谢本文所参考的博文,如果大家对tabhost还有什么不太明白的话,可以参考本文!
补充
针对于上面的代码,大家可能看到是标签一直在菜单的上方,那么想要让标签在下方的话,直接将TabWidget放在FrameLayout的下方即可!
例如一下代码!
</FrameLayout>
    <TabWidget
    android:id="@android:id/tabs"
    android:layout_width="match_parent"
    android:layout_height="98px" >
    </TabWidget>
如果您对于我的博客喜欢的花,欢迎你来关注我哦!