1
sudo yum install -y curl policycoreutils-python openssh-server
详细输出


已加载插件:fastestmirror, langpacks Loading mirror speeds from cached hostfile * base: mirrors.bfsu.edu.cn * extras: mirrors.huaweicloud.com * updates: mirrors.huaweicloud.com base | 3.6 kB 00:00:00 extras | 2.9 kB 00:00:00 mongodb-org-4.0 | 2.5 kB 00:00:00 updates | 2.9 kB 00:00:00 (1/3): base/7/x86_64/group_gz | 153 kB 00:00:01 (2/3): extras/7/x86_64/primary_db | 206 kB 00:00:02 (3/3): base/7/x86_64/primary_db | 6.1 MB 00:00:14 正在解决依赖关系 --> 正在检查事务 ---> 软件包 curl.x86_64.0.7.29.0-51.el7 将被 升级 ---> 软件包 curl.x86_64.0.7.29.0-57.el7_8.1 将被 更新 --> 正在处理依赖关系 libcurl = 7.29.0-57.el7_8.1,它被软件包 curl-7.29.0-57.el7_8.1.x86_64 需要 ---> 软件包 openssh-server.x86_64.0.7.4p1-16.el7 将被 升级 ---> 软件包 openssh-server.x86_64.0.7.4p1-21.el7 将被 更新 --> 正在处理依赖关系 openssh = 7.4p1-21.el7,它被软件包 openssh-server-7.4p1-21.el7.x86_64 需要 ---> 软件包 policycoreutils-python.x86_64.0.2.5-29.el7 将被 升级 ---> 软件包 policycoreutils-python.x86_64.0.2.5-34.el7 将被 更新 --> 正在处理依赖关系 policycoreutils = 2.5-34.el7,它被软件包 policycoreutils-python-2.5-34.el7.x86_64 需要 --> 正在检查事务 ---> 软件包 libcurl.x86_64.0.7.29.0-51.el7 将被 升级 ---> 软件包 libcurl.x86_64.0.7.29.0-57.el7_8.1 将被 更新 --> 正在处理依赖关系 libssh2(x86-64) >= 1.8.0,它被软件包 libcurl-7.29.0-57.el7_8.1.x86_64 需要 ---> 软件包 openssh.x86_64.0.7.4p1-16.el7 将被 升级 --> 正在处理依赖关系 openssh = 7.4p1-16.el7,它被软件包 openssh-clients-7.4p1-16.el7.x86_64 需要 ---> 软件包 openssh.x86_64.0.7.4p1-21.el7 将被 更新 ---> 软件包 policycoreutils.x86_64.0.2.5-29.el7 将被 升级 ---> 软件包 policycoreutils.x86_64.0.2.5-34.el7 将被 更新 --> 正在检查事务 ---> 软件包 libssh2.x86_64.0.1.4.3-12.el7 将被 升级 ---> 软件包 libssh2.x86_64.0.1.8.0-3.el7 将被 更新 ---> 软件包 openssh-clients.x86_64.0.7.4p1-16.el7 将被 升级 ---> 软件包 openssh-clients.x86_64.0.7.4p1-21.el7 将被 更新 --> 解决依赖关系完成 依赖关系解决 ============================================================================================================================================================================================= Package 架构 版本 源 大小 ============================================================================================================================================================================================= 正在更新: curl x86_64 7.29.0-57.el7_8.1 updates 271 k openssh-server x86_64 7.4p1-21.el7 base 459 k policycoreutils-python x86_64 2.5-34.el7 base 457 k 为依赖而更新: libcurl x86_64 7.29.0-57.el7_8.1 updates 223 k libssh2 x86_64 1.8.0-3.el7 base 88 k openssh x86_64 7.4p1-21.el7 base 510 k openssh-clients x86_64 7.4p1-21.el7 base 655 k policycoreutils x86_64 2.5-34.el7 base 917 k 事务概要 ============================================================================================================================================================================================= 升级 3 软件包 (+5 依赖软件包) 总下载量:3.5 M Downloading packages: No Presto metadata available for base No Presto metadata available for updates 警告:/var/cache/yum/x86_64/7/base/packages/libssh2-1.8.0-3.el7.x86_64.rpm: 头V3 RSA/SHA256 Signature, 密钥 ID f4a80eb5: NOKEY ] 0.0 B/s | 79 kB --:--:-- ETA libssh2-1.8.0-3.el7.x86_64.rpm 的公钥尚未安装 (1/8): libssh2-1.8.0-3.el7.x86_64.rpm | 88 kB 00:00:00 libcurl-7.29.0-57.el7_8.1.x86_64.rpm 的公钥尚未安装 19% [=============- ] 274 kB/s | 700 kB 00:00:10 ETA (2/8): libcurl-7.29.0-57.el7_8.1.x86_64.rpm | 223 kB 00:00:02 (3/8): openssh-server-7.4p1-21.el7.x86_64.rpm | 459 kB 00:00:03 (4/8): openssh-7.4p1-21.el7.x86_64.rpm | 510 kB 00:00:04 (5/8): policycoreutils-python-2.5-34.el7.x86_64.rpm | 457 kB 00:00:02 (6/8): openssh-clients-7.4p1-21.el7.x86_64.rpm | 655 kB 00:00:06 (7/8): curl-7.29.0-57.el7_8.1.x86_64.rpm | 271 kB 00:00:07 (8/8): policycoreutils-2.5-34.el7.x86_64.rpm | 917 kB 00:00:05 --------------------------------------------------------------------------------------------------------------------------------------------------------------------------------------------- 总计 433 kB/s | 3.5 MB 00:00:08 从 file:///etc/pki/rpm-gpg/RPM-GPG-KEY-CentOS-7 检索密钥 导入 GPG key 0xF4A80EB5: 用户ID : "CentOS-7 Key (CentOS 7 Official Signing Key) <security@centos.org>" 指纹 : 6341 ab27 53d7 8a78 a7c2 7bb1 24c6 a8a7 f4a8 0eb5 软件包 : centos-release-7-6.1810.2.el7.centos.x86_64 (@anaconda) 来自 : /etc/pki/rpm-gpg/RPM-GPG-KEY-CentOS-7 Running transaction check Running transaction test Transaction test succeeded Running transaction 警告:RPM 数据库已被非 yum 程序修改。 ** 发现 2 个已存在的 RPM 数据库问题, 'yum check' 输出如下: 2:postfix-2.10.1-7.el7.x86_64 有缺少的需求 libmysqlclient.so.18()(64bit) 2:postfix-2.10.1-7.el7.x86_64 有缺少的需求 libmysqlclient.so.18(libmysqlclient_18)(64bit) 正在更新 : openssh-7.4p1-21.el7.x86_64 1/16 正在更新 : libssh2-1.8.0-3.el7.x86_64 2/16 正在更新 : libcurl-7.29.0-57.el7_8.1.x86_64 3/16 正在更新 : policycoreutils-2.5-34.el7.x86_64 4/16 正在更新 : policycoreutils-python-2.5-34.el7.x86_64 5/16 正在更新 : curl-7.29.0-57.el7_8.1.x86_64 6/16 正在更新 : openssh-clients-7.4p1-21.el7.x86_64 7/16 正在更新 : openssh-server-7.4p1-21.el7.x86_64 8/16 清理 : openssh-server-7.4p1-16.el7.x86_64 9/16 清理 : policycoreutils-python-2.5-29.el7.x86_64 10/16 清理 : openssh-clients-7.4p1-16.el7.x86_64 11/16 清理 : curl-7.29.0-51.el7.x86_64 12/16 清理 : libcurl-7.29.0-51.el7.x86_64 13/16 清理 : libssh2-1.4.3-12.el7.x86_64 14/16 清理 : openssh-7.4p1-16.el7.x86_64 15/16 清理 : policycoreutils-2.5-29.el7.x86_64 16/16 验证中 : policycoreutils-2.5-34.el7.x86_64 1/16 验证中 : curl-7.29.0-57.el7_8.1.x86_64 2/16 验证中 : openssh-clients-7.4p1-21.el7.x86_64 3/16 验证中 : policycoreutils-python-2.5-34.el7.x86_64 4/16 验证中 : libcurl-7.29.0-57.el7_8.1.x86_64 5/16 验证中 : openssh-7.4p1-21.el7.x86_64 6/16 验证中 : openssh-server-7.4p1-21.el7.x86_64 7/16 验证中 : libssh2-1.8.0-3.el7.x86_64 8/16 验证中 : policycoreutils-2.5-29.el7.x86_64 9/16 验证中 : openssh-7.4p1-16.el7.x86_64 10/16 验证中 : openssh-server-7.4p1-16.el7.x86_64 11/16 验证中 : policycoreutils-python-2.5-29.el7.x86_64 12/16 验证中 : openssh-clients-7.4p1-16.el7.x86_64 13/16 验证中 : libssh2-1.4.3-12.el7.x86_64 14/16 验证中 : libcurl-7.29.0-51.el7.x86_64 15/16 验证中 : curl-7.29.0-51.el7.x86_64 16/16 更新完毕: curl.x86_64 0:7.29.0-57.el7_8.1 openssh-server.x86_64 0:7.4p1-21.el7 policycoreutils-python.x86_64 0:2.5-34.el7 作为依赖被升级: libcurl.x86_64 0:7.29.0-57.el7_8.1 libssh2.x86_64 0:1.8.0-3.el7 openssh.x86_64 0:7.4p1-21.el7 openssh-clients.x86_64 0:7.4p1-21.el7 policycoreutils.x86_64 0:2.5-34.el7 完毕!
2
sudo systemctl enable sshd
sudo systemctl start sshd
3
sudo firewall-cmd --permanent --add-service=http
sudo systemctl reload firewalld
详细输出
[root@localhost /]# sudo firewall-cmd --permanent --add-service=http
success
[root@localhost /]# sudo systemctl reload firewalld
4
curl https://packages.gitlab.com/install/repositories/gitlab/gitlab-ee/script.rpm.sh | sudo bash
详细输出
[root@localhost /]# curl https://packages.gitlab.com/install/repositories/gitlab/gitlab-ee/script.rpm.sh | sudo bash
  % Total    % Received % Xferd  Average Speed   Time    Time     Time  Current
                                 Dload  Upload   Total   Spent    Left  Speed
100  6856  100  6856    0     0    347      0  0:00:19  0:00:19 --:--:--  1635
Detected operating system as centos/7.
Checking for curl...
Detected curl...
Downloading repository file: https://packages.gitlab.com/install/repositories/gitlab/gitlab-ee/config_file.repo?os=centos&dist=7&source=script
done.
Installing pygpgme to verify GPG signatures...
已加载插件:fastestmirror, langpacks
Loading mirror speeds from cached hostfile
 * base: mirrors.bfsu.edu.cn
 * extras: mirrors.huaweicloud.com
 * updates: mirrors.huaweicloud.com
gitlab_gitlab-ee-source/signature                                                                                                                                     |  862 B  00:00:00
从 https://packages.gitlab.com/gitlab/gitlab-ee/gpgkey 检索密钥
导入 GPG key 0x51312F3F:
 用户ID     : "GitLab B.V. (package repository signing key) <packages@gitlab.com>"
 指纹       : f640 3f65 44a3 8863 daa0 b6e0 3f01 618a 5131 2f3f
 来自       : https://packages.gitlab.com/gitlab/gitlab-ee/gpgkey
从 https://packages.gitlab.com/gitlab/gitlab-ee/gpgkey/gitlab-gitlab-ee-3D645A26AB9FBD22.pub.gpg 检索密钥
gitlab_gitlab-ee-source/signature                                                                                                                                     |  951 B  00:00:01 !!!
gitlab_gitlab-ee-source/primary                                                                                                                                       |  175 B  00:00:10
软件包 pygpgme-0.3-9.el7.x86_64 已安装并且是最新版本
无须任何处理
Installing yum-utils...
已加载插件:fastestmirror, langpacks
Loading mirror speeds from cached hostfile
 * base: mirrors.bfsu.edu.cn
 * extras: mirrors.huaweicloud.com
 * updates: mirrors.huaweicloud.com
正在解决依赖关系
--> 正在检查事务
---> 软件包 yum-utils.noarch.0.1.1.31-50.el7 将被 升级
---> 软件包 yum-utils.noarch.0.1.1.31-54.el7_8 将被 更新
--> 解决依赖关系完成

依赖关系解决

=============================================================================================================================================================================================
 Package                                      架构                                      版本                                                源                                          大小
=============================================================================================================================================================================================
正在更新:
 yum-utils                                    noarch                                    1.1.31-54.el7_8                                     updates                                    122 k

事务概要
=============================================================================================================================================================================================
升级  1 软件包

总下载量:122 k
Downloading packages:
No Presto metadata available for updates
yum-utils-1.1.31-54.el7_8.noarch.rpm                                                                                                                                  | 122 kB  00:00:00
Running transaction check
Running transaction test
Transaction test succeeded
Running transaction
  正在更新    : yum-utils-1.1.31-54.el7_8.noarch                                                                                                                                         1/2
  清理        : yum-utils-1.1.31-50.el7.noarch                                                                                                                                           2/2
  验证中      : yum-utils-1.1.31-54.el7_8.noarch                                                                                                                                         1/2
  验证中      : yum-utils-1.1.31-50.el7.noarch                                                                                                                                           2/2

更新完毕:
  yum-utils.noarch 0:1.1.31-54.el7_8

完毕!
Generating yum cache for gitlab_gitlab-ee...
导入 GPG key 0x51312F3F:
 用户ID     : "GitLab B.V. (package repository signing key) <packages@gitlab.com>"
 指纹       : f640 3f65 44a3 8863 daa0 b6e0 3f01 618a 5131 2f3f
 来自       : https://packages.gitlab.com/gitlab/gitlab-ee/gpgkey
Generating yum cache for gitlab_gitlab-ee-source...

The repository is setup! You can now install packages.
5 下载至本地(后续方便离线安装)
yum install --downloadonly --downloaddir=/song/git gitlab-ee
详细输出
已加载插件:fastestmirror, langpacks
Loading mirror speeds from cached hostfile
 * base: mirrors.bfsu.edu.cn
 * extras: mirrors.huaweicloud.com
 * updates: mirrors.huaweicloud.com
gitlab_gitlab-ee/x86_64/signature                                                                                                                                     |  862 B  00:00:00
gitlab_gitlab-ee/x86_64/signature                                                                                                                                     | 1.0 kB  00:00:00 !!!
gitlab_gitlab-ee-source/signature                                                                                                                                     |  862 B  00:00:00
gitlab_gitlab-ee-source/signature                                                                                                                                     |  951 B  00:00:00 !!!
正在解决依赖关系
--> 正在检查事务
---> 软件包 gitlab-ee.x86_64.0.13.2.4-ee.0.el7 将被 安装
--> 解决依赖关系完成

依赖关系解决

=============================================================================================================================================================================================
 Package                                    架构                                    版本                                             源                                                 大小
=============================================================================================================================================================================================
正在安装:
 gitlab-ee                                  x86_64                                  13.2.4-ee.0.el7                                  gitlab_gitlab-ee                                  791 M

事务概要
=============================================================================================================================================================================================
安装  1 软件包

总下载量:791 M
安装大小:1.7 G
Background downloading packages, then exiting:
警告:/song/git/gitlab-ee-13.2.4-ee.0.el7.x86_64.rpm.45252.tmp: 头V4 RSA/SHA1 Signature, 密钥 ID f27eab47: NOKEY==========================================-]  51 kB/s | 791 MB  00:00:00 ETA
gitlab-ee-13.2.4-ee.0.el7.x86_64.rpm.45252.tmp 的公钥尚未安装
gitlab-ee-13.2.4-ee.0.el7.x86_64.rpm                                                                                                                                  | 791 MB  02:29:18
exiting because "Download Only" specified

6 本地安装
rpm -ivh gitlab-ee-13.2.4-ee.0.el7.x86_64.rpm
详细输出
[root@localhost git]# rpm -ivh gitlab-ee-13.2.4-ee.0.el7.x86_64.rpm
警告:gitlab-ee-13.2.4-ee.0.el7.x86_64.rpm: 头V4 RSA/SHA1 Signature, 密钥 ID f27eab47: NOKEY
准备中...                          ################################# [100%]
正在升级/安装...
   1:gitlab-ee-13.2.4-ee.0.el7        ################################# [100%]
It looks like GitLab has not been configured yet; skipping the upgrade script.

       *.                  *.
      ***                 ***
     *****               *****
    .******             *******
    ********            ********
   ,,,,,,,,,***********,,,,,,,,,
  ,,,,,,,,,,,*********,,,,,,,,,,,
  .,,,,,,,,,,,*******,,,,,,,,,,,,
      ,,,,,,,,,*****,,,,,,,,,.
         ,,,,,,,****,,,,,,
            .,,,***,,,,
                ,*,.


     _______ __  __          __
    / ____(_) /_/ /   ____ _/ /_
   / / __/ / __/ /   / __ `/ __
  / /_/ / / /_/ /___/ /_/ / /_/ /
  \____/_/\__/_____/\__,_/_.___/


Thank you for installing GitLab!
GitLab was unable to detect a valid hostname for your instance.
Please configure a URL for your GitLab instance by setting `external_url`
configuration in /etc/gitlab/gitlab.rb file.
Then, you can start your GitLab instance by running the following command:
  sudo gitlab-ctl reconfigure

For a comprehensive list of configuration options please see the Omnibus GitLab readme
https://gitlab.com/gitlab-org/omnibus-gitlab/blob/master/README.md
7
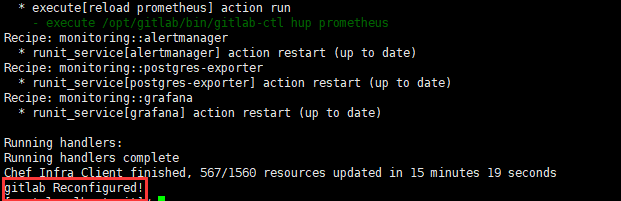
sudo gitlab-ctl reconfigure
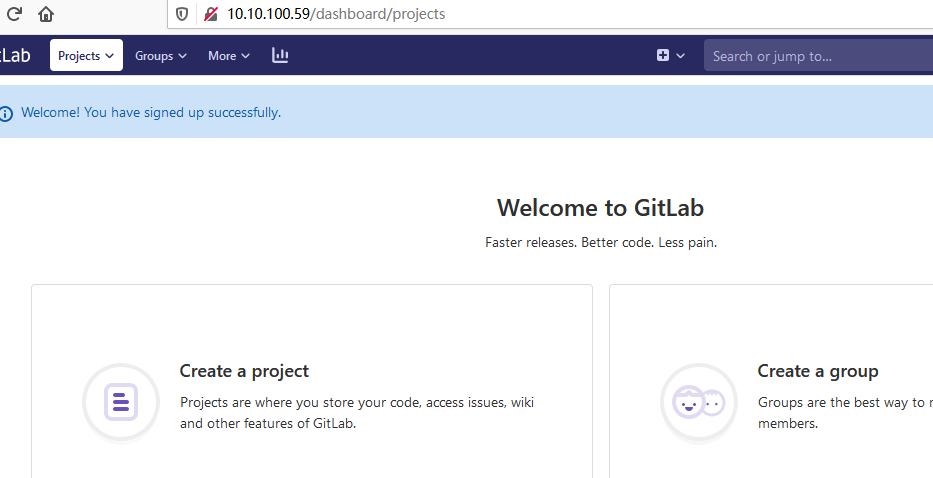
8
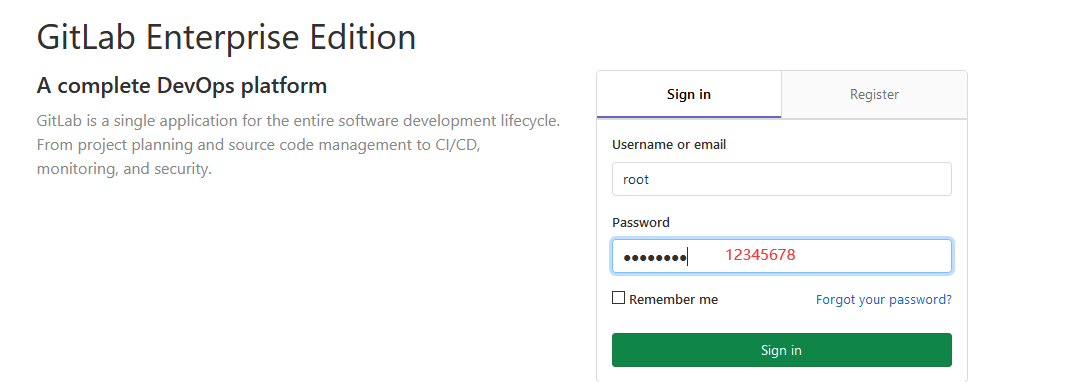
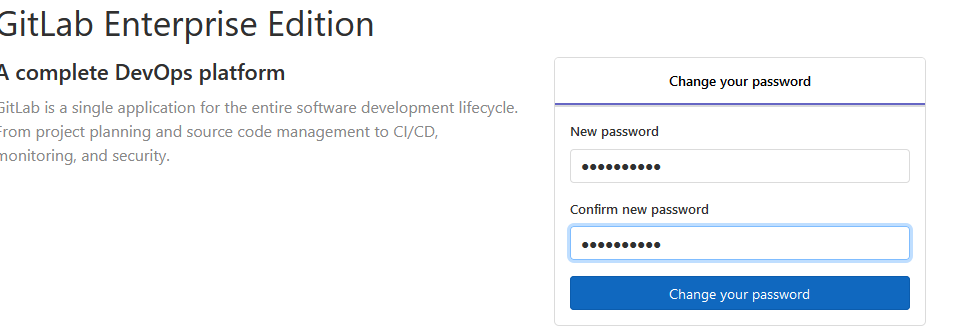
打开一个浏览器,输入你安装GitLab的服务器IP地址,就会打开一个网页。第一次进入会让你设置密码

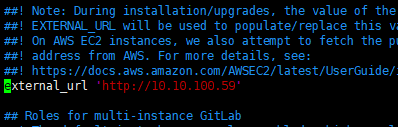
9
vim /etc/gitlab/gitlab.rb
10
gitlab-ctl reconfigure

gitlab-ctl restart
[root@localhost /]# gitlab-ctl restart
ok: run: alertmanager: (pid 36996) 0s
ok: run: gitaly: (pid 37012) 0s
ok: run: gitlab-exporter: (pid 37056) 1s
ok: run: gitlab-workhorse: (pid 37061) 0s
ok: run: grafana: (pid 37072) 0s
ok: run: logrotate: (pid 37082) 0s
ok: run: nginx: (pid 37093) 0s
ok: run: node-exporter: (pid 37102) 0s
ok: run: postgres-exporter: (pid 37108) 0s
ok: run: postgresql: (pid 37137) 0s
ok: run: prometheus: (pid 37154) 0s
ok: run: puma: (pid 37481) 0s
ok: run: redis: (pid 37492) 0s
ok: run: redis-exporter: (pid 37500) 0s
ok: run: sidekiq: (pid 37575) 0s
11

解决办法:https://blog.csdn.net/qq_15792013/article/details/77984570
12 修改root密码
[root@localhost /]# gitlab-rails console
--------------------------------------------------------------------------------
 GitLab:       13.2.4-ee (5f3e8be35c3) EE
 GitLab Shell: 13.3.0
 PostgreSQL:   11.7
--------------------------------------------------------------------------------


Loading production environment (Rails 6.0.3.1)
irb(main):001:0>
irb(main):002:0>
irb(main):003:0>
irb(main):004:0> u=User.where(id:1).first
=> #<User id:1 @root>
irb(main):005:0> u.password='12345678'
=> "12345678"
irb(main):006:0> u.password_confirmation='12345678'
=> "12345678"
irb(main):007:0> u.save!
Enqueued ActionMailer::MailDeliveryJob (Job ID: 97150c01-d8f7-44ff-8907-581bfb42583f) to Sidekiq(mailers) with arguments: "DeviseMailer", "password_change", "deliver_now", {:args=>[#<GlobalID:0x00007f46f23fd0a0 @uri=#<URI::GID gid://gitlab/User/1>>]}
=> true
irb(main):008:0> exit
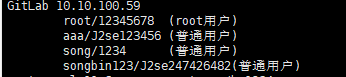
13 添加用户 用于克隆项目 前提是用root用户登录
step1
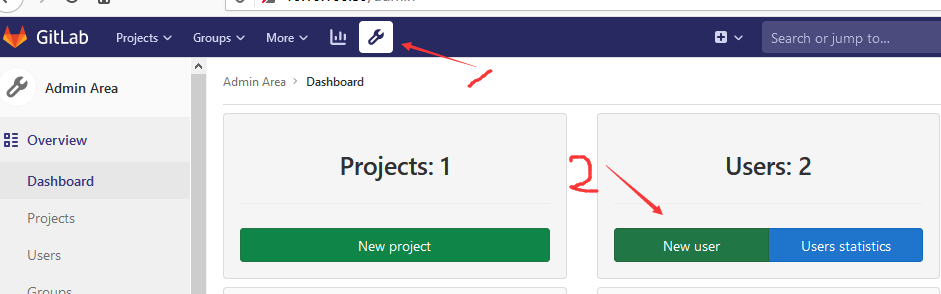
step2
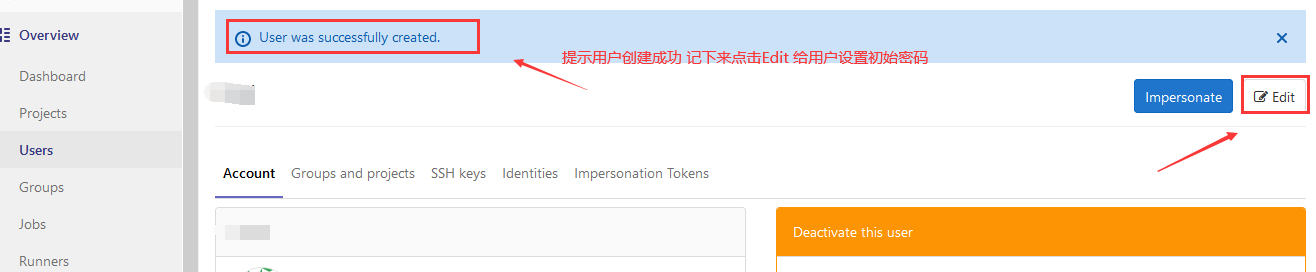
step3 点击编辑 给用户初始密码

step4

启动:gitlab-ctl start
查看状态:gitlab-ctl status
重启:gitlab-ctl restart
重新配置:gitlab-ctl reconfigure    # 一般是修改配置后用
查看实时日志:gitlab-ctl tail
登录