LDAP用户登录流程:
当在客户端输入账号登录系统时,系统根据/etc/nsswitch.conf配置文件获取账号查找顺序,然后再根据PAM配置文件调用相关模块,对账号(/etc/passwd)及密码(/etc/shadow)进行查找并进行匹配。当本地匹配不成功时,会通过后端认证服务器(OpenLDAP服务器)进行验证。
主要的几个配置文件说明:
-
/etc/nsswitch.conf 该文件主要用于名称转换服务,用于系统验证用户身份所读取本地文件或是远程验证服务器文件。
-
/etc/sysconfig/authconfig 主要用于提供身份验证之LDAP功能,该配置文件用来跟踪LDAP身份认证机制是否正确启用。
-
/etc/pam.d/system-auth 主要用于实现用户账户身份验证。
-
/etc/pam_ldap.conf 实现客户端与服务端的交互。(rhel7没有该配置文件)
-
/etc/openldap/ldap.conf 主要用于查询OpenLDAP服务器所有条目信息。
安装客户端软件包
yum install -y openldap-clients nss-pam-ldapd
配置Openldapclient
将LDAP服务器端主机名和IP地址的解析记录写入到/etc/hosts文件,因为我们没有配置DNS方式来解析主机或,所以就简单地写入到hosts文件里。
#echo "192.168.100.200 server0.ultrapower.com" >> /etc/hosts
3种配置图LDAP客户端的方式
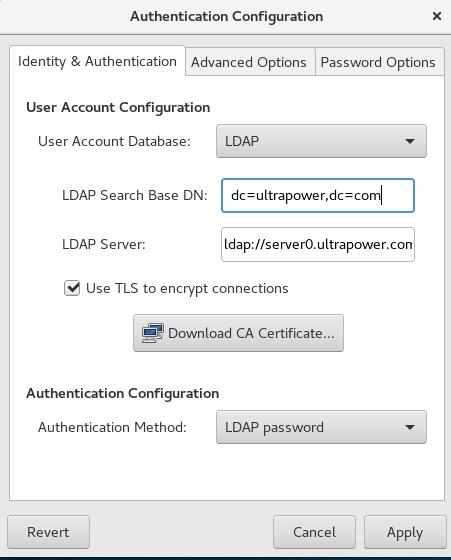
1、图形界面配置方式
[root@desktop0 ~]# authconfig-gtk ---默认没有安装该工具,yum install authcongif-gtk 安装之后才能使用。
或者[root@desktop0 ~]# system-config-authentication
 L
L
LDAP server:填写主机名或IP都可以。开头的’ldap://‘可以省略不写。
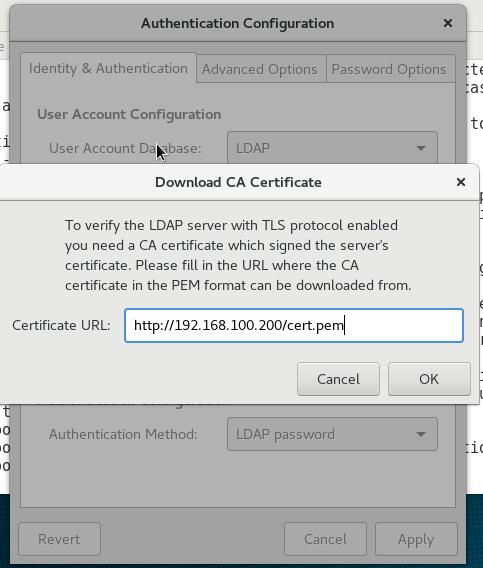
密钥获取通过http方式,因为我们在服务器端已经安装配置了httpd服务,并且已经把公钥文件cert.pem放到网站默认目录下了。
另外两种配置方式则使用scp方式拷贝密钥文件。
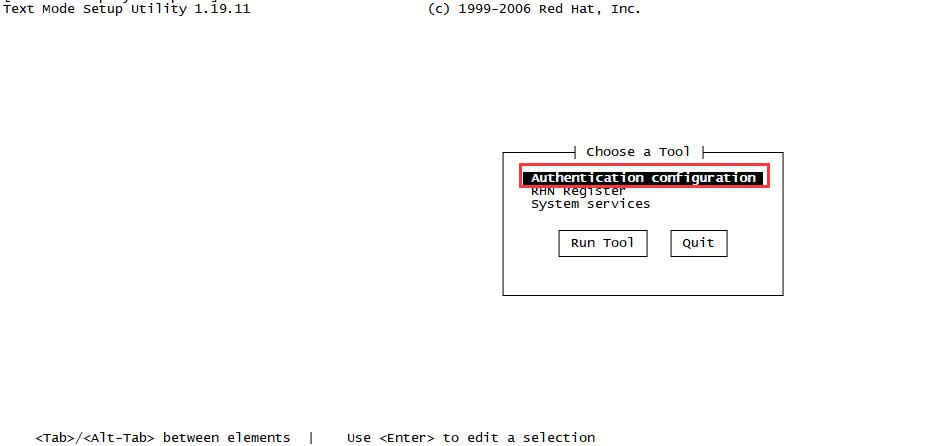
2、字符界面配置方式
[root@desktop0 ~]#authconfig-tui

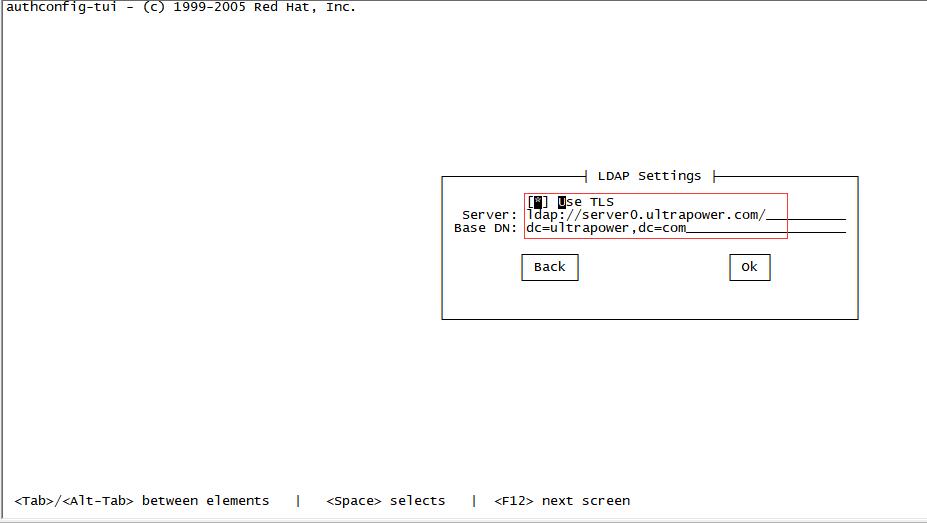
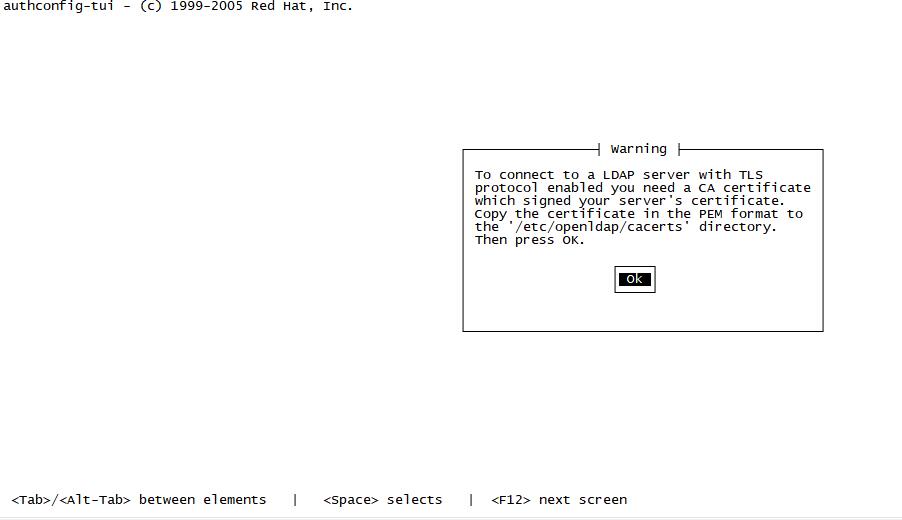
或者直接输入setup命令,选择Authentication configuration。之后的界面界面同上。
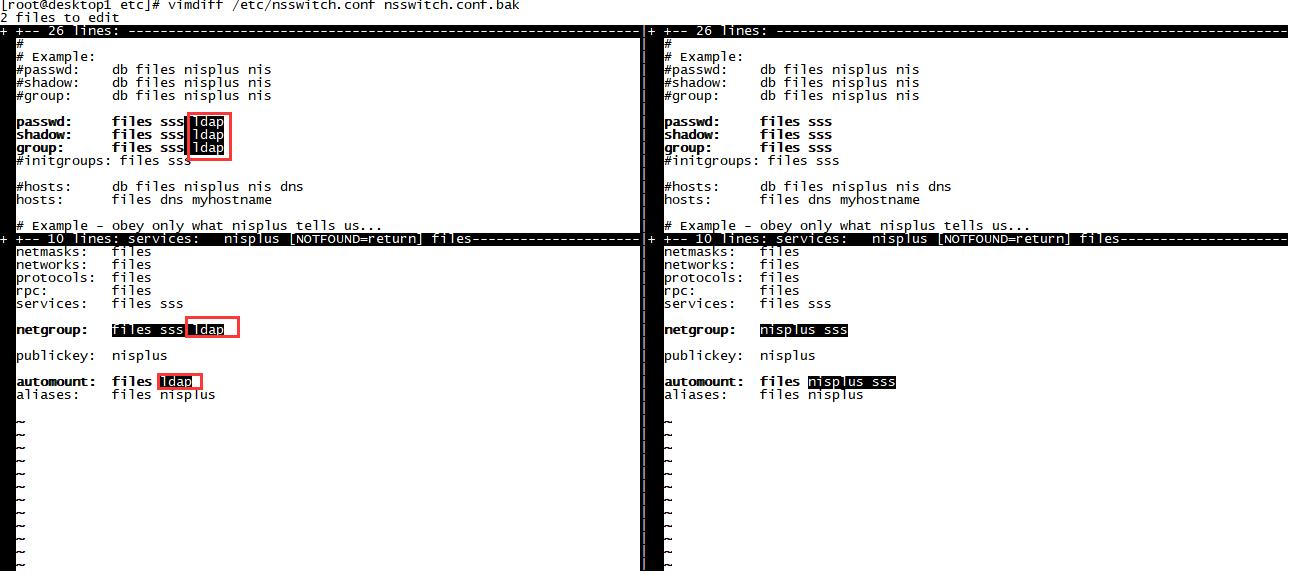
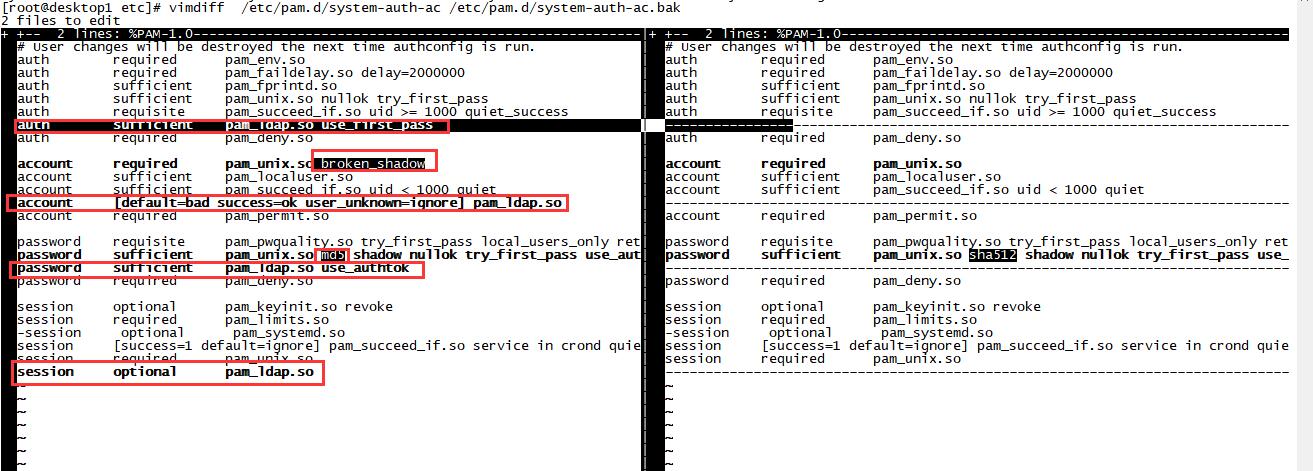
对比修改前后的配置文件:
1、/etc/nsswitch.conf 配置文件
2、/etc/pam.d/system-auth-ac配置文件
3、/etc/nslcd.conf
uri ldap://server0.ultrapower.com/
base dc=ultrapower,dc=com
ssl start_tls
tls_cacertdir /etc/openldap/cacerts
3、命令行配置方式
As the authconfig-tui is deprecated, to configure the LDAP client side, there are two available options: nslcd and sssd.
In this tutorial, the nslcd option will be used, see the authconfig tutorial for the sssd option.
nslcd方式:
# authconfig --enableforcelegacy --update
# authconfig --enableldap --enableldapauth --ldapserver="server0.ultrapower.com" --ldapbasedn="dc=ultrapower,dc=com" --update
# scp 方式获取密钥
# authconfig --enableldaptls --update
也可以加上这个参数–enablemkhomedir ,ldap用户在登录系统时自动创建家目录。但是我们要使用nfs服务器上的共享目录,所以这里不需要该参数。
Note1: According to your requirements, you can need to specify the –enablemkhomedir option after the installation of the oddjob-mkhomedir package. The option creates a local user home directory at the first connection if none exists.
Note2: Type # authconfig –help | grep ldap to remember the necessary options.
[root@desktop2 ~]# authconfig --help | grep ldap
    --enableldap            enable LDAP for user information by default
    --disableldap           disable LDAP for user information by default
    --enableldapauth        enable LDAP for authentication by default
    --disableldapauth       disable LDAP for authentication by default
  --ldapserver=<server>
    --ldapbasedn=<dn>       default LDAP base DN
  --enableldaptls, --enableldapstarttls
  --disableldaptls, --disableldapstarttls
  --ldaploadcacert=<URL>
[root@desktop2 ~]#
ssd方式:
# yum install -y sssd
# authconfig --enableldap --enableldapauth --ldapserver="server0.ultrapower.com" --ldapbasedn="dc=ultrapower,dc=com" --update
# scp root@192.168.100.200:/etc/openldap/certs/cert.pem /etc/openldap/cacerts/
# authconfig --enableldaptls --update
最后,我们要获取服务器端公钥文件并测试
把服务器端的密钥文件放到客户机/etc/openldap/cacerts目录下
[root@desktop1 ~]# scp root@192.168.100.200:/etc/openldap/certs/cert.pem /etc/openldap/cacerts/
测试:
[root@desktop1 ~]# ping server0.ultrapower.com  --必须能够ping通服务器主机名
PING server0.ultrapower.com (192.168.100.200) 56(84) bytes of data.
64 bytes from server0.ultrapower.com (192.168.100.200): icmp_seq=1 ttl=64 time=0.417 ms
^C
--- server0.ultrapower.com ping statistics ---
1 packets transmitted, 1 received, 0% packet loss, time 0ms
rtt min/avg/max/mdev = 0.417/0.417/0.417/0.000 ms
[root@desktop1 ~]# id testldapuser1
uid=1001(testldapuser1) gid=1001(testldapuser1) groups=1001(testldapuser1)
[root@desktop1 ~]# id testldapuser3
uid=1003(testldapuser3) gid=1003(testldapuser3) groups=1003(testldapuser3)
[root@desktop1 ~]#
切换到ldap用户时提示没有用户目录:
[root@desktop1 ~]# su - testldapuser1
su: warning: cannot change directory to /home/guests/testldapuser1: No such file or directory
-bash-4.2$
如果我们勾选下图选项,则切换到LDAP用户时,会自动创建用户的家目录:

[root@desktop1 ~]# id testldapuser8
uid=1008(testldapuser8) gid=1008(testldapuser8) groups=1008(testldapuser8)
[root@desktop1 ~]# ls /home/
rusky
[root@desktop1 ~]# su - testldapuser8
Creating home directory for testldapuser8.
[testldapuser8@desktop1 ~]$ pwd
/home/guests/testldapuser8
[testldapuser8@desktop1 ~]$ touch testfile8
[testldapuser8@desktop1 ~]$ ls
testfile8
但是会出现一个这样的问题,如果用户在不同的客户机上都创建自己的家目录,无法做到在不同的客户机下共享家目录。比如上面的testldpauser8用户在desktop1上登录时,创建了一个testfile8文件,下一次从desktop2上登录时是看不到这个文件的,因为该文件是保存在客户机本地。所以下一篇文章中,我们将使用NFS服务为每个用户都创建自己自己的共享目录,用户从不同的客户机上登录时,都挂载使用NFS服务器上的共享目录,这样就能保证用户家目录下的文件一致了。
参考文档:
https://www.certdepot.net/ldap-client-configuration-authconfig/
http://www.linuxidc.com/Linux/2016-08/134228.htm