网络请求框架retrofit 是目前非常火的请求框架
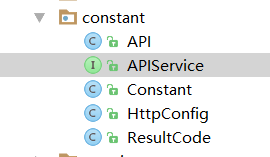
这是 constant包 是retrofit的一些网络配置
当然首先我们应该先去依赖retrofit的依赖包
ompile 'com.squareup.retrofit2:retrofit:2.1.0'
   compile 'com.squareup.retrofit2:converter-gson:2.1.0'
   compile 'com.squareup.retrofit2:converter-scalars:2.1.0'
   compile 'io.reactivex.rxjava2:rxandroid:2.0.1'
   compile 'io.reactivex.rxjava2:rxjava:2.1.0'
   compile 'com.squareup.retrofit2:adapter-rxjava2:2.3.0'

我一般习惯retrofit 与rxjava 一块使用
API这个 里面主要存放的是服务器的网址
public static String HTTP = "服务器网址";


APIServer 里面主要存放的是请求接口:
get请求方式:
/**
 * 接口作用:发送验证码
 * 接口名称:SendCode.do
 * 请求参数:
 * 参数名称  类型 含义
 * type  int    区分 1 注册 2 找回密码/绑定手机
 * username  String 用户手机号
 * t_time    Int    当前时间戳
 * charVal   String 用户手机+当前时间戳+密匙 进行md5加密后的字符串
 */
@GET("SendCode.do")
Call<String> SendCode(@Query("type") int type,
                      @Query("username") String username,
                      @Query("t_time") int t_time,
                      @Query("charVal") String charVal
);


httpClient 存放的是网络配置:
/**
 * 网络设置
 */
public class HttpConfig {
    public static Retrofit mRetrofit;
    public static final MediaType FORM_CONTENT_TYPE
            = MediaType.parse("application/x-www-form-urlencoded; charset=utf-8");
    public static Retrofit retrofit() {
        if (mRetrofit == null){
            OkHttpClient.Builder builder = new OkHttpClient.Builder();
            //设置缓存
//            File cacheFile = new File(FileUtils.SDCardPath, "SnailkNightCache");
            try {
//                Cache cache = new Cache(cacheFile, 1024 * 1024 * 2);  //1M
//                Interceptor cacheInterceptor = new Interceptor() {
//                    @Override
//                    public Response intercept(Chain chain) throws IOException {
//                        Request request = chain.request();
//                        if (!NetUtils.isConnected(BaseApplication.getApplication())) {
//                            request = request.newBuilder()
//                                    .cacheControl(CacheControl.FORCE_CACHE)
//                                    .build();
//                        }
//                        Response response = chain.proceed(request);
//                        if (NetUtils.isConnected(BaseApplication.getApplication())) {
//                            int maxAge = 0;
//                            // 有网络时 设置缓存超时时间0个小时
//                            response.newBuilder()
//                                    .header("Cache-Control", "public, max-age=" + maxAge)
//                                    .removeHeader("WuXiaolong")// 清除头信息,因为服务器如果不支持,会返回一些干扰信息,不清除下面无法生效
//                                    .build();
//                        } else {
//                            // 无网络时,设置超时为4周
//                            int maxStale = 60 * 60 * 24 * 28;
//                            response.newBuilder()
//                                    .header("Cache-Control", "public, only-if-cached, max-stale=" + maxStale)
//                                    .removeHeader("nyn")
//                                    .build();
//                        }
//                        return response;
//                    }
//                };
//                builder.cache(cache).addInterceptor(cacheInterceptor);
            } catch (Exception e) {
                e.printStackTrace();
            }
            //Log信息拦截器
            if (BuildConfig.DEBUG) {
                // Log信息拦截器
                HttpLoggingInterceptor loggingInterceptor = new HttpLoggingInterceptor();
                loggingInterceptor.setLevel(HttpLoggingInterceptor.Level.BODY);
                //设置 Debug Log 模式
                builder.addInterceptor(loggingInterceptor);
            }
            //设置超时和重连
            builder.connectTimeout(30, TimeUnit.SECONDS);
            builder.readTimeout(30, TimeUnit.SECONDS);
            builder.writeTimeout(30, TimeUnit.SECONDS);
            //错误重连
            builder.retryOnConnectionFailure(true);
            //最后设置
            OkHttpClient okHttpClient = builder.build();
            mRetrofit = new Retrofit.Builder()
                    .baseUrl(API.HTTP)
                    //增加返回值为String的支持
                    .addConverterFactory(ScalarsConverterFactory.create())
                    //增加返回值为Oservable<T>的支持
                    .addCallAdapterFactory(RxJavaCallAdapterFactory.create())
                    //增加返回值为Gson的支持(以实体类返回)
                    .addConverterFactory(GsonConverterFactory.create())
                    .client(okHttpClient)
                    .build();
        }
        return mRetrofit;
    }
}


现在配置的都差不多了  现在我们要讲retrofit 进行初始化 一般都放在 baseapplication 的 onCreate 中 进行初始化
apiService = HttpConfig.retrofit().create(APIService.class);

在项目中我们该如何的进行 网络请求操作获取数据呢?
/**
 * 发送验证码
 */
private void sendcode(String name, int time, String varch) {
  //  showWaitDialog("获取验证码...");
    BaseApplication.apiService.SendCode(2, name, time, varch).enqueue(new Callback<String>() {
        @Override
        public void onResponse(Call<String> call, Response<String> response) {
            LogUtils.e("发送验证码 URL" + call.request().url().toString());
            LogUtils.e("发送验证码 成功" + response.body().toString());
            if (response.code() != 200) {
                ToastUtils.showInfo(getApplicationContext(), "服务器繁忙" + response.code());
              //  hideWaitDialog();
                return;
            }
            JSONObject object = null;
            String returnCode = "0001";
            try {
                object = new JSONObject(response.body());
                returnCode = object.getString("return_code");

            } catch (JSONException e) {
                e.printStackTrace();
            }
            if ("1000".equals(returnCode)) {
                ToastUtils.showInfo(getApplicationContext(), "验证码已发送请注意查收");
                new VerifyCodeTimer(60000, 1000).start();
            } else if ("0005".equals(returnCode)) {
                ToastUtils.showInfo(getApplicationContext(), "账号已存在");
            } else if ("0006".equals(returnCode)) {
                ToastUtils.showInfo(getApplicationContext(), "账号不存在");
            } else if ("0004".equals(returnCode)) {
                ToastUtils.showInfo(getApplicationContext(), "访问已超过最大次数");
            } else if ("0003".equals(returnCode)) {
                ToastUtils.showInfo(getApplicationContext(), "密匙不存在");
            } else if ("0010".equals(returnCode)) {
                ToastUtils.showInfo(getApplicationContext(), "非法操作");
            } else {
                ToastUtils.showInfo(getApplicationContext(), "服务器繁忙");
            }
            hideWaitDialog();
        }

        @Override
        public void onFailure(Call<String> call, Throwable t) {
            ToastUtils.showInfo(getApplicationContext(), "服务器繁忙");
            hideWaitDialog();
        }
    });
}

在此使用的是 gson 来解析数据的
 如果有啥疑问 可以评论下方  小编看到了 会主动回复给大家的  文笔不是很好 请各位亲多担待(づ ̄3 ̄)づ╭❤~