1. 通过 xml 赋值给 bean
1) 通过set 方法赋值 (必须要有空的构造方法)
<bean id="user" class="com.test.User">
<property name="name" value="张三"></property>
<property name="age" value="20"></property>
<property name="address" value="北京"></property>
</bean>
2) 通过构造方法赋值
<bean id="user2" class="com.test.User">
<constructor-arg value="李四"></constructor-arg>
<constructor-arg value="20"></constructor-arg>
<constructor-arg value="上海"></constructor-arg>
</bean>
3) 装配 list 属性 (实体类中必须先定义好list)
<bean id="user3" class="com.test.User">
<property name="name" value="王五"></property>
<property name="age" value="30"></property>
<property name="address" value="hebei"></property>
<property name="books">
<list>
<ref bean="book"/>
<ref bean="book2"/>
</list>
</property>
</bean>
4) 装配 map 属性 (实体类中必须先定义好 map)
<bean id="user4" class="com.test.User">
<property name="name" value="王五"></property>
<property name="age" value="30"></property>
<property name="address" value="hebei"></property>
<property name="bookMap">
<map>
<entry key="AA" value-ref="book"></entry>
<entry key="BB" value-ref="book2"></entry>
</map>
</property>
</bean>
5) 装配 properties 属性
<bean id="jdbcDatabase" class="com.test.JDBCDatabase">
<property name="properties">
<props>
<prop key="user">root</prop>
<prop key="password">123</prop>
<prop key="jdbcUrl">com.mysql.jdbc.Driver</prop>
<prop key="driverClasss">jdbc:mysql://test</prop>
</props>
</property>
</bean>
6) 声明集合类型的 bean, 也可以是map
<util:list id="books2">
<ref bean="book"/>
<ref bean="book2"/>
</util:list>
7) 简易写法 ref 6) 中的 books2
<bean id="user5" class="com.test.User" p:name="赵六" p:age="50" p:address="shanghai" p:books-ref="books2"></bean>
8) 自动装配 byName 是通过 persion中的set方法来匹配装配项, 如下的: address 和 car (在开发中很少会使用)
<bean id="address" class="com.test2.Address" p:name="北京" p:number="203"></bean>
<bean id="car" class="com.test2.Car" p:name="宝马" p:price="20000000"></bean>
<bean id="persion" class="com.test2.Persion" p:name="张三" autowire="byName"></bean>
byType 是通过类型进行装配(如上的Address类和Car类, 如果有2个同样的类, 就不能装配了)
9) 配置继承 将相同的去掉, 使用 parent="address2" 来实现继承没有的属性
<bean id="address2" class="com.test2.Address" p:name="北京" p:number="203"></bean>
<bean id="address3" p:number="205" parent="address2"></bean>
10) 抽象 bean , 只能用来被继承, 不能被实例化、 如果是非抽象bean , 则必须要有属性值
<bean id="address2" class="com.test2.Address" p:name="北京" p:number="203" abstract="true"></bean>
<bean id="address3" p:number="205" parent="address2"></bean>
11) bean 依赖关系, 如果配置了 depends-on="car" 属性, 则必须要有一个定义了 car 的bean,
12) bean 的作用域 如果配置了 scope="singleton" 属性, 表示在整个bean的生命周期中是 单例的, 只创建这一个bean (默认值为这个)
如果配置了 scope="prototype" 属性, 表示在整个bean的生命周期中是 原型的, 每次会创建一个新的bean
13) 通过bean 链接mysql
<bean id="dataSource" class="com.mchange.v2.c3p0.ComboPooledDataSource">
<property name="user" value="root"></property>
<property name="password" value="root"></property>
<property name="driverClass" value="com.mysql.jdbc.Driver"></property>
<property name="jdbcUrl" value="jdbc:mysql:///mysql"></property>
</bean>
ApplicationContext ctx = new ClassPathXmlApplicationContext("jdbcBeans.xml");
javax.sql.DataSource dataSource = (javax.sql.DataSource)ctx.getBean("dataSource");
System.out.println(dataSource.getConnection());
14) 通过引用外部文件来获取 链接数据库信息, spring 链接数据库
1> 新建 db.properties 文件, 内容为:
user=root
password=root
driverClass=com.mysql.jdbc.Driver
jdbcUrl=jdbc:mysql:///mysql
2> bean配置文件内容为:
<context:property-placeholder location="classpath:db.properties"/>
3> 配置 bean配置文件内容 类似于 el 表达式的方式来获取
<bean id="dataSource" class="com.mchange.v2.c3p0.ComboPooledDataSource">
<property name="user" value="${user}"></property>
<property name="password" value="${password}"></property>
<property name="driverClass" value="${driverClass}"></property>
<property name="jdbcUrl" value="${jdbcUrl}"></property>
</bean>
15) 引用外部函数来动态指定属性值 (SpEl表达式)
<bean id="car" class="com.properties.Car">
<property name="name" value="Aodi"></property>
<property name="price" value="500000"></property>
<property name="tyrePerimeter" value="#{T(java.lang.Math).PI*50}"></property>
</bean>
16) 通过SpEl 表达式来引用其他bean
<property name="car" value="#{car}"></property>
通过SpEl 表达式来引用其他bean中的属性 (动态赋值)
<property name="info" value="#{car.price > 300000 ? '金领' :'白领'}"></property>
17) bean 的生命周期, init2 和 destroy 都是 Car中自定义的方法,在启动这个IOC容器会先调用 init2 方法, 关闭的时候会调用 destroy 方法
执行顺序是: 构造方法----> init ----> main ----> destroy
<bean id="car" class="com.properties.Car" init-method="init2" destroy-method="destroy">
<property name="name" value="Aodi"></property>
</bean>
18) bean 的后置处理器 (检查 bean 的合法性), 这样在这个配置文件下所有的bean都会执行这个后置处理器, 这个配置和在Car类中不需要增加任何东西
1> bean 的配置如下:
<bean class="com.properties.MYBeanPostProcessor"></bean>
2> 后置处理器类的内容如下: 需要实现 BeanPostProcessor 接口
public class MYBeanPostProcessor implements BeanPostProcessor {
public Object postProcessBeforeInitialization(Object bean, String beanName) throws BeansException {
System.out.println("postProcessBeforeInitialization "+ bean + " "+ beanName);
return bean;
}
public Object postProcessAfterInitialization(Object bean, String beanName) throws BeansException {
System.out.println("postProcessAfterInitialization "+ bean + " "+ beanName);
return bean;
}
执行流程将会变为: 构造方法 ----> postProcessBeforeInitialization ----> init ----> postProcessAfterInitialization ---- main ----> destroy
19) 静态工厂方法来配置 bean,不需要实例化工厂类, 注意不是配置静态工厂方法实例,而是配置bean实例
1> bean配置内容如下:class指定静态方法工厂类, factory-method指定指定获取指定bean的具体方法,
如果工厂方法需要传入参数, 则使用 constructor-arg 传入参数
<bean id="car1" class="com.staticFactory.StaticFactory" factory-method="getCar">
<constructor-arg value="baoma"></constructor-arg>
</bean>
2> 静态方法类内容如下:
public class StaticFactory {
private static Map<String, Car> cars = new HashMap<String, Car>();
static {
cars.put("aodi", new Car("aodi",300000));
cars.put("baoma", new Car("baoma", 500000));
}
public static Car getCar(String name) {
return cars.get(name);
}
}
20) 实例工厂方法: 需要先实例化工厂, 再实例化 bean
1> bean 代码如下:
<bean id="instenceFactory" class="com.staticFactory.InstenceFactory"></bean>
<bean id="car2" class="com.staticFactory.Car" factory-bean="instenceFactory" factory-method="getCar">
<constructor-arg value="aodi"></constructor-arg>
</bean>
2> 实例工厂代码如下:
public class InstenceFactory {
private Map<String, Car> cars = null;
public InstenceFactory() {
cars = new HashMap<String, Car>();
cars.put("aodi", new Car("aodi", 300000));
cars.put("ford", new Car("ford", 500000));
}
public Car getCar(String name) {
return cars.get(name);
}
}
21) 通过 spring 自带的 FactoryBean 来配置bean
1> bean 配置如下:
<bean id="car3" class="com.staticFactory.CarFactoryBean">
<property name="name" value="BMW"></property>
</bean>
2> 自定义类 CarFactoryBean 代码如下:
public class CarFactoryBean implements FactoryBean<Car>{
private String name;
public void setName(String name) {
this.name = name;
}
public Car getObject() throws Exception {
return new Car(name, 500000);
}
public Class<?> getObjectType() {
return Car.class;
}
public boolean isSingleton() {
return true;
}
}
22) 通过注解来配置 bean
1> 扫描annotation包下的所有类和子包下的所有类
<context:component-scan base-package="com.annotation"></context:component-scan>
2> 只扫描 annotation包下的 component包下的所有类
<context:component-scan base-package="com.annotation" resource-pattern="component/*.class"></context:component-scan>
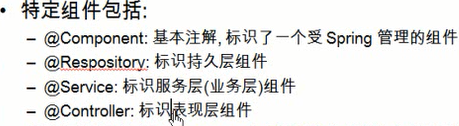
3> 不包含 @Repository 来注解 的类
<context:component-scan base-package="com.annotation" >
<context:exclude-filter type="annotation" expression="org.springframework.stereotype.Repository"/>
</context:component-scan>
4> 只包含 @Repository 来注解 的类 (使用 annotation 来对注解类的过滤)
<context:component-scan base-package="com.annotation" use-default-filters="false">
<context:include-filter type="annotation" expression="org.springframework.stereotype.Repository"/>
</context:component-scan>
5> 不包含具体的类或接口
<context:component-scan base-package="com.annotation">
<context:exclude-filter type="assignable" expression="com.annotation.service.userService.UserService"/>
</context:component-scan>
6> 只包含具体的类或接口 (使用 assignable 来指定对具体类来过滤)
<context:component-scan base-package="com.annotation" use-default-filters="false">
<context:include-filter type="assignable" expression="com.annotation.service.userService.UserService"/>
</context:component-scan>
7> 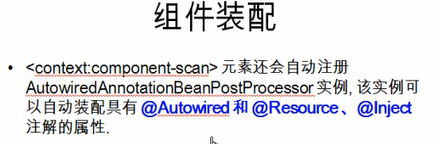 对 IOC容器中的类里面的属性进行自动装配(也就是说组件之间的相互引用)
例如:@Autowired, 也可以放到 set方法上, @Autowired默认设置的属性都必须在 IOC 容器里管理, 否则会抛异常 找不到 bean
如果容许可以不是 IOC 容器里的bean 可以这样进行设置:@Autowired(required=false)
@Controller
public class UserController {
@Autowired
private UserRespository userRespository;
public void save() {
System.out.println("UserController...");
userRespository.save();
}
}
8> @Autowired 可以用在 数组, 集合, map 上
23) 使用 spring 中的 AOP 来实现 动态代理 前置通知 (顺便看 动态代理实现方式)所需要的包为:

1> 前置通知类 所有通知中可以没有 JoinPoint 参数和其他参数
1.xml 配置文件
<context:component-scan base-package="com.aopImpl"></context:component-scan>
<!-- 使 AspjectJ 注解起作用: 自动为匹配的类生成 代理对象 -->
<aop:aspectj-autoproxy></aop:aspectj-autoproxy>
2. 前置通知类: 其中 @Before("execution(public int com.aopImpl.ArithmeticCalculator.*(int, int))")可以是用通配符来匹配
比如 @Before("execution(* com.aopImpl.*.*(int, int))") 这样就表示, 第1* 表示任意返回值,com.aopImpl 第2* 表示包下的所
有类,第3* 表示中的所有方法
@Aspect
@Component
public class loggingAspect {
@Before("execution(public int com.aopImpl.ArithmeticCalculator.*(int, int))") //指定加入的类方法
public void beforeMethod(JoinPoint joinPoint) {
String methodName = joinPoint.getSignature().getName();
List<Object> args = Arrays.asList(joinPoint.getArgs());
System.out.println("The method "+methodName+" begin with "+args );
}
}
主要有这几种通知
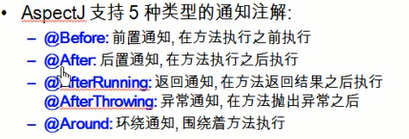
2> 后置通知 (@After)是在方法执行完后或抛出异常时都会执行, 但不能访问方法返回结果, 返回结果需要在返回通知中访问
3> 返回通知 (@AfterReturning) 是在方法正确执行完之后才执行的, 可以访问到返回值
@AfterReturning(value = "execution(* com.aop2.*.*(int, int))", returning="result")
public void afterReturnAop(JoinPoint joinPoint, Object result) {
System.out.println("The afterReturning ..."+joinPoint.getSignature().getName()+" result is "+result);
}
4> 异常通知, 可以指定具体抛出那个异常才去执行: 比如: NullPointerException ex
@AfterThrowing(value = "execution(* com.aop2.*.*(..))", throwing="ex")
public void afterThrowingAop(JoinPoint joinPoint, Exception ex) {
System.out.println("The afterThrowing Exception is : "+ex.getMessage());
}
5> 环绕通知,
/**
* 环绕通知需要携带 ProceedingJoinPoint 类型的参数
* 环绕通知类似于动态代理的全过程, ProceedingJoinPoint 类型的参数可以决定是否执行目标方法
* 且环绕通知必须有返回值, 返回值即为目标方法的返回值
* @param pjd
*/
@Around(value = "execution(* com.aop.*.*(int, int))")
public void aroundMethod(ProceedingJoinPoint pjd) {
String methodName = pjd.getSignature().getName();
try {
//前置通知
System.out.println("The method "+methodName+" 前置通知 with "+ Arrays.asList(pjd.getArgs()) );
//执行目标方法
Object result = pjd.proceed();
//返回通知
System.out.println("The method "+methodName+" 返回通知 with "+ Arrays.asList(pjd.getArgs()) );
} catch (Throwable e) {
//异常通知
System.out.println("The method "+methodName+" 异常通知 with "+ e);
throw new RuntimeException();
}
//后置通知
System.out.println("The method "+methodName+" 后置通知 with "+ Arrays.asList(pjd.getArgs()) );
}
6> 如果有多个切面类,可以使用 @Order(1) 来指定切面优先级, 值越小, 优先级越高, 如:
@Order(1)
@Around(value = "execution(* com.aop.*.*(int, int))")
public void aroundMethod(ProceedingJoinPoint pjd) {
7> 定义切入点表达式, 以便重用 (该方法不需要填入其他代码)
@Pointcut("execution(* com.aop.*.*(int, int))")
public void jointPointExpression() {}
使用如下: <1> 同类中 @Before("jointPointExpression()")
<2> 同包不同类中 @Before("类名.jointPointExpression()") (类名指定义切入点方法的类)
<3> 不同包 @Before("包.类名.jointPointExpression()")
8> 通过xml 来配置通知
