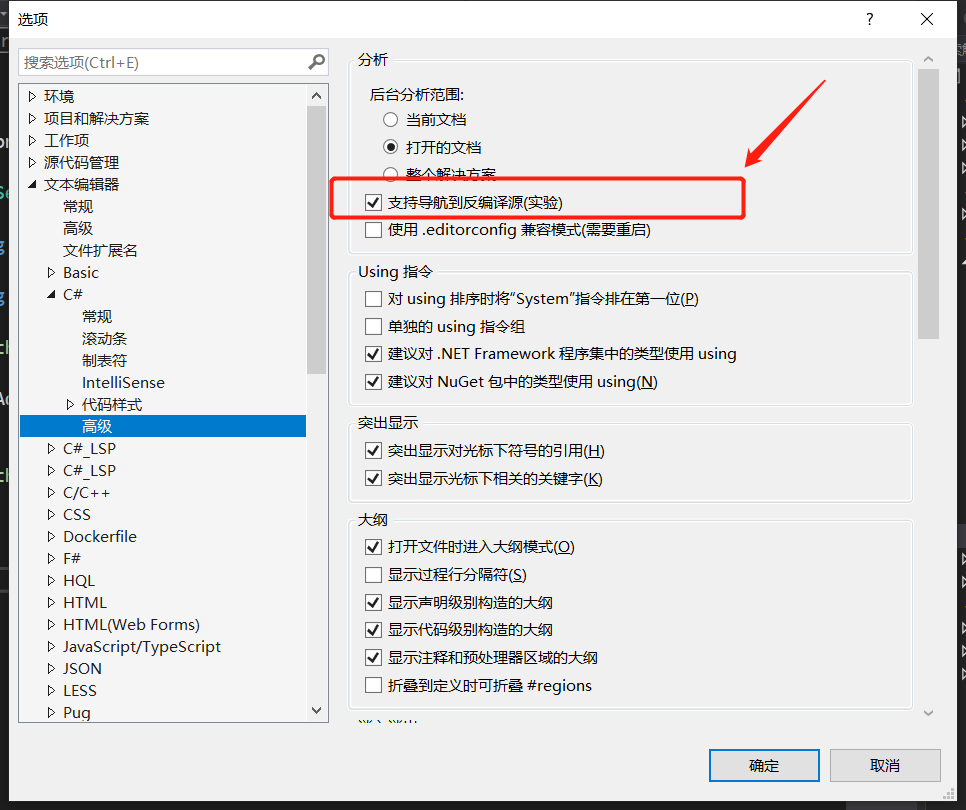
建议大家使用VS2019开发时把自带的反编译功能打开:
进入正题,首先上一个本节最终能实现的健康检测UI界面:

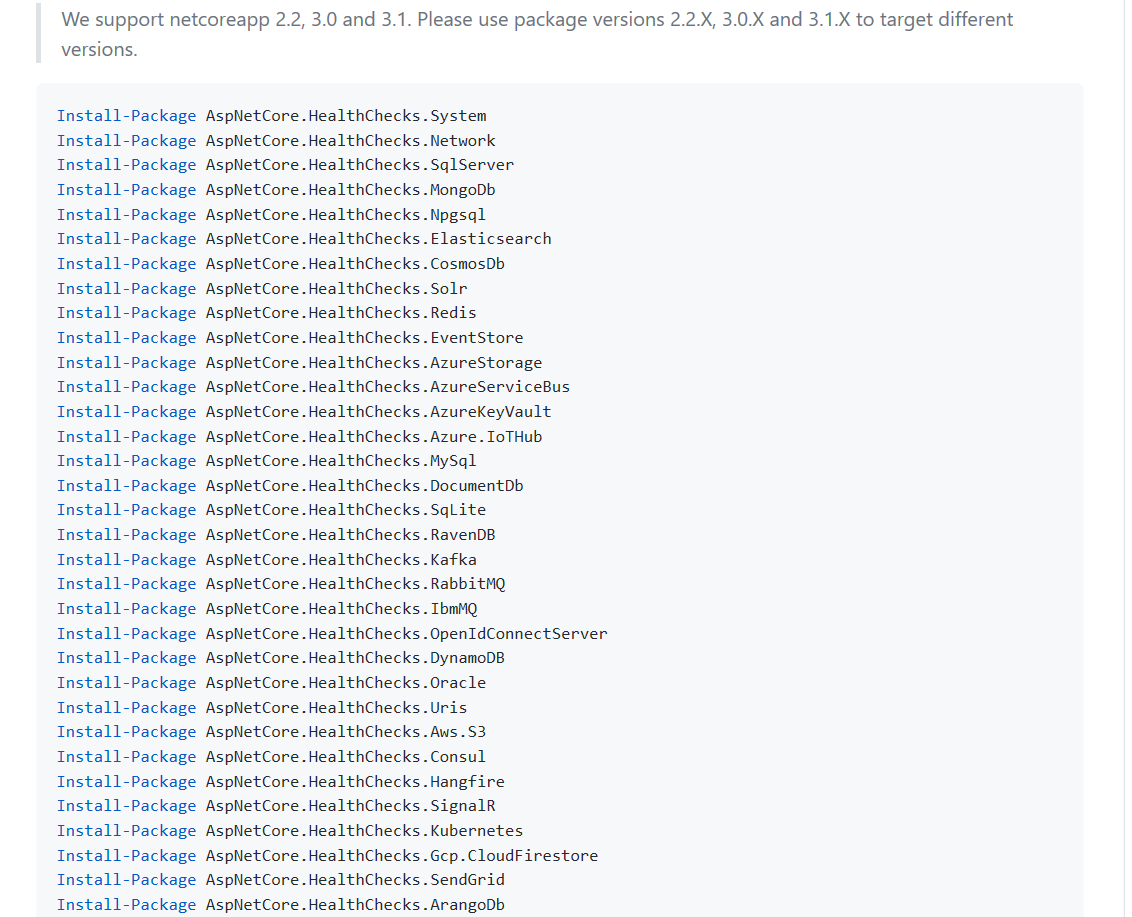
本节实现的健康检测是通过引用以下系列nuget进行的实现:

github上有该包的实现方式,使用过程中可以参考源码来编写相关参数,github地址:https://github.com/Xabaril/AspNetCore.Diagnostics.HealthChecks
在此也列一下清单吧,总共实现了对以下功能点的健康检测功能:
以上主要是些通用的检测点,如api是否正常,数据库、redis等存储库是否正常,rabbitmq是否正常等,除此之后我们还可以自己扩展,比如与我们系统业务相关的功能数据检测等,简单的实现估计也就几行代码,主要看需求。
如何实现web或api、数据库、redis等的状态检测呢?下面开始各种配置。
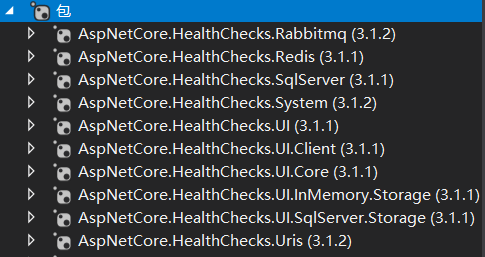
- 首先还是引用nuget包,我是引用了以下一堆,用哪个还是看需求:
- 配置Startup.cs文件:
 1     public class Startup
 2     {
 3         public Startup(IConfiguration configuration)
 4         {
 5             Configuration = configuration;
 6         }
 7         public IConfiguration Configuration { get; }
 8
 9         public void ConfigureServices(IServiceCollection services)
10         {
11             services.AddCustomHealthCheck(this.Configuration);
12
13             services.AddHealthChecksUI(setupSettings =>
14             {
15                 //检测站点,可以添加多条,UI中会把站点内的检测点分组显示(也可通过配置文件实现)
16                 setupSettings.AddHealthCheckEndpoint(name: "localhost-5000", uri: "http://localhost:5000/health");
17                 //当检测出异常结果时发送消息给api
18                 setupSettings.AddWebhookNotification("webhook1",
19                     uri: "http://localhost:5008/WeatherForecast/message",
20                     payload: "{ "message": "Webhook report for [[LIVENESS]]: [[FAILURE]] - Description: [[DESCRIPTIONS]]"}",
21                     restorePayload: "{ "message": "[[LIVENESS]] is back to life"}");
22                 setupSettings.SetMinimumSecondsBetweenFailureNotifications(60);
23                 setupSettings.SetEvaluationTimeInSeconds(10);
24             }).AddSqlServerStorage(Configuration["HealthStorageConnectionString"]);//数据库持久化
25             //.AddInMemoryStorage();//内存持久化
26         }
27
28         public void ConfigureContainer(ContainerBuilder builder)
29         {
30             //autofac
31         }
32
33         // This method gets called by the runtime. Use this method to configure the HTTP request pipeline.
34         public void Configure(IApplicationBuilder app, IWebHostEnvironment env)
35         {
36             if (env.IsDevelopment())
37             {
38                 app.UseDeveloperExceptionPage();
39             }
40
41             app.UseRouting();
42             app.UseEndpoints(endpoints =>
43             {
44                 endpoints.MapHealthChecks("/health", new HealthCheckOptions()
45                 {
46                     Predicate = _ => true,
47                     ResponseWriter = UIResponseWriter.WriteHealthCheckUIResponse
48                 });
49                 endpoints.MapHealthChecksUI();
50             });
51         }
52     }
其中AddCustomHealthCheck的实现如下,实现的检测实例:
 1         public static IServiceCollection AddCustomHealthCheck(this IServiceCollection services, IConfiguration configuration)
 2         {
 3             var hcBuilder = services.AddHealthChecks();
 4
 5             hcBuilder.AddCheck("Jobs.MicrosoftBackgroundService-apiself", () => HealthCheckResult.Healthy());
 6             hcBuilder.AddSqlServer(
 7                     configuration["ConnectionString"],
 8                     name: "Jobs.MicrosoftBackgroundService-sqlserver-check",
 9                     tags: new string[] { "sqlserverdb" });
10             hcBuilder.AddRabbitMQ(
11                     $"amqp://{configuration["EventBusConnection"]}",
12                     name: "Jobs.MicrosoftBackgroundService-rabbitmqbus-check",
13                     tags: new string[] { "rabbitmqbus" });
14             hcBuilder.AddRedis(
15                 configuration["RedisConnectionString"],
16                 name: "Jobs.MicrosoftBackgroundService-redis-check",
17                 tags: new string[] { "redisdb" });
18             hcBuilder.AddUrlGroup(new Uri(configuration["testApiUrl"]), name: "testApiUrl-check", tags: new string[] { "testApiUrl" });
19
20             return services;
21         }
可以看到这里实现了对sqlserver数据库、rebbitmq、redis、webapi的健康检测,参数中最重要的是名称及配置如连接字符串的信息,如redis的连接字符串格式如何写,我们可以通过查看源码来了解,此处实现redis的健康检测源码如下:
 1 using Microsoft.Extensions.Diagnostics.HealthChecks;
 2 using StackExchange.Redis;
 3 using System;
 4 using System.Collections.Concurrent;
 5 using System.Threading;
 6 using System.Threading.Tasks;
 7
 8 namespace HealthChecks.Redis
 9 {
10     public class RedisHealthCheck : IHealthCheck
11     {
12         private static readonly ConcurrentDictionary<string, ConnectionMultiplexer> _connections = new ConcurrentDictionary<string, ConnectionMultiplexer>();
13
14         private readonly string _redisConnectionString;
15
16         public RedisHealthCheck(string redisConnectionString)
17         {
18             _redisConnectionString = (redisConnectionString ?? throw new ArgumentNullException("redisConnectionString"));
19         }
20
21         public async Task<HealthCheckResult> CheckHealthAsync(HealthCheckContext context, CancellationToken cancellationToken = default(CancellationToken))
22         {
23             _ = 1;
24             try
25             {
26                 if (!_connections.TryGetValue(_redisConnectionString, out ConnectionMultiplexer value))
27                 {
28                     value = await ConnectionMultiplexer.ConnectAsync(_redisConnectionString);
29                     if (!_connections.TryAdd(_redisConnectionString, value))
30                     {
31                         value.Dispose();
32                         value = _connections[_redisConnectionString];
33                     }
34                 }
35
36                 await value.GetDatabase().PingAsync();
37                 return HealthCheckResult.Healthy();
38             }
39             catch (Exception exception)
40             {
41                 return new HealthCheckResult(context.Registration.FailureStatus, null, exception);
42             }
43         }
44     }
45 }
实现就几行的代码,同时我们看到这里是通过StackExchange.Redis实现的redis连接,我们传递的连接字符串就很明显了,如下:
"RedisConnectionString": "192.168.217.128:6379,defaultDatabase=1,password=123!@#..."
其他的相关参数也可以通过查看源码的方式来进行操作。。。
----------------------------------------------------------------------------------------------------------------------------------
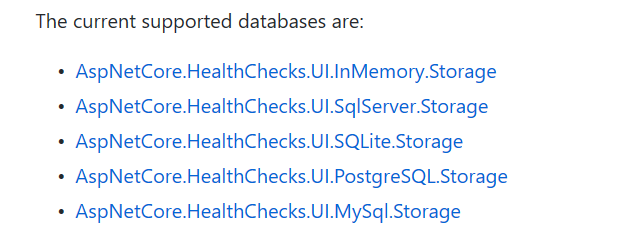
设置数据持久化,可以通过查看源码得知此处是使用的EFCore,支持以下种类的持久化:
services中添加配置(记得引用需要的持久化nuget包):
services.AddSqlServerStorage(Configuration["HealthStorageConnectionString"]);
程序启动后会自动根据配置的数据库连接信息创建数据表,大概就是配置信息、当前状态信息、历史记录信息。
----------------------------------------------------------------------------------------------------------------------------------
如果健康检测异常需要发送消息至api,可以添加以下配置:

具体参数格式也可通过源码查看,此处是post方式数据传输,关键源码如下:
 1                 foreach (var webHook in _settings.Webhooks)
 2                 {
 3                     bool shouldNotify = webHook.ShouldNotifyFunc?.Invoke(report) ?? true;
 4
 5                     if (!shouldNotify)
 6                     {
 7                         _logger.LogInformation("Webhook notification will not be sent because of user configuration");
 8                         continue;
 9                     };
10
11                     if (!isHealthy)
12                     {
13                         failure = webHook.CustomMessageFunc?.Invoke(report) ?? GetFailedMessageFromContent(report);
14                         description = webHook.CustomDescriptionFunc?.Invoke(report) ?? GetFailedDescriptionsFromContent(report);
15                     }
16
17                     var payload = isHealthy ? webHook.RestoredPayload : webHook.Payload;
18                     payload = payload.Replace(Keys.LIVENESS_BOOKMARK, name)
19                         .Replace(Keys.FAILURE_BOOKMARK, failure)
20                         .Replace(Keys.DESCRIPTIONS_BOOKMARK, description);
21
22
23                     Uri.TryCreate(webHook.Uri, UriKind.Absolute, out var absoluteUri);
24
25                     if (absoluteUri == null || !absoluteUri.IsValidHealthCheckEndpoint())
26                     {
27                         Uri.TryCreate(_serverAddressesService.AbsoluteUriFromRelative(webHook.Uri), UriKind.Absolute, out absoluteUri);
28                     }
29
30                     await SendRequest(absoluteUri, webHook.Name, payload);
31                 }

可以看到此处的Webhooks可以配置多个
 1         private async Task SendRequest(Uri uri, string name, string payloadContent)
 2         {
 3             try
 4             {
 5                 var payload = new StringContent(payloadContent, Encoding.UTF8, Keys.DEFAULT_RESPONSE_CONTENT_TYPE);
 6                 var response = await _httpClient.PostAsync(uri, payload);
 7                 if (!response.IsSuccessStatusCode)
 8                 {
 9                     _logger.LogError("The webhook notification has not executed successfully for {name} webhook. The error code is {statuscode}.", name, response.StatusCode);
10                 }
11
12             }
13             catch (Exception exception)
14             {
15                 _logger.LogError($"The failure notification for {name} has not executed successfully.", exception);
16             }
17         }
我们可以通过api接收异常消息后添加日志或进行发送邮件等提醒信息。
最后如果要配置UI界面,只需在endpoint中添加配置:
1             app.UseEndpoints(endpoints =>
2             {
3                 endpoints.MapHealthChecks("/health", new HealthCheckOptions()
4                 {
5                     Predicate = _ => true,
6                     ResponseWriter = UIResponseWriter.WriteHealthCheckUIResponse
7                 });//要进行该站点检测应添加此代码
8                 endpoints.MapHealthChecksUI();//添加UI界面支持
9             });
写的比较散,希望对大家学习有一丝丝帮助~~